Monday, June 25, 2012

Sewing with Knits - Ann Steeves of Gorgeous Fabrics

Happy Monday!  It's a beautiful day in Chi-Town.  Over the weekend I was able to sew.  But I'm not ready to post reviews.  Those will come later.

In the meantime, the vendor presentations continue.  This afternoon will be the first of eight to be held this week.  I am bound and determine to stay in touch with all of you.  So this morning I decided to take a minutes to read a few reviews of Patternreview.com.  Heatherrique provided a link to Ann's video on Sewing with Knits.  Ann gives some important tips on what needles to use and how to sew flawless seams.  Enjoy!


Happy Sewing!
C


Thursday, June 21, 2012

Thank you!

Dear Readers,

Thank you for continuing to visit and comment on my sewing adventures.  I have quite a busy summer ahead of me.  We are looking a several vendor products for electronic research administration.  That means all day meetings, only one telecommute day, little sewing and blogging time.  I'm not too happy about it either.  At the end of the day, I'm too tired to eat.

I hope you will continue to read and comment.  Coming soon, Rhonda's three in one top and some fancy pants.  Thanks, again!

Happy Sewing!
Cennetta

Sunday, June 10, 2012

Lovin' Vogue 1291

Vogue 1291 is a winner! When Vogue first released this pattern, I thought I would take a pass. When I saw BernieGee's top, I quickly changed my mind and added this to the top of my list.

This top is easy to make and very stylish. Don't pass it up. Everyone can wear this style, and you have so many fabric options, woven or knit.

Vogue describes this as a loose fitting, pullover top. A, B have bias neck band, front sleeve overlapping back sleeve forming shoulder opening, no shoulder seams and narrow hems. It's a Sandra Betzina top.

The sizes listed A through J, which is comparable to sizes 10 - 28. This cute top can be made in knit or woven fabric. If you decide to make it in a woven, select one size larger then normal and install a short zipper at the waist.


 My first version does look like the the photos on the pattern envelope, except I turned under the neck band and stitched it down.

The instructions were easy and provided a few helpful tips on how to construction using different fabrics. I have a few likes:
- It's stylish; unique silhouette
- Forgiving and easy to wear
- Sews up with no problems
- Can be easily made using woven or knit fabric
The above photo shows how it looks unzipped.

 One great top. No dislikes.

The fabric used is a rayon challis that I purchased at Vogue in Evanston while shopping with Carolyn.

 I made a few pattern adjustments. And I'm not sure how to explain the FBA. Initially, I made adjustments to the front sleeve and front. But when it came time to sew the front and back sleeve together, I realized I didn't add length to the circumstance of the back sleeve. So I ended up easing some of the length (front) into the back sleeve, I moved the seam about a inch past the circle, and the rest I trimmed off. It wasn't a hard fit, but I will adjust the back sleeve for the next woven top. The pictures of the adjustments can be found in my Flickr set.

I also made a small prominent shoulder blade adjustment. And I turned the neck band inside the neckline and stitch it down.

Next week I plan to make another top. This top is a excellent complement to contour waist bottoms as the hem of the top lays nicely about the upper hip.

 If you don't have this pattern already, I recommend you pick it up at the next JoAnn or Hancock pattern sale. It's worth it. This is a great top. I love, love it. You should try it!

 Happy Sewing!
C

Friday, June 8, 2012

McCall 6028


Pattern Description: Misses' Dresses: Fitted dresses A, B, C, D have front and back princess seams, back zipper and sleeve variations; dress A has purchased trim and back slit; dress B has contrast panels and back slit; dress C has short self-faced sleeves and left front slit; dress D has elbow length sleeves and back slit; dresses A, B, C, D lengths are 1" below mid knee.
  
Pattern Sizing: 8 to 22; I used size 14 with modifications.  


Did it look like the photo/drawing on the pattern envelope once you were done sewing with it? Basically, yes. Simple princess seam dress with front yoke.  


Were the instructions easy to follow? No problems with the instructions.  

What did you particularly like or dislike about the pattern? I like the princess seam with the front yoke. No dislikes.  

Fabric Used: Plaid rayon suiting that I bought many, many years ago from a fashion fabric club. Can't remember which one though.  


Pattern alterations or any design changes you made: Several alternations. Most are in the previous post. The rest: invisible zipper, added a inch or two to lengthen it, added two different color piping to the seams. The last change almost turned this dress into a waddler. The plaid is uneven and I didn't want to take the time to line up the print across all seams. So I decided to cut the center front and back on the bias. I sewed the dress together with no problem, until it was time to hem it. The hem flared out at the center front and back. It looked terrible. I tried adding fusible interfacing; then I tried sewing deeper seam allowance near the hem. Neither worked. So, I decided to ask some of the ladies in the club (Haute Couture Club June luncheon 6-2-2012). They made the same suggestions that I already tried. Sadly, I decided the dress was an unwearable waddler. I told my DD there was no solution except for the trash. Then she said, "Mama, What about adding chain to the hem to make it hang evenly. You know, like in a Chanel jacket." Imagine that, a newbie to sewing helped solve my problem. I immediately went to my notion cabinet to find some chain. What I had on hand was not heavy enough so I doubled the weight by sewing two rows of chain to the center front and back. Then I tried on the dress. It worked! It's not perfect, but I can at least wear it.  


Would you sew it again? Would you recommend it to others? Yes, I plan to sew it once more. This was a test for the tissue pattern alteration post. There is one more small change I will make on the next version, and that is to add a little width from the lower hip down. I look a little "too" top heavy.

 Conclusion: This is a fairly easy pattern to sew. And I am I was able to work out my "self-imposed" trouble. Next, dress will be straight forward. All of the fitting adjustment are resolved. It will take no time to make.

Thursday, June 7, 2012

Pattern Adjustments - Princess Seam Dress M6028


With almost every pattern I choose to sew, I must make pattern adjustments.  This is true with most  blogging sewists.  Most of the time.  I usually include a snap shot of the completed change that I made to show the results of my personal fitting adjustments.  Those pictures don't show the step by step process taken to arrive at the final adjustment.

Weeks before the "prom dress" series, I received a few emails from some of my followers who wanted to get more details on the process of making adjustments.  During the same time, I had several conversations with friends about the full bust adjustment (FBA).


So I decided to write a few blog posts detailing the steps I take to make adjustments to the pattern. This post will include details on the full bust adjustment for a princess seam dress (M6028), prominent shoulder blade, raising the armhole of a sleeveless dress, and sway back adjustments.  All will be made using M6028.  I selected this pattern for three reasons:  it's been on my to-make list for a while, it's Palmer/Pletsch (includes the adjustment lines, and it has princess seams.

The Palmer/Pletsch patterns make it easy for you to make most adjustments because the adjustment lines are drawn on the pattern and the guide sheet includes construction details on how to make those adjustments.  Princess garments provide many opportunities to make adjustments.  You can add width and length to all or some of the pieces to easily fit the various regions of your body.

I must add a disclaimer:

These adjustments are based on fitting adjustments that work for me and should not be viewed as the "standard".  They may not work for you.  I use the Palmer/Pletsch tissue fitting instructions to help me understand and determine how I can make the best fit adjustment for me.

 
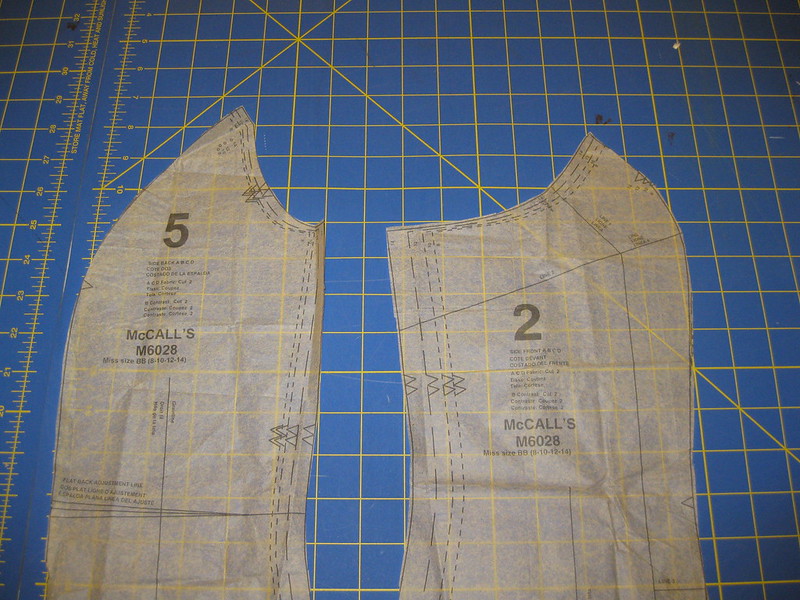
That being said, I will start the adjustment process with raising the armhole of  a sleeveless dress.

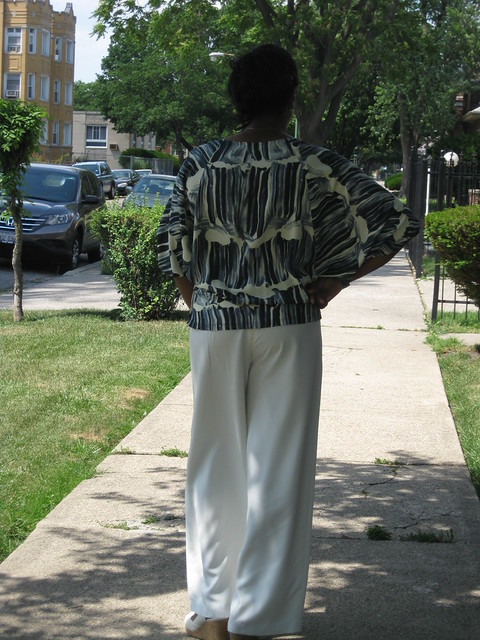
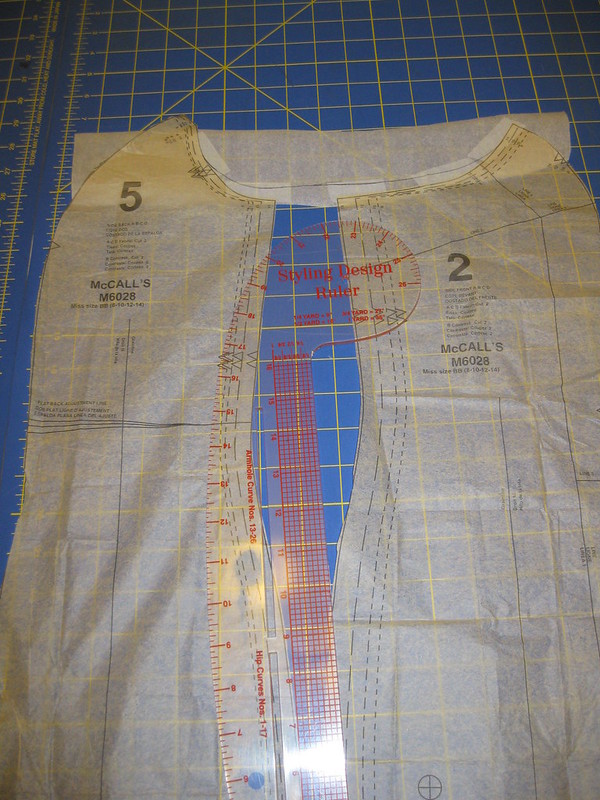
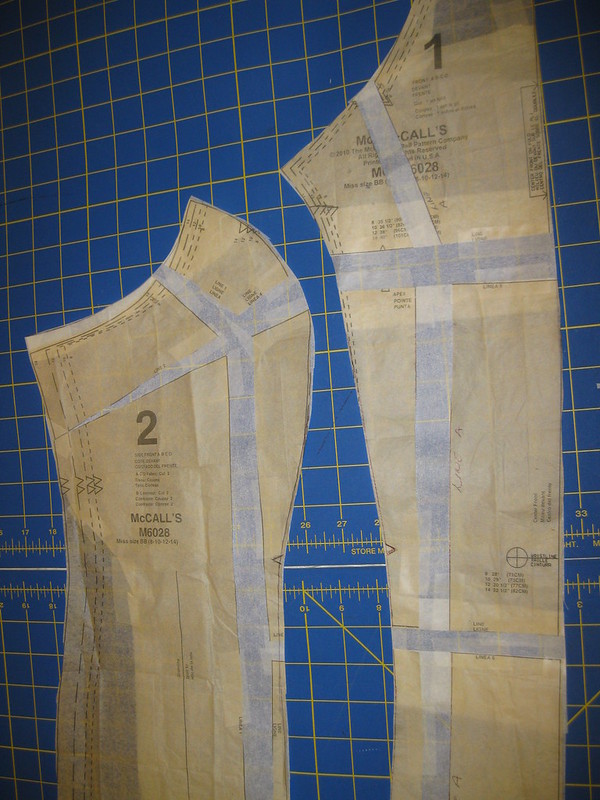
 This first picture displays the front and back sides of a princess seam dress. I like to raise the armhole to conceal side boobage. It looks much nicer without the exposure.
NOTE: These instructions are not found in the guide sheet.
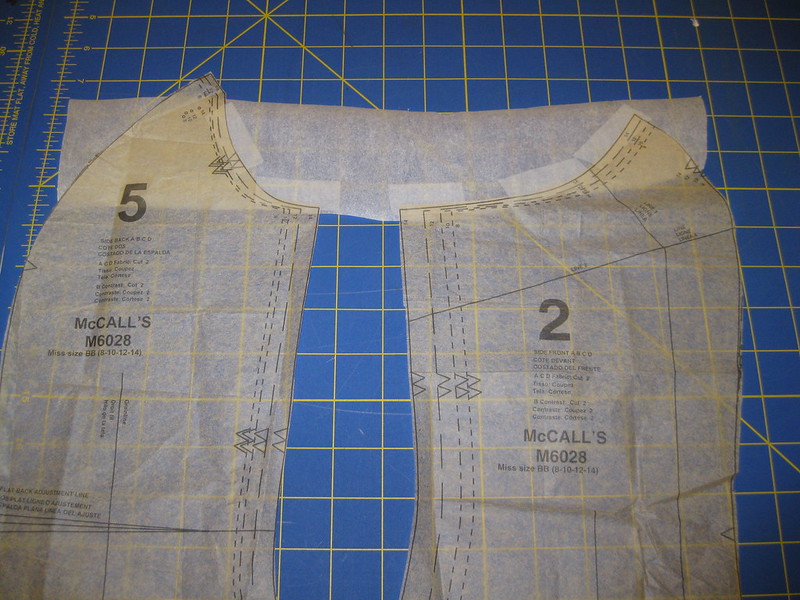

 Step 2 -
Next place pattern tissue paper under both pattern pieces having the tops even.


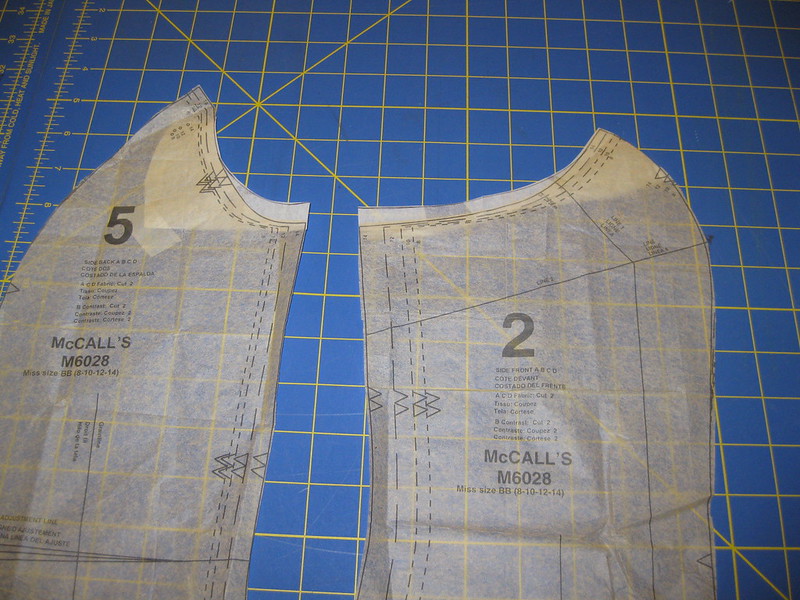
Step 3 -  Next draw a new lower armhole line.


Step 3b - Closer view.


Step 4 - Finally trim away the excess tissue paper.


Full Bust Adjustment (FBA)


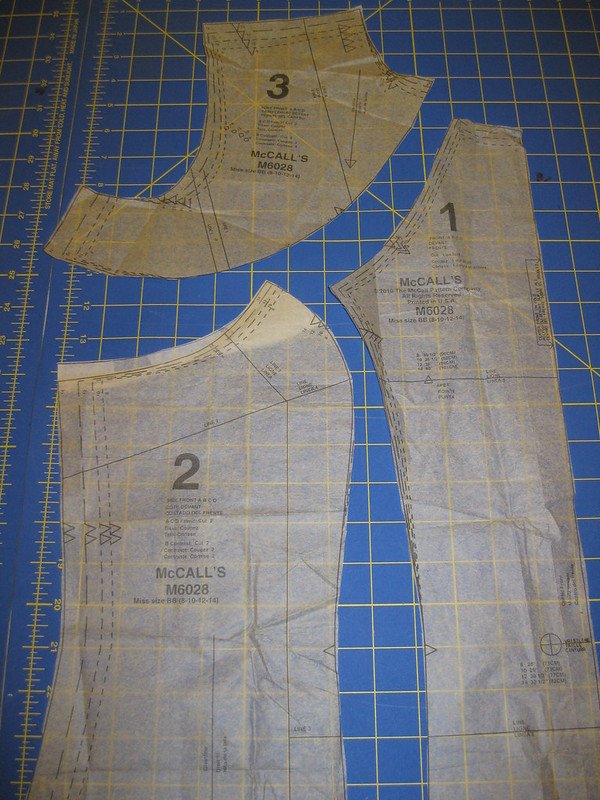
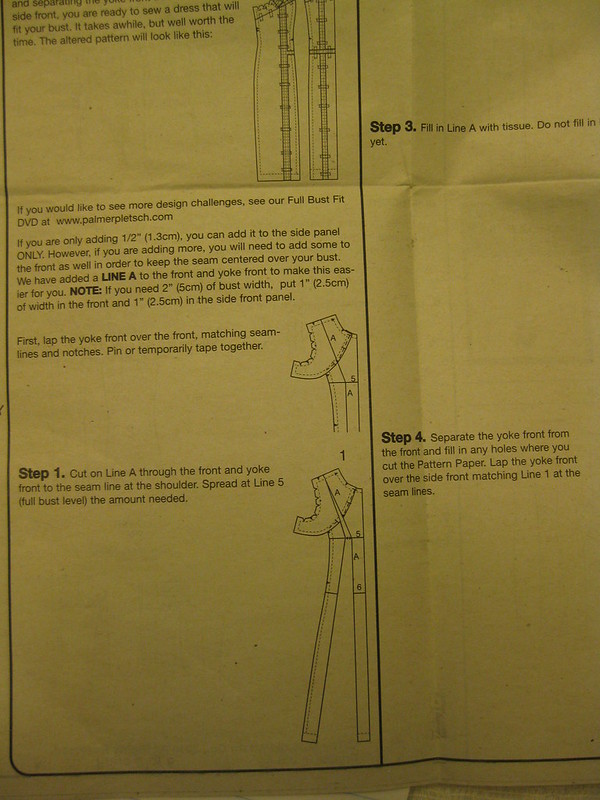
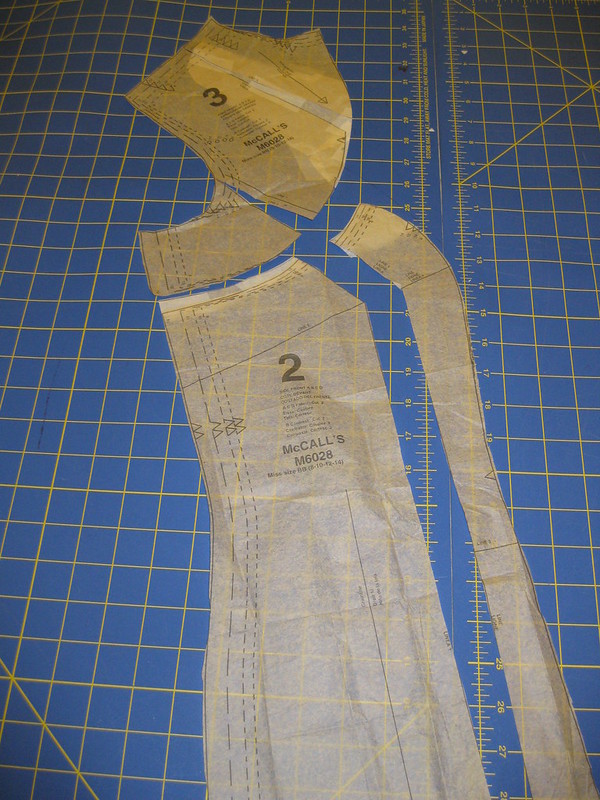
Step 1 - With the armhole adjustment already made, layout pattern 1, 2, 3 to make the Full Bust Adjustment (FBA). Palmer-Pletsch patterns include cutting lines for making most pattern fitting adjustments.


The FBA is a lengthy process, but it is easy to achieve. Just take your time. Let's start with the front yoke and the front of McCall's 6028.
This picture shows Line A on the yoke front 3. But Line A is missing from front 1.


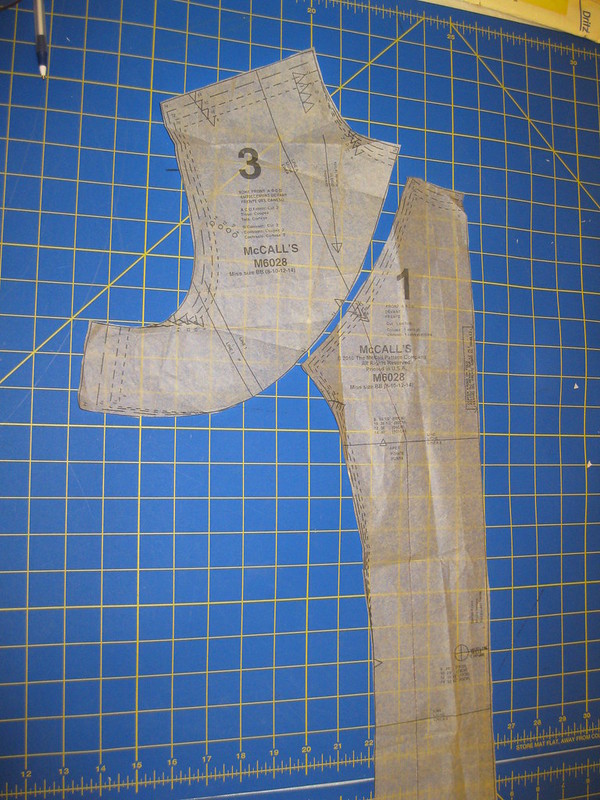
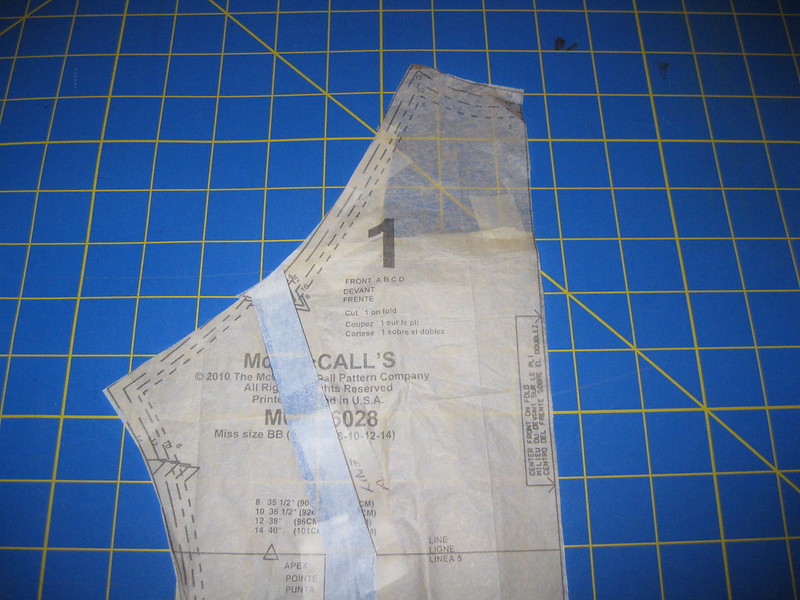
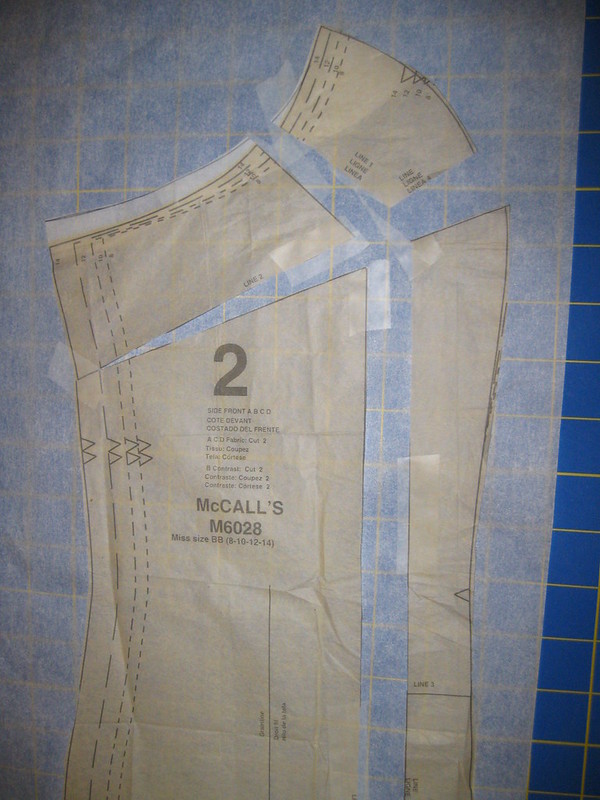
 FBA - Here I drew the Line A on the front 1 pattern.


 FBA - Slash Lina A on both front yoke 3 and front 1.  Spread the desired amount as illustrated in step one of the guide sheet for McCall's 6028.


FBA - Here is how the pattern looks after slashing Line A from the to of the front 1.


FBA - The slash and spread should continue through the hemline on front 1.


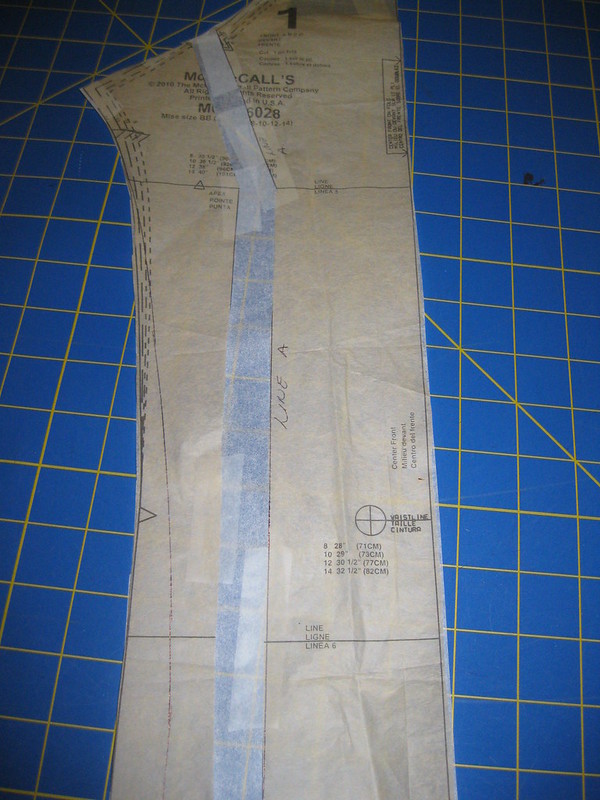
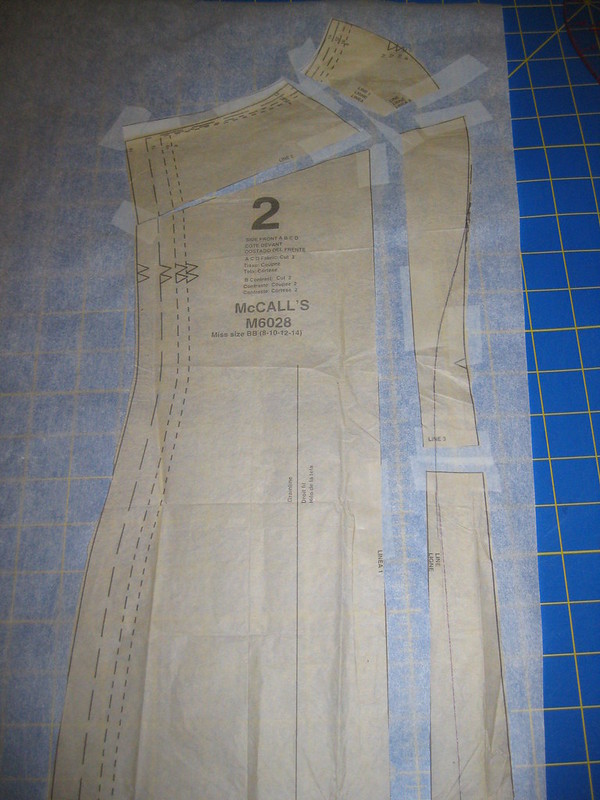
FBA - Before trimming the excess tissue paper, true up the upper edge where the front is to join the front yoke 3.


FBA - The added width below the bust area makes the dress too wide for me.  So to eliminate that width, I  remove the excess from the left side of the pattern by drawing a new line to the end of the hemline.  Transfer the notch to the new edge before cutting away the excess tissue.


FBA - This picture shows the new line at the bottom of the pattern (front 1).


FBA - To maintain the slit at the lower section of the pattern, cut along the new line and then across the top of the slit.  Save this section so it can be relocated after the remainder of the excess width is cut away.


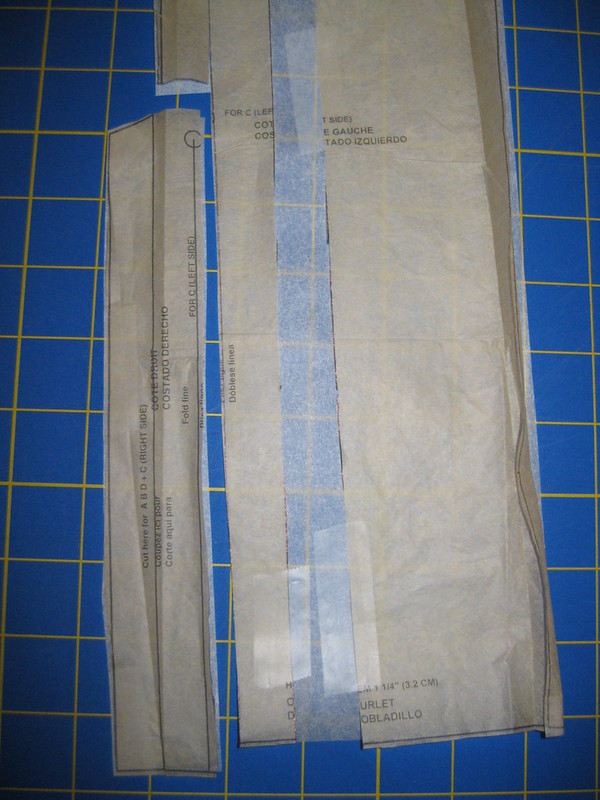
FBA - After removing the excess width, place the slit section at the lower section lining it up with the cut edge.


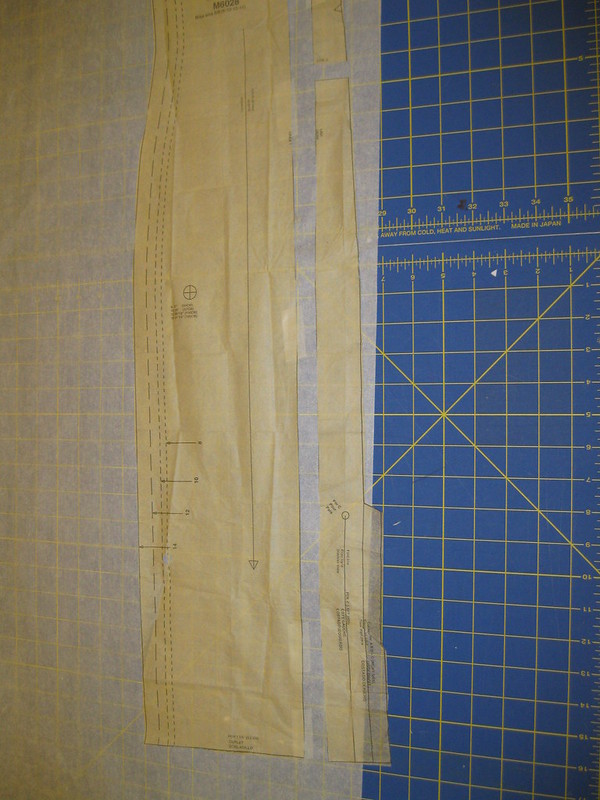
FBA - Now let's work with the side front 2, before completing the rest of the adjustment to the front 1.  This picture shows the affect of the slash and spread of Line A on the front yoke 3.


FBA -  Next, slash and spread the side front 2 the same amount as the front 1.  It is important to spread each equal amounts to maintain balance across the front of the dress.


FBA -  NOTE - This adjustment is not exactly like Steps 5 through 13.  But this works for me. So to continue, This is my adjustment for this side front 2.


FBA - Pictured here is the spread through the hemline.  NOTE:  slash at hip area to realign the lower portion of the dress.


FBA - Another view of the spread.  Also, note the new line drawn under the bust area of the side front 2.


FBA - Now spread the front 1 is the same sections making sure it is the same as on the side front 2.


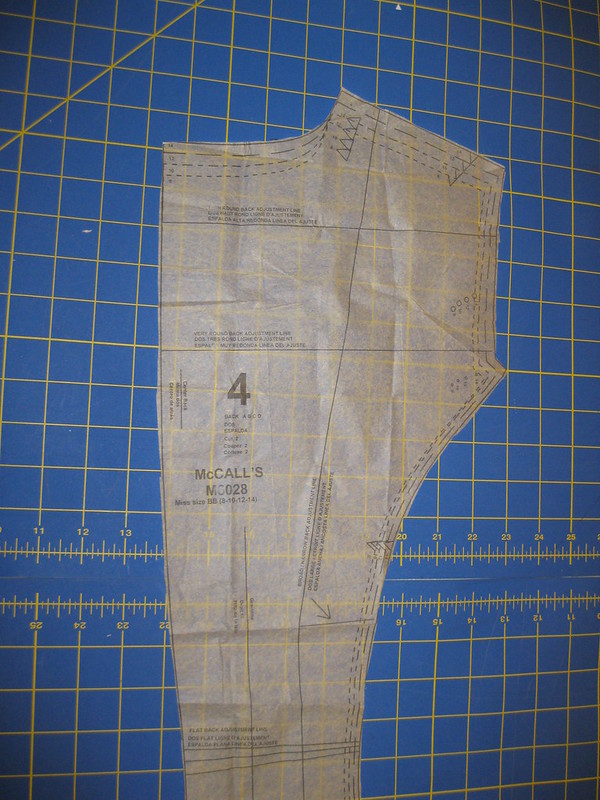
PSBA -  There is no line drawn on the pattern for this adjustment.


PSBA -  I typically place a vertical line  about 21/2" from the edge of the back pattern at the should seam.  Here it is identified as Line 1.


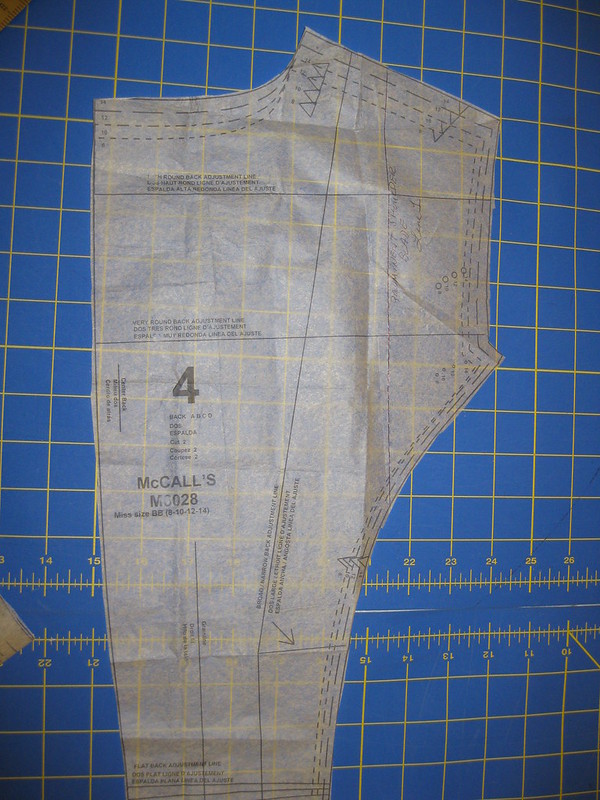
PSBA - Slash the back 4 starting at the base of the PSBA line.   Spread the desired amount.  True up the spread by drawing a new line.  Then cut away excess tissue paper.


 PSBA - I usually do not spread the side back 5.  There is enough ease along the curve to match up the toe amount of the spread needed for my PSBA.  But you may have to slash and spread the side back 5 as well.


Sway Back Adjustment - SBA

 This illustrates how the sway back adjustment is done.  For M6028 horizontal lines are drawn to indicate where to make the sway back adjustment.


My apologies, I didn't include a photo of the sway back adjustment.  Please scroll up to the last picture of the PSBA.  There you can clearly see the sway back adjustment lines on the pattern.  These lines help you make SBA.

That's it!  I hope this was helpful and not confusing.

Happy Sewing!


LinkWithin

Blog Widget by LinkWithin