It's when awhile since my last post. I've had very little time to blog. So I chose to read a few blogs instead of writing a few posts of my own. I hope everyone is enjoying the holiday season. For over a week I have been suffering with whatever virus that's going around. I couldn't sew even though I wanted to. For two days all I could do was drink plenty of liquids and lie in bed.

Anyway, I have several knit tops to show and review. The first set was made with a free pattern from Hot Patterns, the Fringe Festival Scarf-T. If you remember during the summer, this was a free pattern available on the Fabric.com website.

This top goes together with no problem. Very simple and easy to sew. There are a few things I did differently. Here is the review:
This top is a pull-over, cap sleeved T-shirt that has center front & back seams, a curved hemline and a self fabric scarf tie at the V neckline. Fringe the ends of the scarf for a funky look, and add decorative stitches to the center front & back seams.
The sizes range from 6 to 26. This top can be worn be women of all shapes and sizes given a few adjustments. My tops did look like the drawing on page one of the pattern. It is a slightly longer than I expected it to be.

The instructions were okay. How to finish the section were the scarf meets in the center front were a little unclear. I decided to change the finishing of the neckline. The instructions tell you to press the seam allowance forwards the body of the top. Then stitch it in place. I didn't want stitching to show around the neckline. So I only turned down and stitched the center front. And at the center back, I folded the scarf inside as if I were going to attach the raw edge to the inside of the neckline only stitching about a 1/2 inch on either side of the center back seam to keep the scarf from bunching up around the neck.
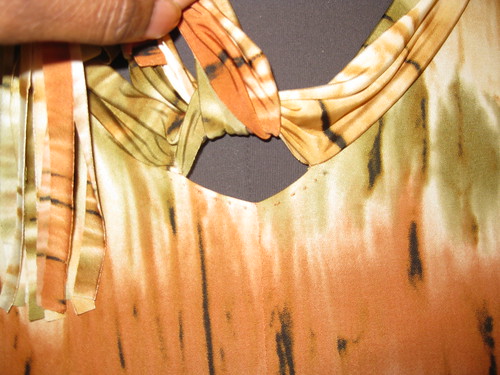
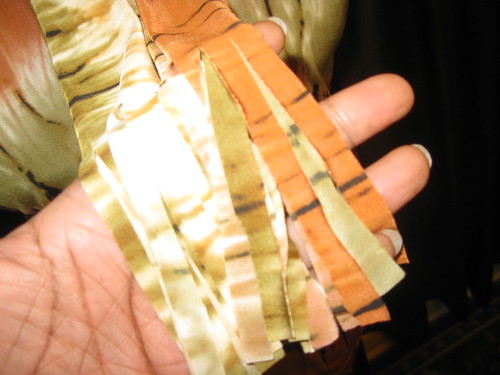
After reviewing and cutting the pattern, I changed my mind about making the fringe for fear of making a mess trying to transfer the markings onto the fabric. But I quickly changed my mind again to give it a try. With the end of the scarf placed on the cutting mat, I used a rotary cutter to cut 4 inch fringes on each end of the scarf. This was achieved by slowly cutting them with no marking.
I omitted the decorative stitching at the center front and back. The print of the first top was speaking loud enough. And the second one looks good without it. I also made my usually sway back and prominent shoulder blade adjustments. No FBA. I just cut a size 16 through the bust area. The rest was cut at size 14.
What I like about this pattern was the fringe scarf. And I thought it would work well under a blazer. Plus you have the option of adding sleeves to it for a winter ready version. You can easily extend the cap sleeves or you can use the sleeve of M6241. My next version will have long sleeves.
The multi-color fabric (Vogue) is the leftover from a failed knit dress project from two years ago. And the gray knit (Hancock) is leftover from a drape neck cardigan made earlier this year.

In conclusion, this is a nice, easy top to make that is a great wardrobe builder. If you downloaded this pattern, give it a try.
The sizes range from 6 to 26. This top can be worn be women of all shapes and sizes given a few adjustments. My tops did look like the drawing on page one of the pattern. It is a slightly longer than I expected it to be.
The instructions were okay. How to finish the section were the scarf meets in the center front were a little unclear. I decided to change the finishing of the neckline. The instructions tell you to press the seam allowance forwards the body of the top. Then stitch it in place. I didn't want stitching to show around the neckline. So I only turned down and stitched the center front. And at the center back, I folded the scarf inside as if I were going to attach the raw edge to the inside of the neckline only stitching about a 1/2 inch on either side of the center back seam to keep the scarf from bunching up around the neck.
After reviewing and cutting the pattern, I changed my mind about making the fringe for fear of making a mess trying to transfer the markings onto the fabric. But I quickly changed my mind again to give it a try. With the end of the scarf placed on the cutting mat, I used a rotary cutter to cut 4 inch fringes on each end of the scarf. This was achieved by slowly cutting them with no marking.
I omitted the decorative stitching at the center front and back. The print of the first top was speaking loud enough. And the second one looks good without it. I also made my usually sway back and prominent shoulder blade adjustments. No FBA. I just cut a size 16 through the bust area. The rest was cut at size 14.
What I like about this pattern was the fringe scarf. And I thought it would work well under a blazer. Plus you have the option of adding sleeves to it for a winter ready version. You can easily extend the cap sleeves or you can use the sleeve of M6241. My next version will have long sleeves.
The multi-color fabric (Vogue) is the leftover from a failed knit dress project from two years ago. And the gray knit (Hancock) is leftover from a drape neck cardigan made earlier this year.
In conclusion, this is a nice, easy top to make that is a great wardrobe builder. If you downloaded this pattern, give it a try.