Showing posts with label BWOF 10/2010 128. Show all posts

Tuesday, April 12, 2011

BWOF 10-2010-128 - My First Garment on the Runway


This is the first of several reviews of the Haute Couture Fashion show 2011 garments made by yours truly. First, I'd like to say it was wonderful participating in the fashion show this year. It allowed me the opportunity to experience the formal steps involved in getting my creation on the runway.


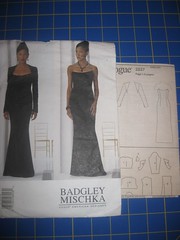
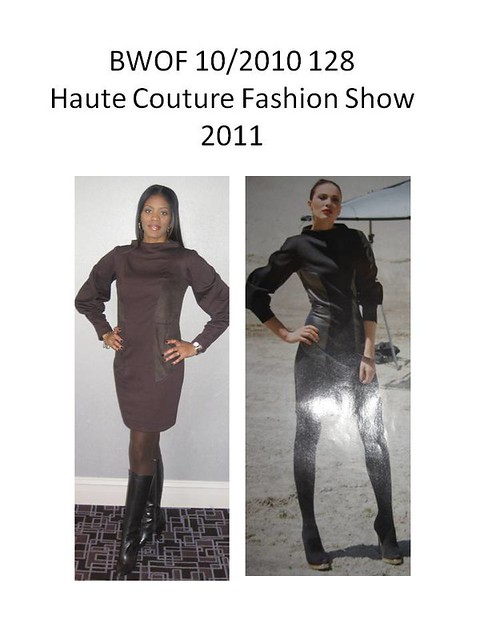
Last fall, my sister and I sat down to look at possible fashion show outfits. This Burda dress was one choice we thought would be great for the show. It had incredible lines and gave me a chance to use something from my many, many BWOF magazines. I started on the dress in January.

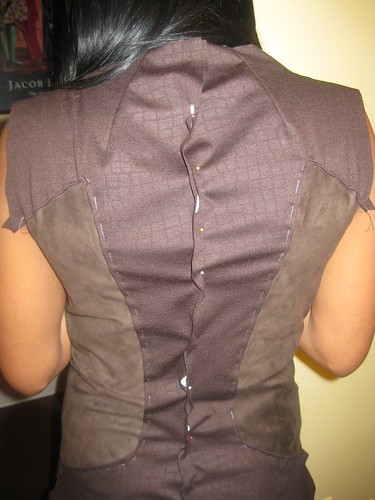
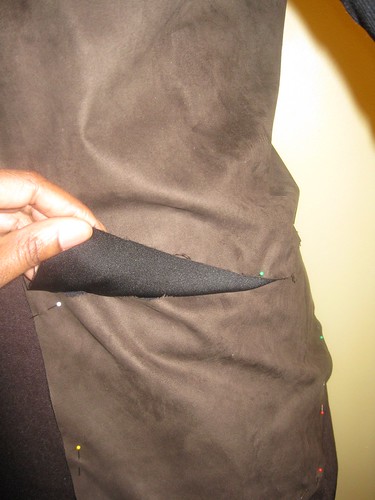
My first challenge with this garment was tracing all of those pieces. Man o man. This step took a lot of time. The second challenge arose when it didn't fit. Burda magazine patterns run are larger than the big four. Ie., McCalls 12 is Burda 10. Finally, I tried tracing a smaller size and re-cutting the pieces of the dress. Here is the review.

Featured in - Out of Africa segment

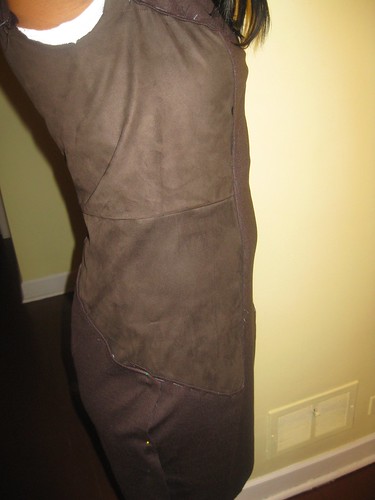
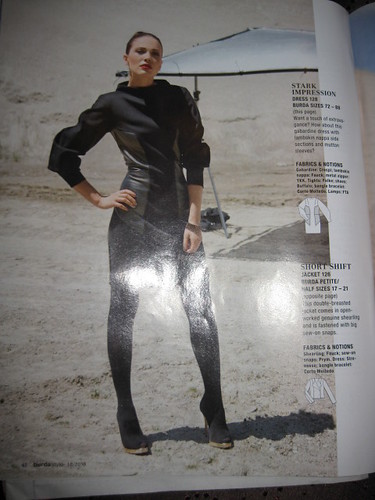
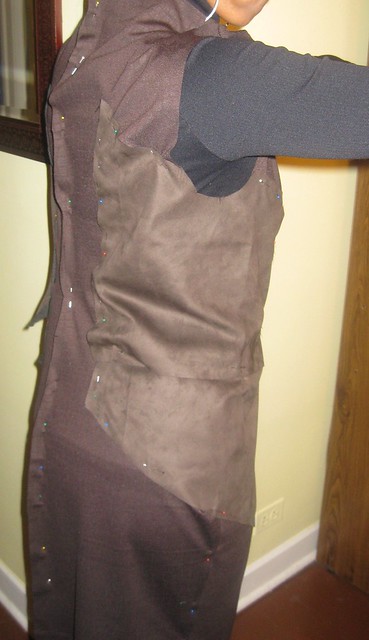
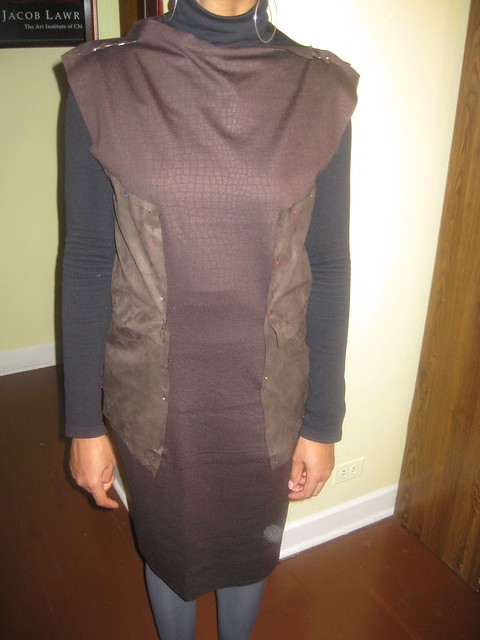
Pattern Description: funnel neck knit dress with side panels and flared sleeves.

Pattern Sizing: sizing 72 - 88. You know BWOF has some special sizes for tall or petite pattern. The size I eventually selected was equivalent to size 10.

Did it look like the photo/drawing on the pattern envelope once you were done sewing with it? Yes, but the sides in the magazine appeared to be more tapered at the waist. I think Rosy said that Burda probably had the dress pinned at the back to give the tapered silhouette.


Were the instructions easy to follow? Well, the instructions were typical Burda instructions. Several bloggers helped me with interpreting the instructions. Thank you, guys! See this post for details.

More details can be found here.

What did you particularly like or dislike about the pattern? Sis, DD and I liked everything about it. The style of the dress and the two-tone, two textures. I can't say I have any dislikes. I had a little trouble with sizing and construction of the two textures, but no real quarrel with the dress.

Fabric Used: Faux suede and a stable knit from Hancock. Both fabrics handled well.

Pattern alterations or any design changes you made: I didn't have to alter any of the pattern pieces, which was nice. The only change I made was using faux suede instead of leather.

Would you sew it again? Would you recommend it to others? Yes. My daughter and sister want would like this dress in another color. And instead of faux suede, they want leather.

Conclusion: This is a very unique dress that will definitely get a lot of attention. It looks complicated, but it was easy to sew once I got past the challenges. It’s a great look. Try it.


Here is my flickr set on this project.

Friday, March 11, 2011

Spreading It Thin - Update on Fashion Show Activities


My, my, my!! Spreading it thin is how I have been living lately.

I'm almost finished with the five "new" dresses for the fashion show. Tomorrow is the garment review. We have to bring in the garments, shoes, and other accessories. If someone is modeling the garment other than the sewist, they must come too. The session includes putting on the outfit and taking a picture. So that means my sister and daughter will also come.

I had planned to make a jacket as well, but I ordered the fabric too late. I'm still waiting for it. I hope it comes today.

My sister said, "You should stop posting about the progress of the fashion show garments. Everyone will see your entries." So I haven't posted any updates. I have finished the Burda dress and two LBD's. The red and black dress for DD is almost done. The black and purple mylar dot dress is nearly done as well.

In the midst of the fashion show garments, I have managed to get three client projects. The first is a dress for Ms. Paulette Bell; the muslin is done and fitted, but I can't think about it until I get the show clothes done. Also I have two vests for another client. On top of that, I need to call a few people who want clergy robes. ..., Oh yeah, my cousin asked me to make her a coat, like the black simplicity coat I made winter 2009.

Last week I started feeling a little selfish because I haven't sewn anything for myself. Spring is coming and I still have several things cut for winter that I don't want to leave undone. But spring is coming! I picked up my Cadena magazine last week. It's loaded with inspiration. I already know that I will make something coral, mint green, and yellow.

So this post only has one photo. The back of the Burda dress.

Happy Sewing!
C

Friday, February 18, 2011

2nd Fitting - BWOF 10/2010 128 Dress - Part III

After making the adjustments, my sister came by for another fitting. It fits much better. Now I can do the top stitching.


Previously, I thought the side panels didn't quite match and my be a problem with fitting in the waist area. But after I made the size adjustments, the fit issues disappeared.


I wanted to see how the sleeves would look. We slid them on to get an idea. It looks okay. They are a little long. I added about two inches to the length. That plus the hem allowance is tucked in. NOTE: There is some pull across the chest; This will disappear. She wearing a lot of "winter gear" underneath the dress.

Friday, February 11, 2011

BWOF 10-2010 128 Dress - Part II

Update on the BWOF Dress 10-2010 128 -

Thanks for all your suggestions on how to resize and fit this dress. Last week I retraced a smaller size and trimmed off the excess fabric to match it.

Next, I sewed the side panels together, pressed. Then I stay stitched the dress front and back along the side seams, clipped corners and pressed the seam allowances to the wrong side. On a flat surface, I laid the side panels then placed the dress front over them, pinned, and handstitched. Followed the same process, I attached the back dress to the panels. I decided that I would be best to complete these steps before sewing the lower side seams and the shoulder seams. After fitting I will sew the side seams then stitch along the panels. There is quite a bit of allowance on the side dress.


So far so good.

Parting Shots: Dress #2 for the Fashion Show will be made from Vogue 2237.


Stay Tuned!
C

Friday, January 28, 2011

Haute Couture Fashion Show 2011 - Burda Dress 128 10-2010 - So It Begins

Review on Haute Couture Fashion Show garment #1-

Last year my sister and I looked through Burda magazine and decided that this would be a good dress put in the fashion show.


At the time, I didn't really think about the design lines and how they would impact fitting. My sister is easy to fit; she is tall and slim. I just have to make it long enough.

There are some adjustments needed. This dress designed for tall women. I traced off the size 12/84. After cutting out the pattern, I laid the front, back, and side panels out to see how they would fit together. I noticed that the upper and lower side panels do not meet evenly; they overlap by about two inches. That was the first red flag. So I logged onto the net to see if anyone had made this dress. ... not a soul. Back to the measuring board. I rechecked the pieces. They didn't come togehter. Still I thought, "this might not be too bad." I can always trim off the extra fabric.

So I proceed to cut out the dress. (Good thing is, I have enough of the contrasting fabric to cut the side panels again.) Tuesday, was the first fitting. I didn't want to sew it; so I pinned it together.

Lo and behold the panels overlapped and did not fit the curve of the body.


Pictures are worth a thousand words. I noticed that the lower section of the armhole is too low. Moving the upper side panel would eliminate the overlap at the waistline. Now the seam allowance at the top of the panel is huge.


The dress on the model curves to her body. The drawing in the magazine is boxy. And the dress is boxy on DS.


After seeing the shapeless dress on her, I felt a little like Winney the Pooh when he is faced with a dilemma..., "Think, think, think"... Then I came up with two possible solutions: redraft the side panels and cut them again or cut the panels (current) in half to create four pieces upper front, upper back, lower, front and lower back. Then reshape those pieces to fit the curve of her body.

So to get a visual, I pinned out the excess fabric along the sides.


Next observation: size 12/84 is too big for her. She fits size 12 (big four pattern companies); but this size 12 is a few inches above her size. Size 80/10 would have been closer to her size.

Final observation: Both the front and back have four points where the panels are joined to the front and back of the dress. These areas must be perfectly aligned to look good. (I think I picked a "good" one with a few challenges.)

The instructions state: "Lay front and back pieces on seam allowances of the side pieces, with wrong side facing right side and stitch." The instructions didn't say anything about turning under the seam allowance of the panels.

What do you think? Any suggestions/advice would be greatly appreciated.

LinkWithin

Blog Widget by LinkWithin