Showing posts with label Vogue 1015. Show all posts

Friday, August 15, 2008

Vogue 1015 - Final Bits and Pieces

Well I have waited about a month since Ms. CB event for a photo of her in the dress. The only photo sent to me is very grainy and does really show the dress. So I decided to post the photo that I took at the final fitting and pick up.

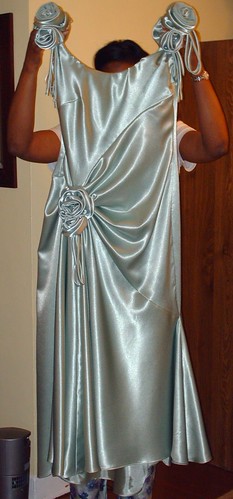
(Ms. CB was having a bad hair day on the pick up day.)

I also wanted to include some final thoughts on the project.
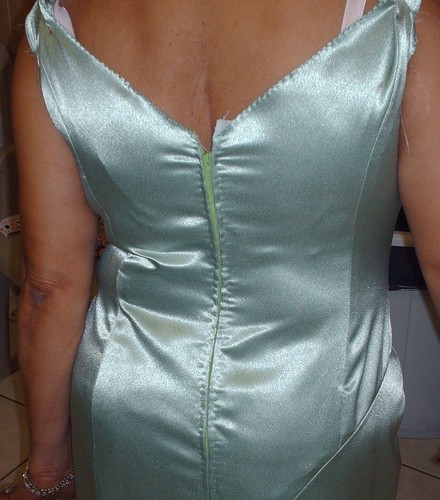
Sewing:
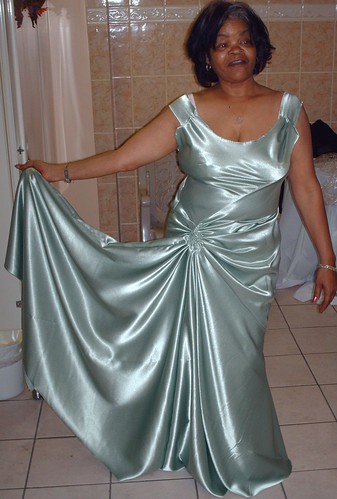
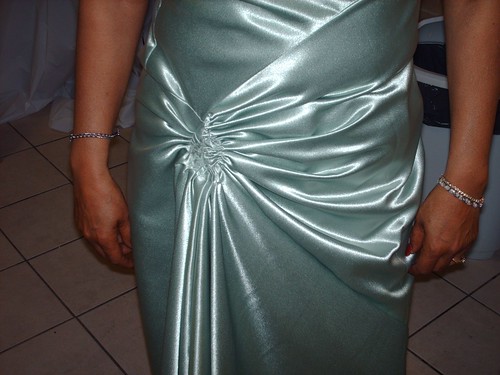
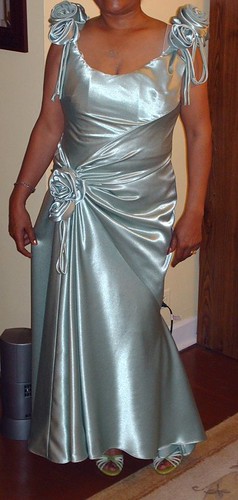
- Ms. CB wanted to wear the shoulder straps directly on top of the shoulder as the photographed model. But the dress is designed to wear just above the ball of the shoulder. This changes the way the dress falls and/or drapes across the neckline.

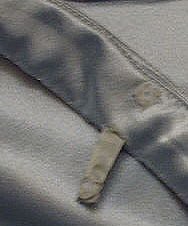
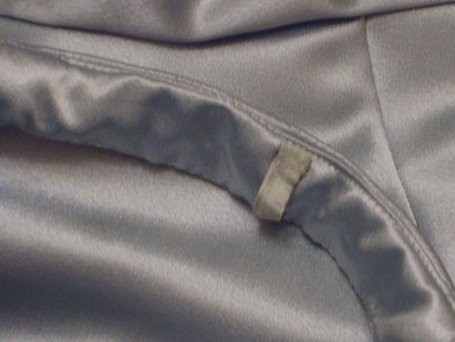
- I added small bra strap holders to the straps to hold them in place.


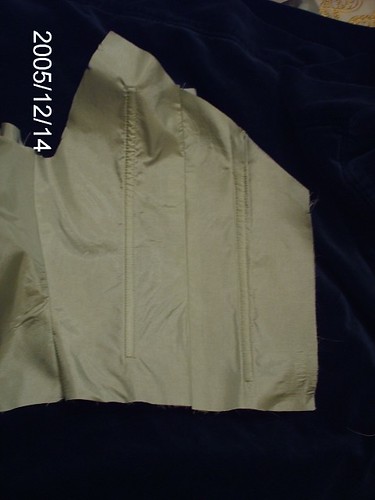
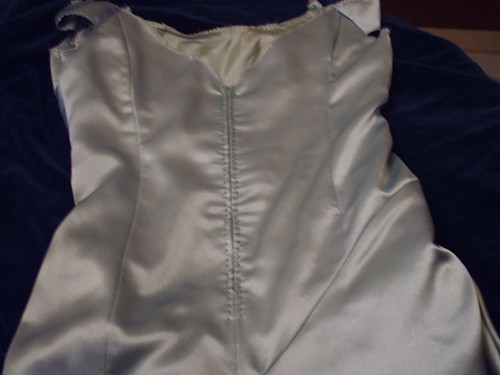
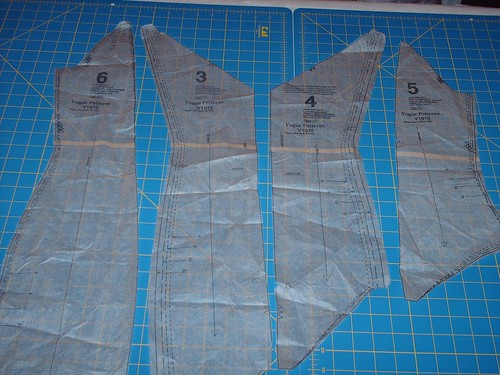
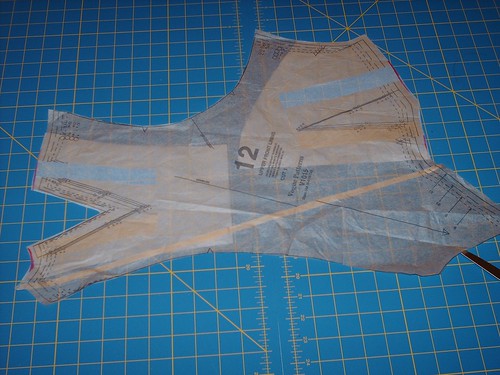
- There is a lot of hand sewing involved. The attachment and closure of the armholes, straps, and foundation were all sewn by hand. The flowers were almost completely sewn by hand except for the streams and gathering of the flowers pedals. Before joining the lining to the foundation, I sew one of my labels to the inside.


- As requested I cut off about 3 1/2 inches from the length of the skirt. Note: the hem of the dress is longer in the back, which creates a small train. This I liked, Ms. CB was very conscientious about ease of movement in the dress. She was the coordinator for her family reunion. Her role, of course, required a lot of movement. And hence, she wanted to remove any opportunity of tripping over the train of the dress. She reported that the dress was still a little too long, but workable.

Word on Ms. CB:
Ms. CB asked me to make this dress around the time that Ms. PB asked me to make the white suit from Vogue 8355. I was skeptical about doing it for several reasons:

- Ms. CB has been sewing prom and formal attire for as long as I've been trying to sew. I asked, "Why me." She knows several other seamstress and she sews! Well her response was, "I'm tired of sewing 'like that'. All I want to make is blankets. I'm confident that you'll be able to make the dress." That being said I cautiously agreed to do it.

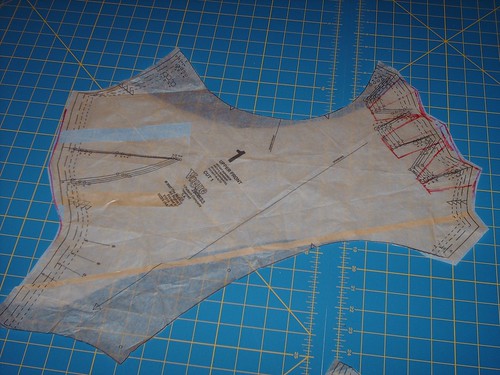
- The first fitting was, of course, the muslin. It revealed some sticky points with attaching the skirt to the bodice, completing the skirt front closure, and fitting the neckline. At the fitting she asked, "Why bother? You've taken my measurements." I was surprised and answered, "I have to do this step. It helps me know what changes to make and helps identify sticky points." Good thing I did. The straight size 14 needed several changes. I will always make a muslin when sewing for other people and will make one (or paper pattern fit) 95 percent of the time for myself or DD.


- Very detailed and time consuming process. I promised myself to limit the number of challenging projects for other people. Practice on me. I'd seen this pattern online and in the catalogue at the fabric store. My thought was hmmmm.., pretty..., interesting..., Who will make this?..., But in everything, I tried to find the positive. It was a challenge that I could also benefit from giving me an opportunity to give life to my new year's resolution.

Lessons Learned:
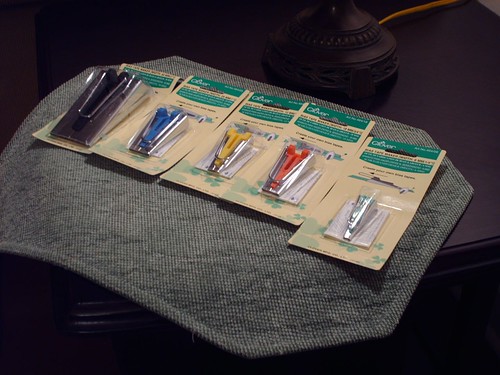
"Practice on me"-- I'd feel more comfortable practicing new techniques on me or DD. This was the first for: hand picked zipper with beading and attaching the foundation to the dress. Both are interesting processes that I enjoyed trying. They are also very time consuming. My favorite of the two was the hand picked zipper. I really like the affect of the added beads. This is a process that I will definitely do again in the near future.

Still more to grow on fitting. Continue refinement of my fitting skills. After doing the muslin, I still struggled with the bias neckline fitting.

Have complete clarity on positioning of straps, waistlines, and hemlines before cutting into the fashion fabric.

And finally,

Make sure I take an adequate number of pictures at the final fitting. ;-)


All related posts.

Sunday, July 27, 2008

Vogue 1015 - Waiting for Event Photos

I'm still waiting for the event photos. Ms. CB sent one, but it was really grainy. I'll give it a few more days. Then I'll use what I already have to post the complete and final review here and on PR.

Saturday, July 12, 2008

Vogue 1015 - Thank you!

Thanks everyone for your generous compliments. Ms. CB is very happy with her dress. She picked it up Thursday evening. I took a few photos, but I still might wait for photos from the event before publishing the full review. Ms. CB was having a bad hair day and requested that I only show the dress.

I've made quite a few purchases and plans for my own wardrobe during the time I was making this dress, but spent very little or no time blogging about them.

Fabric Purchases -

Coating from Gorgeous Fabrics for Great Coat Sew-Along


Stopped by Vogue Fabrics to pick up a few notions - Came away with:


Shopping on eBay - Grabbed these


Several months ago Marji had a give away. She was so kind to send me these nice buttons. (Thanks again, Marji!)


To do Sewing:

Make Muslin for Great Coat Sew Along
Make two jackets that I started in May
Complete two dresses for DD started in May
Complete three dresses for me started in June

And that's the short list. ;-)

Happy Sewing!
C

Thursday, July 10, 2008

Vogue 1015 - PT IV Finally Finished!

Last night I attached the flowers and hemmed the dress. Ms. CB asked that I shorten by it by 3 1/2 inches. Can you believe it! I have never owned a dressfoam; not ever. I think I need to buy one. So here a preview of the finished dress. Excuse the presentation. I'm holding it by the straps. More later..., I will post my final review.


Saturday, July 5, 2008

Vogue 1015 - PT III

Finally, an update on Ms. CB dress. There were so many distractions. I sew best when I stay on task until its done. Today I was determined to get a post out of this much needed to be completed dress.

Time line:

6-8-08 - 6-12-08 Business Trip

6-14-08 3:15p-5:00 and 5:50p - 8:40p
Foundation prep
Sewed foundation and lining together

6-26-08 6:00p- 8:15
Fitting and sewed skirt lining
More changes requested -
Shorten skirt by 3 1/2 inches
Wanted straps to rest on shoulders - need to lower armhole 1/2 inch
Possible exclusion of foundation :-( (I really want to include it)

6-28-08 6:00p - 10:00
Sewed beads to back of dress
removed an re attached the straps
I added about 1 1/2 inches to the overall seam allowance of the foundation - It
was a little snug on her. So I reduced the seam allowance to add move in the
abdominal area. Altered the foundation (this is me, not Ms. CB - try to convince
her to keep it)
Cut out flowers

I made all changes on last Saturday except the length. Ms. CB considered not including the foundation, but I think t would be better to include it. Because it provides support and helps shape the body.

Foundation:
Since I already put the foundation together I want to talk about the process a little. The instructions were typical for most close fitting bodices. The difference is it's attached and on the inside of the dress and closed by hook and eye tape.


I also made a slight change to adding the boning to the inside of the lining. The pattern instructs to sew ribbon onto the lining for the casing. I chose to use the original casing instead as it provides added padding to protect the body from the hard boning. After sewing the two sides and one end of the casing to the lining, I inserted the boning, then sewed the remaining end closed. The casing will not show on the outside.


This evening I convinced Ms. CB to allow me to add the foundation. ;-)

Zipper:
As mentioned in an earlier post, I decided to insert a regular zipper using the hand prick method (first time). The Threads tutorial that I followed includes an optional step on adding beads to the outside seam of the zipper. One of my goals is to explore new techniques and incorporate them into my skill set. I'm inspired by other sewists who practice couture techniques. So I wanted to learn a new method or technique while sewing this dress. The color is bad on this photos, but you can get an idea about how it looks.


Flowers:
I'm make those today.
Update: I made them today. They took 5 hours to make. This pattern offers an interesting way to make the large flower. But to me it seemed like the medium and large flowers are the same size. May be I should have added more gathers to the large flowers.


Stay Tuned. I have to attach the foundation to the dress, tack on the flowers, and hem the dress. I'm close and I'm very glad as I have spent an enormous amount of time on this dress. The desire to make something less complicated is overwhelmingly attractive to me now and I want to sew for myself for a while.

Happy Sewing!
C

Wednesday, June 4, 2008

Vogue 1015 - Putting It Together PT II


Fabric and Notions: crepe back satin, ambiance lining, 18" zipper, emerald seed beads, fusible interfacing.


Friday night I spent about 45 minutes making the pattern adjustment.


On Saturday, the majority of the day was spent working on the dress.

From 12-3p I cut the dress out of the fashion fabric. All adjustments were included except shortening the length of the dress.

Note: If you plan to make this dress, patience is needed with the layout and cutting. There are a lot of pieces to this dress. Many require only one of the fabric and/or lining. Several pieces are very large and require the joining of two pattern pieces to make one piece to sew. Be sure not to allow the fabric to hang over the edge of the cutting table. It pulls the fabric that is on the table and distorts the width and length.

Skirt #8 is used to cut the lining and outer fabric. Each has to be cut separately. Be careful, the grain lines are different and some of the cutting lines are different.


From 3 to 10p I worked on putting the dress together. The front bodice pieces and the side/front skirt are to be cut on varying degrees of bias. On a piece of scrap, I tested sewing with a sharp 11 and universal 11 needles. Neither produced good stitches on the crepe back satin. So I tried a Singer ball point 11. It worked just fine.

The pattern called for an invisible zipper. I didn't have one on hand and wanted to complete as much work as possible. So I hand-picked a regular zipper. I decided to wait for Ms. CB's approval before adding the beads. She liked the idea.


My Struggle: Pattern #8 is joined at the center back then it comes together at the front where all the pleats and gathers meet. I read the instructions, looked at the illustrations, and made several attempts at joining the pieces. At each failed attempt the skirt, pleats, and gathers looked wonky. This pattern/dress had truly worked my nerves. So I decided to go back to the original pattern. There it was as clear as day. I forgot to mark the square where the skirt attaches to the side bodice. It all made sense now. I marked the square and everything went together.


Dislike: The instructions only shows how the godet and the front skirt come together on the wrong side. The only right side view is when the "cover up" rectangle is applied to the area.

I'm Almost There: All of the adjustments were incorporated into the pattern pieces before cutting.

The back view: More was needed across the back. I increased the back by 1 1/2 inches dividing the increase evenly among the four pieces.

From the second fitting - At the lower shoulder I needed to reduce by 1/4" on each side. Through the first 4 inches of the zipper (at side back seam) I need to let out by 1/4" and the release of the pins at the shoulders will take the stress off the zipper. Slight pulling in the upper part of the zipper.


The Straps need to be shorten by 3/4".

The front view: The bust darts were lowered, both pattern pieces. And 3/8" added to each side. The pleats were lowered as well. But I notices that the last one needs to be rotated a bit and moved up.


The Skirt - I added 1/4" to the seam allowances were multiple size adjustments are indicated. The skirt needs to be shorten by 2". This will be done at the very end because I want to make sure the strap adjustments are correct before cutting.

After these adjustments are made, I'll sew on the beads, add lining, and sew together the foundation. The flowers, leaves, and steams have not been cut yet. I'm saving that for last. When I arranged for the second fitting, I forgot to ask Ms. CB to bring foundation to be worn underneath. It will definitely impact the way the dress wears on the body and it will show any additional adjustments. I think we are good on the adjustments though, but I want to see the look of the dress with both foundations.

Next fitting -- After June 12th.

Stay Tuned...,

Monday, May 5, 2008

Fitting Vogue 1015 - Ms. CB


This weekend I worked on several projects. Some for myself, my DD, and Ms. CB's gown. Saturday I completed the muslin, and Sunday after church I was able to work on fitting the muslin.

When I make a muslin for a client, I usually select the recommended size based on the measurements taken. Ms. CB measurement coincided with size 14. The pattern was up to size 12. So I graded it up to what would be size 14. One of the benefit of sewing the muslin is I get an idea of where the challenges are in the construction of the garment. First noted was the multiple pieces of the skirt, some pieces requiring gathers while others requiring pleats. The joining of these sections with careful handling of the thickness of the final seam. And the joining of the lower bodice (cut on the bias) to the front of the skirt.

Sunday's fitting did not include the fitting of the foundation. I'll work on that once I've had the adjustments to the shell/lining of the dress.

Ms. CB is petite about (5'3")

Alterations needed:

Shorten the lower bodice by 1"
Lower bust dart by 1"
Shorten Straps 3/4"
Increase width of back bodice by 1 1/2" from bust to waist
Shorten skirt by 2"
Decrease width at neckline 1"; gaps at center front


Pricing is always a challenge for me. Most of the people that I sew for are friends, family or church family. I always log the amount of time spent for each item made for clients. (I'm slow). The final price divide by the hours gives me a rate per hour, which in most cases very little considering the amount of time spent. (I've got to work on my speed).

Log to date:

4/19/08 Reading instructions and cutting pattern 4:30p- 5:52p
5/3/08 Sewed Muslin 5:15p-7:24p
5/4/08 Fitting the Muslin 2:00p- 2:30p

I took several photos which I'll display later with the adjusted views.

More Later...,

LinkWithin

Blog Widget by LinkWithin