Showing posts with label Clients. Show all posts

Monday, May 14, 2012

Fitting Vogue 8190 and McCall 4321

It's such a blessing to have clients with minor fitting issues.  I'm in the process of making the second prom dress.  This one is for my cousin (second) Traci.  The only fit issues are:  slightly too big in the bust area.  All is needed is a reduction is the width of the bodice.  And slightly to big below the hip area.  Simple.  (Yes the skirt is uneven due to lack of width of the muslin fabric.)


I'm using Vogue 8190, View C, for this dress.  The design changes are minor too.  Traci does not want the tulle exposed at the bottom so the overlay will be the same length.  A beautiful embroidered, beaded lace will adorn the top of the dress.  She wanted the bottom detachable; but I said nothing doing.  That takes too much time.  


Traci's date will wear a matching vest and bow tie.  I'm using McCall's 4321.  His muslin fitting was just as painless with adjustments along the upper back and the side seams.  I'm thankful.


Next week, I will reveal the finished gown and vest.  Meanwhile, the reveal of my niece's prom dress is scheduled for this Friday night. 

Stay tuned and Happy Sewing!
Cennetta

Saturday, April 7, 2012

The Finish - Vogue 8615 - Ms. Bell

It seems like ages since I last posted. I've missed blogging and hope to start back as soon as things settle down a bit. Well, the Pastoral Anniversary (35) celebration was last Sunday. This is my review of Ms. P. Bell dress using Vogue 8615.


Pattern Description: MISSES' DRESS: Lined, below mid-knee or below mid-calf dresses A, B have fitted bodice, back neckline is lower than front and three-quarter or full length sleeves, flared skirt has side seam pockets and back zipper. Purchased petticoat and belt. Separate.

Pattern Sizing: 8 to 24.

Did it look like the photo/drawing on the pattern envelope once you were done sewing with it? Yes. Pretty much with the exception of a few design changes by Ms. Bell. I will talk them later in the review.

Were the instructions easy to follow? There were only six pattern pieces. Simple right? Right. The instructions were typical and easy to follow. I didn't like the finish of the armscye. So I turned in the seam allowance and hand stitched the lining to the armhole.

What did you particularly like or dislike about the pattern? This dress was for a client, but there were a few likes we both shared. and they are:

- simplicity of the design. Classic.
- the full skirt.
I also liked;
- the placement of the bodice darts and as well as the darts at the elbows.
- the most of the pieces went together well.

Dislikes -
- the amount of ease in the sleeve.
- the width of the sleeve cap. It wasn't smooth and formed a bubble around the upper part of the armscye.
- the shoulder seam is extremely narrow.

Fabric Used: A beautiful matalasse fabric from Fishman's.

Pattern alterations or any design changes you made: Most of the pattern alterations and design changes are here. But during the second fitting, Ms. P. Bell was not completely happy with the length of the sleeves and the formation of the sleeve cap. So, I shorten the sleeves two more inches and reset the sleeve to eliminate the bubble effect along the upper portion of the sleeve.

I added two inch black lace to the edge of the skirt lining, just to pretty it up a bit. (Carolyn taught me this.) I also added the bra strap holders to the shoulder seams to help keep the dress in place. Caution - If you're planning to make this dress, you may want to add a inch or two the the length of the shoulder seam.


Ms. P. Bell wanted a matching belt. So I made one. Easy to do by cutting the belt the desired width and length plus seam allowance. Use canvas hair interfacing to add body. To finish the belt, a sparkling buckle. To keep the belt end from floppy over, I added a stripe of velcro. The stitching is buried in the fabric so you can't see it.


I also made a corsage that Ms. Bell can attach to the lapel or shoulder of her coat. You can use any flower pattern to make it. Finish the bottom of the flower and add a closer.


Would you sew it again? Would you recommend it to others? I thought about using this pattern for my Tracy Reese inspired dress, but I decided B4443 will work just fine. And yes, I do recommend it to others with modifications. It's classic. Just make a muslin for the bodice at least to get the fit down pat.

Conclusion:
This was good pattern choice for a classic design.

Tuesday, February 2, 2010

Special Thanks and New Client Projects

Special thanks to everyone who commented and complimented on the wardrobes for my DD. On Friday she interviewed with two companies: one for her entrepreneur class and the other with a cyberspace newspaper. She wore the hounds tooth suit. Blessed girl..., she was hired for the cyberspace newspaper on Saturday. Today DD is a Voter Administrator for election. She is growing up and doing exciting things. I'm happy..., sigh, sigh

Saturday I went shopping with Ms. PB. You remember her? I made Vogue 8355 for a dinner party about two years ago.


This time I'm commissioned to make Vogue 1084.


Dinner date March 28th. Back to the shopping experience. The dress will be made of silk dupioni. First we went to Fishman's to just look at all the beautiful fabric candy. Their silk dupioni is $18.00 per yard and the silk taffeta and shantung was $60.00. So went walked over to Vogue; they had the dupioni for $11.99 per yard. We ordered the fabric there. The Evanston store has every fabric in every color. Their silk taffeta and shantung is $30.00 per yard.

I only had one prom dress commission this year; she canceled Sunday. So that leaves more time for me to sew for myself.

Finally, I'm making another clergy robe and am about half way done. Still need to finish DD's purple dress for wardrobe 2.

So that's it for now.
Stay Tuned and Happy Sewing!
C

PS
Still making rounds to all the blogs I like. See ya soon!

Tuesday, October 13, 2009

Fall Projects Are Looming

First I would like to thank everyone for continuing to visit my blog. Lately I've been a little slow with posting and reading blogs. But will be making my rounds to the blogs of my favorite designers/sewists soon. Last night I finished the second (fifth) robe for Min. Ross. This will probably be the last commission of the year as I plan to make most of my Christmas gifts. I also want some time to sew for myself and DD.

On the table are two mini wardrobe garments both need to be hemmed and pressed. I'm hoping to finish at least one wardrobe before Thanksgiving and maybe two dresses for myself.

More on my pending projects later.

Happy Sewing!
C

Tuesday, September 29, 2009

Update! It's Been A While

It's been a while since I've blogged. I'm not short on material, just short of time. Lots of things happening: church, work, and sewing(life in general). Last week was our Annual Men and Women's Unity Conference. And to sum it all up in one word: "Excellent". So I took a few days off. The media crew was expected to be at church for the duration. To top that I'm taking a non-linear editing course at CAN TV every Monday from 5:35 to 9:30 pm. It's fun, but exhausting. Work: playing catch up and major testing of two new upgrades to one of our servers. Argh!! Now the good stuff: sewing..., lots of projects under way (DD and me). But I'm currently working on two clergy robes for a regular client. This will be the forth and fifth robe that I have made for her. Here are a few shots of one of them.

Inside front. I used the "cross" fabric for the front facing. It's underlined to the waistline.

Back view. I like the look of the print from the collar to the yoke.

Back Vent. I only have the set the shoulder pads, sew on the snaps, hem and press. Then finish the second robe.


Also, sharing and teaching the gift of sewing with my DD and niece. Saturday before last we had a four hours sewing lesson. The young ladies were thrilled and did learn how to sew thread the sewing machine, sew a straight stitch, sew the zig zag stitch, and make button holes. At the end of the session, each had made traveler shoe bags.


Last week Trudy Callan and Ivalyn Actie nominated me for the Kreativ blogger award. Thanks ladies. I'll post my nominees soon. I'm playing catch up with blog reading and posting.

Happy Sewing!
Cennetta

Friday, September 4, 2009

Yep ..., There is a Little Sewing Going On

I'm happy the weekend is here. For the entire week I have been suffering with a head cold. Good news is I was able to work from home three days. So I did not have to tackle rush hour traffic, coming and going. And the second good thing, the slow work day gave me a few hours to finish five pants for a client.

Well, today I delivered them. She was extremely pleased. This weekend I'll finish up the last two. I'm hoping to throw in a piece or two for myself. I need some knit tops and a dress or two. This week I was able to spend some time planning my early fall wardrobe and a few pieces for my upcoming cruise vacation. Still haven't made final picks for it. But I thinking that I'll make several knit tops, a couple of dresses, and a jacket or two.

Well, we'll see. Maybe this weekend I'll finalize my plans on what to make next. I do have another client though. Details on her project later.

Have a fantastic weekend and enjoy the holiday (US)!
C

PS - Christmas is around the corner. What gifts to make? Another burning (sewing) question!

Friday, June 5, 2009

B4731 - Rhianna's Dinner Dance Outfit


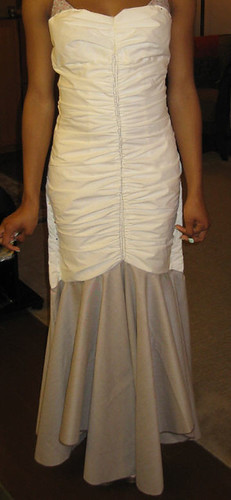
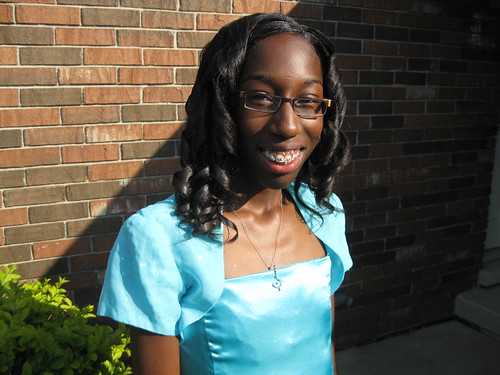
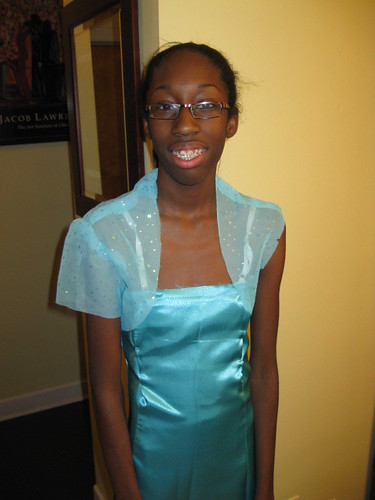
I finished this dress about a month and half ago for my niece's GalPal, who is attending the same graduation Dinner Dance as my niece. This pattern has been in my collection for about a year. I purchased my copy because I thought it would be a good basic form fitted dress pattern to have. It can serve as a foundation for many design options for a formal gown or a casual dress that you can add straps to. That all being said, here is my review of the dress for Rhianna's version.

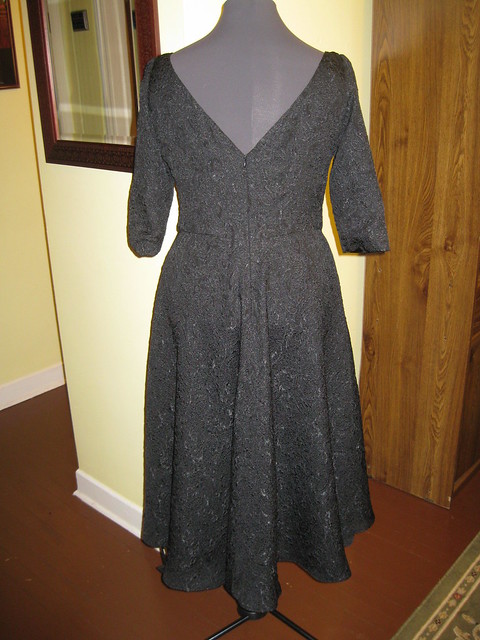
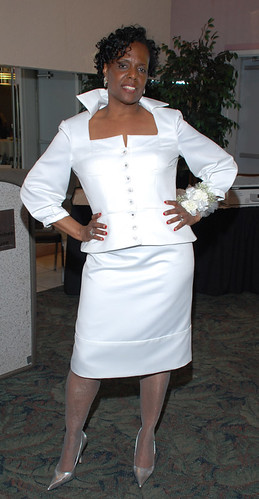
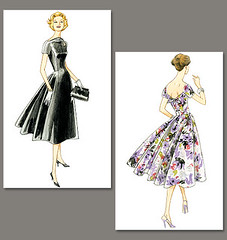
Pattern Description: MISSES’/MISSES’ PETITE SHRUG AND DRESS: Lined shrug has short or long sleeves. Shrug A: front button and loop closure. Fitted, lined, slightly flared dress, evening or floor-length has boned foundation and back zipper closure. Dress D: flounce and shaped hem (lower calf length at front and floor length at back).

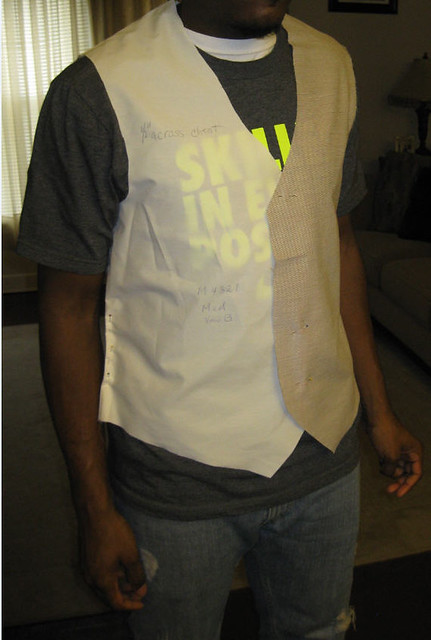
Pattern Sizing:6 to 20. I made what would be a size 1 1/2". The little lady is tiny. Sizing it down was a bit of a challenge because of the amount of the decrease required to fit her. I use the multiple sizing in reverse to scale down the pattern. That is, I used the distance between the sizes to scale down to what could be considered the desired size. My first attempt was about a size 4. But after the first fitting I had to reduce the width of the dress and shrug. More details below.

Did it look like the photo/drawing on the pattern envelope once you were done sewing with it? For the most part. I added straps.

Were the instructions easy to follow? Nothing confusing about the instructions. Pretty standard for this type of design.

What did you particularly like or dislike about the pattern? I like the pattern because it had classic lines and offer a variety of styling options. Nothing to dislike.

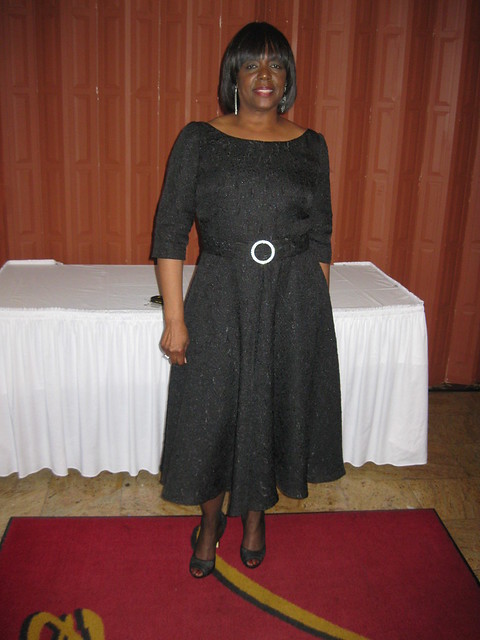
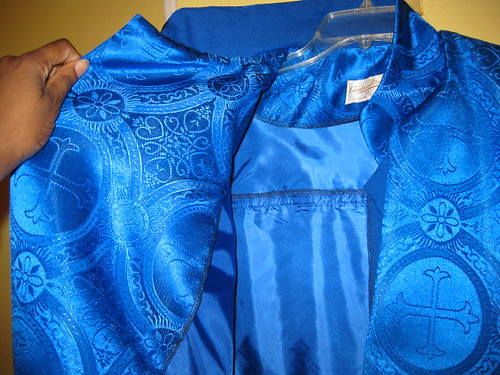
Fabric Used: A polyester satin with glitter on top for the dress. A polyester chiffon for the shrug. Also finished with a glitter like substance. Pressing it was a challenge. I had to double my pressing cloth to keep from removing the finish (glitter). Both fabrics were purchased at Hancock.

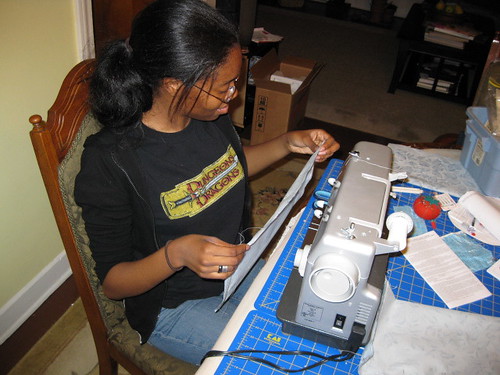
Pattern Alterations or any design changes you made: There were quite a few alterations and one design change. I didn't make a muslin. So most of the alterations were made as I sewed the dress.

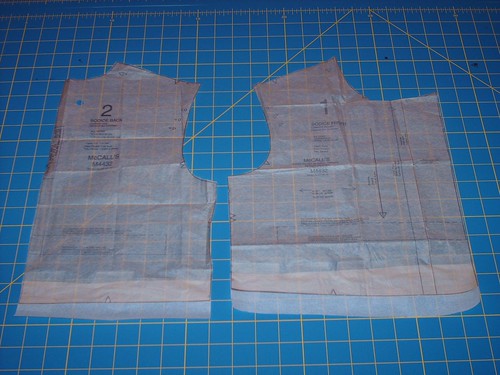
I cut the pattern at what I considered a size 4. I shorten the skirt and the bodice by 1 1/2".

I put together the dress for the first fitting. There were several changes needed:

-The shoulder seam were too long. I trimmed 1/2" from the seam. The results of the shoulder adjustment.


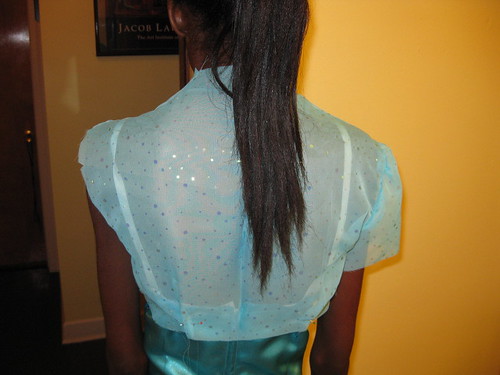
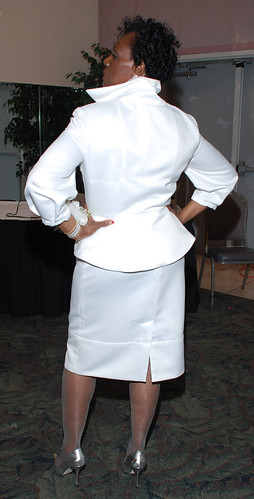
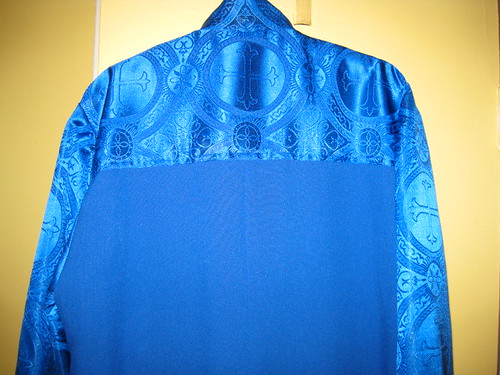
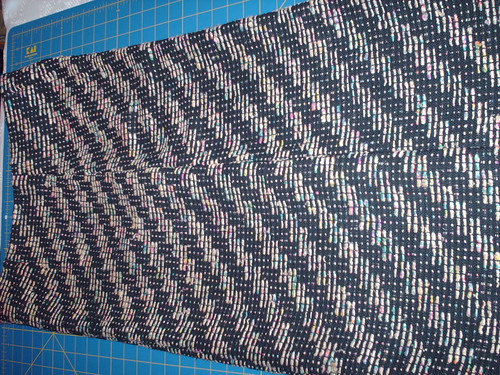
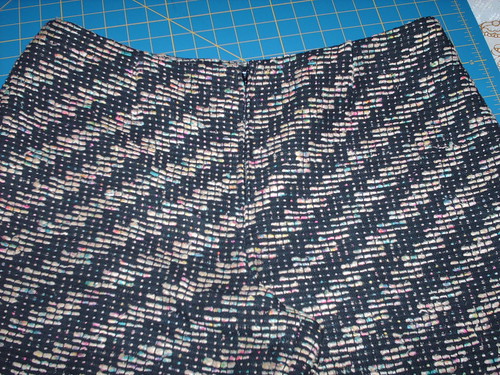
-The back of the jacket stood away from her body. I added two tucks to bring it closer to the body.

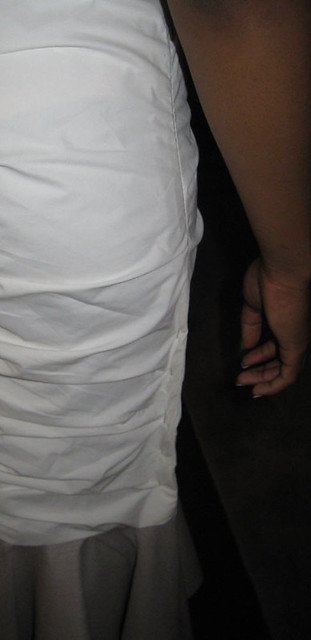
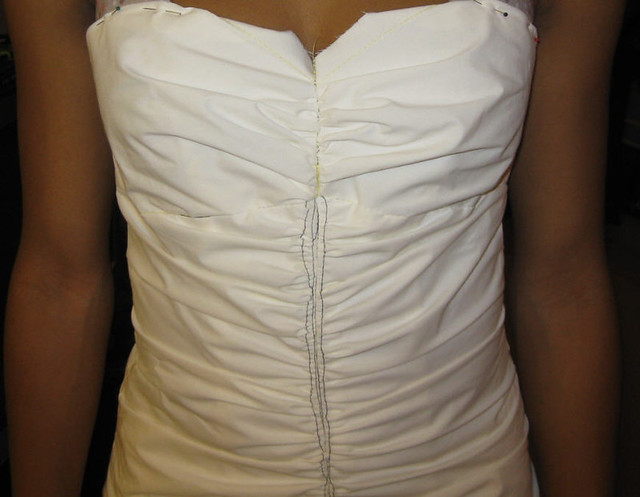
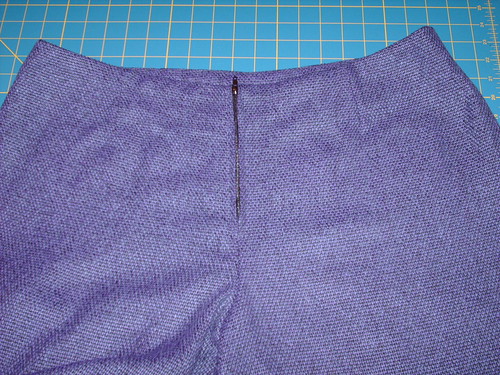
-The dress was still too large. I took it in about 3" more through the bodice area. Adjustment needed at the back.


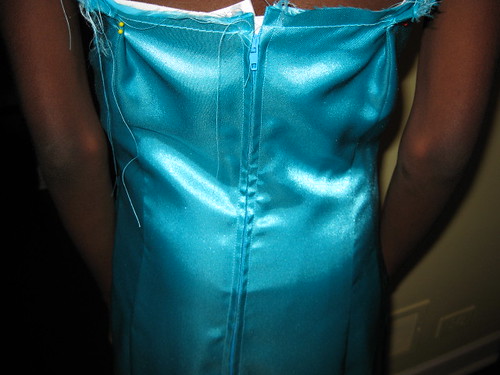
Final finish of the dress adjustment.


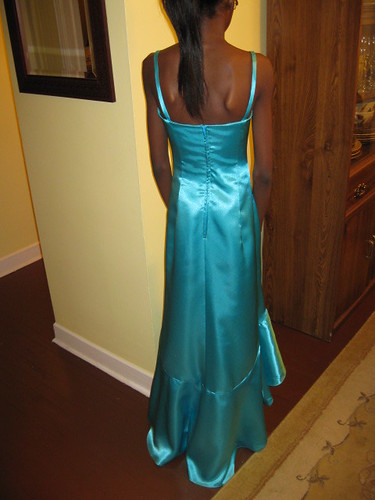
- Straps were added to it for added comfort.
- I made a purse to go with the outfit.


Would you sew it again? Would you recommend it to others? May be if another special occasion comes up. Yes, I would recommend it to others. It's a decent pattern to use for a classic form dress.

Conclusion: This dress was easy to make. My challenge was achieving a good fit for a tiny lady.

Friday, May 8, 2009

Do Sewing for Other People?

Occasionally I receive e-mail from readers about a variety of things as they relate to sewing. A few weeks ago Elaray asked me about sewing for other people and how do I manage the stress that comes with it?

Here's her note to me:

Cennetta,

Your post, in which you described all of your responsibilities, made me think. You sew for other people, proms & weddings in particular, and you sew for yourself. The reason I give for not sewing for hire is sewing for someone else would be just another source of stress. Do you still find relaxation and joy in sewing for yourself? Is it less relaxing when you are sewing for hire? Are your clients too demanding because they are paying you? Obviously, if I think of clients as "too demanding". I don't have the personality to sew for profit! But, I am curious about how you can have the same activity for fun … and for profit. -- Elaray


My response:

Good afternoon Elaray,

You are absolutely right about the amount of stress related to sewing for others. The pressure is on each time I take a commission. If you are like me, you think about: are my skills good enough for pay? Will they be pleased with the results? Are the seams straight enough? Is the fit right? Can I finish on time? All of these questions enter my mine. To help combat some of the stress, I only take a few commissions. Most are regulars from church and work, a few family related clients. I'm very methodical in how I organize my client projects. At the beginning of the year, I gave notice to those interested telling them that I would only take a select number of jobs this year. After I reached my quota, I will not accept anymore. I discuss deadline dates, information about the garment to be made (occasion, style, etc.), pay and pattern(s). Because I need time to sew for me and DD.

When I sew for myself or DD, there is virtually no stress. It's the best. Some clients can be too demanding and very unpleasant. If a client is overly difficult, it's a one time deal. Sometimes, people want the "perfect look" that is not "perfect" for their body structure. Over the years, I have become very selective about what type of jobs I'm willing to take. Being careful not to stress myself too much. In that, I decline some projects. I will tell them, "I'm sorry that will require much more time and a higher skill set than I currently have. May I recommend: (I know a few people that sew and may be willing to do the job.)?"

I understand your statement about having the "personality" to sew for people. You have to a keen sense of "customer service". I love the interaction especially with young people. They are so creative and energetic in most cases. Often clients give me opportunities to try out a new technique and/or test my skills. That's good for me. Lately, I have been thinking about making some accessories to sell. People love the things that I crochet. I've also sewn a few scarves, purses, belts, etc., that people have begging me for. This approach to client sewing will totally eliminate stress. Because I can make up several items and sale them as is.

I hope this answers your questions. Thanks for asking. Please feel free to ask other questions. I think these are questions other people might have as well. ..,


How do you feel about sewing for other people?

Wednesday, April 15, 2009

Back to the Clients - Prom and Graduation 2009

I've finished my nieces dinner dance outfit. It's ready for pick up. I think it turned out well. Final photo shot when my sister picks up the dress. The full review posted after that.

Over the weekend, I got things in order for the next two client projects. Patterns cut, notions and fabric all accounted for. Last night I cut the muslin for another niece. This is the second muslin, B5182. I hope this one works for her.

I'm sewing a dress for my niece's friend, Rianna, using Butterick 4731, Views:B & D. It's cut and ready to sew. Hopefully, she will be available for a fitting Saturday or Sunday. Need to call and schedule.

There are quite a few events and deadlines coming up. I want to have these projects finished by the first week in May. My DD is going to the Anime Convention next month and wants part of her custom made. The media team is expected to work every evening from April 21st through 24th. I'm working on a clergy proposal for my pastor, due May 16th. I'm hosting Mother's Day. Part of my team (work) will be travelling to Urbana for retreat; and then in June three of us will travel to the User Group Meeting (I want something new to wear, of course. lol).

Sigh...,

Happy Sewing!
C

Sunday, February 8, 2009

Celebrating African-American History Month -NL6147


This is a review of the second outfit made for a friend.

Pattern Description: Misses' Coordinates: unlined jacket, pull over top, elastic waist pants and skirt.

Pattern Sizing: 10 - 22. I used size 20. Views E and C


Did it look like the photo/drawing on the pattern envelope once you were done sewing with it? Pretty much. I made a slight change to the back of the skirt (making a vent instead of a slit). Finished vent.

Were the instructions easy to follow? Yes. Nothing confusing.

What did you particularly like or dislike about the pattern? Ms. Bonnie requested some simple skirts that could be easily put together. This pattern fits the bill.

Fabric Used: Cotton from WalMart

Pattern Alterations or any design changes you made: The only change was making the vent in the back of the skirt.

Would you sew it again? Would you recommend it to others? Yes. I originally bought this pattern for the top. So I will try it for myself.

Jacket on Table


Headwrap made from leftover fabric, cut 8"X50"


Conclusion: This is an easy pattern that I would recommend to beginners. You can sew up some easy coordinates in no time at all.

Celebrating African-American History Month -McCalls 3145


In celebration of African-American History Month, one of my church friends wanted two Afro-Centric outfits made. So she asked if I would do the honor. She basically wanted skirts and head wraps. This is the first of the two projects that I made for her in January.

This skirt is easy, easy. I've made it for myself, clients, and one of my sisters countless times. It sews up really fast and can double as a cover up over a swim suit.

Pattern Description: MISSES' WRAP SKIRT IN THREE LENGTHS: Wrap skirt has back darts and opening in right side seam for tie to pass through; all edges of skirt are narrow hemmed

Pattern Sizing:4 - 22 (x-small to X-large. I made Large. View B

Did it look like the photo/drawing on the pattern envelope once you were done sewing with it? Yes it did.

Were the instructions easy to follow? Yes. This is a make in 1 hour wrap skirt.

What did you particularly like or dislike about the pattern? Everything to like; no dislikes. It's quick and easy and a classic style. Plus Ms. Bonnie like it as well.

Finished Skirt on the Table


Fabric Used: Cotton print from Wal Mart

Pattern Alterations or any design changes you made: None.

Ms. Bonnie requested a head wrap to wear with this skirt, which I made from the scraps. The head wrap is about 12" X 36". Ms. Bonnie is quite the creative one. She gave me a mini head wrap tying lesson when I delivered the two outfits to her on Tuesday. Here are a few photos of the various styles.


Would you sew it again? Would you recommend it to others?
This pattern is out of print. But if you have it in your collection, do try it.

Link to all photos.
Conclusion: It's a great quick project. Good for beginners.

PS - Forgive the boots. It's cold, wet, and messy in Chi-town.
Happy Sewing!
C

Saturday, February 7, 2009

The First Aider's Dress Using McCall 4432


One of my church friends asked me to make the one and only junior first aider's a uniform. She told me what she had in mind, so I looked through my pattern collection to see if I already had something that I could use to make the uniform. No luck. So I searched the pattern books at Hancock's and found McCalls 4432, which worked perfect for this project.

The order was for a white jumper style dress that could be worn over a blouse. Fabric: something easy to care for, wash and wear. The little lady is about 10 years old and fits a size 10 child's pattern. Once I finished the seams on the serger, it took no time at all to finish the dress (uniform).


Pattern Description:
CHILDREN'S AND GIRLS' DRESSES AND HAT: Loose fitting, above ankle dress has raised waist, dirndl skirt and front button closure; A, B, C, D are sleeveless; E, F have short sleeves; C has contrast collar; D, F have a collar; A, B, C, E have pockets; B has contrast lower band; hat has crown, band, contrast brim and elastic back.

Pattern Sizing:
Children 3-6 and Girls 7-14 I made view B; size 10.

Did it look like the photo/drawing on the pattern envelope once you were done sewing with it? The basic form was the same, but I changed my version a little by adding 1 1/2 inches to the bodice and shorten the skirt by 4".


Were the instructions easy to follow? Yes. There was nothing confusing about them.

What did you particularly like or dislike about the pattern? This is an easy dress pattern that you could easily create a variety of dresses for little girls. No dislikes.

Fabric Used: Linen blend for Hancock's

Pattern Alterations or any design changes you made: As mentioned above I made two changes: I added 1 1/2" to the bodice and shorten the skirt by 4".

Would you sew it again? Would you recommend it to others? Probably not. But who knows.


Conclusion: This is a easy pattern to sew that only takes a few hours to make. Great pattern for beginners.

A Peak Inside the Gentleman's Over Coat

A few weeks ago, I was asked to altered a man's over coat (London Fog). The gentleman had lost weight and wanted the back and sides taken in a bit. Well in order to do that I had to take the lining a part to get to the inside of the coat to make the changes.

For the most part the manufacturer used the bag method of attaching the lining. The final seam of the lining was in one of the sleeves where they stitched it together after the coat was turned to the right side. After I opened the seam and turned the coat inside out, I was able to see the inner workings of the coat. This is all very interesting to me as I want to make more coats and make them better or as good as RTW.

Here are a few shots of what I found on the inside:


At the shoulder, armhole and center front padding is attached to help smoothing and shaping of the chest area.


The sleeve head is made of the coating fabric instead of interfacing or batting.


The shoulder pads weren't anything special. For the most part they were made of interfacing.


Each of the armholes has two rows of stitching: one to secure the sleeve to the armhole and the other to attach seam binding to the armhole.


Every stress point (pockets, around the armholes, along the center front, collar and chest area, along the hems and back vent) was interfaced for added durability. Finally, the lining was attached at various points of the coat: at mid sleeve, underarm, shoulder, and along the back side seams.

At first I was not that thrilled to do this job, but after I started taking the lining apart I recognized the value of doing this alterations. I hope this information is helpful to someone who is interested in making coats.

Happy Sewing!
C

Monday, February 2, 2009

And The Stitching Goes On

This weekend I got a lot of sewing done. None of it was for me, but it felt great to finish three projects. All of them for clients.

The first was a dress for a ten year ago first aider (church). One of my friends asked if I would make the dress for their young member. I agreed to do it at no cost except for the material and notions. I actually finished this dress the last Sunday of January. But took a look at the measured length of the skirt and noticed that it was too long. So I shorten it by four inches and re hemmed the dress. This was a easy, easy project. After the seams were finished, it only took a few hours to make. It's nothing fancy. White linen blend from Hancock's, four buttons, all work done on the machine except for the hem. Full review and pictures later this week.

Second project was two Afro-centric outfits for another friend who fellowships at my place of worship. The original order was two head wraps and two skirts. As we talked about what kind of skirt and how long, she decided to add a jacket to one of the orders. All of the seams were finished the week before. So Friday and Saturday I put the outfits together. All sewing done by machine. More easy projects. Full review and pictures later.

A forth project is altering to a London Fog coat for a gentleman. This is an interesting project. The coat is a little too big in the back and sleeves. So I started the process by opening the lining in one of the sleeves to get to the interior of the coat. The adjusts were temporarily stitched. I wanted the client to try the coat on first to make sure the adjustments were correct. Believe it or not, I was excited about this particular alteration. The inside gave me a bird's eye view of the construction of a man's overcoat. There is a lot of padding and even seam binding at the armholes. This is a neat little learning experience for me. I am for the most part, a visual learner. This helps me with future coat construction techniques. I'll show a picture or two of the inside.

Tuesday, January 20, 2009

Did I Say Multi-Tasking or Multi-Projects?

My Goodness! I have so many projects on the table right now it's making me dizzy and more conscious about organizing processing more. Like cutting all pattern at once and making pattern alterations and muslin all at once.

- Clients: I'm trying to organize a little better to stay on top of all of the deadlines dates and scheduling fittings. I purchased a journal to log all 2009 client projects. The first four projects are first aider's uniform for a junior member (church), two Afrocentric outfits another client, and a dinner dance dress for my niece. All expect my niece's dress has been cut and ready to sew. I need to make a muslin for the her dress before starting the work on the actual dress.


- For me: Yesterday I worked on the pattern alterations for my two "Copy That Style" dresses. The Bodice of the Beyonce dress is a little challenging. I purchased S4070 to address the "heart" shaping in the bodice. The Peter Sow dress can be copied using S2926 with a few pattern alterations. Still working on another coat and several coordinates and UFO's.

- DD: OMG! Her list is BIG! So..., I said all of that to say..., "I'll be making a variety of posts on all projects until there are done.

Happy Sewing!
C

Friday, January 9, 2009

Graduation and Prom 2009 - Oh My God!

Commissions for prom and graduation dresses are starting to pour in. I'm limiting myself to only a few. Quality over Quantity is the goal. I really want to do more sewing for myself. Next Saturday, I have two appointments to talk about dress designs and fabric.

A few people approached me for other sewing jobs. Some I said yes to and others I gracefully said no. I promised myself no more stressful client sewing in 2009 or forever.

On the table:

I'm finishing up two jackets that I started at the end of 2008. All is left to do is hemming and pressing. My full reviews will be posted in a few days. Both jackets will complement skirts and pants already in my wardrobe. Next, I'll dig through the UFO's and find something that is nearly completed as my next project. Perhaps something for DD.

Happy Sewing!
C

Thursday, September 11, 2008

Neue Mode Stil Young Collection J22928


This is my girlfriend's all time favorite pants pattern. I've used it at least 15 times. It's very versatile; I've added pockets, slits, and waistband to style them up a bit.


This time last year, DeeDee and I made a trip over to Vogue Fabrics during the lunch hour. In less than an hour, she had 10 cuts of raw silk basket weave fabric for pants and jackets. At that time she was in no hurry for the pants and said, "Just take my fabric home with you and I'll let you know when I'm ready." Well a few months ago she said, "I'm ready." I made five pair (Black and Purple and three multi-color) this time around, no additions (pockets or waistbands) and no belt loops.


Pattern Description: Wide leg pants with front and back darts, front zipper, faced waist and optional carriers.

Pattern Sizing: 8-18

Did it look like the photo/drawing on the pattern envelope once you were done sewing with it? Pretty much. I omitted the belt loops.

Were the instructions easy to follow? Yep. I just glanced over them. Typical instructions for basic pants.

What did you particularly like or dislike about the pattern? Like: Everything. These pants go together really fast. I finished all of the seams and sew them together in two sewing evenings. I also like the versatility of the style; it's very easy to add pockets (patch or in-set), the zipper can be moved to the side or back seam, and slits can be added as well. Nothing to dislike.

Fabric Used: Raw silk, basket weave

Pattern Alterations or any design changes you made: This time I only added two darts to the back for better shaping at the waist.


Matching the pattern of the fabric side seam.


Matching the pattern of the fabric at center front seam.


Would you sew it again? Would you recommend it to others? Yes and Yes, if you can find it or have it in your collection. Dee will probably have me to make a few more this winter. We'll see. ;-)

Conclusion: This is a great pattern that a beginner could easily put together. Great wardrobe builder.

LinkWithin

Blog Widget by LinkWithin