Showing posts with label hats. Show all posts

Tuesday, February 9, 2021

Simplicity Accessories S2508 - Tackling UFO's in 2021 - Part I


In the past six months I have made so many hats!  This next post adds two more to the list of completed toppers.  I'm pleased with getting off to a good start with accomplishing my sewing goals for 2021.  I'd like to complete at least one UFO per month.  So for January and February, I finished three things:  two hats and a scarf.  

Oh, it's so amazing how time flies.  These projects were cut and stored from over seven years.  Incredible..,  It only seems like yesterday.  

Often I'm so excited about sewing, and I want to make everything.  Then I see something on social media that inspires me to try even more things.  Thus, I end up with so many projects to make and/or finish.  This year, I'm making an effort to slow down the excitement and focus more on the project before me and get it done.


Simplicity S2508

This pattern is out of print.  It's loaded with goodies: jacket, scarf, hat, shawl.  Nice accessories and coordinates to try.

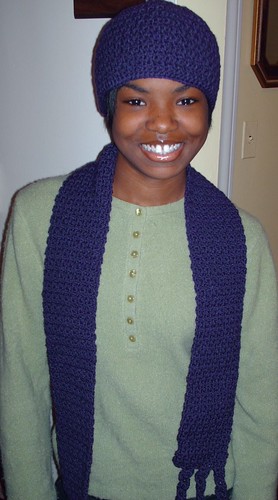
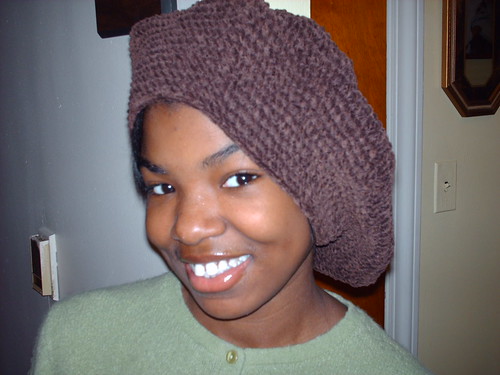
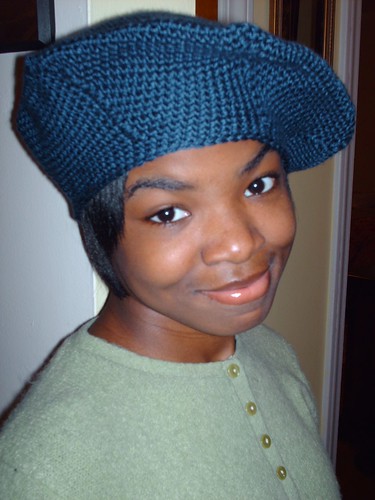
I made view E and F  The pattern has grouped sizes 6-14 and 14-22.  The hats come in sizes small, medium, and large.  I made a large.  The fabric I used is anti-pill polar fleece.

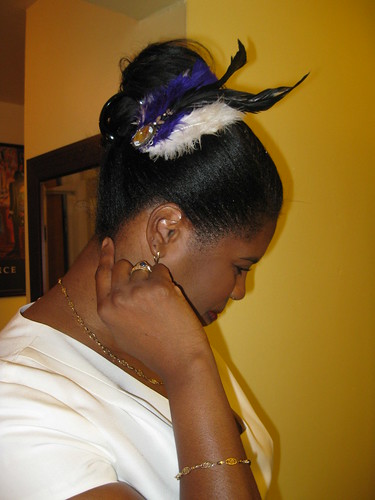
My hats and the scarf look like the illustrations on the envelope and guide sheet.    The instructions were typical and easy to follow.  Nothing confusing.


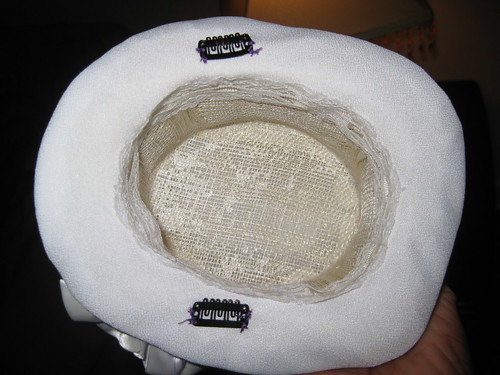
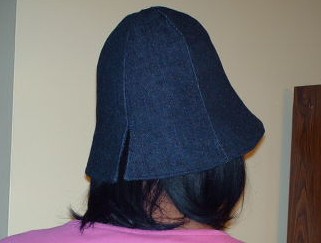
I found the construction of the hat interesting.  The brim has cording incased to form a ridge.  I like the affect.  I didn't follow step 5 for the bow.  I just machine stitched it to the hat.  I enjoyed making the flower and leaves for the scarf.  I do like making those little extras.


Overall, there was nothing to dislike in the construction or the finish projects.  I enjoyed making both the hat and scarf.  It took me less than two hours to make all three pieces.  

I like how these accessories turned out.  Really quick projects.  Good for all level sewists.  And I do recommend this pattern if you have it.  


My UFO bind is getting smaller.  wink, wink. I have to figure out what will I finish next.  So in the meantime, I hope you are having a great day.  Do something that brings you happiness.  It's the little things that seem to count the most these days.


Parting Shots:  Facial masks - I apply at least one per day.  During these cold, blustery winter months, stay hydrated.  Drink plenty of water and keep you skin moisturized too.  Masks are a great additional to my facial routine. 


Enjoy and Happy Sewing!

C

Wednesday, October 28, 2020

More Bucket Hats with Vogue v8403


I've turned into a little "Mad Hatter". Lol  After making the first bucket hat,  a few people have asked for one.  So, I decided to go ahead a make a few more.  But, these are for me. Lol  Next round will be for gifts.


For I used Vogue V8403, view E.  Compared to Vogue V7784, the basic shape of the hat is the same.  But I like the narrower front brim of V8403.  The crown is only one piece. 

Like the other pattern, this one comes with a group of several hats plus cuffs for gloves.  Vogue describes the pattern as:  Hats and Glove Cuffs - Package includes patterns and instructions for five different hats and glove cuffs.  Each hat fits small 22", medium 23", and large 24" head sizes. 


I made size medium and still had plenty of room.  The crown is deep and may require a little adjustment if you don't have super big hair.

My hats look pretty much like the hat on the envelope.  It's pictured in a beautiful  blue velvet.  I used some remnants from the home dec department at Vogue Fabrics.  Both hats were made with less than 1/2 yard of fabric.  The ribbon and lining I already had at home.  More than likely these hats will be worn with some new coat or jacket I make. Tee Hee.  There are also be good for vacation, on the beach wear.  


The instructions for this design is not much different from the previous bucket hat made.  Both had typical instructions that were easy to follow.  These sewed up very quickly maybe taking an hour or so each to complete after cutting them out.

Great hats to protect my head and hair, rain or shine.  The timeless style is simple but fashionable.  I thought about adding some netting to them if I make a coordinating outfit to showcase in the Haute Couture Fashion Show.   We will see.


No alterations made on them and no design changes.  Straight from the envelope and sewn together.  Depending on a person height or style preference, a smaller back brim would be a little more comfortable.  The front  can be trimmed down as well.  It depends on preference like I said.

So, these are number two and three bucket hats inspired by the Dior inspiration hat.  I have at least two more to make and I will probably use this pattern instead of the other (V7784).

This is a nice little accessory project try.  And I recommend both patterns to sewists.  I enjoyed the process.  Now, I'm thinking about embellishment for a totally custom style.

Parting Shots:  The same day that I made these hats, I made my second Cashmerette Appleton Wrap Dress.


Monday, September 19, 2011

DIY Fascinators


For a while I've wanted to try my hand at making hats. Not the crocheted type but ones made of wool felt or straw adorned with all the accoutrements that make it special. Since reading about fascinator's in a current issue of Essence magazine, I decided to try making one.

I purchased a petite hat on eBay. I needed a white one, but they only had off-white.  So first, we tried to paint it pearl white. That didn't work. Then I decided to make a cover for it. Sorry I don't have any measurements and not many pictures.  But it's not hard to do.   Here's how.

- Place the hat top side down on the fabric; trace the outline. Cut the cloth, adding the desired seam allowance.

- Measure the circumference of the traced outline minus the seam allowance. This measurement (circumference) is the length of the fabric for the body of the hat.
- Next, measure the height of the body. Use these to measurements to cut the body of the hat. Add seam allowance.

- Double the fabric. Then place the hat top side down on the fabric; trace the outline of it. Then turn the hat right side up and trace the brim of it. Cut away the smaller oval. Next, cut away the fabric from the larger outline (brim) adding the seam allowance.

- Sewing; join the two short lengths of fabric for the body of the hat. Press. Make little slashes around the Oval (top of the hat). Then pin it to the body of the hat. Sew and press. Now turn it inside out and roll it down over the hat. For the brim - sew the outer edge of the brim together. Slip it over the top of the hat. Work the brim between the two layers.

- The hat band (ribbon) will cover the raw edges. Glue it in place.  For the inside, add ribbon or lace, whatever you like, to conceal the raw edges on the inside of the hat. Add little hair comb clips to hold the hat in place when worn.


- Finally add (glue) feathers, flowers (Mine are handmade leftovers from a previous project), or ribbon to decorate.


And you are done.

Parting Shot: DD made this fascinator for me. Worn Unity Conference 2011.

Tuesday, August 23, 2011

Chic Chapeaus - Hats Are Back in Style!

Gene Tiernery - Hollywood Legend from the 30's and 40's
Great matching hat and purse


Ava Gardner - Hollywood Legend from the 30's and 40's


Back in the day, women almost always wore hats and gloves in public. It was an essential part of getting dressed to leave the house. Over time, that all changed. Nowadays it is rare to see women wearing hats in church. Since the courtship of Prince William and Kate Middleton there has been a resurgence of hat-wearing.

Last year, our church Unity Conference Coordinator announced that she'd like the women to wear hats on the climax of the 2011 conference. Of course, I thought about making my own. I wanted it to be unique. Another creative skill to add to my repertoire. The September issue of Burda Style magazine arrived just in time for me to take advance of its feature article on "DIY Trend", which teaching you how to make popular hats and fascinators similar to the whimsical styles worn by Princess Kate.


Essence magazine also featured an article all about the toppers, and how you can incorporate them into your style. I loved every one of them. So for your viewing pleasure hear they are:


That's all for now.  More reviews still to come.

Happy Sewing!
C


Saturday, December 27, 2008

Just a Little Crocheting in 2008


My niece so willing to model my crocheted hats and a scarf.

Tuesday, April 15, 2008

Patricia Underwood Hat V8440


Test driving Patricia Underwood hats. I started with view A of V8440. This is my wearable muslin originally made to wear on the return trip from the March Spa weekend. More details later.

LinkWithin

Blog Widget by LinkWithin