In August, I shared my intentions to make
my LBD's for Fall 2010. Both dresses are finished but, not in time to enter the already awarded PR LBD contest. Rats..., Seriously...,
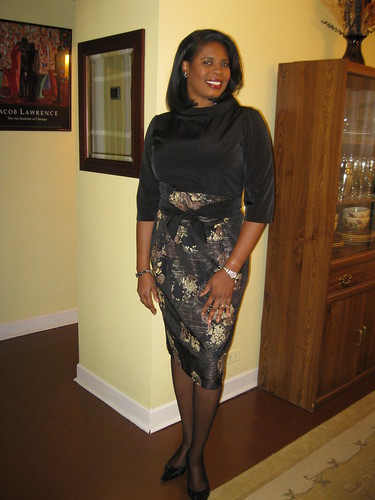
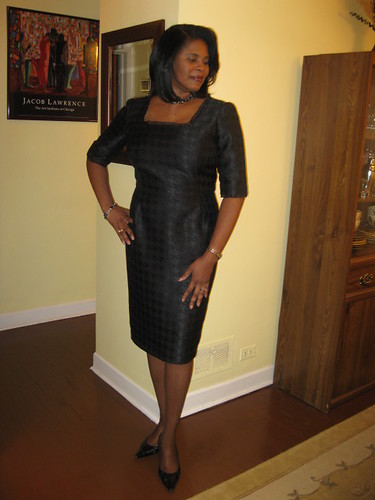
I wore one for the Captains Ball (cruise) and the other just a few days ago. I love them both for different reasons. LBD-1 The sash is cute and creates a waist for me. LBD-2 is just classic: The ruffled neckline combined with the fabric. Love, love. It's amazing how you can use one pattern to achieve different looks. For these LBD's I used New Look 6824, same pattern I used for my
2008 birthday dress. My first thought was to try the full skirt for the first LBD, but the remnant that I purchased was not long enough to accommodate the skirt. So, plan B, slim skirt.
In this review I'm describing the my process, my thoughts on the fabric, and the feel/fit of both dresses hoping not to confuse you. So here goes.
Pattern Description: Misses Design Your Look Dresses. This pattern includes a variety of necklines, skirts, and sleeves style that can be mixed and matched.
LBD-1 I used B+C+E+G+I+J
LBD-2 I used A+E+G
Pattern Sizing: 8-18, I used size 14 with modifications.
Did it look like the photo/drawing on the pattern envelope once you were done sewing with it? Both dresses looked like the basic design lines for the pattern drawings.
Were the instructions easy to follow? No difference from what I reported in the first go round. The instructions were pretty standard. Some processes were added/changed based on my design changes.
What did you particularly like or dislike about the pattern? I like the versatility of this pattern and the "vintage" appeal. There are many, many options.
Fabric Used: LBD-1 is made of peach skin from JoAnn's(Bodice) and a
beautiful jacquard from Vogue's(skirt). The photo does not do the jacquard justice. It was easy to sew. On the other hand, the peach skin was a bear to achieve that smooth finish we all love to get with in-set sleeves. So I decided to live with my second attempt. Peach skin is very tightly woven. I suppose I could have reduce the amount of ease..., Next, time.
LBD-2 is made from a black on black
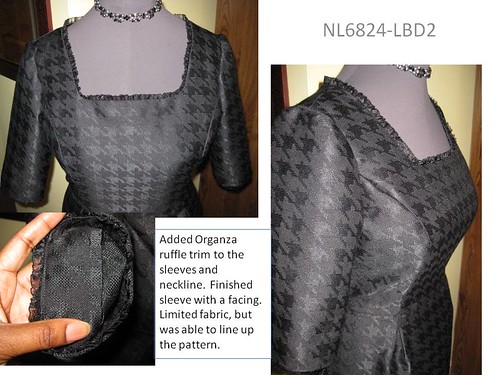
hounds tooth from Vogue's. The fiber contain of the weave of the hounds tooth contained the flexibility needed to insert the perfect sleeve. I was lucky to find a two yard remnant of this quality.
Pattern alterations or any design changes you made: For both -
FBA
Prominent shoulder blade adjustment
Added two inches to the length of the skirt
Lined the skirt
installed an invisible zip.
LBD-1 -
- I finished the hem with a slit attaching the lining to it.
LBD-2 -
- Carefully planned the layout to line up the hounds tooth pattern throughout the dress.
- Shorten sleeves by a inch or so (limited fabric)
- Added organza ruffled trim to the neckline and sleeves. The trim was on an elastic band. So I stayed the neckline. Then I used a thin strip of stitch witchery to hold the trim in place while I basted it to the dress. Next I follow the steps described in the instruction finishing the with understitching.
- Added facing to the sleeves for a polished finish
 Would you sew it again? Would you recommend it to others?
 This is now one of my TNT/slopers. I'll probably use it again and again. And yes I do recommend it to others.
Jewelry Made by my DD Conclusion:
 This is a great dress pattern that provides many design options for that classic, "vintage" look.


