Showing posts with label dresses. Show all posts

Saturday, August 2, 2025

Two Red Dresses - Simplicity S1314 and McCall M7405


Like I said in a recent post, I've been sewing quite a lot during the past few months trying to sew up some of the beautiful fabrics that I already own.  These two red dresses were made in early July.

Simplicity S1314 is a favorite TNT.  I can make this dress in a few hours.  All adjustments already made and using a neoprene knit makes it quick and easy.  This fabric comes from Minerva Fabrics in the UK.  I've had it for a few years.  Originally, I made an off the shoulder McCall's top.  But it just didn't work out.  The whole project was trashed, and I order two more yards of fabric because I really like the print.


McCall's M7405 I only made it once before in 2022.  I thought  it was time to make another.  It is a perfect style for summer.  And these dog days of summer in the Midwest have been extremely hot.  This fabric came from Fashion Fabric Fabrics.  I purchased it this year.  The light and airy viscose challis moves with the slightest ease.  It's a great little summer dress that breathes. 

So, these are two of the dresses that I planned to make and wear this summer.

Stay Tune for more of the summer sewing lineup.

Happy Sewing!

C


Thursday, March 17, 2022

Anthropologie So Inspired: It's Spring and Summer Dresses

Dresses, dresses, and more dresses!

It's time for a little dress inspiration.  Spring is already here, and summer is around the corner.  I'm itching to make a pretty dress.  Before I start planning what fabric, style, and color I wanted to see what RTW styles are on the horizon.  Anthropologie has a great selection of the season's best spring and summer looks.  From their posted inventory, I see an entire caribbean vacation wardrobe.  They have beautiful florals, abstract prints and solids of every style and for every shape.  Below are some of the dresses I'd like to have.  But you can take a look at the entire collection that is posted online here.    


Happy Sewing!

C

Monday, April 20, 2020

The Pleated Wrap Dress - Butterick B6703


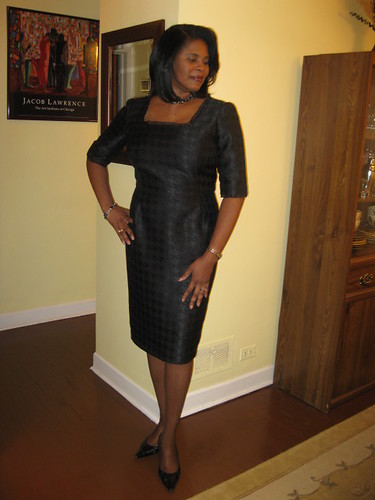
If you follow me on Instagram, you've seen my posts on "My Dress Projects" that I'm currently working on.  I "need" some new ones.  Lol.  Actually, I've been making so many masks.  I need to get back to making other things.

This Butterick wrap dress is relatively new, published 2019.  I haven't made a wrap dress in awhile.  So, I put this one next on my list to sew.


Butterick pattern description:  Wrap dress has semi-fitted bodice with tie closures, front pleats and narrow hem. A: 3/4 sleeve with double-stitched hem, straight skirt with right front pleats. B: 3/4 sleeve with flounce. C: long sleeve with elastic casing. B, C: flared skirt.

I made view A with a ton of adjustments and process changes.  Honestly, I started to write this as two post instead of the one.  But I have some other posts I want to get to this week.

This pattern comes in size groupings (8-16) and (18W- 24W).  I used size 16 with modifications.


The instructions were typical.  Some I didn't follow because there are other construction processes that I like to use.  There is nothing confusing in the instructions.  The pattern is raked: easy; and it was.

My dress has a lot of changes, but it does look like the dress pictured on the envelope.

There are several things I like about the dress and a few things I disliked about it.  First, my likes: wrap dress, pleats, sleeve variations, skirt-waist dress, and knit comfy.  My dislikes:  I didn't like the way the tie worked and the neckline finishing.

The fabric that I used is from Minerva Fabrics.  It is a very nice jersey knit with about 30% four-way stretch. The John Kaldor Abstract Floral Print Stretch Jersey knit has some of my favorite colors.  Yes, I know it looks a little Fall-ish.  But these colors work well with my skin tone.  I used a sharp sewing machine needle, size 12. The jersey and microtex needles produced a lot of skipped stitches. 

I made numerous pattern alterations and a few construction changes:


  • FBA - this one was huge.  I probably created more work for myself.    Anyway, I began with slashing the front right bodice to add more width and a little more length.  Pictured above.  To eliminate the gapping neckline, I made a small tuck.  With the added width, I had to make an additional pleat at the waist.  The remaining width was removed from the side.  Sorry, it's not pictured here.
  • For the left bodice front, I needed to also add more width and length.  That change resulted in the adjusted above.  Similar to the right side, difference is an additional dart at the waist.  The rest is the same as the right front bodice.

  • Prominent Shoulder Blades, Swayback, forward shoulder Adjustments - First I slashed the back from the shoulder seam to the end of the back (at the waist).  Then I create a small dart at the shoulder so that the shoulder back and front seams are the same length. This change also increase the  width at the waist. I removed the excess at the waist.  Not shown in picture. Next for the swayback I added a tuck starting at the center back and graduating to nothing near the side seam.  Also, I added a center back seam for a better fit.  Finally, for the slightly forward shoulder adjustment I added a little vertical length as needed.  See shoulder seam area.


  • Now for the skirt - almost always I need to lengthen the skirt.  In this case, I only lengthen it by 2".  I could have added more.  I like my skirt to fall at the bottom of my knee.  So next time I'll at 1.5" more.  So lengthening is easy.  With all the changes to the bodice, some changes are needed in the skirt. 
  • Let start with the back skirt.  It's the easiest.  In additional to lengthening the back skirt, I added the tucked amount from the back bodice to the bottom of the skirt.  The compensated for the curved back area.  The left skirt front was lengthen the same as the back.  For the right skirt.  I added width from the waist to the hem to create an additional pleat.  The number of pleats in the skirt, now match the number of pleats in the bodice.  (Note:  This was an after thought. After I noticed that the pleats were off by one.)  Barely noticeable though.  So I had to make adjustments to the top and bottom of the front right skirt.  See picture above.

  • Construction change - 
    • Neck Binding - I preferred to bind with fashion fabric.  So instead of bias tape, I cut a neck band about 22.5" long (3" shorter than the neckline) and 2.25" width.  I folded it in half wrong side together. Pressed. Attached it to neckline easing in the excess.  Then I turned the neck band to the inside and stitched again.  This creates a nice sturdy neckline.
    • Belt - Preference again.  I'm not fond of the twill tape ties on the inside.  I prefer to thread the belt through a slit at the side waist.  So that's what I did.  For the left belt, I made it long enough to wrap around the back to the left side with the length to tie the same as the right belt.  I created a small slit on the right side for the belt to go through.
    • For the narrow hem, I pressed the seam allowance for the hem, applied steam a seam right at the fold line.  Then turned the raw edges in.  At the areas where the belt is attached, I only  turned in the skirt.  Once the hem was finished for the skirt, I secured the belt by making another row of stitches 1/4" away from the edge.
A lot of changes, right?  Whatever it takes. ;-)  With all those changes, I MUST make this dress again.  At least one of the other views.


I like it, and I do recommend it to others.  You might want to make a muslin.  Sorry, I didn't this time. I thought I could wing it.  I think my dress turned out pretty good.  It will be in high rotation when the crisis goes away.


Thank you for stopping by and for reading this very long review.  I truly wanted to include all of the details of "my" sewing experience.  Yours may be different. wink, wink.  Anyway, have a great day!

Happy Sewing!
C


Thursday, September 27, 2018

September Is Almost Over! Sewing Reflection

It's hard to believe that September is almost over!  This week I started seriously thinking about fall and winter sewing projects.  There is always so much I want to make and do.  It's overwhelming.  There isn't enough time in a day to accomplish as much as I'd like to.

I'm happy to report that I finished at least 2/3 of the summer projects on my list including a swimsuit (UFO) for my daughter.  Right now, I have three more summer projects to complete.  I'll work on finishing them over the course of the next several days.  I've ready finished two fall garments.  Reviews on those will be posted this weekend.  They are part of the Style Maker Fabric Fall Tour.

So over the next several days review to post are:

  • Simplicity Dress S1314
  • Butterick Jacket B6329
  • Butterick and McCall Swimsuit BP291 & M7578 for DD (UFO)
  • McCall Pants  M7726 (made in June)
  • McCall Shirt M7753 (made in July)
  • McCall Top M7687
  • Vogue Dress V1352
  • McCall Dress M6116 


Meanwhile, I'm continuing to work on my top ten projects to make this fall.  One will be McCall Jacket M6440, view D.


Monday, September 26, 2016

Notes on a Pattern (Design Element) - Always on Trend: Ruffles and Flounces


This started out being just a simple post: Notes on a Pattern, Vogue 8256, that I received as a gift.  I thought the skirt was something that I would consider making.  It's not difficult, it would just take some time to hem the flounces. The pattern is Sandra Betzina's three tier flounce skirt, copyright 2006. 


While pondering the thought of making the skirt, I decided to do a little research to see what designers were creating for Spring 2017.  That's when the flood gates opened.  I Googled "Ruffle and Flounce".  Thousands of images appeared in the search results.  Right then another thought occurred to me, "There is nothing new under the sun."


Every possible way to include ruffles or/and flounces appeared on screen.  I looked and looked until I couldn't look anymore.  I saved a few to show to you.   Next, I Googled "Vogue Pattern Ruffle and Flounce".  Here again hundreds of images appeared.  Many were pictures of my fellow sewing sistas/bloggers wearing the very own creations.


Needless to say, ruffles and flounces never ever go out of style.  You just need to determine how you want to incorporate them into your garment.  We don't have to be slaves to making anything exactly like the pattern calls for.  Be audacious or subtle as your personality and style dedicates.  Be creative.  Need a little inspiration, look at what the designers are doing.  See if there is something to suits you.


So, my little research project helped me decide to definitely make something with ruffles and/or flounces real soon.   For you viewing pleasure, here are a few designs that I'd like to share with you.

Happy Sewing!
C


Tuesday, November 9, 2010

My Little Black Dresses - New Look 6824 Part II


In August, I shared my intentions to make my LBD's for Fall 2010. Both dresses are finished but, not in time to enter the already awarded PR LBD contest. Rats..., Seriously...,

I wore one for the Captains Ball (cruise) and the other just a few days ago. I love them both for different reasons. LBD-1 The sash is cute and creates a waist for me. LBD-2 is just classic: The ruffled neckline combined with the fabric. Love, love. It's amazing how you can use one pattern to achieve different looks. For these LBD's I used New Look 6824, same pattern I used for my 2008 birthday dress. My first thought was to try the full skirt for the first LBD, but the remnant that I purchased was not long enough to accommodate the skirt. So, plan B, slim skirt.

In this review I'm describing the my process, my thoughts on the fabric, and the feel/fit of both dresses hoping not to confuse you. So here goes.


Pattern Description: Misses Design Your Look Dresses. This pattern includes a variety of necklines, skirts, and sleeves style that can be mixed and matched.

LBD-1 I used B+C+E+G+I+J
LBD-2 I used A+E+G


Pattern Sizing: 8-18, I used size 14 with modifications.

Did it look like the photo/drawing on the pattern envelope once you were done sewing with it? Both dresses looked like the basic design lines for the pattern drawings.

Were the instructions easy to follow? No difference from what I reported in the first go round. The instructions were pretty standard. Some processes were added/changed based on my design changes.

What did you particularly like or dislike about the pattern? I like the versatility of this pattern and the "vintage" appeal. There are many, many options.

Fabric Used: LBD-1 is made of peach skin from JoAnn's(Bodice) and a beautiful jacquard from Vogue's(skirt). The photo does not do the jacquard justice. It was easy to sew. On the other hand, the peach skin was a bear to achieve that smooth finish we all love to get with in-set sleeves. So I decided to live with my second attempt. Peach skin is very tightly woven. I suppose I could have reduce the amount of ease..., Next, time.

LBD-2 is made from a black on black hounds tooth from Vogue's. The fiber contain of the weave of the hounds tooth contained the flexibility needed to insert the perfect sleeve. I was lucky to find a two yard remnant of this quality.


Pattern alterations or any design changes you made:
For both -
FBA
Prominent shoulder blade adjustment
Added two inches to the length of the skirt
Lined the skirt
installed an invisible zip.

LBD-1 -
- I finished the hem with a slit attaching the lining to it.

LBD-2 -
- Carefully planned the layout to line up the hounds tooth pattern throughout the dress.
- Shorten sleeves by a inch or so (limited fabric)
- Added organza ruffled trim to the neckline and sleeves. The trim was on an elastic band. So I stayed the neckline. Then I used a thin strip of stitch witchery to hold the trim in place while I basted it to the dress. Next I follow the steps described in the instruction finishing the with understitching.
- Added facing to the sleeves for a polished finish


Would you sew it again? Would you recommend it to others? This is now one of my TNT/slopers. I'll probably use it again and again. And yes I do recommend it to others.

Jewelry Made by my DD


Conclusion: This is a great dress pattern that provides many design options for that classic, "vintage" look.

LinkWithin

Blog Widget by LinkWithin