Friday, January 17, 2014
Full Bust Adjustment and Dart Rotation - Tutorial
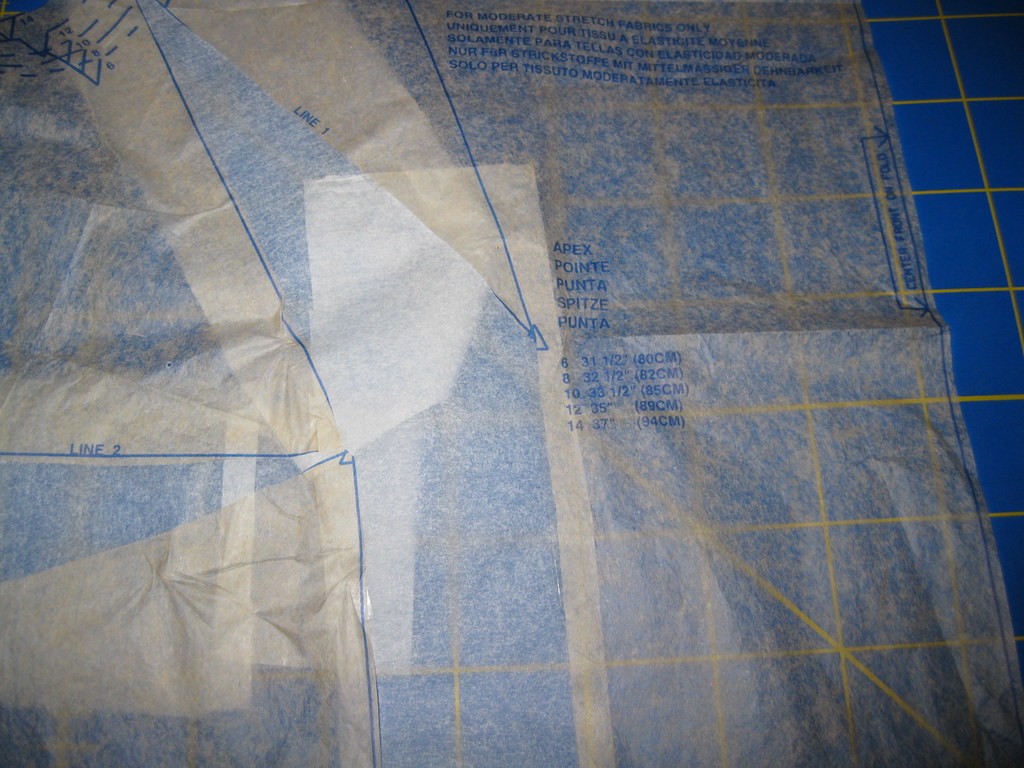
I wondered if it was worthwhile to post an entry on full bust adjustment (FBA) and dart rotation. The internet has tons of guides for FBA. But, I haven't seen many FBA and dart rotation tutorials. At the Palmer/Pletsch retreat, Marta Alto taught a segment on dart rotation and how it could be used as a style element as well adding form and shape to a garment.
Although, I tried dart rotation in the past, her lesson helped build my confidence to try new ways to use this technique when making a FBA. It is most challenging to make a FBA on a one piece front bodice. Sometimes the dart is too large and it is difficult to form without dimpling or sharp points.
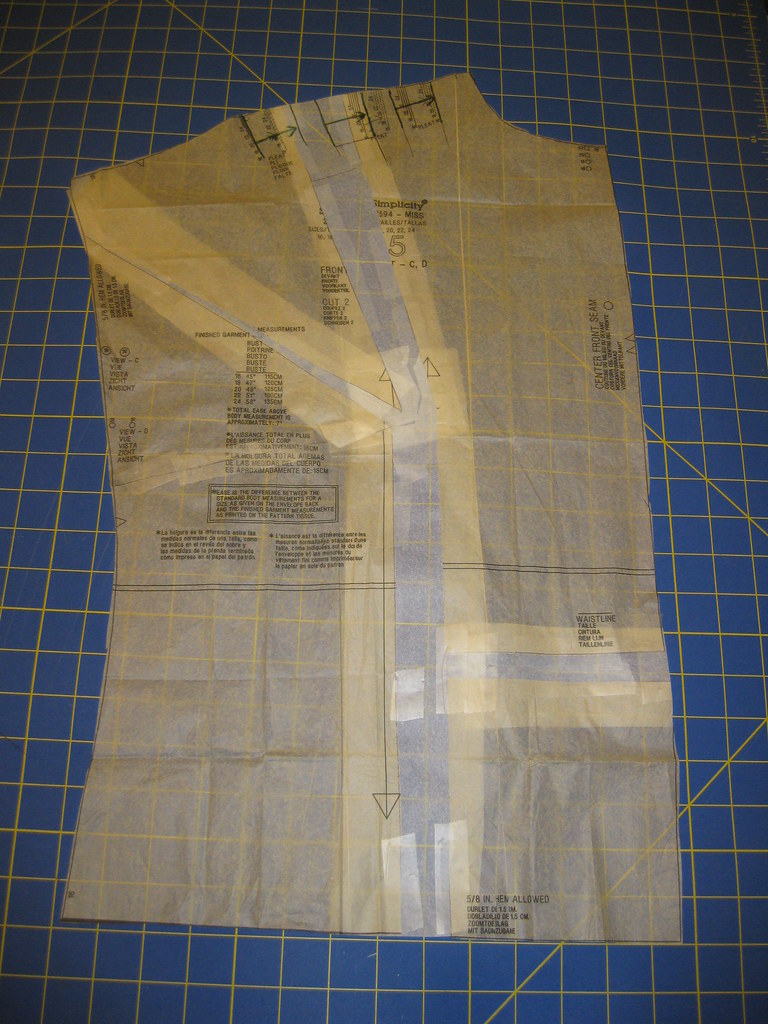
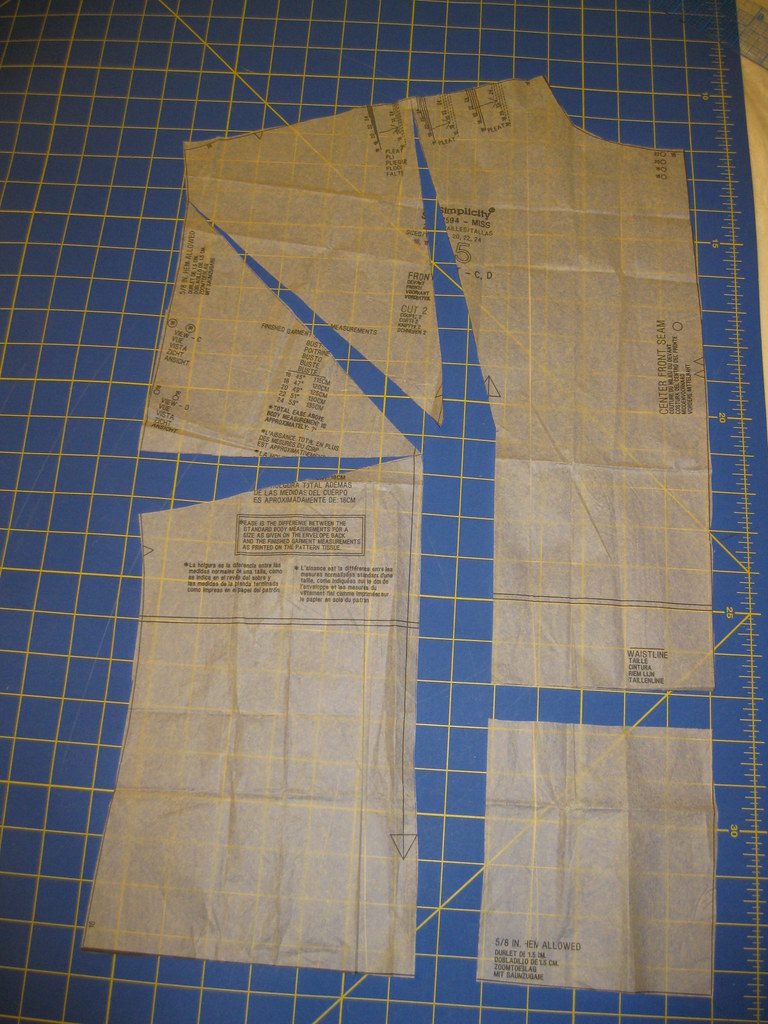
Today I'd like to share some examples of how I made a FBA combined with dart rotation. My first illustration is a simple one. It is Simplicity 2594-C, top with pleats below the yoke.
1. Make the standard FBA on the bodice. I used the Palmer/Pletsch "Y" method because the FBA was greater than 1 inch.
2. Fill in the FBA with tissue paper, leaving one lege of the "Y" and the dart open.
3. To close the dart, slash the second leg of the "Y" to open the end at the second pleat. Next close the dart and tape it together. You may need to cut/tear the added tissue to fully rotate the dart into the
4. Next fill in the rotated dart, which is now part of the pleated area of the top. Redraw the stitching lines for the pleats, evenly distributing the excess.
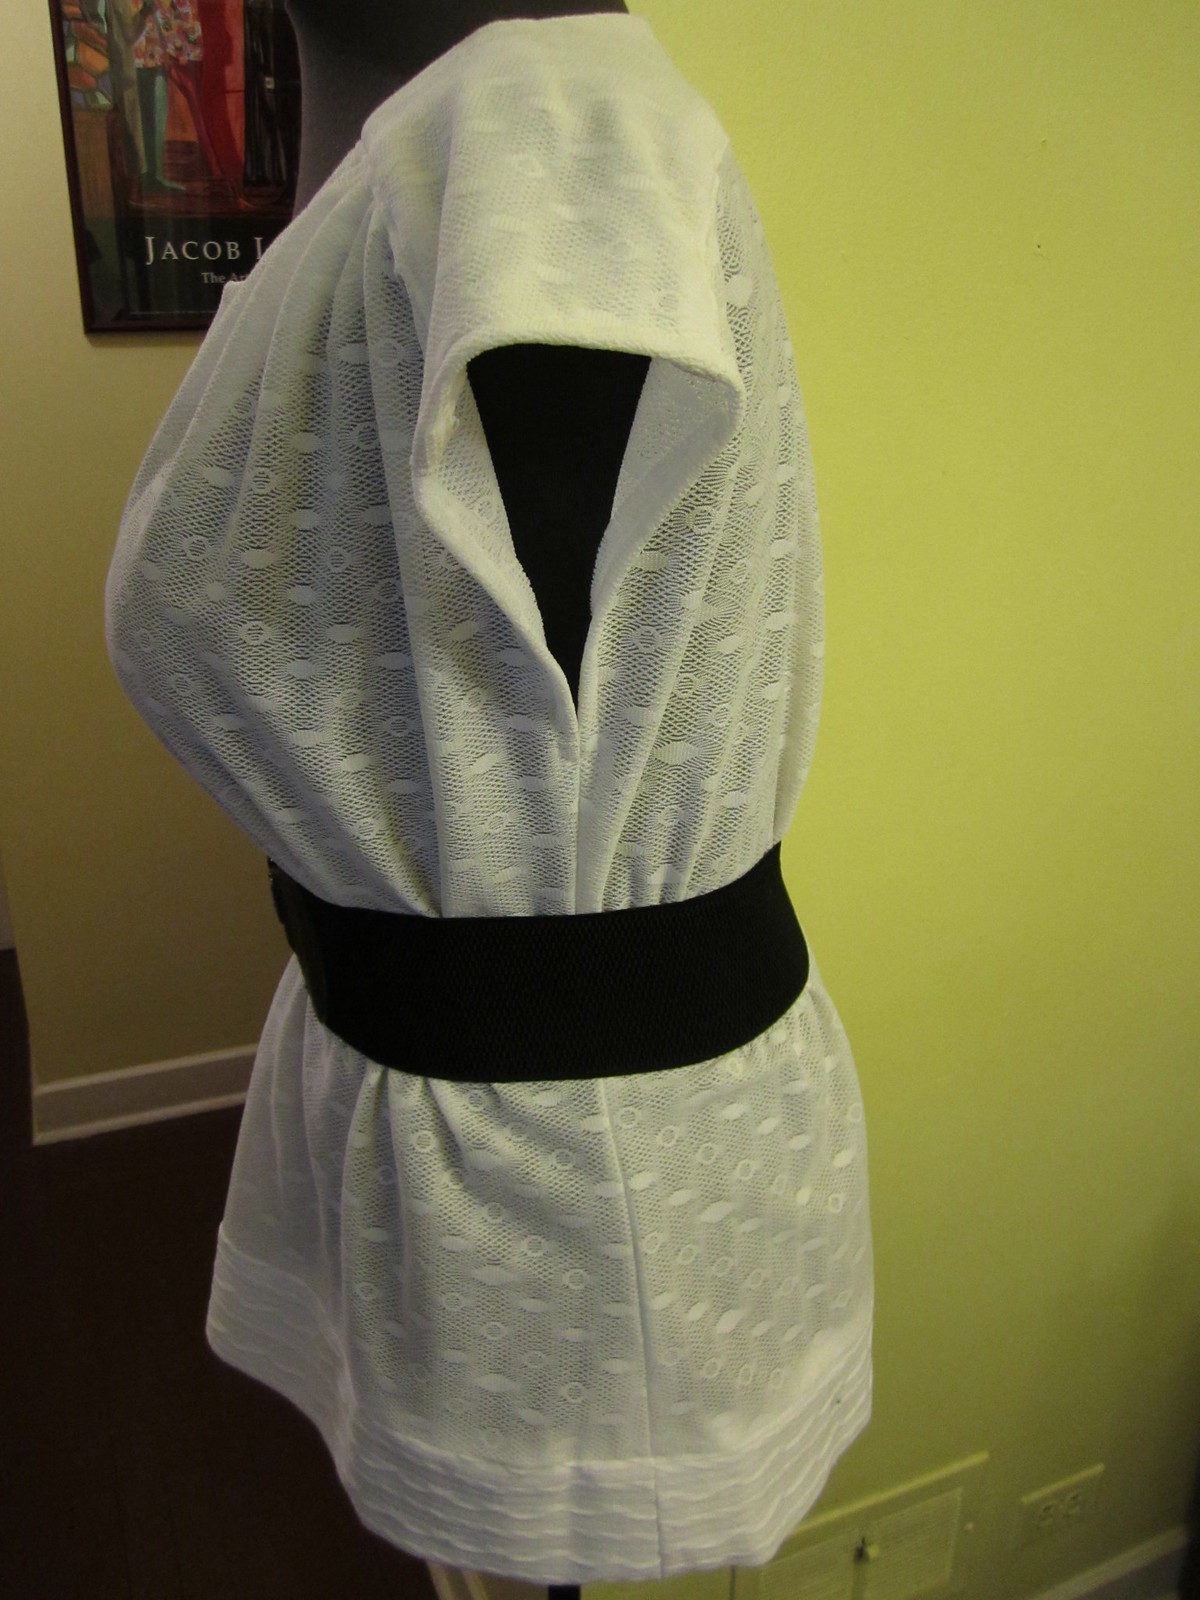
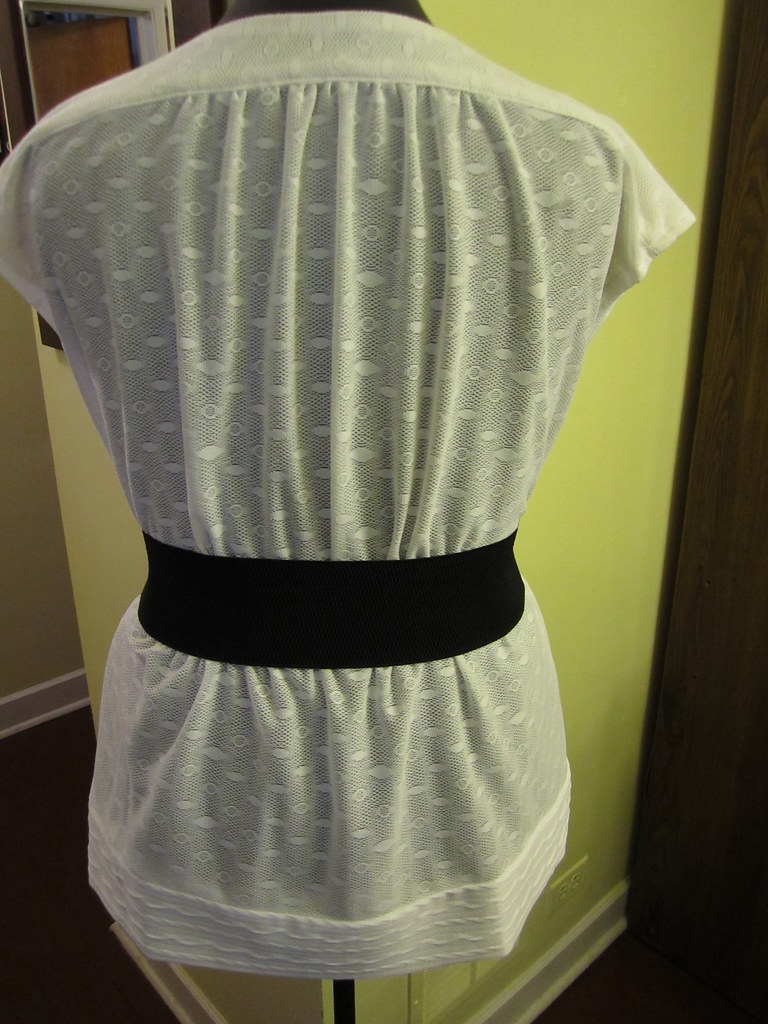
5. No bust darts on top pictured below.
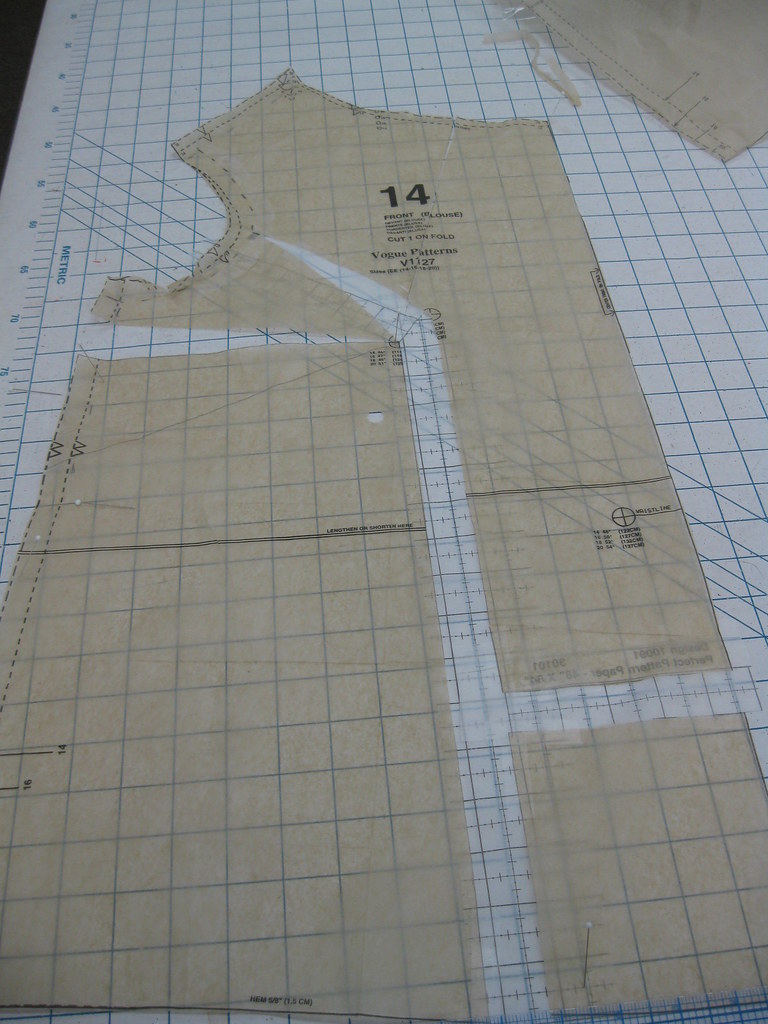
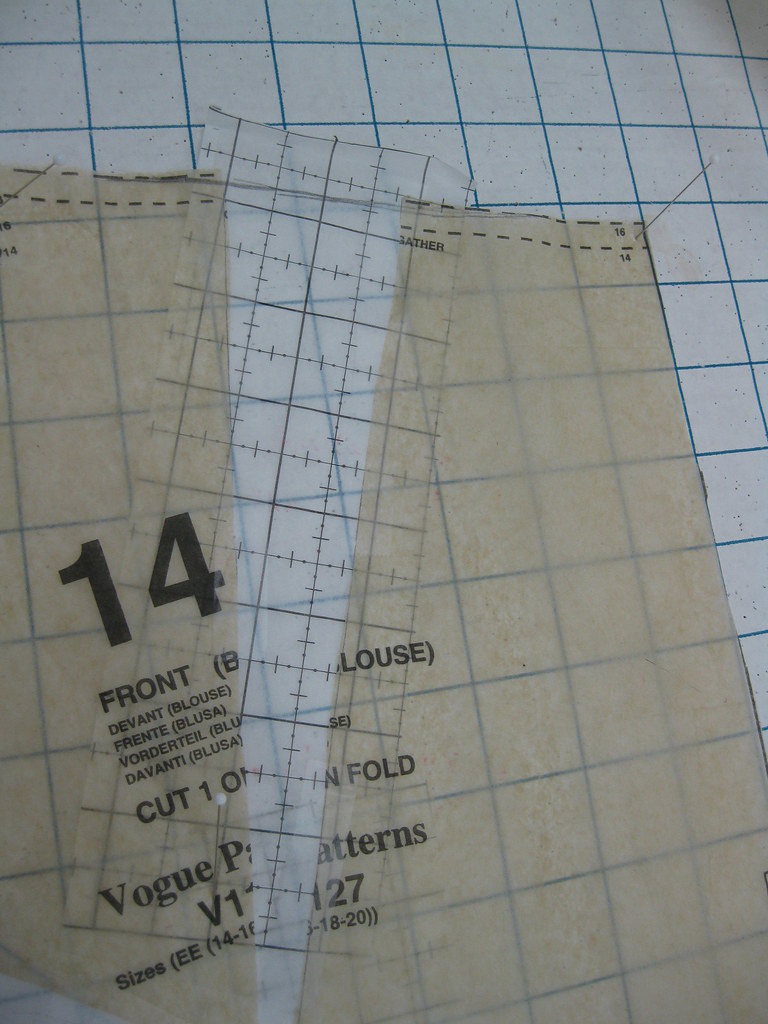
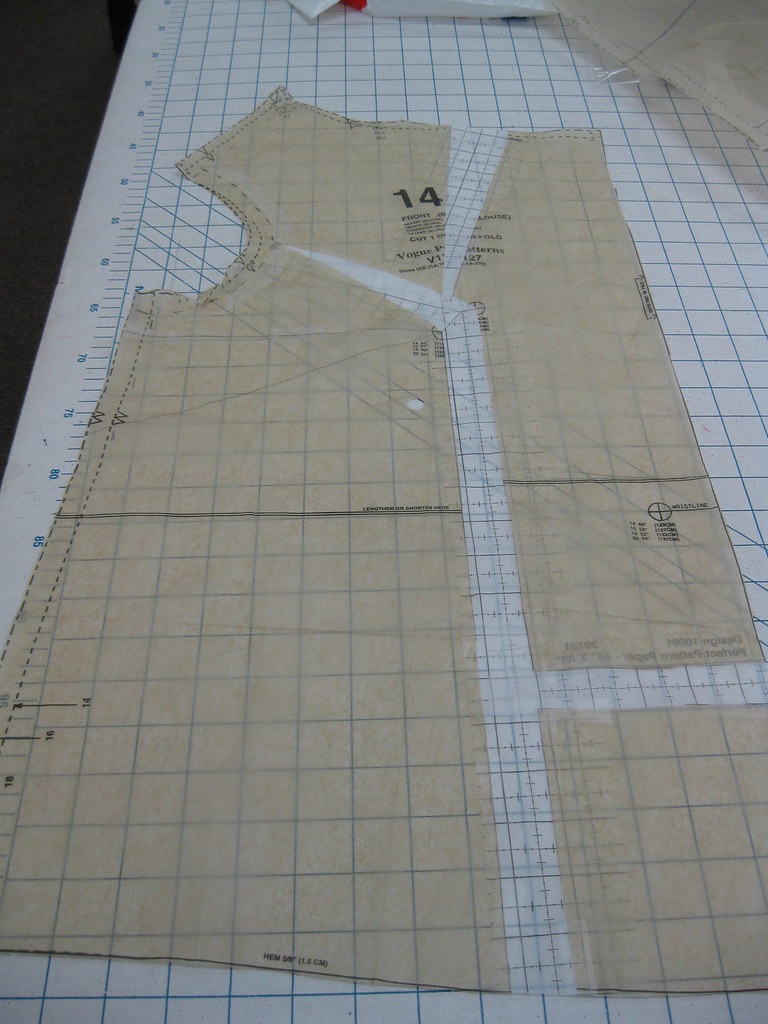
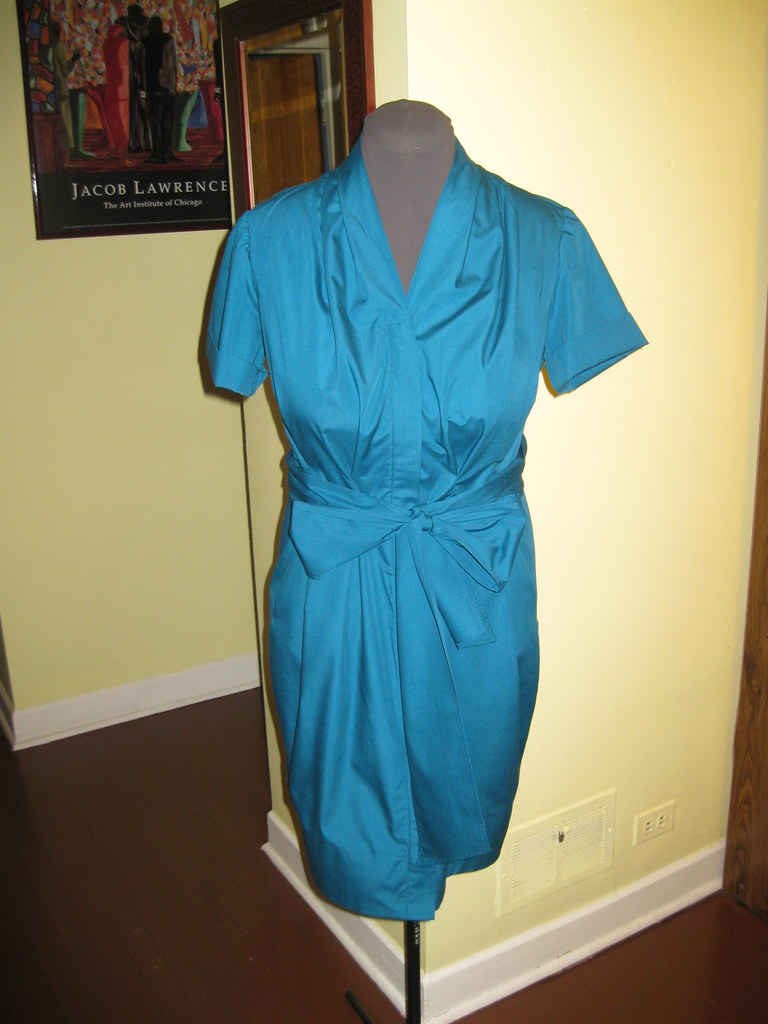
Next example is FBA dart rotation on Vogue 1127. A gathered neckline blouse with bow tie. This was fitted at the Palmer/Pletch workshop in 2012.
1. Make the standard FBA on the bodice. Do not fill in the new bust dart with tissue.
2. Next, slash the neckline to rotate the dart. Now tape the slash made for the bust together.
3. Fill in the slash at the neckline with tissue.
4. Rotated dart becomes part of the gathered neckline. I haven't made this one yet. Soon...
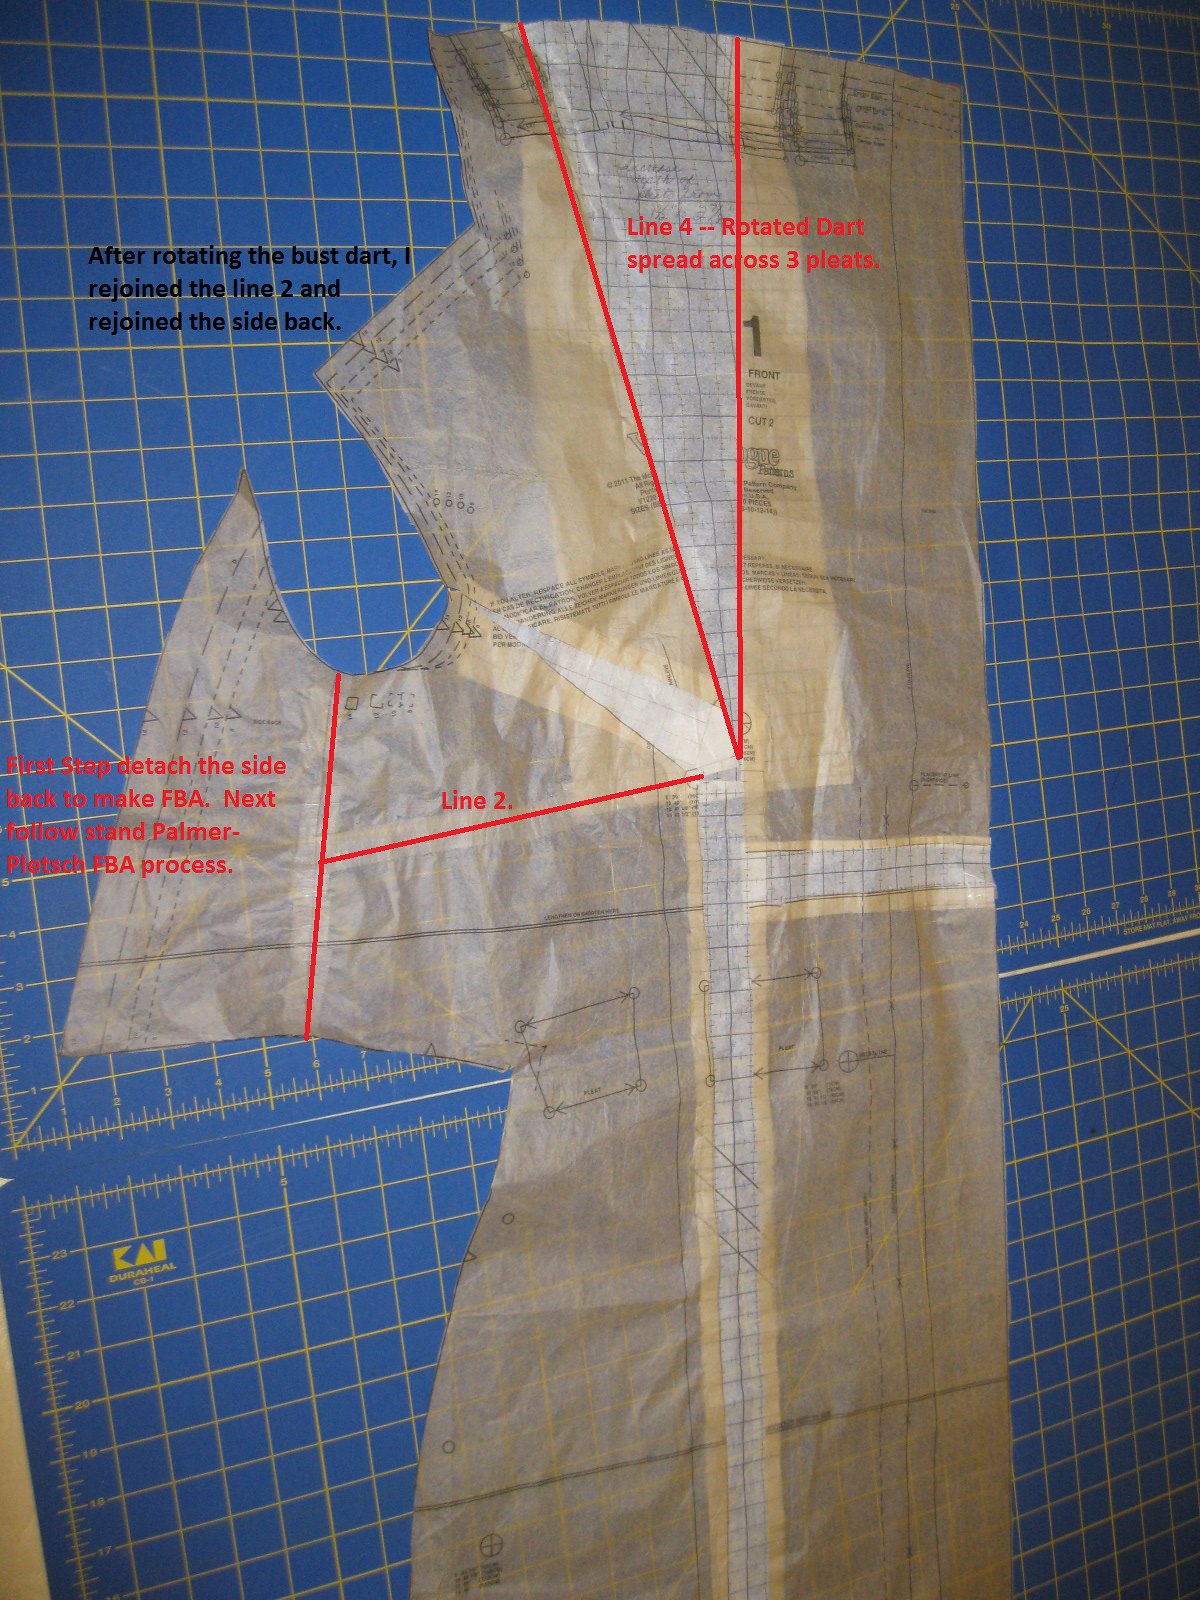
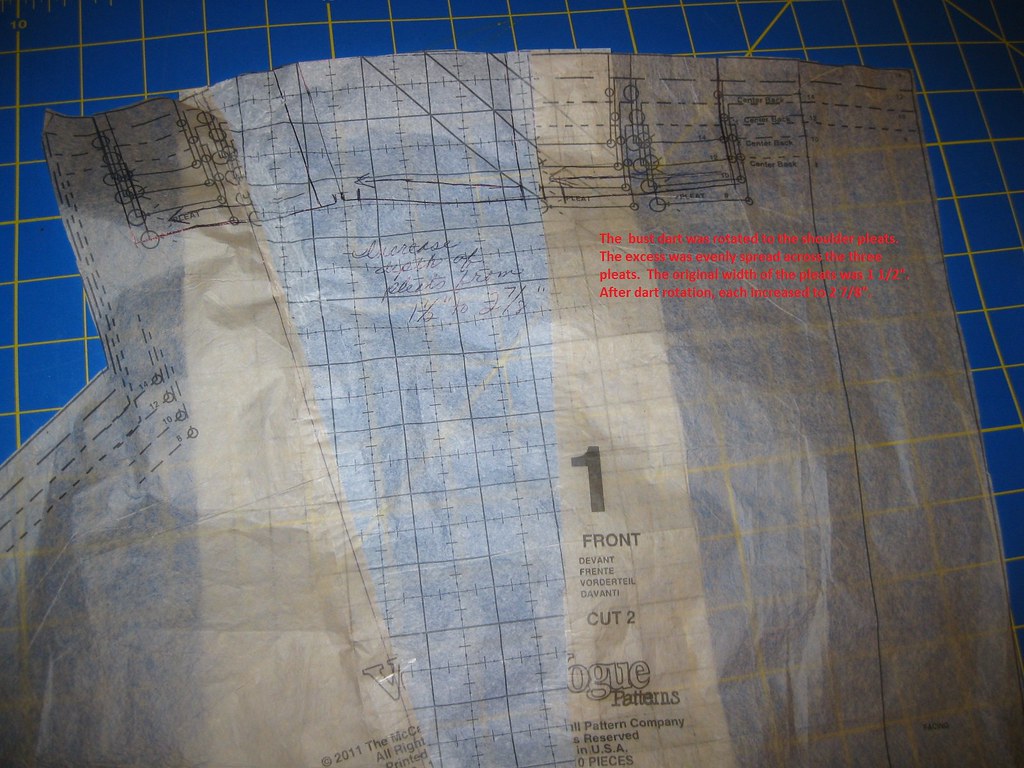
And my final example, is Vogue 1220. This example does not include all of the steps for making the FBA. I think you'll understand how to make the FBA and rotate the dart to the shoulder pleats.
1. Remove the side back bodice from the front bodice and set it aside until the FBA and the rotation are complete.
2. Follow the steps for making a standard FBA and rotate the dart to the pleated area of the bodice. Tape the slash for the bust dart together and tape the side back bodice in place.
3. Redraw the pleats so they are evenly distributed at the joining edge. That's it.
Happy sewing!
Cennetta
Wednesday, January 8, 2014
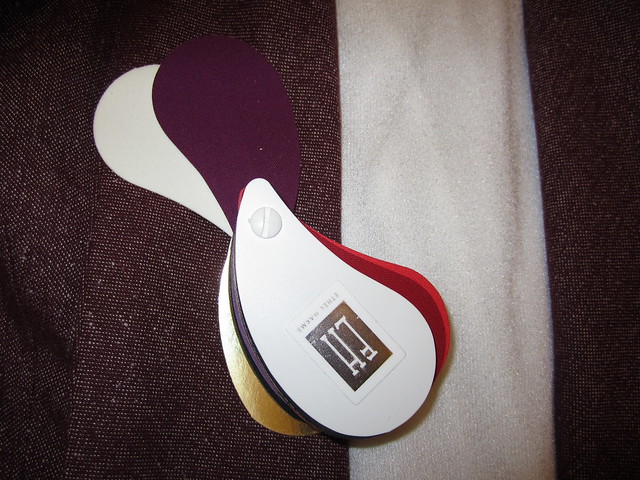
Colors! Colors! Spring 2014
I'm sure by now everyone knows the Pantone "It Color" for Spring 2014 is dazzling blue. It's not your regular ole dark blue or navy. It's bright, bold and fresh. This eye catching hue is the perfect catalyst to jump start your 2014 wardrobe.
I'm sure we will be seeing many of the other Pantone colors for Spring 2014. There are four colors from this palette that are in my own personal color palette: dazzling blue, radiant orchid, celosia orange and sand.
That brings me to my next thought: Do you follow the colors trends? Or do you base your seasonal color palette on the colors that best suit your skin tone?
Last week I started playing around with different color combinations in my personal color palette. Most of them are fall-ish, but the work well with my skin tone.
The next group of palettes are colors I want to incorporate into my wardrobe.
So what color combinations are you thinking about adding to your wardrobe?
Happy Sewing!
C
Monday, January 6, 2014
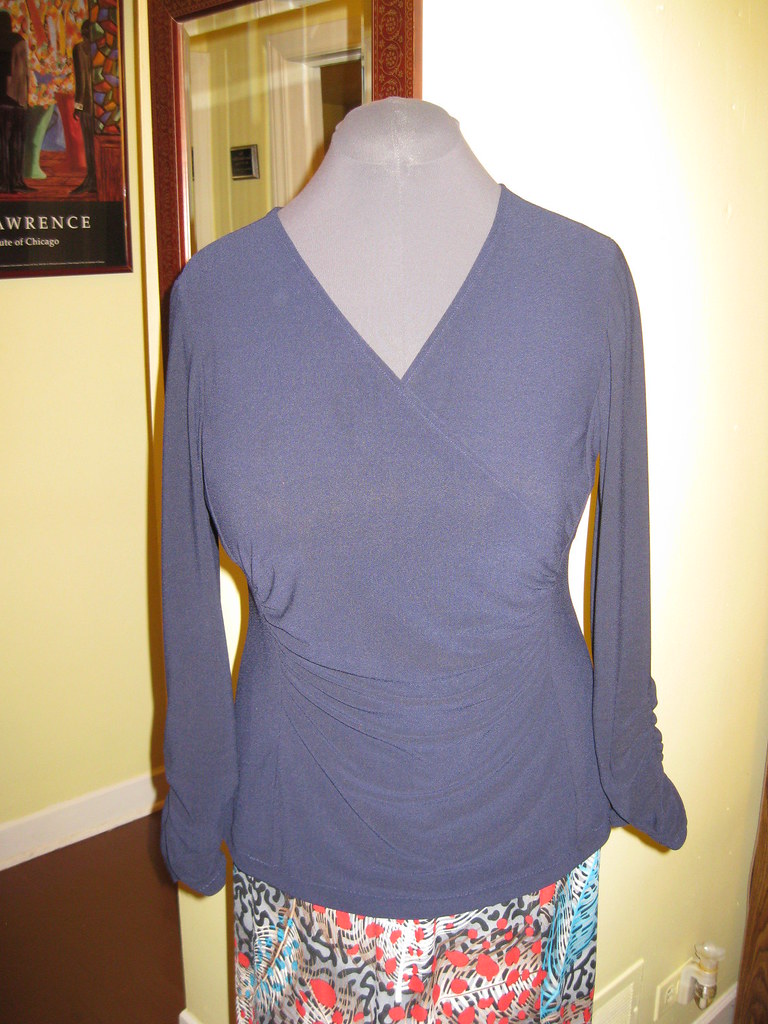
McCall's 6513 - Views B and D
Hi!
I hope everyone is keeping warm. Today it is -17 degrees in Chicago. I haven't left the house in two days and am happy not to go out tomorrow or the next day. Both tops were finished late November, 2013. Finally, I'm reviewing them.
I jotted down a few notes about this project and other 2013 projects for fear of forgetting something important. These tops are not short on reviews as there are many posted on Patternreview.com. About 15 reviews. It's funny how the big four recycle the pattern numbers. There is a New Look and another McCall's pattern with the same number. You'll see those reviews at the bottom of the linked list.
McCall 6513
Pattern Description:
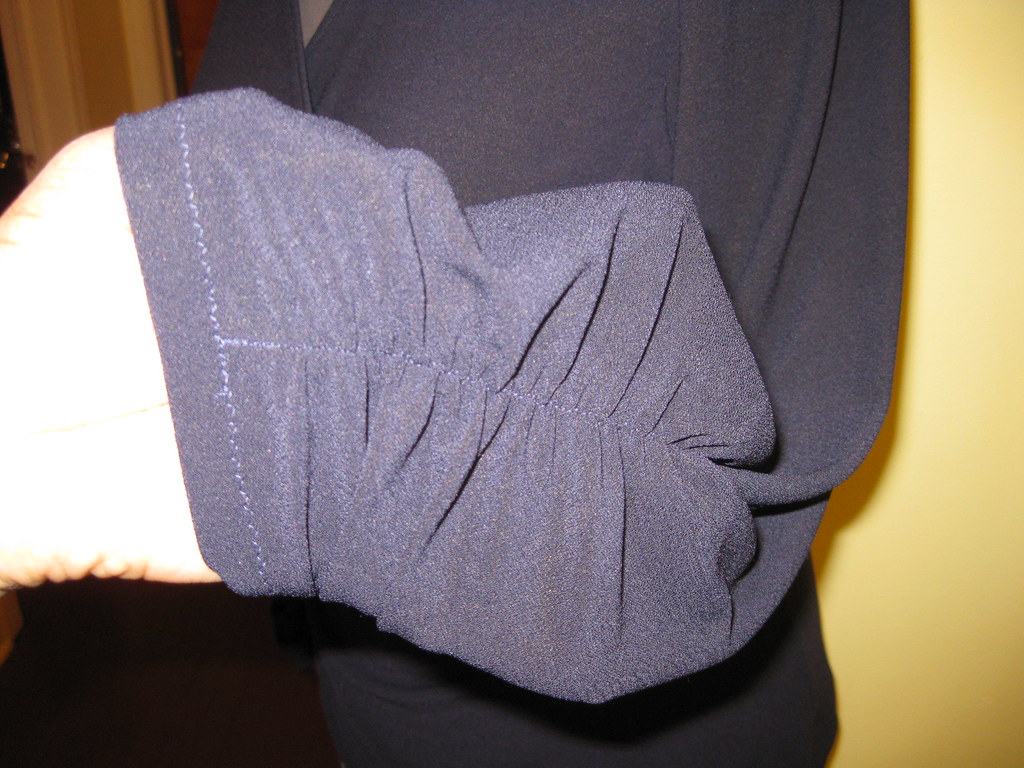
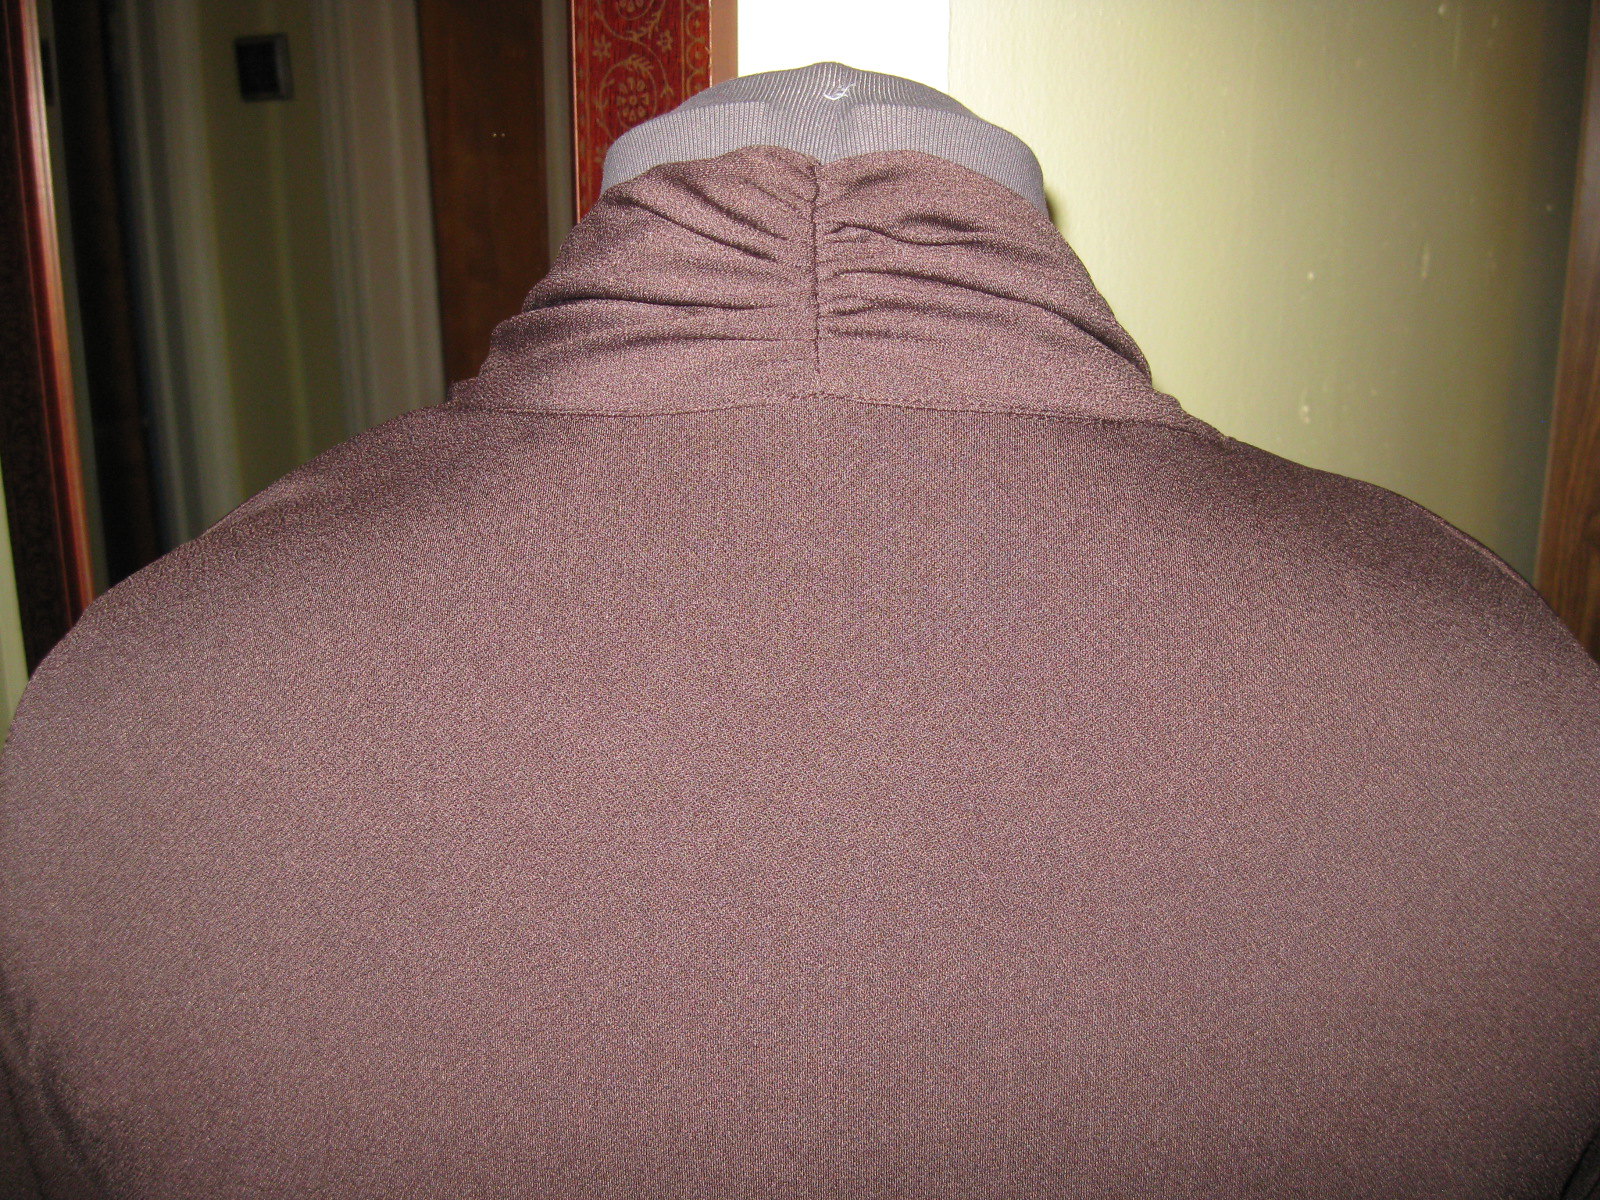
MISSES' TOPS: Close-fitting, pullover tops have gathered front and narrow hem. B,C sleeves and C,D back collar: elasticized. Designed for lightweight to medium weight moderate stretch knits.
Pattern Sizing:
6 to 22; 14 with modifications.
Did it look like the photo/drawing on the pattern envelope once you were done sewing with it?
Yes, they did. I made both long sleeves instead of 3/4 length.
Were the instructions easy to follow?
The instructions were easy. Nothing confusing.
What did you particularly like or dislike about the pattern?
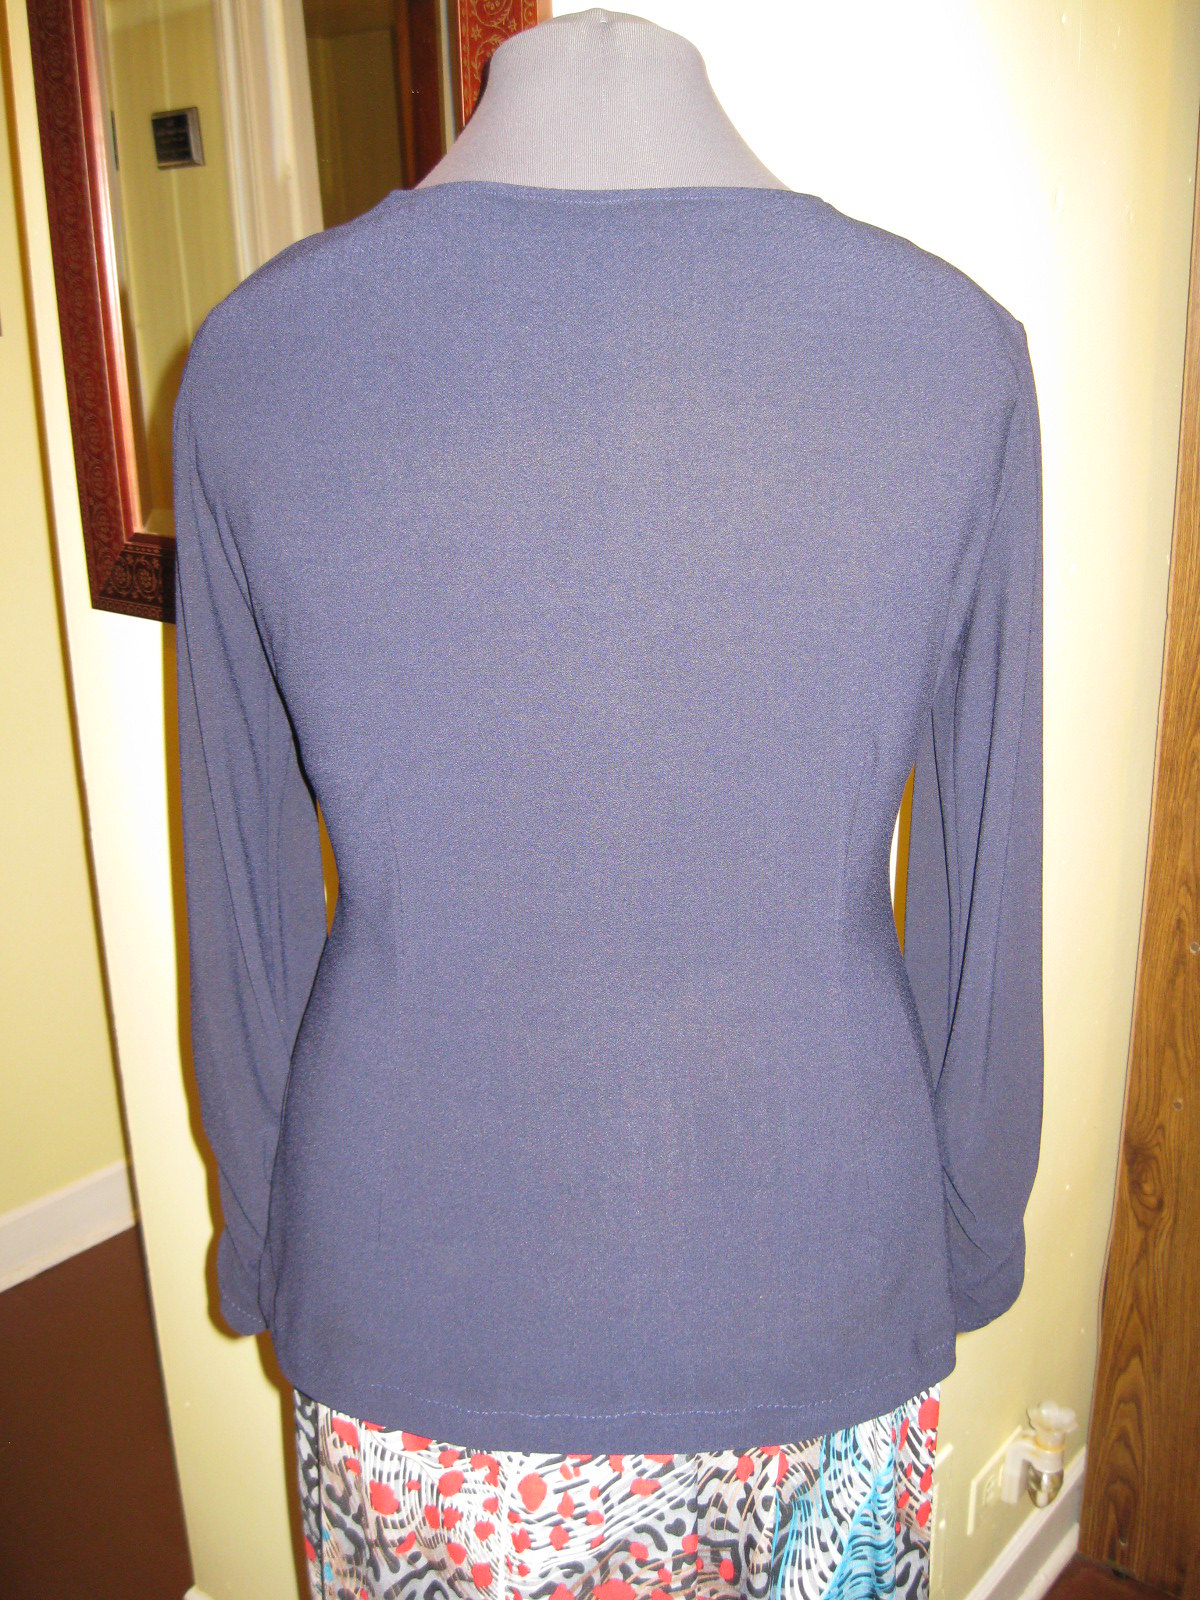
There are a few things I like about the tops. First, everyone knows I am a fan of the Palmer/Pletsch fitting techniques as well as their pattern designs. I really like that the fit instructions are built in the guide sheet along with some helpful tips. I also like the ruching on the sleeves, front, side, and neck. This detail adds style to two simple knit tops. I don't have any dislike.
Fabric Used:
I used moderate knit fabrics with a pebbly texture. Both purchased at Vogue Fabrics on Roosevelt Rd.
Pattern alterations or any design changes you made:
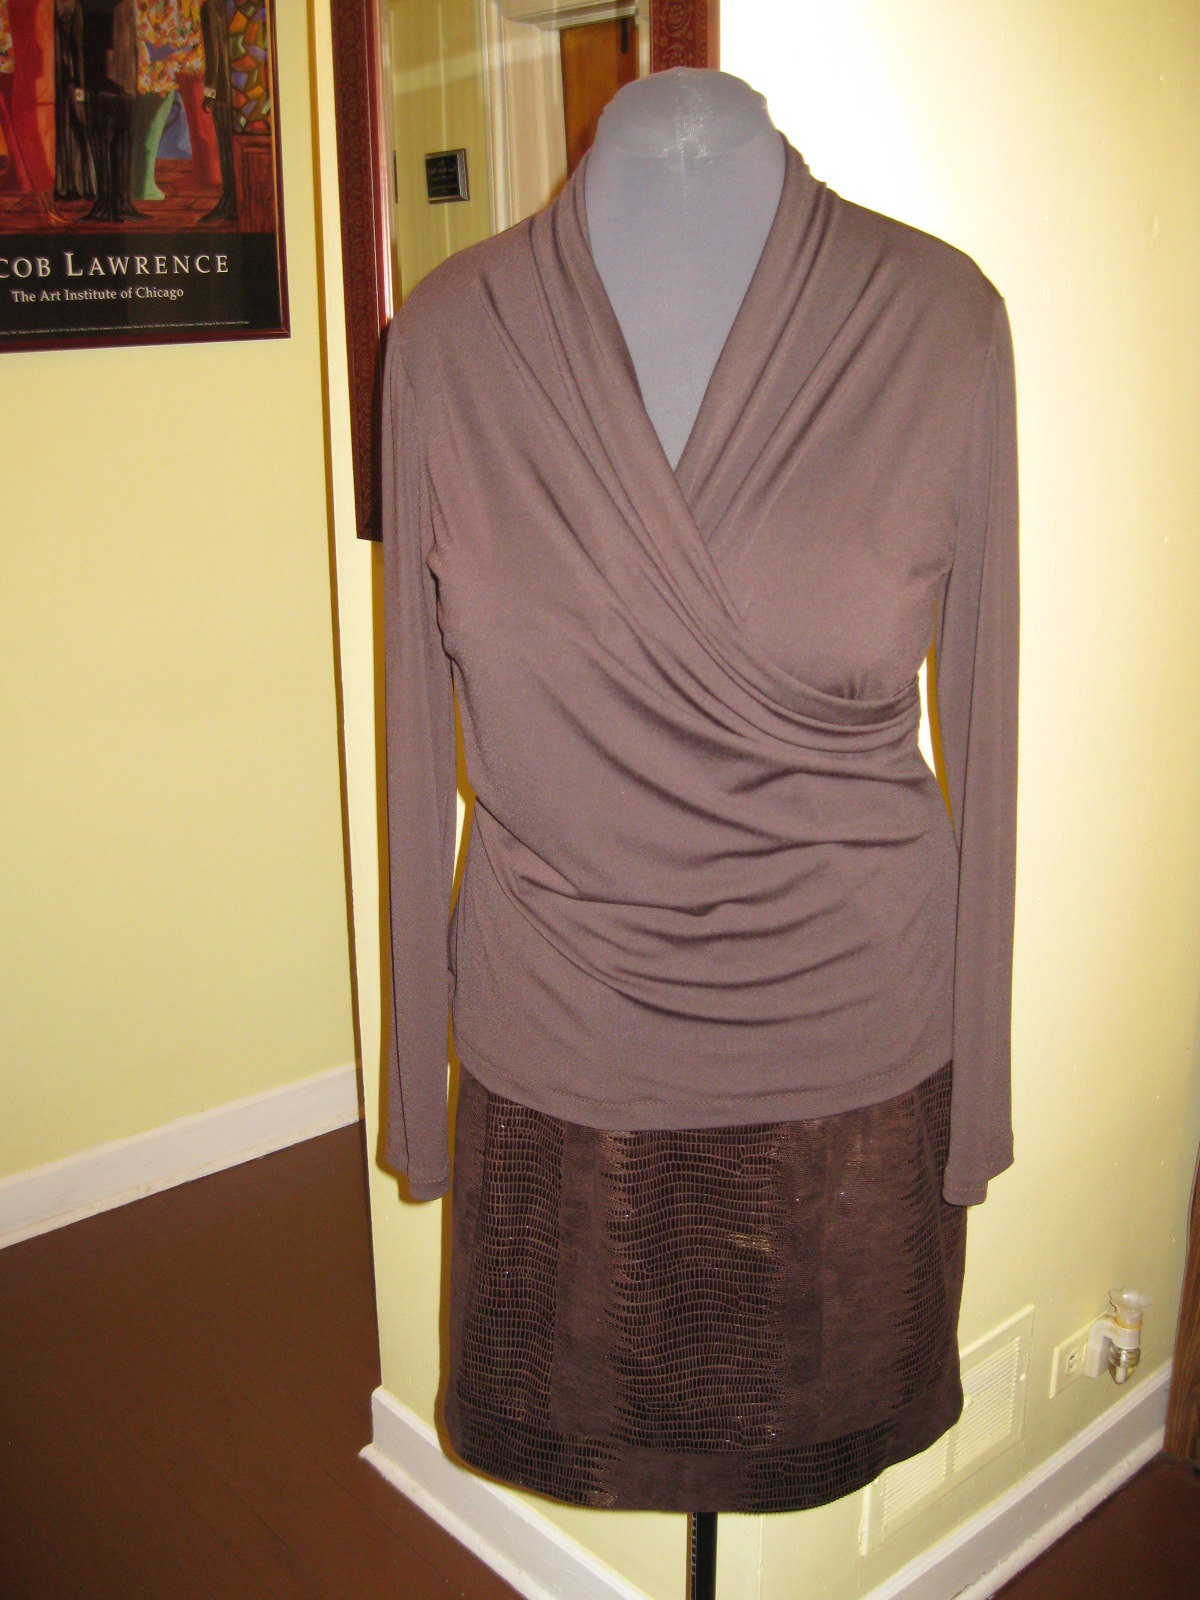
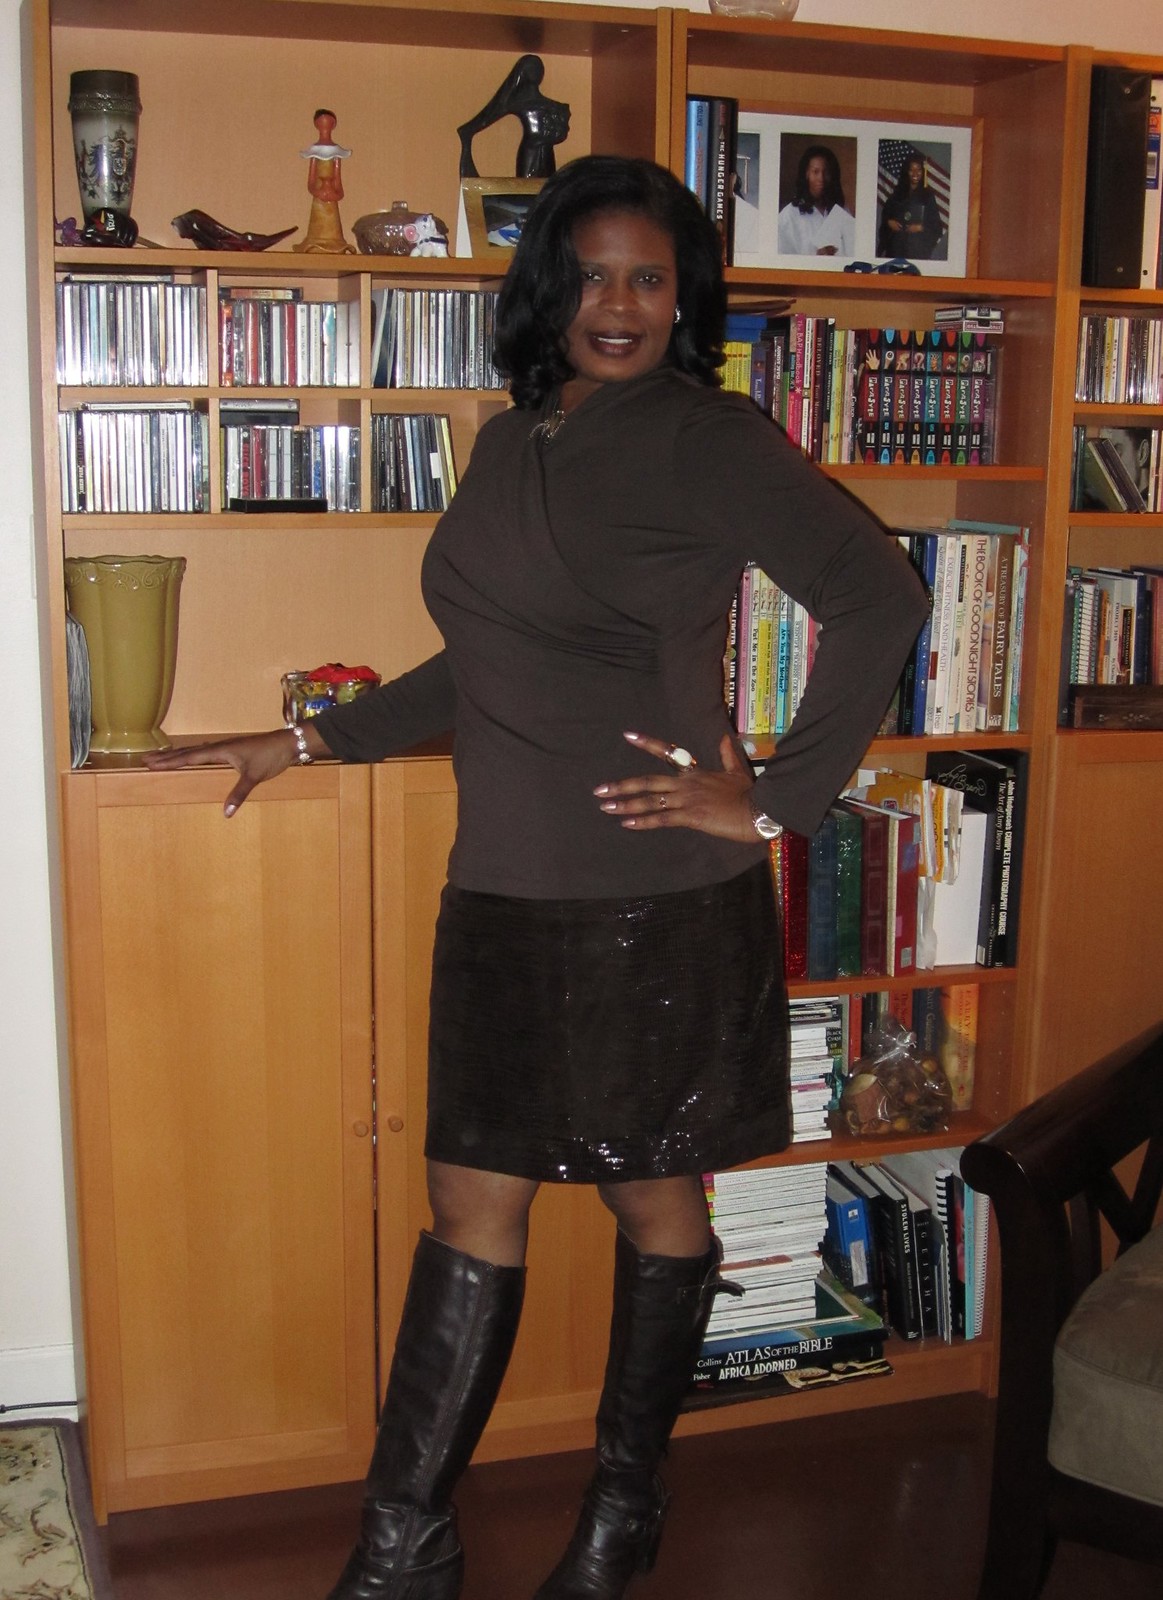
I made my usual fit adjustments: FBA, swayback, and prominent shoulder blade adjustment. I also added about 1" to the length of the sleeves. My seam allowances were 1 inch plus. My FBA was a bit too much. Once I got the fit down pat, I noticed a few little wrinkles on the side of the bust (view B (blue)). But I see the same issue on the model in the orange top. For the brown top, view D, the FBA resulted in a bust dart. A horizontal swayback adjustment was not enough on the blue top. I also added vertical darts to the back to take up the bagginess in the lower back area. I always forget to mention that I use steam a seam or stitch witchery to hold my hems in place for care free hemming by machine. This method was used for the neckline of view B, hems for the sleeves and the top.
Would you sew it again? Would you recommend it to others?
Yes, I will probably sew view C again. I especially like this style.
Conclusion: Both tops turned out great. All level sewists should be able to make these tops.
All photos on Flickr.
Tuesday, December 31, 2013
Vogue 8799 - In Review
Yes, I'm trying to crank out as many 2013 reviews as I can before the new year begins. There are still at least a dozen projects that won't be reviewed before the new year. RATS! I've got to do better in 2014.
Here is Vogue 8799 in review.
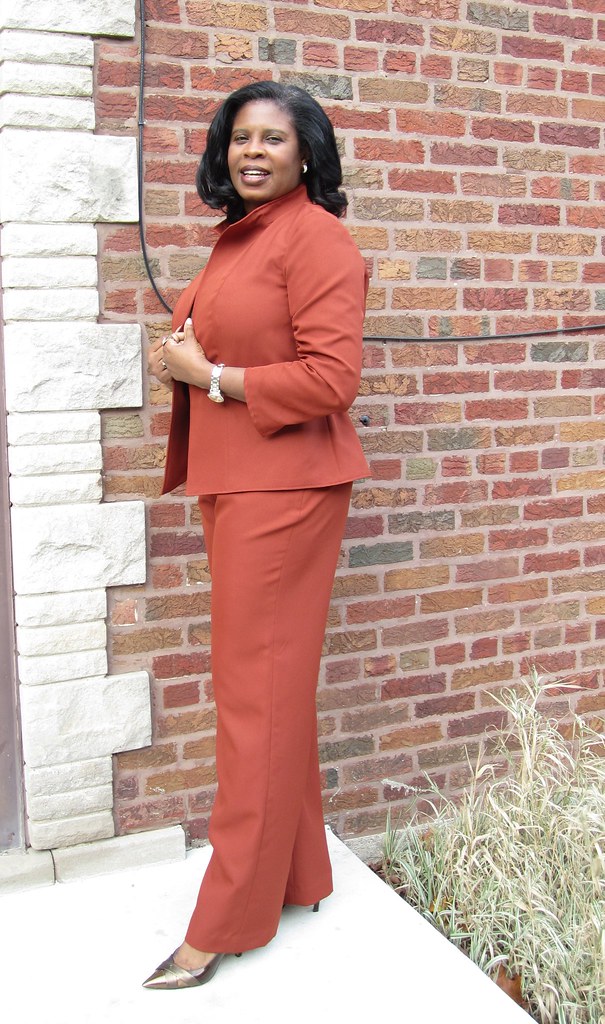
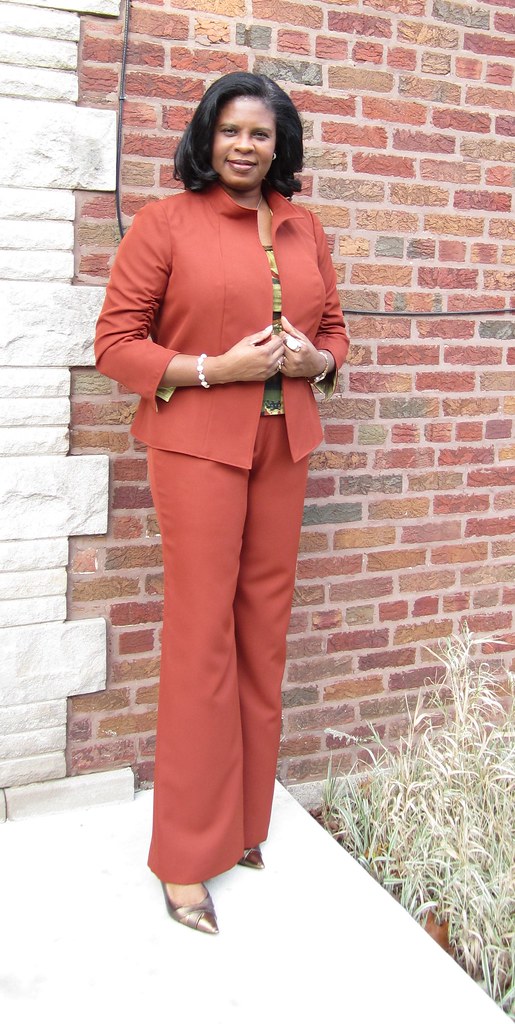
Pattern Description: MISSES' JACKET, TOP, DRESS, SKIRT AND PANTS: Loose-fitting, unlined jacket has collar, elastic back, and two-piece sleeves with elastic forming ruching effect/slit, and topstitching. Fitted top or dress has seam detail and back zipper. C: back slit. Semi-fitted skirt or straight-legged pants have self-lined yokes. D: pleated lower back. A, B, C and D: lined. B, C, D and E: stitched hems.
Pattern Sizing: 6 to 22. I used size 16 with modifications. Views A and E.
Did it look like the photo/drawing on the pattern envelope once you were done sewing with it? Yes, it did.
Were the instructions easy to follow? Nothing confusing or difficult. I would say that is should be rated as average instead of easy. All views are lined except for the pants. The casing for the ruched sleeves and the elasticized waist of the jacket are done between the jacket and the lining. The dress and the top have extra seaming in the side front and side back panels that must line up at the side seams. Instructions are clear, but executing them is another story.
What did you like or dislike about the pattern? This is another pattern I purchased for the jacket. I liked the ruching on the sleeves. Of course the princess seams make it easy to make adjustments. The curved waistband is always a welcomed plus. It fit nicely across the tummy area. I wish I had installed a zipper along the center front of the jacket. I find myself wanting to hold the front closed. The model is holding the front or moving one jacket front to the side. She is also wearing a belt in one of the photos. My dislike: center back zippers in pants. I installed it on the side.
Fabric Used: Polyester gabardine for the Textile Warehouse.
Pattern alterations or any design changes you made: I did a FBA. The waist of the jacket is elasticized; so I did not need to make a sway back adjustment. I didn't need to do a prominent shoulder blade adjustment. I started with size 16 and this jacket is kind of boxy across the back. I had plenty of room in the upper back area.
I added about four inches to the length of the pants and about an inch to the length of the sleeves.
Would you sew it again? Would you recommend it to others? Yes, I'd like to make the jacket in leather. Yes I do recommend it to others. It goes together with no problems. The only caution would be to take your time making the casing for the elastic in the sleeves. It's done after the sleeve and the lining is put together. So make sure your markings are clear.
Conclusion: This is a nice wardrobe pattern. The jacket and the pants sew up with no problem. It's worth a try if you like to style.
Monday, December 30, 2013
Butterick 5928 - Still Needs A Little Work
I hesitated on posting a review for this jacket because I wanted to try it again to work out the kinks. I wasn't completely satisfied with the shape of the sleeves, the finished hem, and the fit in the bust area.
It is rated as very easy. There are some elements that I think may be challenging for a beginner: it's a lined jacket with two pivot points at the neck area that require accuracy for balance across the shoulders and neck area.
I couldn't find any reviews on it in blog land or on Pattern Review. So I guess I'm the first person to post a review on it. Maybe ours have tried it but have not shared their experience. That being said, I hope my review is helpful.
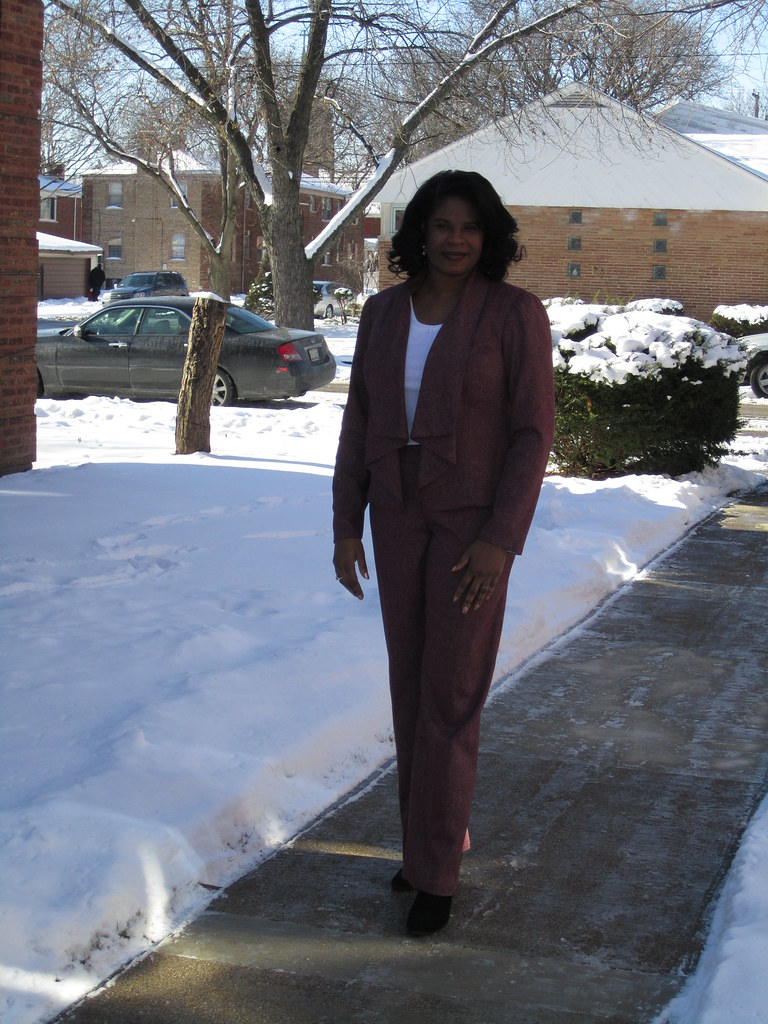
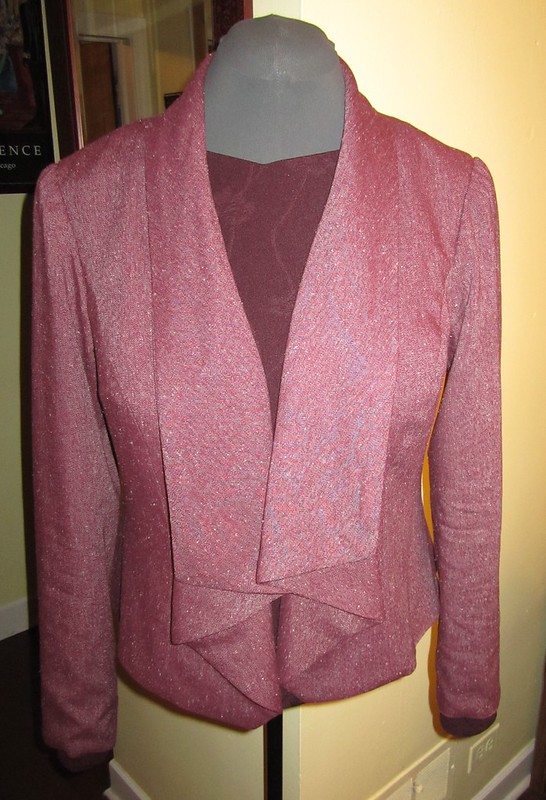
Pattern Description: MISSES' VEST AND JACKET: Fitted, lined vest or jacket has front extending into drape and back collar, shoulder pleats, princess seams, and shaped hemline. Lining shows on hemline.
Pattern Sizing: 6 - 22; I used size 14 with "not enough" modifications.
Did it look like the photo/drawing on the pattern envelope once you were done sewing with it? Yes, it did. I made view A with the sleeves of view D.
Were the instructions easy to follow? There was nothing difficult or confusing about the instructions.
What did you particularly like or dislike about the pattern? From the moment I saw it in the Butterick pattern catalog, I knew I would make it. I liked the draped collar and the back peplum. These were the two design elements that drew me to this jacket. I disliked some of the construction steps: #25 Stitching the front, neck and lower edges to the lining. You can't understitch to ensure that the jacket is slightly pulled to the inside. The inside of the drape shows in one of the smooth pleats along the front. I ended up rolling and pressing the edges slightly to the inside so the lining would not show. #28 Baste armhole edges together. I like to set the sleeve in the jacket to the jacket only. Then attach the lining. Finally, I didn't like to one piece sleeve. I think it should be two pieces. Just my personal preference.
Fabric Used: I purchased this nubby mystery blend (definitely some natural fibers included)from the Textile Warehouse. It was priced at $6.00 per yard. Because it was stained on the edge, I got it for $3.00 per year instead. It has a soft hand and feels good against the skin.
Pattern alterations or any design changes you made: I made my usual FBA and back adjustments (swayback) not included in the illustration, plus I added width to the sleeve. All of which did not proof a great fitting jacket. Above the fullness of the bust, there is a little fabric "bunching". I don't like it and it just doesn't feel right. Maybe a bigger FBA would help, but I think I'll end up with a lot of excess fabric above the bust. Second, either there is issue with the shape of the sleeve or I have more fat on the back of my upper arm than I care to admit. Third, there is too much ease in the sleeve cap.
Would you sew it again? Would you recommend it to others? I think I will. The issues cited are minor and can be tweaked. This first try is not a total failure. I can wear the jacket. In fact, I received a lot of compliments when I wore it earlier this month. For those who plan to make it, make a muslin first. Choose a fabric similar to your fashion fabric.
Conclusion: I don't agree that this an very easy pattern to sew. That implies a beginner could sew with no problems. Average may be a better rating, given it is a lined jacket and there is some pivoting required around the neck that could be challenging for a beginner to get sharp points and balance between the two pivot points. Make a muslin before you cut into your fashion fabric.
Friday, December 27, 2013
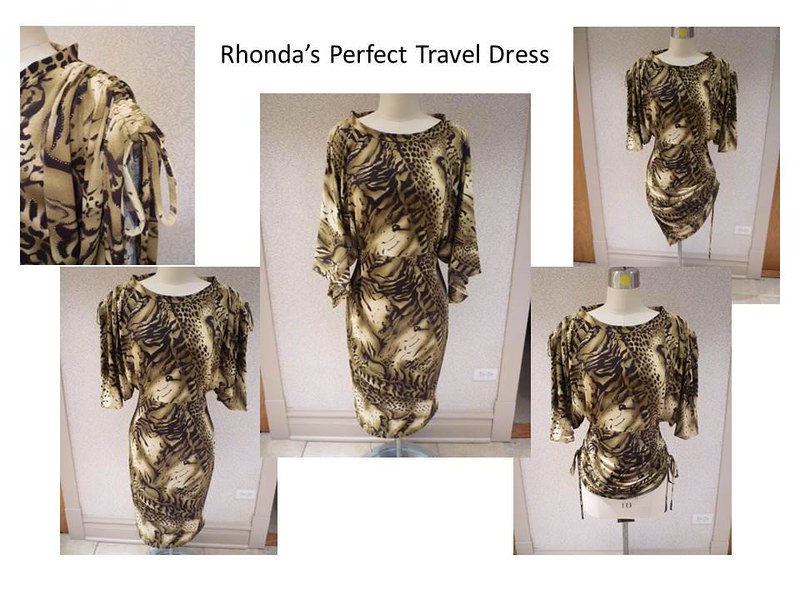
Rhonda's Perfect Travel Dress In Review
I hope everyone is enjoying the holiday season. For weeks, I have anxiously waited for this time. The university is closed from Christmas to New Year's day. That is a treat in itself. So, it's a good time to post more reviews, sew, and get some sleep.
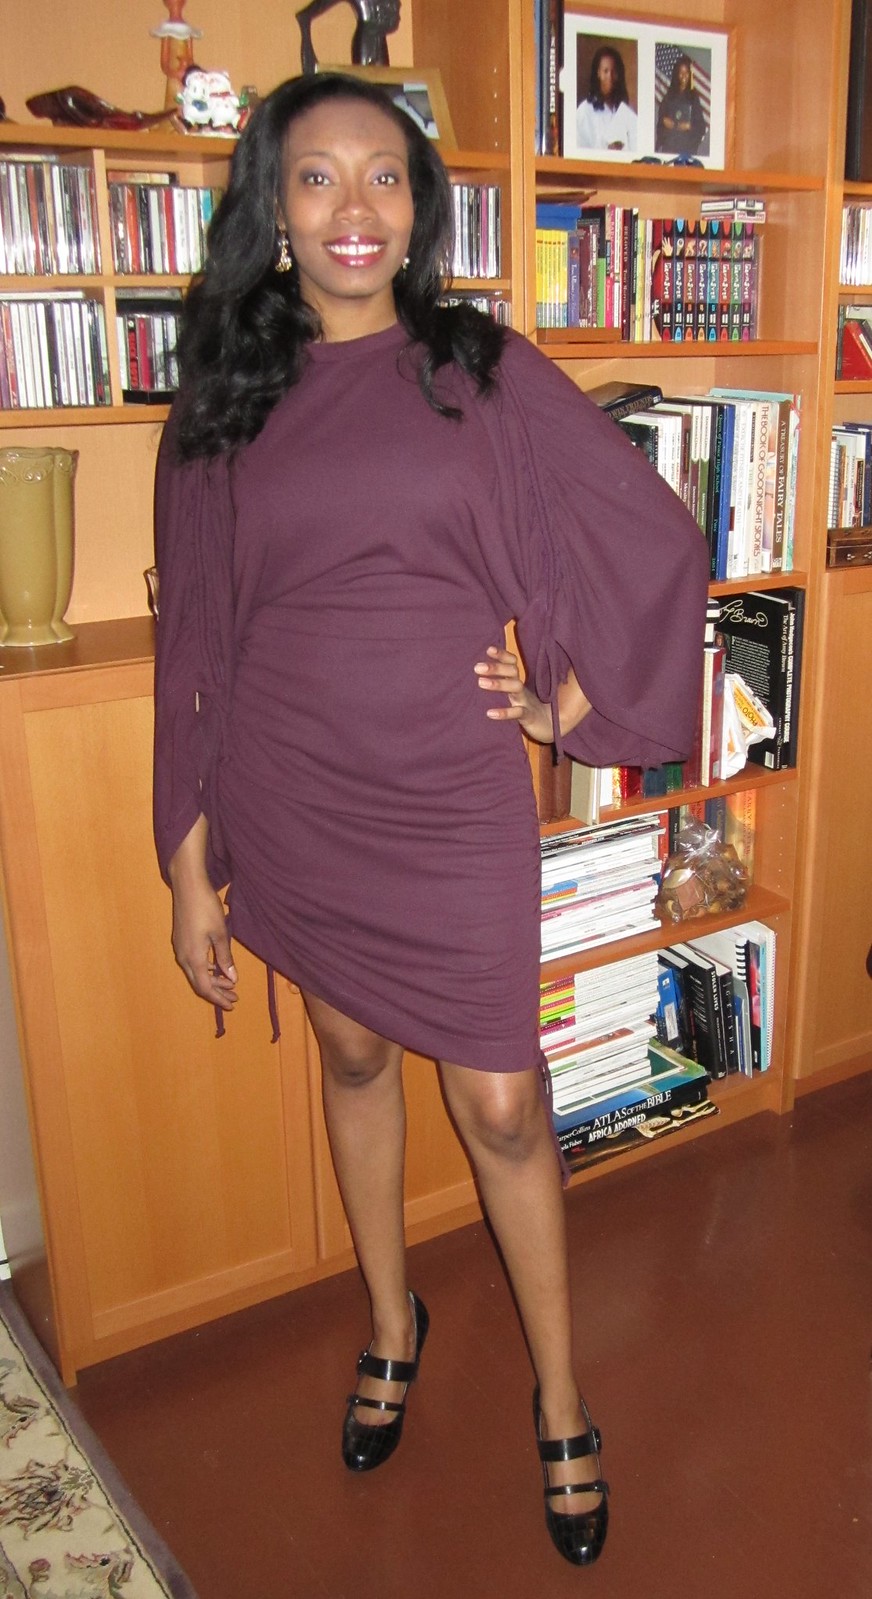
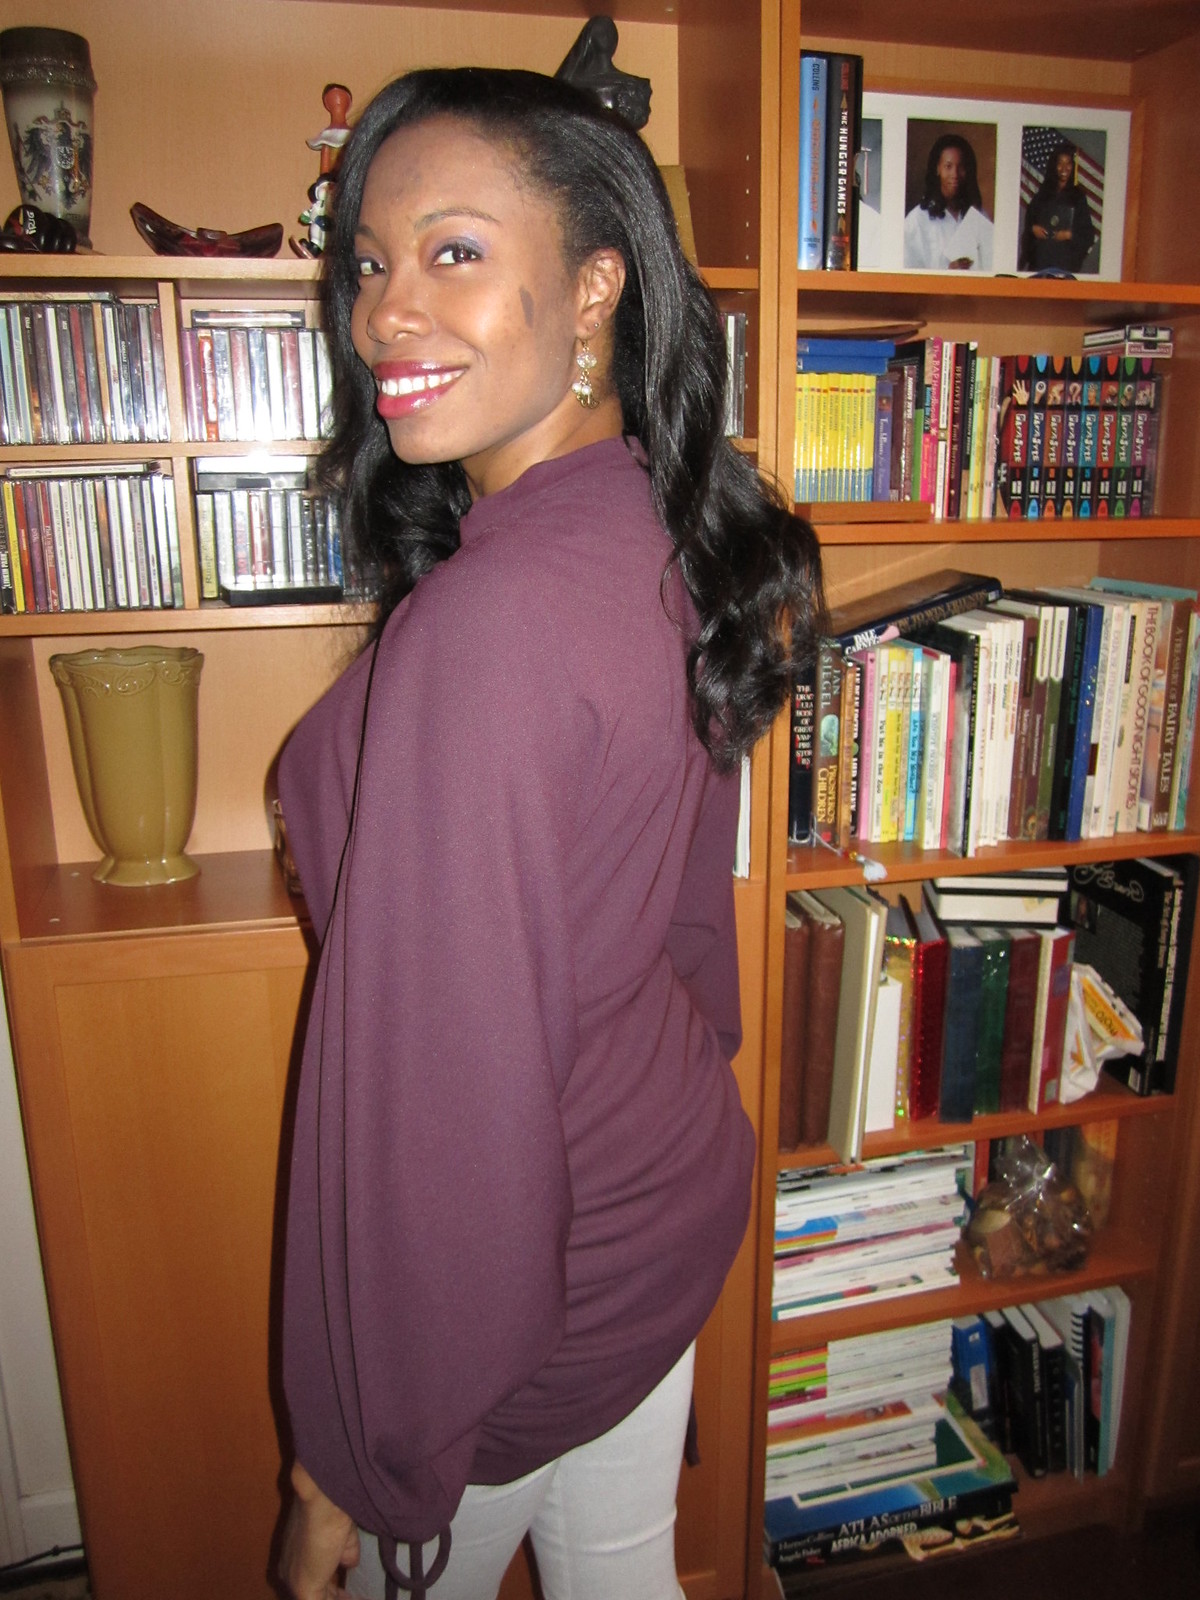
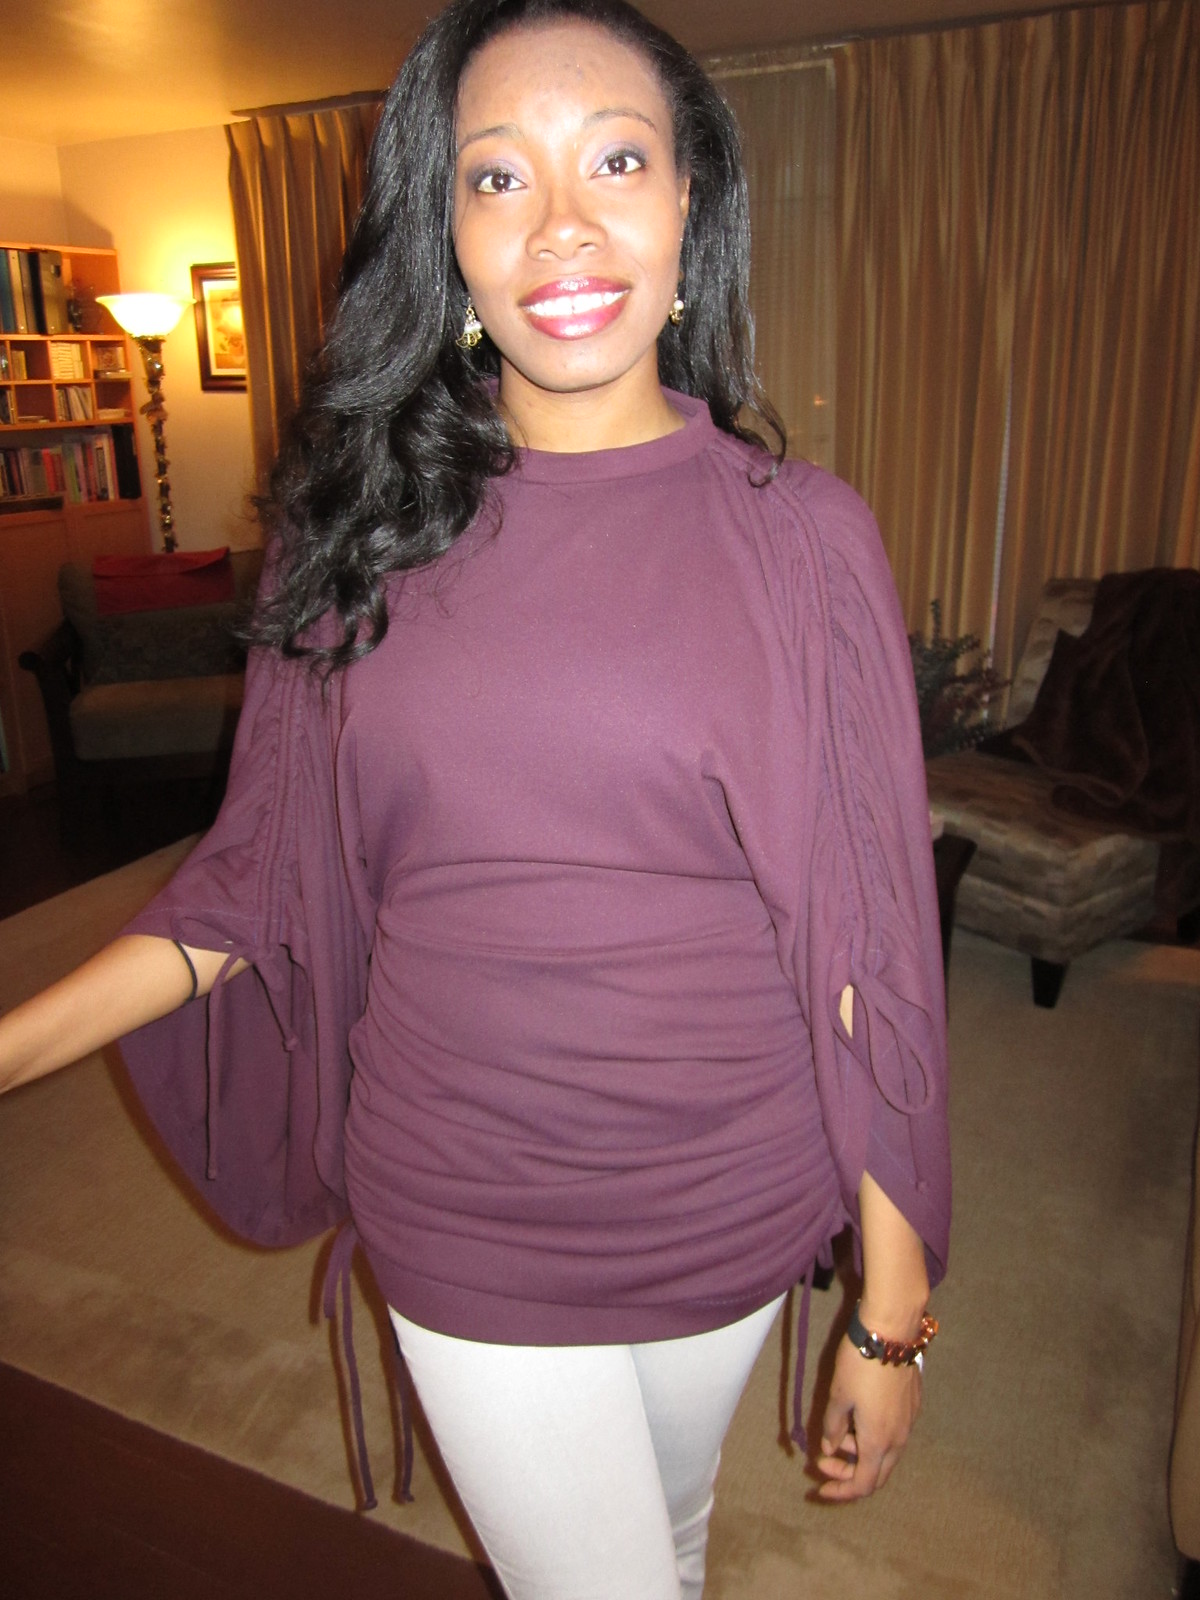
Today I am reviewing Rhonda's Perfect Travel dress. She posted how to make it back in October, 2012. Finally, I started on it two days before Christmas, finishing it at 2:00am on Christmas Eve. It took about four hours to sew, with the sewing, turning and threading the cords taking the most time. All in all, this was a great dress to make. I must also add, it's more than the perfect travel dress. It's a great party dress too.
This first rendition was for my daughter. She is my principal model for testing design and drapy. The next one I'll make will be for my sister. She has been dying for this dress since I posted a picture of it on Facebook.
Pattern Description: The dress pattern consist of five pattern pieces: bodice front and back, skirt, neckband, and cord. It can be described as pullover dress, loose-fitting through bust,with neck band. The sleeves are wide with shirring cords anchored at the sides of the neck band continuing along the shoulder to the end of the sleeve. The skirt is close fitting, straight with shirring cords along the sides. This dress can also be worn as a top.
Pattern Sizing: You determine the sizing with measurements from mid shoulder to waist and the circumference of the hips.
Did it look like the photo/drawing on the pattern envelope once you were done sewing with it? Yes. My dress is very close to the design lines of Rhonda's posted dress. The neckline of her dress is wider, but you can easily accomplish this by increasing the width of the neckline.
Were the instructions easy to follow? The instructions were good. Nothing difficult or confusing.
What did you particularly like or dislike about the pattern? I liked the shirring along the sleeves and skirt.
Fabric Used: Plum jersey knit with moderate stretch from Vogue on Roosevelt. I got it from the remnant room. It was about two yards in length. I just had enough to finish the dress.
Pattern alterations or any design changes you made: There are a few things I'd like to point out. For the neckline, I followed the instructions. It was not a large as shown in Rhonda's version and the hole was not wide enough to easily fit your head through it. So I increased the width by 1 inch on the front and back, 1/2 inch on either side. Then, I increased the depth of the front curve by 1 inch with the center front being 1 1/2 inch as the lowest point. So to get the exact neckline as Rhonda's top, you may have to play around with the neckline measurements. For the cord casings, make sure you sew them about 1/8" wider than the width of the cord to ensure easy threading and adjusting of the shirring. You may need slightly larger seam allowance (6/8").
Would you sew it again? Would you recommend it to others? Yes and Yes. I will make this dress in red for my sister sometime in the next week or so. (I think, ;-) )
Conclusion: This is the perfect travel dress. It's knit and won't wrinkle on a long flight. This dress can also be the perfect party dress. The shirring and length options are endless. It can double as a hip length top or a knee grazing tunic. I think it is definitely worth a try.
Friday, December 20, 2013
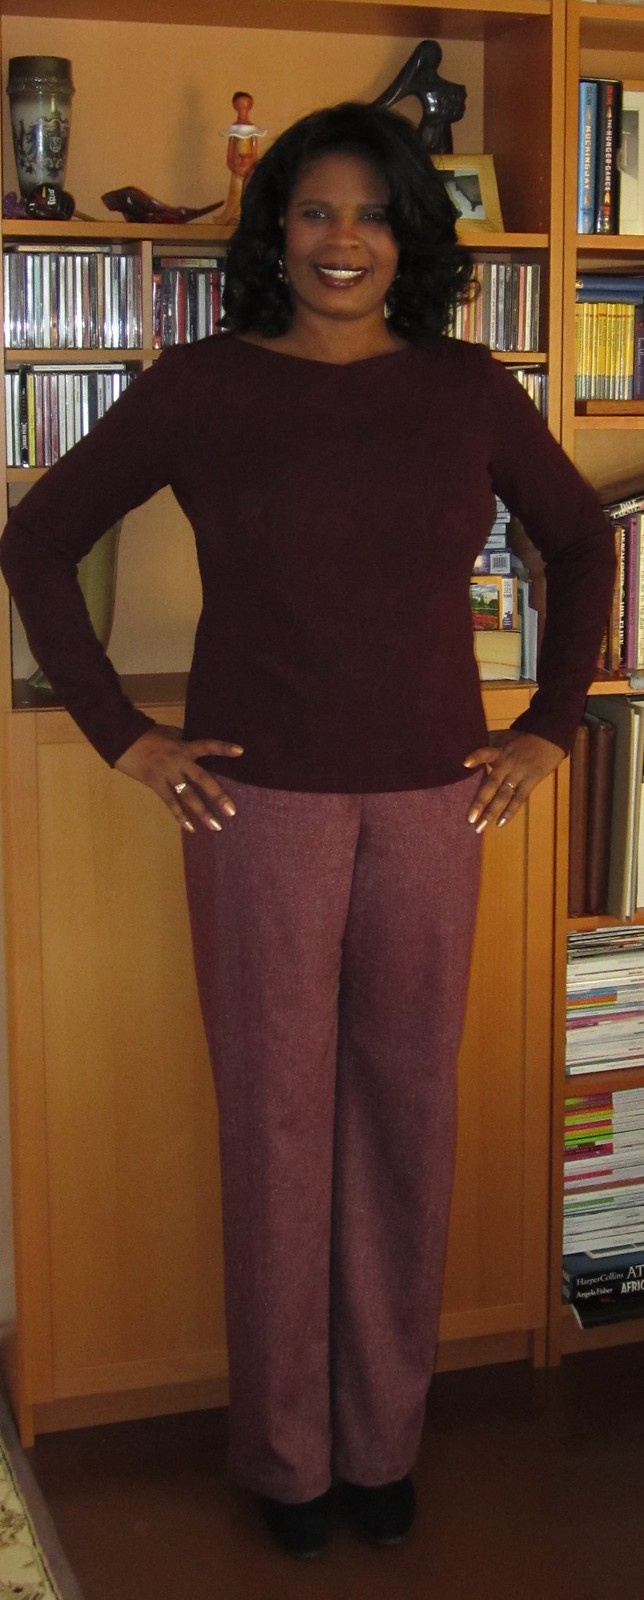
Comfy Top with McCall 6571
Today's review is on a knit top, McCall 6571. I considered waiting until I made the other views of this pattern, but decided to go ahead with this review as I have many more to do.
I guess you've noticed by now that I've made quite a few knit tops. One reason is I needed some new tops and other reason is I don't have a lot of time to sew. So the quick and easy projects are very appealing. This is another Palmer/Pletsch pattern with convenient adjustment lines drawn on the pattern. It makes it so easy to alter to fit.
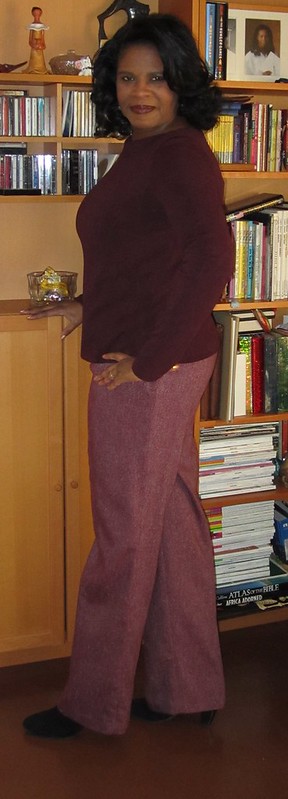
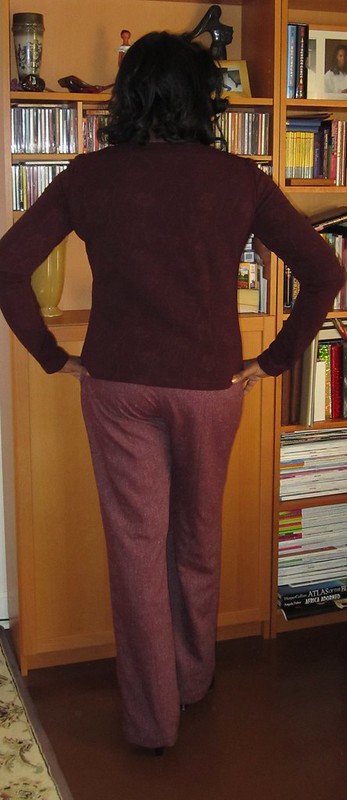
NOTE: Top pictured with Vogue 2948, Sandra Betzina pants, which I will view at a later date.
Pattern Description:
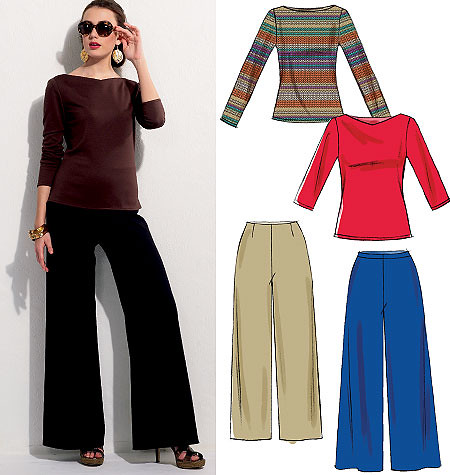
MISSES' TOPS AND PANTS: Close-fitting, pullover tops have neckline variations, below elbow or long sleeves and narrow hems. Fitted, straight-legged or slightly flared pants have elastic waist and no side seams.
Pattern Sizing:
Sizes from 6 to 22; I used 14 with modifications. Note of caution. The sizing of the top runs small. Typically, McCall knit top have a finished bust at 38". But this one finishes with 37". So you want to compensate for the difference when you do your FBA.
Did it look like the photo/drawing on the pattern envelope once you were done sewing with it?
Yes. I think the drawing has a little more shaping at the waist than the actual pattern. But for the most part it looks like the photo and drawing.
Were the instructions easy to follow?
Yes, the instructions were easy and helpful. Typical Palmer/Pletsch instructions with helpful tips and fit information.
What did you particularly like or dislike about the pattern?
I purchased this pattern for the view I made, view A. I liked the shallow "V" neck t-shirt. My dislike is how the neckline is finished with front and back facings. I would have liked a narrow band to finish it. If you use a medium weight knit with moderate stretch, the facings are a little bulky.
Fabric Used:
I used a remnant from a previous project. The fabric was purchased at Vogue Fabrics several years ago. It's maroon and not in my color palette, but the color does work for me. ;-)
Pattern alterations or any design changes you made:
I made my usually full bust, prominent shoulder blade, and swayback adjustments. For the swayback adjustment I also adding darts to the back. The horizontal tuck was not enough to bring the top closer to my lower back. Sorry the photos aren't that great. You can barely see the darts. Also, I used the long sleeves from view B, instead of the 3/4 length sleeves.
Would you sew it again? Would you recommend it to others?
Yes, this t-shirt is a great wardrobe builder. I also plan to make the other views. And yes I recommend this pattern. It's perfect for beginners. It will help new sewers perfecting their fit technique for a t-shirt and simple knit pants.
Conclusion:
This pattern is a great wardrobe builder. It is easy to sew and is great for beginners. This teaching pattern will help perfect alteration techniques for future projects. This is a keeper (TNT).
All photos are on Flickr.
Labels:
knit,
McCall,
Palmer/Pletsch,
pants,
Sandra Betzina,
top,
Vogue
Subscribe to:
Posts (Atom)
