Showing posts with label clergy. Show all posts

Friday, May 14, 2010

The Black and White of B5427

On Tuesday evening I finished the second suit made from Butterick 5427. It's not much different than the black suit finished last week. I put trim down the center front and sewed the buttonholes over that. Here are a few photos. Hopefully, I'll get pictures of my client wearing it.

Before the buttons were added


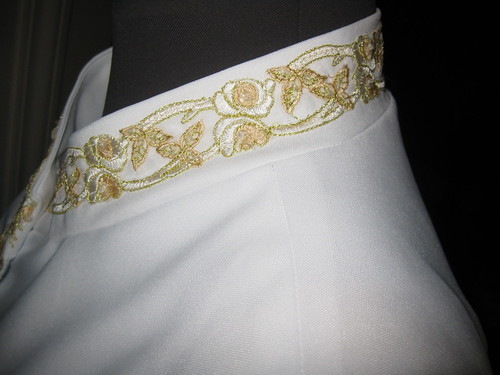
Buttonhole over trim
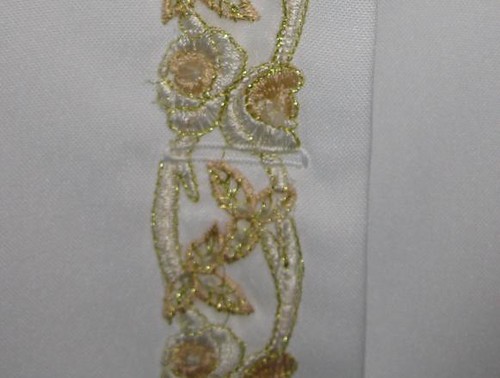
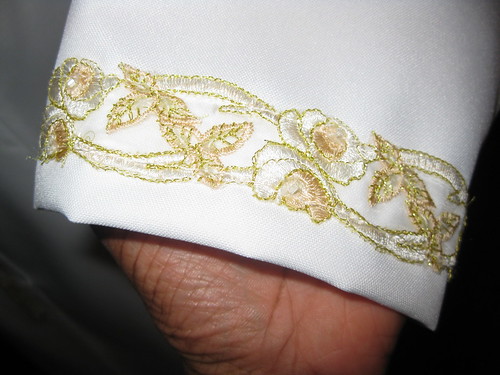
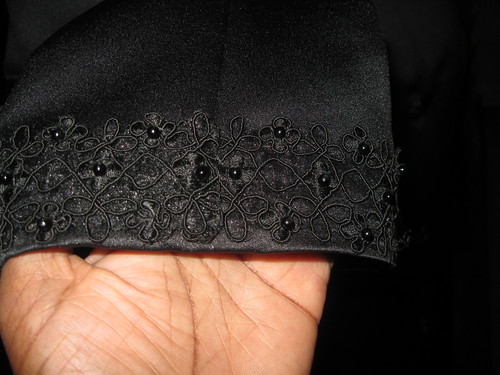
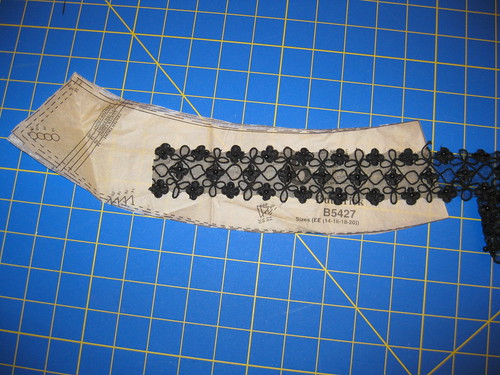

Trim on sleeve


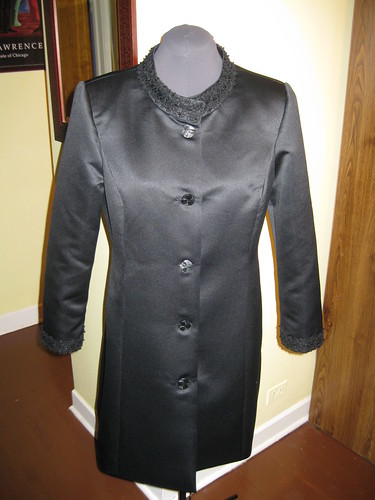
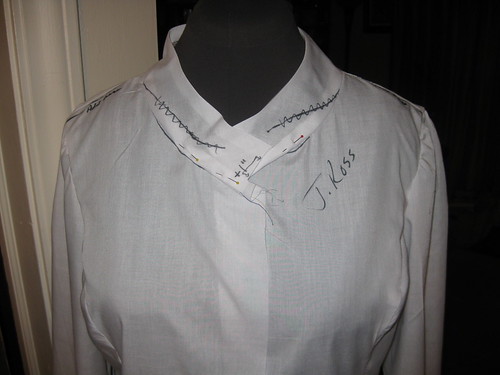
This time I came closer to the "V" shaped neckline.


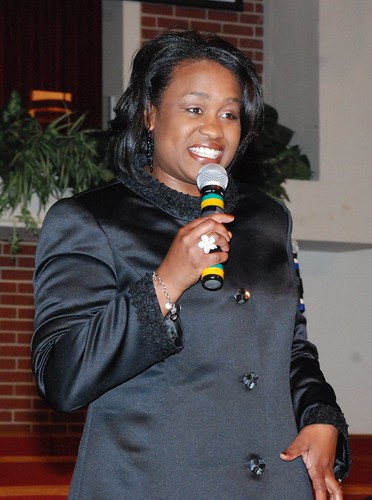
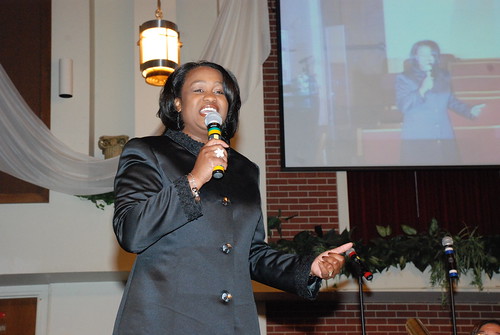
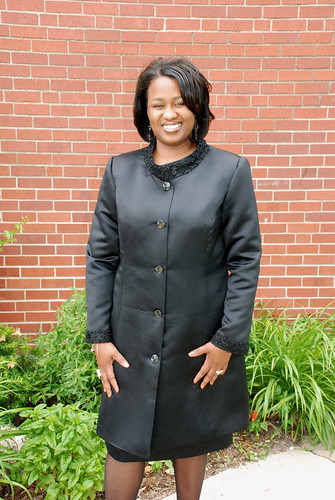
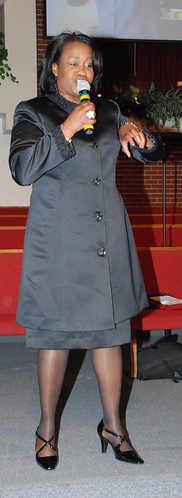
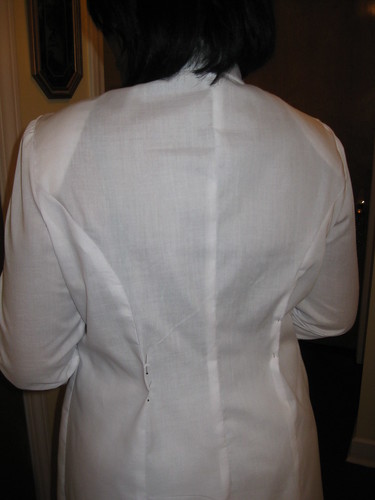
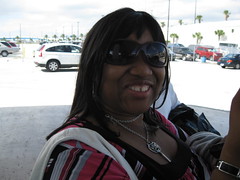
Parting shots - Min. Ross wearing the black suit on May 9, 2010.


Thursday, May 6, 2010

B5427 - The Black Suit


Last night I finished the first suit. I was happy with the results. The muslin the I sewed for the project will be the sloper for future garments. Min. Ross wants this basic suit for more outfits using different fabrics, trim with minor design line changes. That's a plus for me.

This evening she will pick up her suit, and I will probably cut the next on Friday. She needs it be the following week.

Here's the rest of my review:


Pattern Description: MISSES'/MISSES' PETITE JACKET, SKIRT AND PANTS: Lined, fitted jackets A, B, C, in two lengths, have stand-up collar, princess seams and above wrist length sleeves. A, B: snap closing and button trim. C: button and buttonhole closing. A, C: purchased trim. B: jewel stones. Semi-fitted skirt D, mid-knee length, has princess seams and back zipper. Semi-fitted, straight legged pants E have back zipper and optional creases.

Pattern Sizing: 6- 20

Did it look like the photo/drawing on the pattern envelope once you were done sewing with it? Yes and No. I made several changes. But the basic design lines are the same.

Were the instructions easy to follow? I didn't really read them as this is a basic princess seam jacket with basic straight/pencil skirt and pant. I did notice that the instructions suggested attaching one collar to the jacekt and the other to the lining. It's easier to complete the collar then attach it to the jacket then attach the lining.

What did you particularly like or dislike about the pattern? My client liked the basic design lines and saw the potential for several suits made from this same pattern.

Fabric Used: Duchess polyester satin and china silk for the lining.

Pattern alterations or any design changes you made: Several alterations and design changes. First I started with the muslin and incorporated most of the design changes into that. Here is a blog post that documents some of the changes.

On the Skirt:


Trim on the collar and sleeve -


Would you sew it again? Would you recommend it to others? Yes. I'm cutting the next suit Friday. She'll want more things made from the pattern. And yes I do recommend it to others. This can be a sloper for princess style jacket and for a basic skirt and pant.

Conclusion: This was not difficult to sew. This is a good basic wardrobe pattern. All pictures here.

Tuesday, May 4, 2010

B5427 - Clergy Garments

Too bad for me. I had to miss the April Haute Couture Meeting to meet a project deadline for Min. Ross. Last month, she asked me to make two suits from B5427. Of course, I did a muslin first to give a visual of how the suit would look.

Several changes were made based on her style and/or perference:

- Add length to jacket - 9 inches
- Add length to skirt - 2 inches
- Add back slit to skirt - 7 inches
- Add length to sleeve

Fitting changes -

The didn't need to make drastic fitting adjustments. Or maybe I'm getting used to making certain changes. ;-)

At the small of her back, I took in a bit.


I added a bit to the shoulder area. I inserted 1/2 shoulder pads for better shaping. Also from the muslin fitting I noticed that there was a lot of ease in the sleeve cap. So this change helping with that as well.


The collar stood away from the neck same as on the model of the pattern envelope.


She wanted a closer fit.


Jacket front neckline adjustment.


The collar was slightly wider than the desired trim. I adjustment the wideth.


The skirt was perfect as far as fit.


Next post, black suit finished with rest of the review.

Stay Tuned!
C


trying to meet a deadline for a project for Min. Ross. Two weeks prior I made a muslin for the suit.Busily sewing for Min. Ross who has commissioned me to make two suits (black and white) from Butterick 5427. Before I cut into the fabric, I made a muslin as she plans to have several outfits of this style.

Last week was the first fitting

Monday, February 22, 2010

Another Clergy Robe - Butterick 6844


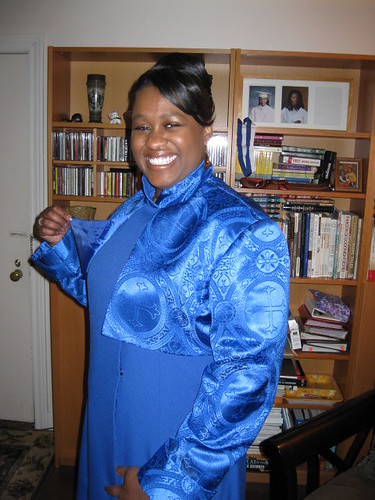
The Harris Family (members of my church) commissioned me to make a robe for Min. Hollis. They wanted to secretly give Min Hollis a robe. So I couldn't tell her who the gift was from when I took her measurements. On Sunday they presented their gift. She was well pleased at the thought and the robe.

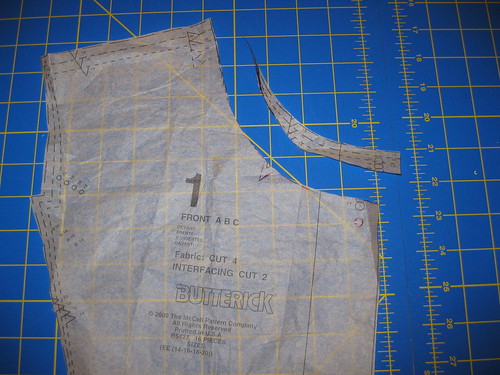
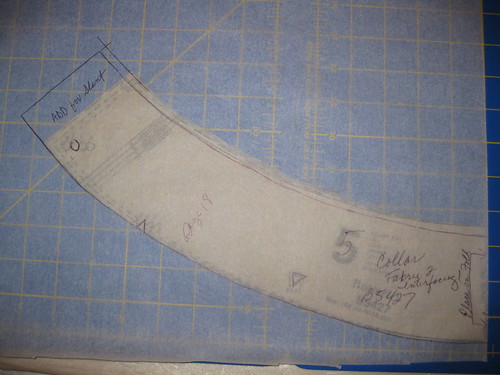
I've used this pattern multiple times for robes for Min. Ross. Each time creating a different look. This version was basic View B with contrasting fabric for cuffs and collar. I also made a matching sash.

Here are a highlights:

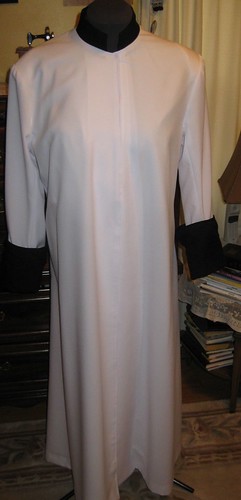
I added shoulder pads. They made they the upper chest and shoulders better form.


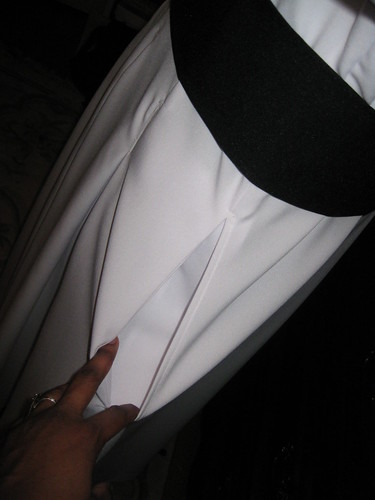
The pocket folds toward the side back of the robe and is anchored to side pleat. The facing of the pocket is slightly exposed through the slit.

Tuesday, November 17, 2009

Vacation and Sewing

It feels like it's been ages since I last blogged. Just before vacation time I couldn't seem to find time to blog post or read. Well I must say after being away, it's even harder getting back into it.

Last month's I vacationed (cruised) to the Bahamas. It was excellent! Four days and four nights is a good first cruise. This time in the Bahamas not much time on the beach, but plenty of time about Freeport and Nassau. Katrina (cousin) and I did a few tours during the days at port, and spent the evenings with the rest of the group. Loads of fun. Here are a some of the photos:


Me on the Queen's Stairs - Nassau

Tree Growing out of rock - Nassau


Tricey - Cruise Planner

The Ladies at airport in Florida

Marilyn - Tour Guide at the Groves - Freeport

Me at the Tree of Life - Freeport

Spider Plant in Gloom at the Groves - Freeport

Tilapia - Freeport

Katrina - Captain's Ball

Me and a few of the ladies - Captain's Ball

Trina - Miniature Golf - Hole in one

Me and Trina - Bottom of the Queen's Stairs - Nassau

Friends we meet on the tour - Nassau -Oops don't remember their names

Waterfall - Freeport
Beautiful sunset - Leaving Nassau


Resident - at the Grove Garden - Freeport


More picture on Flickr.

Sewing.., Of course..., It's mostly about the sewing. I've made two dresses, two pairs of pants and two skirts. Currently working on jackets for DD and coat for me. Will post my reviews and pictures soon. Finally, Minister Ross's husband sent me pictures of all of the robes that I've made for her. The first one (white and gold) made..., I'm thinking about twelve years ago. Not sure. Then I wasn't to keen on taking photos of completed projects.


This week off to the Abbey for some relaxing spa treatments. That's all for now.
C

Tuesday, October 6, 2009

Costume Pattern Transformed Into Clergy Robe S5386


Over the past several years, I have made several garments for Minister Ross. The commissions range from formal wear to clergy robes. In August her husband asked me to make two robes for her: one using the standard pattern Butterick 6844. He allowed me to express my creativity for the second one. ;-) For it I went on a hunt to find something a little different. As I searched the pattern books at JoAnn, I stumbled upon this costume pattern S5386.

Pattern Description: Men's and Teens' Duster. I transformed this pattern into a clergy robe.

Pattern Sizing: Sizes from XS to XL

Did it look like the photo/drawing on the pattern envelope once you were done sewing with it? Yes and No. The style lines of the duster are the same. I did make some changes using contrasting fabric and some in the construction of the garment.

Were the instructions easy to follow? Yes. But again I didn't follow them exactly. All changes construction and design are below.

What did you particularly like or dislike about the pattern? Everything. It was perfect for the project. The design resembled a basic priest robe.

Fabric Used: polyester crepe and jacquard royal blue on royal blued with cross motif.

Pattern Alterations or any design changes you made:
- Underlined from the neckline to the waist.
- Used contrasting fabric for the sleeves, outer collar, gun flaps, back yoke, front and back facings.


- Sew on snaps instead of Velcro for front closure.
- Reverse the closure (right front side over the left front).
- lined the gun flaps instead of forming a narrow hem around the outer edges.


- Under stitched the upper edge of the collar and front facing instead of top stitching them.

Would you sew it again? Would you recommend it to others? Yes. Minister Ross would like another robe made from the pattern.

Conclusion: This costume pattern was easy to sew even with the many changes made to transform it into a clergy robe. This is a very well drafted pattern. The pieces went together easily. An advanced beginner should be able to sew it without any problems.


My Flickr set on this project.

Tuesday, September 29, 2009

Update! It's Been A While

It's been a while since I've blogged. I'm not short on material, just short of time. Lots of things happening: church, work, and sewing(life in general). Last week was our Annual Men and Women's Unity Conference. And to sum it all up in one word: "Excellent". So I took a few days off. The media crew was expected to be at church for the duration. To top that I'm taking a non-linear editing course at CAN TV every Monday from 5:35 to 9:30 pm. It's fun, but exhausting. Work: playing catch up and major testing of two new upgrades to one of our servers. Argh!! Now the good stuff: sewing..., lots of projects under way (DD and me). But I'm currently working on two clergy robes for a regular client. This will be the forth and fifth robe that I have made for her. Here are a few shots of one of them.

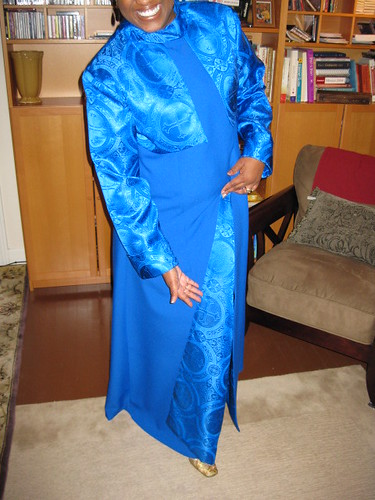
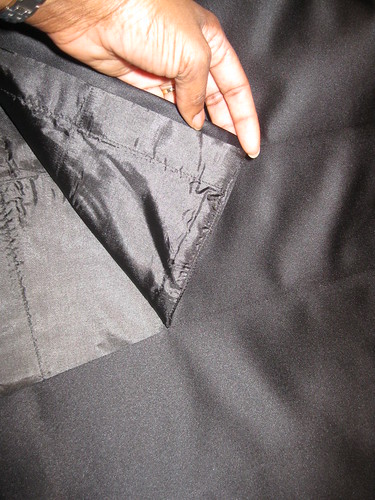
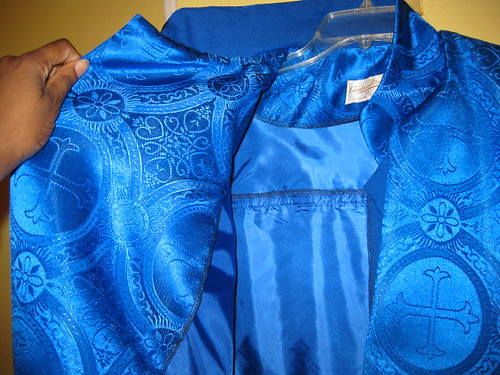
Inside front. I used the "cross" fabric for the front facing. It's underlined to the waistline.

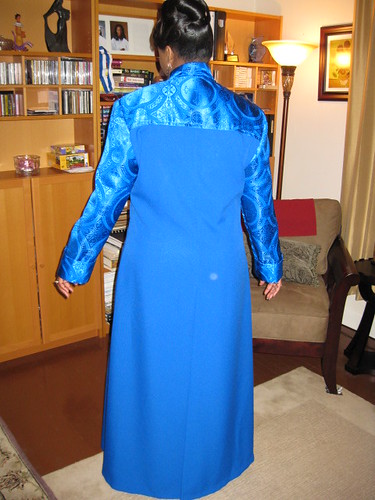
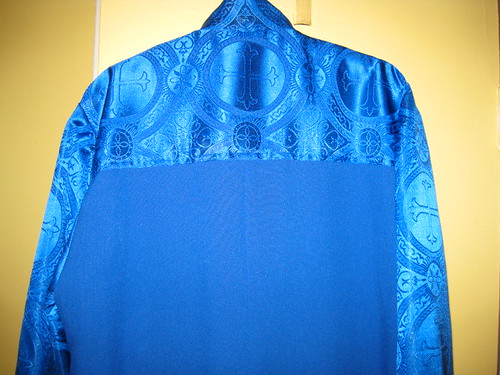
Back view. I like the look of the print from the collar to the yoke.

Back Vent. I only have the set the shoulder pads, sew on the snaps, hem and press. Then finish the second robe.


Also, sharing and teaching the gift of sewing with my DD and niece. Saturday before last we had a four hours sewing lesson. The young ladies were thrilled and did learn how to sew thread the sewing machine, sew a straight stitch, sew the zig zag stitch, and make button holes. At the end of the session, each had made traveler shoe bags.


Last week Trudy Callan and Ivalyn Actie nominated me for the Kreativ blogger award. Thanks ladies. I'll post my nominees soon. I'm playing catch up with blog reading and posting.

Happy Sewing!
Cennetta

LinkWithin

Blog Widget by LinkWithin