Sunday, September 30, 2012

Sandra Betzina's Power Sewing Retreat


I've only been home a few hours, but I wanted to share a brief summary about Sandra Betzina's Power Sewing Retreat.  

In one word; Excellent!

It was an outstanding learning experience!  One solid week of learning from one of the USA’s renowned sewing/designing experts.

The Retreat was held in San Francisco at the Marine’s Memorial Club.  Seventeen ladies were taught by some of the best in the business, Sandra Betzina and Ron Collins.


The days were filled with several lessons and tips to help us horn our skills.  In the evening we were able to continue sewing up to 10pm.  A positive “side effect”of this sewing marathon was the women attending the retreat became friends.  Some have attended several of Sandra’s Retreats over the years.  They return because no  retreat is exactly the same.  Sandra caters to the needs of the students.  Sure some basic information is the same, like fitting and seaming.  Additionally, there is a ton of things that 
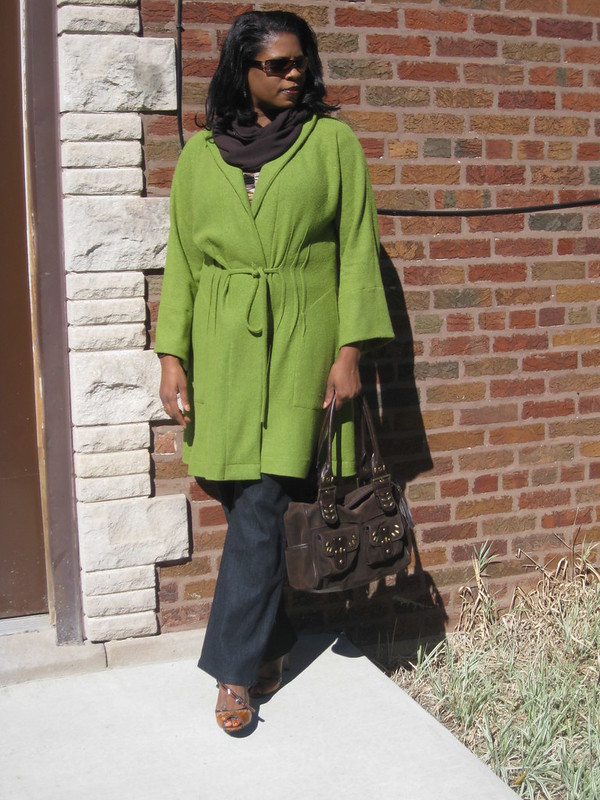
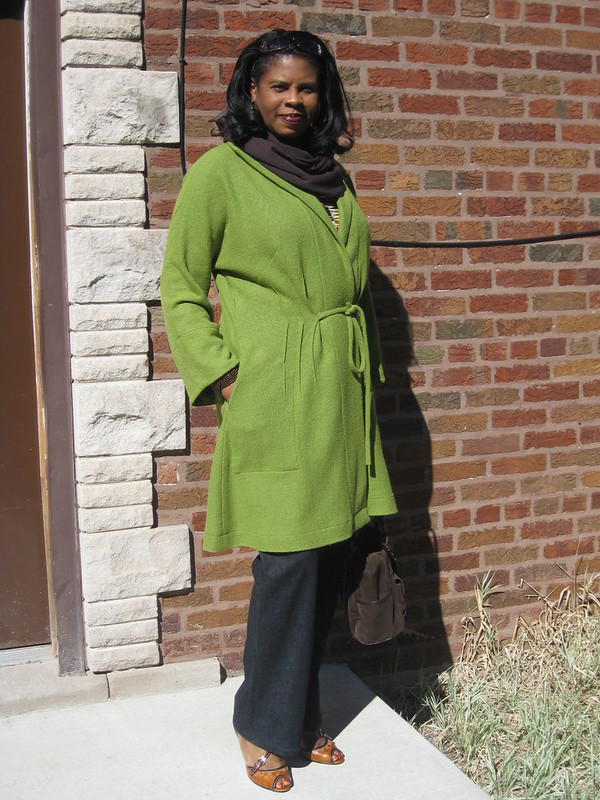
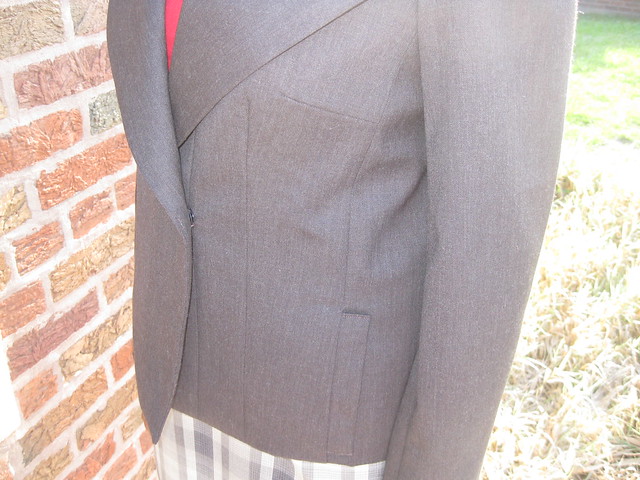
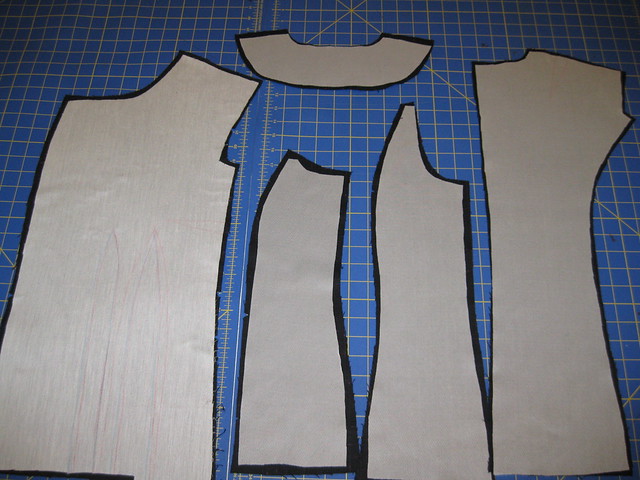
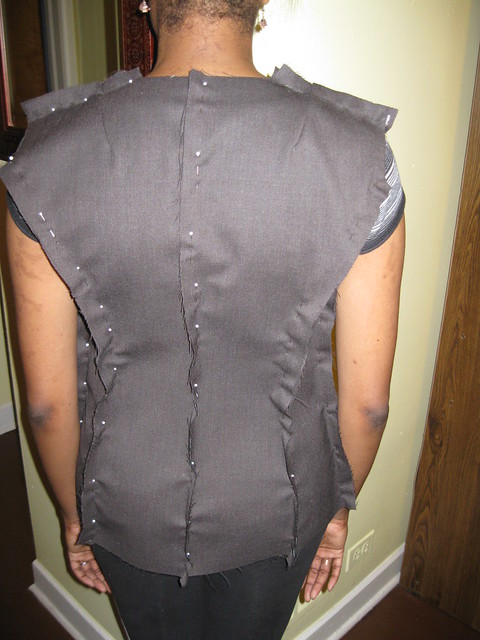
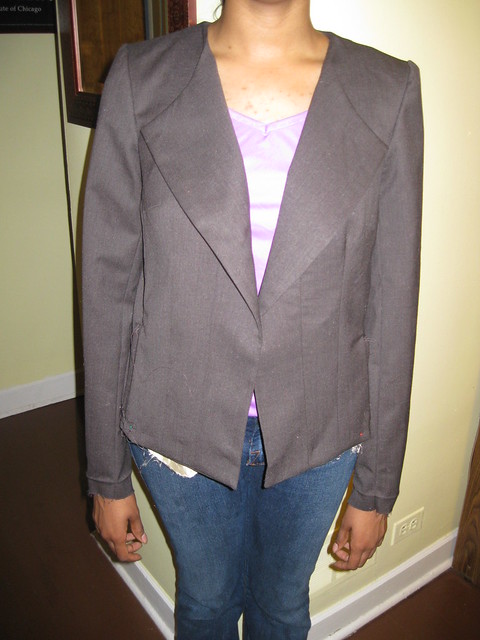
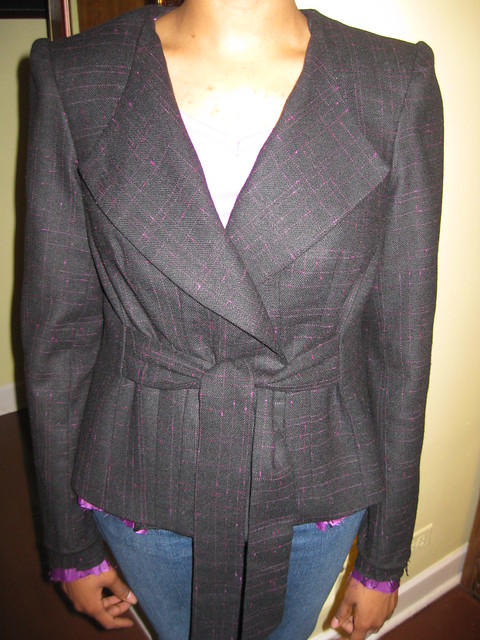
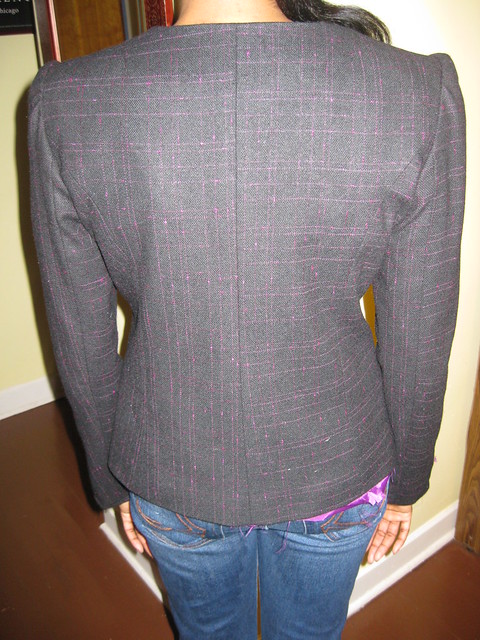
are geared forward the needs of the student attending each particular retreat.  For instance, I brought my French jacket project to check the fit, cut and begin sewing.  Sandra and Ron, guided my through the initial stages of making the jacket.  I tissue fitted Vogue 8804 at the Palmer/Pletsch workshop, but needed to muslin fit it to make sure it was just right before cutting into my fabric.  After we made the needed adjustments, I cut and sewed it with Ron and Sandra's help.  Now, I at the point of sewing and setting the sleeves.  
. 
Sandra’s unique approach to teaching and sewing inspired us to try new and creative sewing techniques. 

Sandra has developed a WebTV show, “Power Sewing”, that provides step by step sewing construction techniques on demand.  Right now she has a special on; the annual cost is $60.00 for a limited time.  This subscription gives you access to over 110 shows, current and archive.  This is a great offer.  Give them a call at 415-876-2434.
 
Over the next week or so, I will post some highlights from the Power Sewing Retreat.  But today I just wanted to give you an idea of what to expect when you go to a Sandra Betzina’s Power Sewing Retreat.  Secondly, you don’t want to miss this great opportunity to subscribe to Power Sewing for $60.00 for one year.  So if you watch one show per week, the average cost to you is less than $2.00.  This is an opportunity to improve your sewing skills for less than a Starbucks’s coffee.

Until next time, Happy Sewing!
C

Tuesday, September 25, 2012

Vogue 1060 - Perfect for Fall


In Chicago we are already well into the fall season.  It's sunny, it's rainy and the nights are very cool.  Great sleeping weather and a great time to be inspired to make stylish, colorful fall clothes.

I hope this fall is more productive, sewing wise, than the summer.  I spent little time making summer clothes this year.  The good thing is, I had plenty to wear from the two previous summer seasons.
Vogue 1060
This Sandra Betzina coat has been on my list for a few years.  Last week I was finally able to make it.  My hold up was the alterations.  I didn't really know how to handle the FBA with the dolman sleeves.  In the end, I handled it as always, except I remove the sleeve from the front before making it.  I also thought the bust dart would take away from the waist dart detail and considered dart rotation.  But where could I rotate the bust dart to?  The waist, the collar or shoulder area?  None of those options would work.  To minimize the depth of the dart, I decided to add some width through the under arm area and the side seam.  And do a smaller FBA.

It seem to work okay.  More details are as follows in my review:

Pattern Description: MISSES’ COATS: Unlined coats have shawl collar, dolman sleeves, darts and sleeve facings. A: fabric front ties. B: purchased piping and ribbon ties.

Pattern Sizing: A through J; 32 through 55.  I used D, E, F where necessary.  This pattern comes in a wide range of sizes.  And it is easy to blend several of the sizes to meet your specific sizing requirements.

Did it look like the photo/drawing on the pattern envelope once you were done sewing with it?  Pretty much,  The boiled wool version has the darts sewn on the wrong side instead of the outside of the coat.  Plus the model looks like she is half my size.  So the coat looks sleeker on her than on me. Lol

Were the instructions easy to follow?   The instructions were a piece of cake.  No problems; no confusion.  Pretty standard and straight forward.

What did you particularly like or dislike about the pattern?
Likes -

Dolman sleeves
Dart detail
Shape of the sleeves

Dislikes -

None


Fabric Used:  Pea Green Boiled Wool from Mood Fabrics.  Before cutting into the fabric, I tossed it in the dryer with a wet hand towel to preshrink it.  I will dry clean it, but didn't want any issues with shrinkage due to any type of moisture. 

Pattern alterations or any design changes you made:  I only made a few alterations.
  - Small FBA, which resulted in a bust dart.
  - I used a blend of the sizes, starting with D at the neck, shoulder, upper sleeve.  Then using sizes E and F along the under arm and side seam.  I didn't want to do a large FBA and I wanted move to wear a jacket or cardigan underneath it on those extra chilly days of fall.
  - I wanted to add a few more inches to the length of the sleeves but the fabric was not wide enough.  I should have order a half yard more.  Good thing is the shaping of the sleeve helps makes it less noticeable.

Construction changes -
  - I finished the seam with my serger, instead of flat felled seams.  I thought the boiled wool was a too bulky. 


Would you sew it again? Would you recommend it to others?  I think I might make it again.  It turned out well and was easy to sew.  The most time consuming part was forming the darts.  Caution tracing paper and wheel don't work well with this fabric.  So I used pins to mark the darts.

I really like this coat.  It's a good transitional coat,  it's easy to make, and you have many fabric options to make it unique.


The color is darker than the suggested charteuse in my personal color palette.  So I made a chocolate brown infinity scarf to complement my eyes and skin color.  It literally took ten minutes to make from start to finish.  My jeans are Simplicity slim pant made last fall. Purse and top from JC Penny's.  Shoes are Bobbi Blu.


Conclusion:   This is an easy, stylish coat to make.  If you have never made a coat, this is a good one to try.  All photos are hear on Flickr.

Happy Sewing!
C


Tuesday, September 11, 2012

Making the Transition with Vogue 1220

Fall is in the air. We feel and see the many signs of the end of the sweltering days of summer. The hot temperatures started in March and continued through August. It was a long, hot, and humid summer for us Chicagoans. But, I wish I had at least another month a warm temperatures. Because I hardly made any summer garments. And now I must turn my thoughts to making transitional and fall clothing.

Vogue 1220 has been on the list for a while. But I hesitated on making it. The front and side back of the dress are all in one, which called for extra steps in the full bust adjustment (FBA). I knew I did not want to separate the sections nor did I want a bust dart. After the Palmer/Pletsch Fit Workshop, I feel much more comfortable practicing dart rotation technique. So as part of this review, I want to share the details. I hope this information is useful.  


Pattern Description: MISSES' DRESS AND BELT: Loose-fitting, mid-knee length dress has shawl pleated collar, partial waistline seam, pleats, side slant pockets, princess seams in bodice back, back darts, short sleeves with turn back cuffs, stitched hem facing, right fly front button closure and tie belt.

Pattern Sizing:  Sizes 8 to 22; I used size 14 with modifications.

Did it look like the photo/drawing on the pattern envelope once you were done sewing with it?
Yes, it did.

Were the instructions easy to follow?  Nothing confusing for me. I didn't follow the steps in the same order. The waist pleats (#13) was done at the end. First I tried on the dress to get a good idea of how deep to make the pleats as the FBA changed the width of the waistline.


What did you particularly like or dislike about the pattern?  Goodness, there is so much I liked about this dress. my likes are:
 - The pleating at the waist; it clinches the waistline creating a waistline for me.
 - The curve of the front to the lower back skirt.
 - The encased raw edges of the neck seam.
 - The narrowed skirt at the hem. It slims and creates more of a hourglass silhouette my inverted triangle shape.
 - The French seamed sleeve.
 - The Pleated neckline.
 - The hem facing.
 - After making all the adjustments, it was easy to sew.

 No dislikes.

Fabric Used:  Your not going to believe this. The fabric was purchased at Vogue on Roosevelt about a month ago. Me, Sandy, and Nikki met up for lunch; then Sandy and I stopped by Vogue before heading home. We find this mystery fabric among several other mystery fabrics in the remnant room on the table. It was only $1.00 per yard. I bought four yards because I didn't know what I would make, dress or shirt. I believe the fiber content has some polyester because it didn't wrinkle that much and it has a little sheen to it. I pre-washed it along two other yardage of the same type. So I could wash this dress or dry clean it with no problem. The color is exactly the same shade of teal as the color recommended by Ethel Harms.

Pattern alterations or any design changes you made:  This pattern was not hard to alter; there were a few more steps than I normally take to make the FBA. I was so engaged, I forgot to take picture at every step. So I'll try to explain the process.

Step 1 - Draw a line from the lower armhole to the waist to use as a guide to detach the side back from the front of the dress.
Step 2 - Cut on the line and put the side back to the side.
Step 3 - Make the FBA; standard process (Palmer/Pletsch).
Step 4 - Instead of making a bust dart, I rotated the excess to the neck pleats. Then closed the bust dart. The excess was evenly divided between the three neck pleats.

Fly -The lengthen the fly same as the length added in the FBA (center front of dress).

Prominent Shoulder Blade - I made this adjustment by adding 5/8" the length of the bodice back. Then I added a small dart to the center of the shoulder seam. Below the shoulder blades, I removed the added width at the waist as shown in the illustration. My usual process is easier. This one builds in extra width throughout the back which might come in handy. I didn't need it for this pattern.

Oh, I thought about this after I wore the dress. I read in Burda Magazine that for full bust girls, like me, you may want to consider stitching down the pleats to hold them in place. This reduces excess fabric. This is just a thought..,

Would you sew it again? Would you recommend it to others?  I probably won't sew it again. It's unique, and I think I is enough for me. But you never know. Lol I do recommend it to others. It's easy to sew, figure flattering, and comfortable to wear. What's not to like.

More pictures on Flickr.

Conclusion: This is a nice dress to sew. And I recommend it to others.

Wednesday, September 5, 2012

This and That

Yes, another this and that post.  It's been too long since I last posted.  There is so much going on this month and last.  So here is the short of it:

  • School started August 20th; I taking two classes.  I've already written four papers and two presentations.  Next, week is the first mid-term for my online management course (six chapters).
  • Finally came up with a theme and segments for the HCC Fashion Show 2013.  Thank you Sue H., Sandy Y., and Delores P.  I'm still pulling together a committee to help with the various aspects of the show.  I started stressing about it; Rhonda Buss helped me overcome that anxious feeling with a single question,  Shhh.., I won't tell.
  • The first HCC Fashion Show Challenge is the color Blue, any shade of blue will do. 
  • Work is a beast!!  Let me say it again, WORK IS A BEAST!!! I'm tired in the morning and tired in the evening.
  • Unity Conference starts next week.  No off-white dress on my to make list.  There are at least three in my closet to choose from.
  • I want to sew but am too tired to.  Good thing is, last week I cut two jackets, two pants, two dresses, and one blouse.  Before selected my fabrics, I pulled out my trusty little color palette to see if the colors were best for me.  Yep.  Right on target.  Monday evening, I serged several pieces to make it easy when I do have the energy to sew a little.
  • A new button company found my blog and sent me some free buttons.  Gorgeous!  They also offer a 20 percent discount for me and my readers.  More on that later. 
Hopefully, this week I will be able to sew something.

Happy Sewing!
C

Tuesday, August 21, 2012

McCall's 6329 - Finished Jackets and Final Words


The final post on fitting and sewing McCall's 6329. My DD is happy to have two new suits (skirts Simplicity 1919). Most of the information on the process was documented:

McCall's 6329 - Tissue Fitting the Pattern
McCall's 6329 - Altering the Pattern
McCall's 6329 - Working with the Clothe

Pattern Description: MISSES'/WOMEN'S LINED JACKETS: Close-fitting with snap closure. A: Tie can be tied in front or back. B: Side front seam pockets

Pattern Sizing: 8 to 24W; I used size 10 with modifications.


Did it look like the photo/drawing on the pattern envelope once you were done sewing with it?  Yes.  There were some changes made for fit and preference.


Were the instructions easy to follow?  Nothing difficult or confusing.

What did you particularly like or dislike about the pattern? These jacket were for DD.  I selected this pattern because I thought it would be an acceptable jacket for her work gear.  She likes the style and cut of the jacket.  No dislikes reported by her.

Now, for my likes and dislikes:
 Likes
- It's Palmer/Pletsch, which makes it easy to alter.  Lines are drawn on the pattern already.
- Style - The tie (view A) is my favorite.
- Pretty easy to make.
Dislikes
- Position of the pockets.  This has happened with other commercial patterns.  The pocket is too close to the hem and tends to create bulk at the hemline.  
- I had a slight problem with getting the sleeve cap smooth.  I set the twice, still not able to get the smooth look I like.  


Fabric Used:  Woolens bought while in Oregon.  Lining  is from stash, leftover projects.


Pattern alterations or any design changes you made:  There were multiple changes related to fit.  See previous posts.  I also made a few during the process of sewing the jackets together.
- The entire shell of the jacket was interfaced.
- Added sleeve heads to the black jacket and used raglan shoulder pads for the brown jacket.
- Two waist darts instead of one.
- Understitched the front up to the the turn of the lapel and along the back facing between the shoulder seams.
- Adjusted the length of the pocket to reduce bulk.

Fitting: The fitting method used is based off the Palmer/Pletsch fitting method.  All documented in the three previous posts as indicated above. 
 
Would you sew it again? Would you recommend it to others?  Only if DD wants more jackets made using this pattern.  But I do recommend it to others. 

Conclusion:   This pattern has great bones and a good one to practice the Palmer/Pletsch fitting technique.  My DD is more pleased than I am with the results.  She says the jackets fit well and look good.

The skirts were made using Simplicity 1919.  That's another review.  You can view the entire process in pictures on Flickr.

Parting Videos: Tip on machine pad stitching on the jacket lapel. I'm planning to try this.


Happy Sewing! C

Friday, August 17, 2012

Do you Follow Color Trends?


Do you follow color trends? Or do you stick to the colors that complement the color of your skin, eye, and hair? With each season comes a trendy color palette that many follow because it features the "in" colors of the season.

Ethel Harms did a color analysis for me while I was in Portland, OR. It revealed that I should use a bright-medium autumn palette. Many of the colors are not in my current wardrobe, and there are many colors I've worn for years that are. My palette has no pink/fuschia or grey hues in it (I love these colors and have plenty of fabric to proof it. Lol). These colors make me look pale or grey.

The spring/summer colors this year are tangerine, mint green, bright yellow, kelly green and coral. My first thought was oh..., I can wear all of these. To date, I have not made or bought anything of these colors. My color palette contains only one of these colors. Surprise to me!


During the color analysis, Ethel placed the colors swatches close to my face, I could clearly see how the colors reflected or repelled the vibrate natural tones in my complexion. What a revelation. I'd never thought to have a color analysis, always thinking I was sure of the colors that work well with my skin tone. I'm happy that I now know that many blues, greens and oranges (especially) are great colors for me. So think about it. What colors work best with your skin, hair and eye colors? Trends are okay, but every trend is not good for every fashionista.

Here are a few of the photos that Pati Palmer took during the color analysis. (warning some pictures are without makeup, just lipstick.  Lol)

Me being silly at the start of the session (I was a little nervous at the beginning.).  Black (hair) is okay and the three shades of brown (eyes).


Draping scrafes and swatches - The first drafted color not so good.  Doesn't really complement.


The blues and browns - better

The brown, gold, and cranberry tones are a perfect complement.


Ethel placed the colors that worked well with my skin on the table.


Next, a few close ups of the plattetts that work for me.


Browns, Reds and Oranges


Greens and Browns

Blues and Browns

A Hand Full of Colors

That's it on color.  So, how do you feel about color trends?  Do you follow them or use colors that work well with your skin tone? 

Happy Sewing and Wardrobe Designing, C

PS - DD's jackets are done.  I will show them in next post.

Color Analysis photographs are compliments of the Pati/Palmer Company.

Monday, August 13, 2012

Mc Call's 6329 - Working with the Clothe

Happy Monday everyone,

I intended to post this on Friday, but the time got away from me.  I hope you're still interested in the process.  There are a few things I wanted to point out related to working with the clothe.  The first is to exercise a little caution when fitting the garment in fabric.  Fabric is flexible and can be easily molded unlike the tissue pattern.  Take into consideration the weave and texture of your fabric.  Some give more than others.


I made two jackets from M6329 for my DD.  The first is in a woolen from the Pendleton Woolen Mill Store in Portland.  It is a tight weave, not much give in the fabric.  The second is also a woolen but the weave is loose.  I pre-shrunk the black wool by tossing it in the dryer with a wet hand towel.  It came out softer, less body the before treating it.  The Pendleton wool was pre-shrunk by steam pressing  with the iron.  The body remained the same.  Both jackets will be dry cleaned.

For body, I interfaced the entire shell of the jacket.


Next, I pinned the shell to fit before sewing. I didn't like the one dart which is shown below in the brown jacket.  So I ripped it out and made two darts for a smoother look.  You don't have to stick to the original design of the jacket; it's only a guide.  You have the liberty to change what you like.


Here are both jackets with the two waist darts.  For the most part, I think brown jacket is in good shape.  But I need to re-set the sleeves in the black jacket.


 Note: For this picture I inserted one shoulder pad (above).  Her right side has wrinkles on the sleeve and shoulder area.  While the left side is smooth with the shoulder pad in place.


The sleeves and shoulder need to be re-set.


Parting tip:  If you are planning to sew a jacket, but don't want to interface the entire body, consider this technique for sewing an invisible hem.


Next the finished jackets.

Happy Sewing!
C

LinkWithin

Blog Widget by LinkWithin