Showing posts with label pattern drafting. Show all posts

Saturday, September 11, 2021

Union Pattern Molly T-Shirt with Rhonda's Square Shoulder Sleeve Design


Today I'm sharing my fifth version of the Molly t-shirt.  This time I drafted Rhonda's Square Shoulder Sleeve design for the sleeve.  The pattern drafting was so easy and the finished sleeve turned out very well.    If you want to try drafting the sleeve, check here on Rhonda's blog.

There isn't much more to say about the process.  Rhonda's post gives you all the details on how to make it.  So there is no need for me to repeat it.

Sorry about the poor quality of the pictures.


Parting Shots:  This is the very first Molly T-Shirt that I made in 2019.


Wednesday, September 27, 2017

Shirred Wrist Sleeve and McCall 6964


This is the second sleeve drafting project that I've done using one of Rhonda's "free sleeve Saturday" patterns.


What I like about this one is that it draws attention to your forearm without a lot of fabric.  That is, not to say that I don't like flounces.  It's just a different type of attention-getter.  I decided to take the shirring higher up my arm. You can see that in the pattern below.


This sleeve was just as easy to draft as the "Draped Cowl Sleeve" but it requires more time to slash and spread the small sections.

Black tops are scarce in my wardrobe.  This new one will be great to wear with jeans, slacks, and skirts.  For cooler days a nice 3/4 sleeve kimono jacket is the perfect topper to add warmth and still show off the cute sleeves.

Again, I won't repeat the tutorial for this sleeve.  Get the instructions from Rhonda's blog here.

Thanks and Happy Sewing!
C

Friday, November 27, 2015

I'm a Guest Blogger on Rhonda's Creative Life


Good evening everyone,

I wanted to let everyone know that I'm a guest blogger on Rhonda's Creative Life. A few weeks ago Rhonda asked me to write a tutorial on my fold over clutch for Fabulous Free Pattern Friday. Of course, I was delighted and welcomed the opportunity to be a guest blogger.

So please stop by Rhonda's Blog to read the tutorial.

Enjoy!
Cennetta

Monday, February 16, 2015

DIY - Faux Fur/Leather Clutch


Over the weekend I was so happy to finally complete some of the many, many sewing projects on my list.  I must admit that it has been a bit of a challenge to organize projects and to think about the next phase of my sewing and creative life.


At the Christmas luncheon, Rhonda Buss, carried a super cute fur clutch.  The minute I saw it, I wanted it and made a mental note to add making a faux fur clutch to my list.  This was an easy, simple project.  And luckily, all of the supplies were already in my stash.

To make it you'll need:


Faux fur (Mine's was leftover from this jacket project.  The scraps were too nice to trash.  So I kept them in a bin along with several other remnants.)
Faux leather (or genuine leather)
Lining (remnant)
Felt
Zipper
Pellon #805 Wonder Under Fusible Web
Thread and other basic sewing tools

Steps:
  • Determine the size purse you would like to make
  • Cut the faux fur, leather, and lining based on the dimensions you chose.  Add seam allowances. (Mine was 13.5" X 11" plus seam allowances.)
  • Fuse one side of the wonder under fusible web to the wrong side of the faux fur.
  • Let cool.

  • Remove the wax paper backing and fuse the felt to the other side of the Wonder Under.  The wrong side of the faux fur is now felt.  This adds body to the faux fur.  The faux leather already had a felt backing.

  • Cut a 2" X 1.25" strip of leather.  Fold it in half the long way.  Edge stitch about 1/8" away from the edge.  This strip will be use to cover the zipper stop.
  • Sew the strip to the zipper tape.

  • Sew the faux fur and leather to the zipper tape.
  • Sew the lining to the zipper tape.  The zipper tape on each side should be sandwiched between the lining and the fabric.


  • Edge stitch the lining near the zipper teeth so that it will not get catch in the zipper when you open and close the purse.
  • Put the right sides of the purse together.  Sew the remaining three sides together.
  • Do the same for the lining, leaving a six inch opening at the bottom to turn the purse inside out.
  • Turn the purse inside out and finger press the seams.

  • Stitch the remaining lining together.
  • You're done!


  • You can use it as a purse or a tech case.  The choice is yours. 


Parting Shot:  Rhonda Buss gave a talk on sleeves at the Chicago Chapter American Sewing Guild meeting Friday evening.  The sleeves on this coat are spectacular.


Happy Sewing!
C

Tuesday, January 8, 2013

Rhonda's Anyway You Want Top

                       Rhonda's Design shown here with self drafted sequined skirt.


Every Friday it's "Fabulous Free Pattern Friday" over at Rhonda's Creative Life. She has taught pattern drafting for almost a year. Rhonda is an excellent teacher.  She makes pattern drafting easy by carefully documenting and illustrating step-by-step instructions.  Her methods make it easy to understand and follow. Andrea of Knit-Knac (will post soon) recently made one of Rhonda's skirts.  It took less than an hour from start to finish. 


A few months ago, I started playing around with drafting her Anyway You Want Top. My first attempt was okay. I used a woven fabric to test it out.  I think it was too crisp and so I didn't get the drape that Rhonda achieved in her top posted here. The second challenge was the depth of the collar. I needed to bring it up a few inches.  In November, I was able to spend some time making another version of the top. This time I used a knit and got better results.

Going through the process has truly helped me overcome the intimidation of pattern drafting. Of course it's easier to buy the pattern; then make the adjustments, but it is so gratifying to be able to add uniqueness to the garments that I make. Rhonda has created the perfect platform to do just that with Free Pattern Friday.   Please visit Rhonda's blog for more details..

Here is my review of Rhonda's Anyway You Want Top.
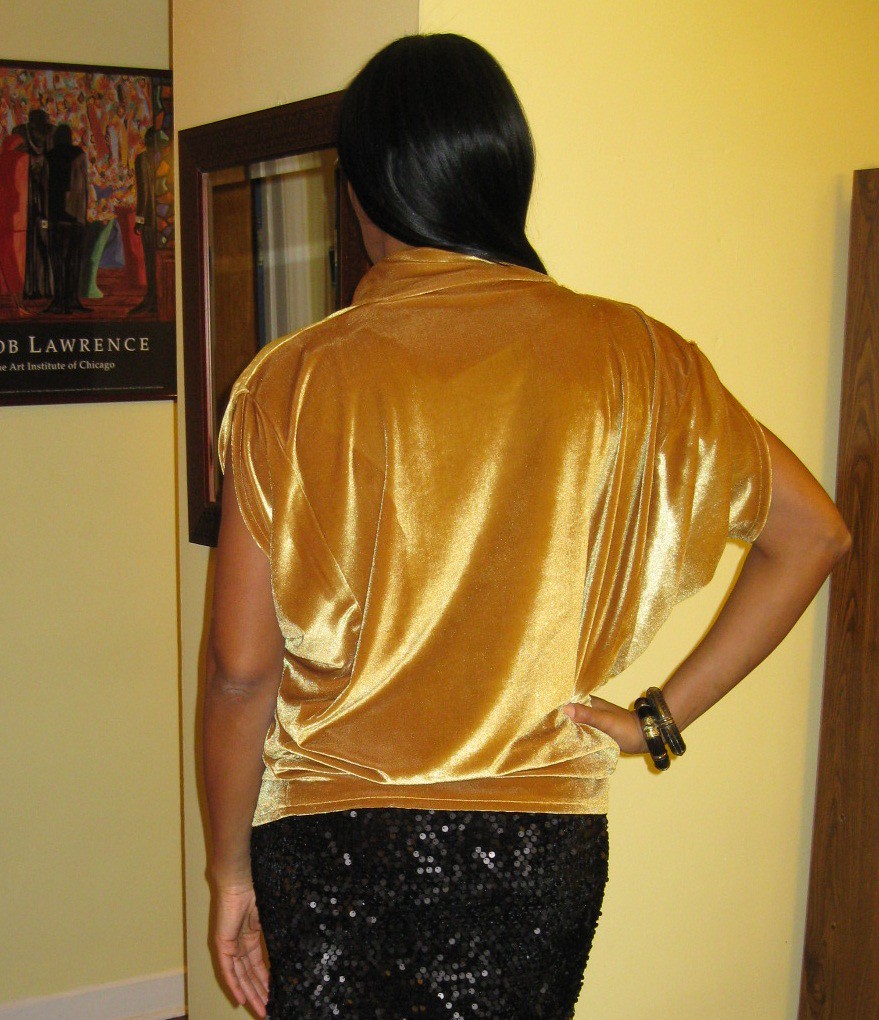
This top consists of three rectangles and two triangles, with split triangle sleeves that taper along the side of the body.   It can be extended to create a tunic or dress and the collar can be draped forward, backward, or across the shoulders. 

There are no limitations on the sizes you can create because it's based on your hip measurement.
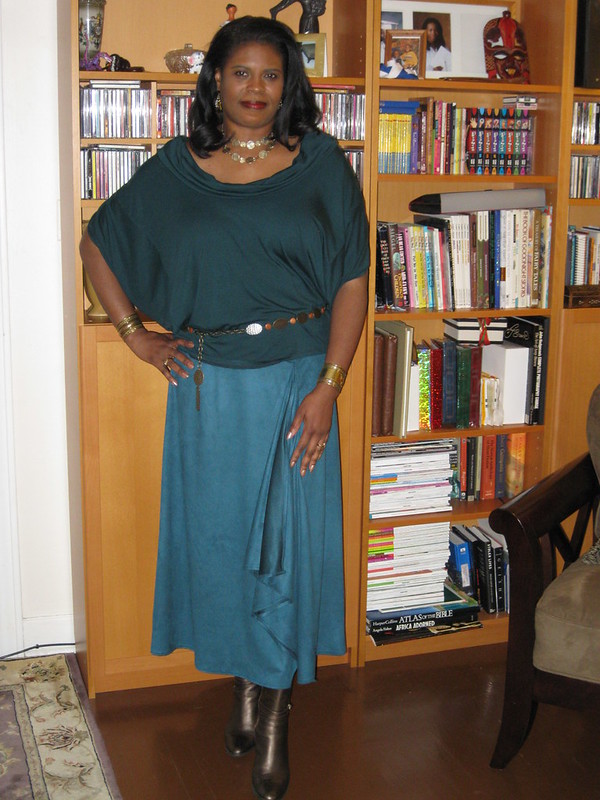

My first and second versions are closer to the silhouette of Rhonda's 
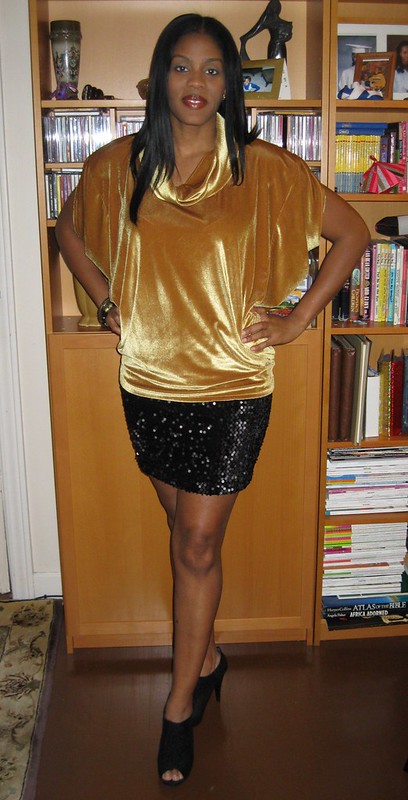
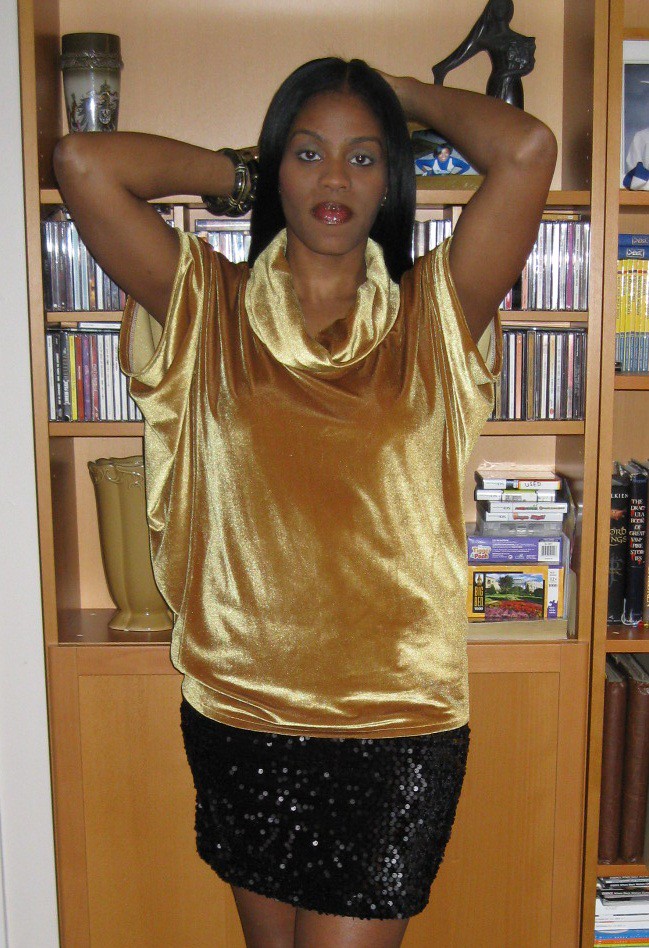
original design.  The fourth version (gold-for my sister), I modified the neckline by reducing the depth by 6 inches.  This version can not be draped about the shoulder as the first three versions.

Depending on the weave of the fabric, you can create different amounts of drape.  My first version is crisp while the second and fourth versions are fluid.
The instructions were super easy.  I was able to follow them with no problem.  I completed the gold stretch velvet top in less than an hour and a half.   That includes serging and pressing.

I really liked the shape and the versatility of this top.  No dislikes.

I tested this pattern using a variety of fabrics:  V1=polyester blend woven; V2 & V3 rayon knit; and V4=stretch velvet 

I'll at least make one more for myself, and I do recommend that you give it a try.

Thank you, Rhonda, for sharing your talent and knowledge.  I appreciate the effort you've taken to teach and help "me" realize my potential for pattern drafting.  You've made pattern drafting easy and stylish for all figures. 

BTW- This is the group project for the Haute Couture Club - Annual Fashion Show 2013.

Happy Sewing!
C

LinkWithin

Blog Widget by LinkWithin