Showing posts with label plaid. Show all posts

Sunday, January 26, 2025

Another 2024 Project In Review - Simplicity S9716


Talk about easy to sew, this pattern is just that.  I made the cardigan, which is perfect for pairing with other simple staples.  Here, I'm wearing it with a ribbed mocked turtle top from JC Penney and a pair of Vogue V8859 pull-on pants that I made a few years ago


Simplicity gives a very basic pattern description:  Misses' knit top, cardigan, and skirt.  It is available in sizes 4 through 20.  I used size 16 with modification. 


This simple cardigan does look like the drawing on the envelope.  I looked closely at the duster that the model is wearing to determine if the shape of the sleeve, the placement of the shoulder seam, and the drape along the side of the cardigan were the same as mine.  I wanted to achieve the same relaxed look of the cardigan as pictured. 

The instructions were typical and nothing difficult in them.  I think this is a great pattern to help beginners start to sew knit fabrics.

What I like most about this pattern is the simplicity of it.  It's super easy and stylish at the same time.  I don't have any dislikes.


The double knit that I used was purchased at New Rainbow Fabrics last fall.  It is a soft but sturdy knit that is perfect for a cardigan.  

I really only made two small changes:

  • Added belt loops to the sides using the fashion fabric
  • At the side bust area I "kind of" curved out that area for added room for a fuller bust.  I hope that makes sense.  I didn't take any photos.
I hope to make at least the duster.  It just a longer cardigan.  As I said earlier, this is a great pattern for beginners.  It can be used to create a mini wardrobe.  A good basic pattern for wardrobe staples.

So that's all for now.

Happy Sewing,
Cennetta


Wednesday, June 15, 2022

Mixing It Up With Simplicity Cardigan S8992 and Vogue Pants V8859


My little collection of TNT patterns is growing.  It's the simple style lines and easy sewing that makes some of these patterns extremely valuable to me.  Vogue V8859 pants I've made at least a dozen pair so far.  And I don't see myself retiring this one any time soon.  I love these pull-on pants.  As for Simplicity S8992, I've only made it once before.  The dress is below.  This could quickly become a TNT.  It is part of Simplicity's "Pattern Hacking" collection.  I like it a lot too.


I started this project with making the pants.  I wanted to add a tuxedo style stripe down the sides.  Like I said to try something new.  Personally, they turned out to be a great looking pair of pants.  After I finished them, I saw that I had about 3/4 yard of the knit fabric left.  So, I attempted to "squeeze" out a little cardigan.  But of course, I had to use another fabric for the stripe and the sleeve to complete it.  The difference in fabric didn't matter.  In fact, they complement each other.  


In the end, I not only made another great pair of pants, but I also have a nice little cardigan to match.

Just to provide some details on the fabrics, I purchased the ponte knit from Vogue Fabrics last winter.  I only bought two yards which was more than enough for the slim pull-on pants.  The ribbed black knit (used for the sleeve and the stripe on the cardigan) came from Joann's.  It was a remnant from another project.  


Also, for the cardigan I used snaps and buttons for the closure.  I didn't want to make buttonholes.  So, I sewed on snaps and sewed buttons to the right side of the front closure.


I like how the outfit turned out.  It is definitely an early fall project.  The ponte knit is too heavy for summer weather. Lol I'll save this outfit for the right time and weather conditions.  

Happy Sewing!

C


Sunday, December 19, 2021

Kitchen -Refresh For The Holiday


It's been awhile since my last post. These days I'm really struggling to find time to blog.    I want to get back to blogging on a regular basis.  Hopefully, I'll get a handled on it soon.

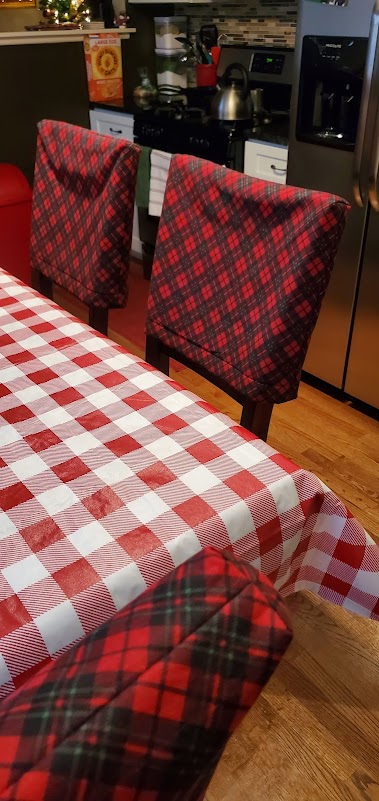
Today's post is on the kitchen curtains and chair covers I made to refresh my kitchen for the holidays.  It was easy and quick, taking only a few hours to complete. 

Like before, I didn't use a pattern. I literally measured and cut, pressed, stitched and pressed again.


 The chair covers are two cotton fabrics with fusible batting between them.  The covers provide a little cushioning and protect the wall from marring when the chair is pushed against it. 


The coordinating curtains are three pieces: two tiers and one valance in the middle. All cut free handed. Sorry no dimensions to note. Just me guestimating. It worked out fine. 

The fabric is from JoAnn's, Christmas cotton.  Natural fibers are so easy to press and work with. I pre-washed and pressed it before starting my project.

I really like how everything turnout. And the kitchen looks warm and inviting.  These will be up for awhile. 


😉😊

Cennetta


Saturday, October 16, 2021

Three Ways To Wear My New Shacket S9388

This is almost a wordless post. I was lucky to have my DD do the photo shoot today. So here are three ways I can choose to wear my new shacket.


Til next time.
C


Friday, October 15, 2021

Ready for October with My First Shacket S9388


Just in time! Fall is here! 

On this lovely Fall day temps are in the mid 60's.  It's suppose to be sunny with clear skies. The perfect Fall day.


Also, perfect for sharing my latest sewing project,  my first shacket. 

My last Inspiration post was all about, the now trending, shacket. All of the popular stores are overflowing with shackets. You can find them in a variety of colors, prints, and styles. But I love the idea of designing and creating my very own. 


Simplicity S9388 is the great pattern to customizing your shacket.  My plan is to make a few of these babies over a next few weeks. My first is finished; the second is cut and ready to sew; and the third is a little shacket challenge that Rhonda and I are doing. Please join us if you like. It's a fun project.

Today I'm also sharing my pattern review of S9388.

Button front jackets with yoke, front patch pockets and seam pockets. Long sleeves, button cuffs with pleats. Back yoke with pleat. Lined yokes. Sizes XS to XXL.

I used size medium/large with very little modifications.

It sews up like a typical oversized shirt with a front button placket. My jacket looks like the view B on the envelope. In addition to the patch pockets there are inseam side pockets, that I like.

The instructions were pretty typical too. Nothing difficult. I did change a few of the construction steps though.


There are a few things I like about this pattern:
  • The oversize style. Comfortable and great for layering.
  • Easy to sew
  • Lined yoke
  • Front placket.  Adds stability and nicer detail than the cut-on front facing design.
Dislikes:
  • Some seams were bulky and hard to work buttonholes around. This was due to my fabric selection. So it made it very important to trim some of the seam allowances.  This may also inspire a slight design change to eliminate the front yoke and/or use snaps buttons instead of regular ones.
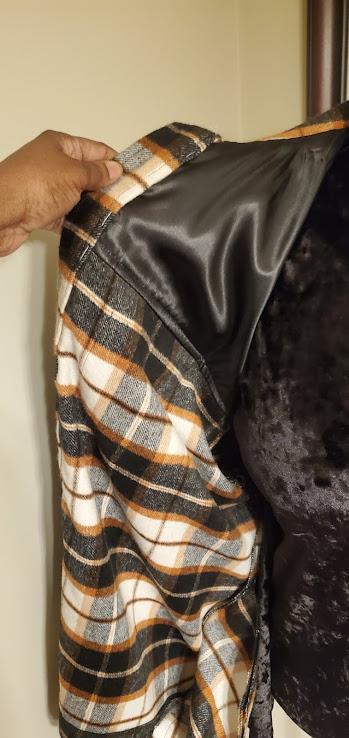
I purchased my fabric from Joann's.  It's a heavy plaid like fannel. They carry it in a few colors.  It's soft and warm, very easy to work with.

I cut between a medium and large, mostly large (upper body). None of my usual fit adjustments were needed. It's extremely over-sized.

Initially,  I added an inch to the sleeve length. Then I had to cut it off plus some. The cuff rests on the upper part of my hand. But that's alright. I I want to be able to wear a hoodie underneath. 

For the underarm curve, I did not trim the seam allowance.  Instead I clipped along the curve to eliminate that plucker look in the armsyce top-stitching. 

My side seam pockets were peeking out at the hem. So I tacked the bottom of the pocket to the hem.

My hem is 1.5 inches.

Note : no serious pattern matching for this project.

I enjoyed making this shacket. It was easy to sew. I recommend this pattern. There are so many style options. 

More to come. Stay tuned.

Happy Sewing!

C


Wednesday, December 16, 2020

Plaid Hat Vogue V8403 and Pants Simplicity S2315 To Match


The brown plaid pant suit is complete!  I actually finished the pants and hat almost two weeks ago.  The pants is Simplicity S2315.  I've used this pattern twice before.  So I won't review the pattern again.  You can read the initial review here. 

The hat is another view of Vogue 8403.  There was enough fabric leftover to make a hat.  So I did.  Lately, I'm trying to make use of as many remnants and scraps from previous projects.  I have a really tough time tossing out pieces that are a half yard or more.  


This hat was really fun to make.  I completed it while watching a Hallmark Christmas movie.  So, it took less than two hours to make.  I changed a few of the construction steps.  Nothing earth shaking.  It was a matter of taking my time with the stitching and pressing as needed.  


I enjoyed the process and will probably make at least one more view of this hat pattern.

Happy Sewing!

C


Thursday, December 3, 2020

Simplicity S8844 Mad About Plaid


This plaid blazer is part of my Brown/Cream Wardrobe Capsule.  (I know it probably seems like I'm all over the place.  But there is a method to my madness. Tee Hee.) Anyway, I've been wanted to sew more plaids this year.  And I was happy to be gifted this stretch plaid suiting from Minerva Fabrics.  When I first selected this fabric, I really didn't know which jacket I would make.  I wanted to choose a pattern that would complement the plaid.  Simplicity S8844 was one of three jackets that I'd plan to make before the end of the year.  


The pattern is described as Misses'/Miss petite unlined blazer with front variations with individual pattern pieces for B, C, D, and DD cup sizes.  It comes in sizes 6 through 24.

The princess seams and the individual cup sizes are what sold me.  My hoped the FBA pattern piece would only need tweaking.  So I used size 16, view A, with still a lot of modifications.  The changes included fit, construction, and design.

For the most part my jacket looked liked the one on the envelope.  The modelled jacket looks a little to full in the upper chest area though.  The instructions were typical.  I didn't see anything difficult in them.  Half of them I didn't follow because I changed a lot of the construction steps and techniques to suit my own preferences.

There were a few things that I like about it and a few things I didn't care for.  I'll start with the likes:

  • The separate pattern pieces for the cup sizes.  I wanted to spend less time adjusting the pattern. 
  • Princess seams.  Easier to adjustment
  • Gathered sleeve cap
  • Separate pattern pieces for the upper and lower collar
  • Separate pattern pieces for the front and front facing
Dislikes:
  • Length of the shoulder seam.  I don't under stand why the pattern company makes them so long.  I removed about 1.75" from the end.
  • "Unlined" blazer.
  • One piece sleeve.  I prefer a two piece sleeve
My fabric choice is a stretch suiting from Minerva Fabrics.  It has a slightly coarse hand.  It sews and presses beautifully.  The plaid is Glenn plaid, I think.  It's uneven.  The matching of the plaid was a bit of a challenge.  I came close with the matching; it's not perfect but wearable. For the lining, I used an anti-static cream colored lining from Vogue Fabrics.  Nothing fancy.  I just pulled it from my stash.

I didn't have to make my usual FBA.  I was able to tweak the DD pattern to fit.  Then I made my usual swayback, prominent shoulder blades, and lengthening the sleeves. 


My other changes were more construction and style preference changes.  They are:
  • Lined the entire jacket
  • I made my own shoulder pads.  There was a hallow area between the upper chest and armpit area.  So I made them larger than the average pad.
  • I added hem facings to the sleeve.  This change was because I didn't add enough length to the sleeve.  This worked out fine.
  • Cut the pockets of the bias.  I love the weight of the interfaced patch pocket.  And I love the bias cut of them. It plays of the plain on the front of the jacket adding a little more interest to the style.
  • I sewed on the pocket after the jacket was assembled.
Note:  I need to move the button about 1/2" up.  The length of the front edge are the same.  I just need to move the button.  I noticed it after I saw the pictures.


I want to make this again soon.  But before that happens, I want to make a pair of pants.  I had enough fabric left.  So hopefully, I will share that project soon.  They are cut and ready to sew.

I recommend this pattern to all level sewists.  Make a muslin first.  I had to make two ;-)  It's important to test before you cut into your fashion fabric. 

Overall, I happy with how this jacket turned out.  It will be in high rotation.  The color looks great with red, and of course, brown.


This blazer is not difficult to sew, but there may be some adjustments needed.  Adding a lining was relatively easy to do.  I just used the jacket pattern pieces to do so.  The back facing looks much nicer with the entire jacket lined.

Until next time, happy sewing!
C

LinkWithin

Blog Widget by LinkWithin