Showing posts with label cotton. Show all posts

Sunday, May 11, 2025

First Summer Dress of the Season - McCall's M8449


Pattern Description:

Pull over dresses have placket, collar, sleeve and length variations.  View C has front buttons on placket.  Separate optional sash included.  I made view B with modifications


Pattern Sizing:  

8 to 26.  I used size size 16.  I was  lucky that the width across the the bust area had plenty of room.  So no FBA.


Did it look like the photo/drawing on the pattern envelope once you were done sewing with it?  

Yes, it did.  I added buttons to the placket. 

Were the instructions easy to follow?  

The instructions were easy to follow.  Nothing complicated or confusing in them.  My biggest concern was the placket.  It is a focal point of the dress, and it has to be perfect.  I'm happy to say it turned out well.

What did you particularly like or dislike about the pattern?  

I like the overall style of the dress.  This is the season for shirt dresses.  And this one was perfect for what I had in mind.  No dislikes.

Fabric Used:  

This striped cotton blend came from The Discount Textile Warehouse on West 21st Street in Chicago.  It is tightly woven with a dry hand.  It is wrinkle resistant and the stripes are vibrant.  No issue with sewing this fabrication.


Pattern alterations or any design changes you made: 


I made minimum alterations/changes.  As I said above, I like the buttons on the placket.  So I added them to this view.  I added a little width across the upper back.  I didn't have enough fabric to cut the collars in one piece.  For the under collar I created a chevron affect and for the upper collar the stripes are vertical.  No other changes.

Would you sew it again? Would you recommend it to others?  

Yes, I would like to make the sleeveless version.  And yes, I do recommend it to others.  Just take your time making the placket.

Conclusion:  

This was a great start to my summer dress wardrobe.  I'm happy with how it turned out.  It is pictured with a white belt that I purchased.  I really would like to find a wide navy belt to complement this summer dress. 

Happy Sewing!
 

Thursday, January 9, 2025

McCall M7978 - Blouse From Muslin to Fashion Fabric


In the Spring I posted this "Notes on a Pattern - McCall M7978" with all the details on the fit adjustments.  It took six months to finally make the blouse.  So here it is with a full pattern review.


Pattern Description: 
Misses' tops:  Tops A, B, C, D have gathered front and back, self faced yoke, button and loop closures, forward shoulder seams and gathered sleeve variation and band.  B: Flounce, A, B, C: Cuffs.  D: Sleeve hand, neckband and ties in one.  I made view B with modifications.

Pattern Sizing:  I used size 16 with modifications and fit adjustments.

Did it look like the photo/drawing on the pattern envelope once you were done sewing with it?  Yes, for the most part.  I didn't have enough fabric for the tie.


Were the instructions easy to follow?  Yes, the instructions were typical and nothing difficult or confusing in them. 


What did you particularly like or dislike about the pattern?  There several things that I like about this blouse.  For starters:  the neckline and the midriff.  I also like the tie and the full sleeve of A.  I'm hope to make view A with a tie and the flounce of view B.  

My only dislike is the front closure.  This is a very easy fit, though.  I simply built in a little more width across the front to overlap the button area.  So the placement of the buttons is an inch from the front edge. 


Fabric Used:  One of my dear friends' mom passed and she gifted me with some of her fabrics.  This is a paisley print cotton.  It has a smooth hand, and it sews and presses beautifully.  The yardage was about a yard and a half.  So I was unable to include the tie for this version.  Next time. :-)

Pattern alterations or any design changes you made:  All of my fit adjustments  are noted in my "Notes on a Pattern" posted in May 2024.  See link above.  

Would you sew it again? Would you recommend it to others?  Yes, I plan to make at least one more version.  Also, mentioned above.  And yes, I do recommend this pattern with modifications based on the sewist's body shape and preferences.  You can mix and match the design elements to your liking.

Conclusion:  This pattern has a few different style options and the "V" neck is great for us busty ladies.  Be careful with the placement of the buttons and the depth of the "V".  The closure as is may gap open and "V" is very low.


All level sewists should be able to make this blouse.  It is definitely more than your average wardrobe builder top. ;-)


Happy Sewing!
C


Wednesday, May 8, 2024

Easy, Breezy Summer Dress - Simplicity S8735 and Simplicity S8637


There is nothing like a floaty, breezy summer dress.  This one has been in the making for two years.  Last week I finally finished it, and I am glad I did. 


Here again, I decided to use two different patterns to come up with the style that I wanted.  I used Simplicity S8735 for the bodice and Simplicity S8637 for the skirt and the flounce sleeve.  

I decided to use S8735 because it included different patterns for the cup sizes.  So all I needed to do was select my cup size and tweak it a little bit.  For the skirt, it was very easy.  No serious fit adjustments; just a little tweaking.  I used size 16 for both.  Both patterns are over six years old.  But they may be still in print. 


Because the bodice of S8735 is above the waist, my dress also sits above the waist.  That's something that you need to pay attention to if you're splicing patterns together.  

What I like about my new dress is:

  • The wrap - I love a wrap dress.  Perfect for my body shape.
  • Princess seam - easy to make fit adjustments.  In this case, having the different cup sizes made it even easier.
  • The flounce on the skirt - Who doesn't love a full skirt dress. 
  • The flounce of the sleeve - I wanted to try something a little different.  This is a cute style design.

No dislikes.

The fabric is from Mood Fabrics.  They may not have it in stock.  It's been in my collection for at least 4 years.  But I’m sure they have similar cottons that would look great in a summer dress.


I'll wear this fit and flare beauty as soon as an opportunity presents itself.


More sewing projects to come.  So stay tuned!


Happy Sewing,

C


Thursday, June 30, 2022

Summertime Fun Dress in Ankara Fabric - Simplicity S8594


Today is the last day of June and it is 98 degrees HOT!  Great time to wear my latest creation, using a red and black, Ankara fabric that I purchased at the Textile Warehouse. I began sewing this dress last Thursday and finished it on Sunday.  

My photographer, DD, was available to take a few pictures of me wearing it this afternoon.   The sun was high and bright.  The heat was on. Lol

This will be a short and sweet review as I don't have pictures of the pattern alterations.  Sorry.  If you check out many of my previous princess fit adjustment makes, you'll get a good idea of the changes I had to make for this pattern. 


Pattern Description:  Misses and Petites with bodice and skirt variations.  The bodice options include a crewneck with slit or a halter, and the skirt can be made straight or flared with pockets.  I made View C with modifications, size 14 graded up. 

Did it look like the photo/drawing on the pattern envelope once you were done sewing with it?  Yes, it did.  Of course, I lengthen the skirt and made a few other changes.

Were the instructions easy to follow?  Sorry, I really didn't read the instructions.  I've made this style dress many, many times before.  At a glance, I guess they were typical.

What did you particularly like or dislike about the pattern? I liked the halter style of the dress.  And I thought it would be a great style for the fabric that I selected.

Fabric Used: I purchased this Ankara fabric from the Textile Warehouse in Chicago on 21st Street.  They have a variety of colors and prints for the reasonable price of about $6.00 per yard.  It is 100 percent cotton.  It also washes and presses very well.  That's something I always appreciate with natural fibers.  I love the print and the vibrant red and black colors.  


Pattern alterations or any design changes you made:  I made a ton of changes.

  • FBA and graded the pattern up.  When I purchased this pattern, the largest size grouping available at the store was size 14. So, I made it work for me.
  • I shortened the straps by 2 inches, much too long for me.
  • NOTE:  I forgot to make a sway back adjustment.  Not too bad though.  If I use this bodice again, I'll be sure to do it to remove the excess fabric at the lower back.
  • Lengthen the skirt.  Also, I barely had enough fabric for my desired length.  On a few of the lower corners of the skirt, I had to "piece" the corners together.  See picture below to see an example.  You can hardly tell. wink, wink.
  • I installed an invisible zipper instead of a regular one, only because I didn't have one in my stash, and I refuse to buy another one. 


Observation:  The bodice is a little low at the underarm.  I'd would bring it up about 1.5 inches for a better fit and look.


Would you sew it again? Would you recommend it to others?  Yes and yes.  I would consider making it again.  This view, view C, which I like the most.  Also, I recommend it to others.  It's a great little summer dress that is not difficult to make.

Conclusion: I am pleased with how this dress turned out.  The fit is almost perfect. and I really like the combination of the fabric and style.  Great little summer dress that beginners and experienced sewists could make with no problem.

Happy Sewing!
C


Sunday, December 19, 2021

Kitchen -Refresh For The Holiday


It's been awhile since my last post. These days I'm really struggling to find time to blog.    I want to get back to blogging on a regular basis.  Hopefully, I'll get a handled on it soon.

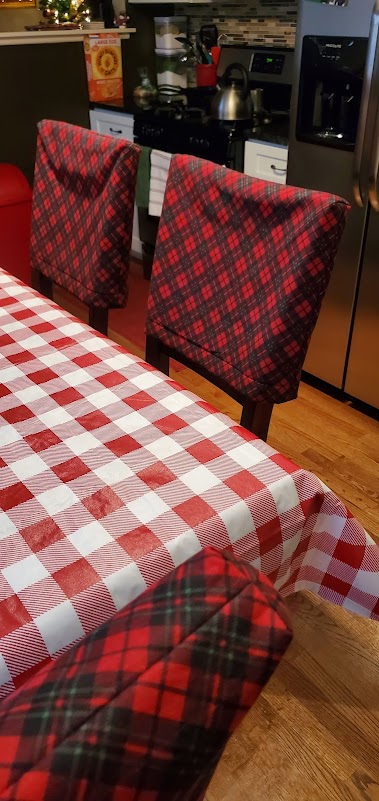
Today's post is on the kitchen curtains and chair covers I made to refresh my kitchen for the holidays.  It was easy and quick, taking only a few hours to complete. 

Like before, I didn't use a pattern. I literally measured and cut, pressed, stitched and pressed again.


 The chair covers are two cotton fabrics with fusible batting between them.  The covers provide a little cushioning and protect the wall from marring when the chair is pushed against it. 


The coordinating curtains are three pieces: two tiers and one valance in the middle. All cut free handed. Sorry no dimensions to note. Just me guestimating. It worked out fine. 

The fabric is from JoAnn's, Christmas cotton.  Natural fibers are so easy to press and work with. I pre-washed and pressed it before starting my project.

I really like how everything turnout. And the kitchen looks warm and inviting.  These will be up for awhile. 


😉😊

Cennetta


Monday, May 18, 2020

The Shirt Project 2020 - Simplicity S1166 In Review


The making of these three shirts is the beginning of my second Shirt Project.  About two weeks ago, I found the shirts in a bag while inventorying my UFO bin.  Everything was already cut and marked.  All I needed to do was sew them.  This was the perfect project to finish while I wait for my button order to arrive.

I made this shirt once before, but I didn't do a full pattern review.  So today I'd like to share my thoughts on this pattern. 

Simplicity almost never gives a good description of the pattern views. For this one they just said, "Misses' blouse, skirt, and bra top.  How vague is that?


My description for view B - Misses' blouse with dolman like 3/4 length cuffed sleeves with wide collar and curved hem.


The pattern comes in sizes 6 to 24. The sizes are grouped: 6-14  and 16-24.  I used size 14 with modifications.

This drawing and the envelope photo do not match.  The drawing is the same silhouette as my blouse, but the blouse on the model is different.  Either the blouse she is wearing  is three sizes too big or the pattern design is for an all together different pattern than what is provided in the envelope.


The instructions were easy, and I didn't see anything confusing in them.  I did make some fit adjustments and minor changes for my versions.

My likes:
  • Sleeve design
  • Wide collar
  • Cuffs
No real dislikes other than the misinterpretation of the design modelled on the envelope.


I used three different fabrics from three different sources:
The pattern alterations are some of my usual adjustments:  FBA plus I lowered the bust dart; and I lengthen the blouse about a few inches.

Design/Construction changes:  I did something a little different for each blouse
  • White - No top-stitching except for the cuffs.  I didn't do a rolled hem.  I serged, turned and sewed the hem.  Added darts to the back.  Stitched in the ditch of the shoulder seams instead of tacking the facing to it.
  • Stripe - Followed the instructions except for the hem and tacking the facing to the shoulder seams.  The collar design change for this one was due to limited amount of striped fabric.  I didn't have enough for both upper and lower collars.  So I used some of the white pima for the under collar.
  • Blue - Same as the stripe blouse. No design change.

So far I've made a total of four blouses using this pattern.  Why stop now?  I can see myself using it again.  And I do recommend it to others.  It's an easy sew.  All level sewists can enjoy making this blouse.

I noticed a few areas where I could tweak the fit a little more.  But overall I'm pretty pleased with how these turned out. They are good wardrobe staples and will be in high rotation.  Perfect pairing with jeans and pull-on pants.  


My tips:

Buttonholes
Collar

My first blouse made 2016.


Side Note:  Whenever I make shirts, I include at least one white one.  You can never have too many. ;-)


Happy Sewing!
C


Friday, May 15, 2020

Shirt Making Project Spring/Summer 2020 - Simplicity S1166


Sometime in January, I decided to do another "Shirt Making Project".  To start, I cut out three shirt using Simplicity S1166.  These shirts were in a bag in the UFO bin that I had almost forgotten about.  This week I decided it was about time I made them.  This is a pattern that I used before.  The initial review and project here.

I like the shape of the collar and design of the sleeves.  These details make it a little better than your average button down shirt (to me).  They can  also make or break the project as they are focal points of the garment. Making this batch of shirts was an opportunity to do a lot of top-stitching and paying attention to the simple details and construction processes.

Tip 1:  Construction of the Collar

The collar is large and curvy ending in the typical point on each end.  There are a few approaches to making the point just right.  I posted Sandra Betzina's method of redrafting the collar pattern.  The details:  Part I and Part II


For these shirts I used another method.  Sorry I don't know what it is called.  But, instead of sewing the seam and pivoting at the corner.  I made it "squared" at the corner then I pivoted to continue.  This is done in addition to "not" interfacing the corners of the collar.


The next few steps are critical:  Use a pointer/creaser to help turn the collar inside out using the point to push the tip of the collar out.

Next, this is key:  Pressing.  I made sure I gave that collar a great press.


My last step is the top-stitching.  I use thread at each point to help guide the collar under the needle.  Often, at the corners of a garment it is difficult to get the end to move through the stitching area.


This method is also good for the cuffs.


Tip 2:  Construction of the Buttonholes

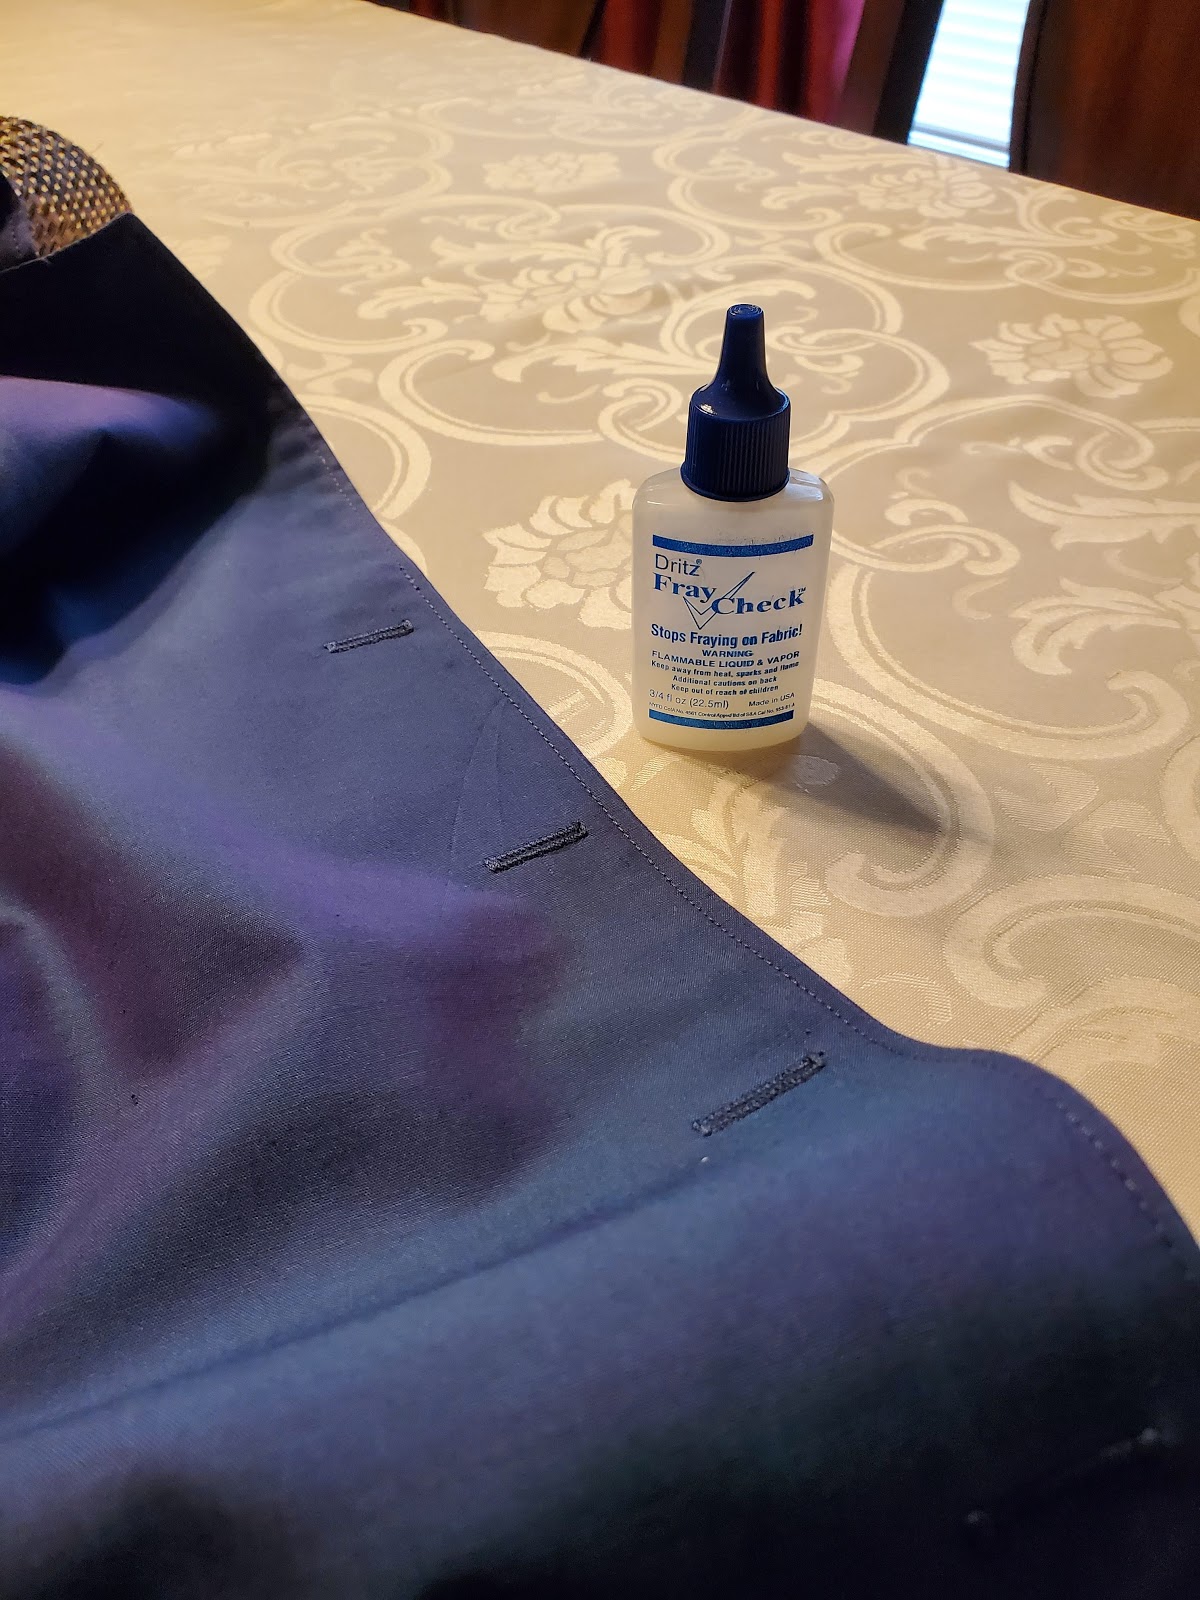
These days I'm making a lot of garments that button down the front.  This is another focal point and I want it to look as good as possible.  I've said this many times before.  I test before I do it on my actual project.  And for each shirt, each type of fabric I tested making the buttonholes.

After successful testing, I sew the buttonholes on my garment.  They are not complete without some Dritz Fray Check.  After the buttonholes are constructed, I apply fray check and allow it to completely dry before opening the buttonholes.

So that's it for my tips.  I hope this information is helpful.

Happy Sewing!

C

LinkWithin

Blog Widget by LinkWithin