Showing posts with label alterations. Show all posts

Tuesday, May 19, 2020

My New Floaty Romantic Dress - McCall M7974 -


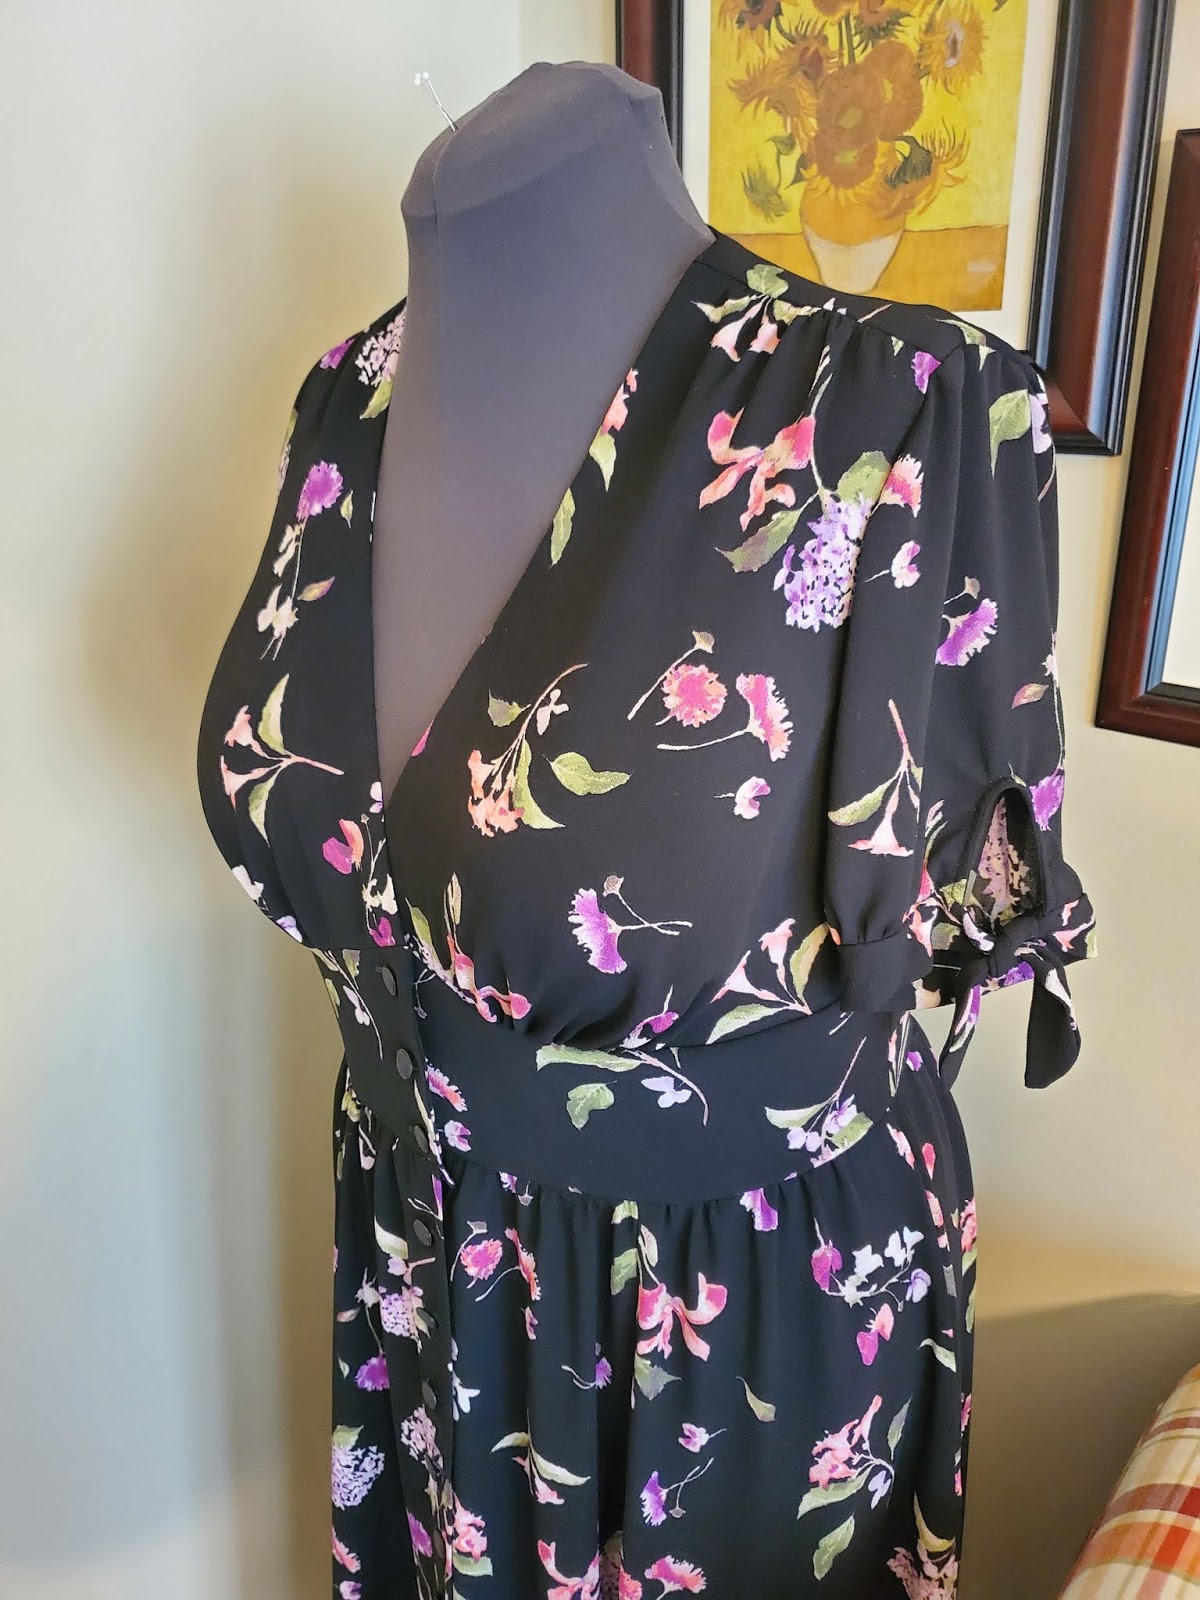
This is one of those feel good and pretty dresses that you cherish for years to come.  I love the way it moves.  The floaty fabric dances about you as you walk.   It feels soft and spongy.  The surface has that pebble crepe texture, but it is not rough. 

This is a closeout fabric that I purchased from Mood Fabric last winter.  The fabric was labelled item# 327930 Black Byzantium and Sage Green Polyester Crepe.  Unfortunately, it is no longer available.


This pattern has been made by so many fabulous sewists on Instagram.   All of the beautiful dresses that I saw inspired me to make it too.  I put it on my "To Make List" last year in July soon after I purchased the pattern.  And I think around September I made the pattern adjustments.  I didn't see the need to make a muslin because I'd made dresses with a similar front bodice.  So, I just went from adjusting to laying out the pattern and cutting the dress out. 

I was able to make my own romantic floaty floral dress for which I am very pleased.  So hear is my review.  


The pattern description  given by McCall's  is misses' dresses: buttoned front dress. A, B. C. D has sleeve and length variations, fitted bodice with front midriff, back yoke and gathered skirt with side seam pockets.

It is available in sizes 6 to 22.  I used 16 with modifications.

I made view A with the length between A and C. The skirt takes up a lot of yardage.  I had four yards of the crepe.  It wasn't enough for the length of view C.  

My dress does look like the illustrations.  The bodice is less fitted then I expected.  And that is true for the dress on the model pictured on the envelope.  The "V" neck is deep.  So I am wearing a lace trim full slip underneath.  It's needed for modesty for the dress as a whole because of transparency.  

The instructions were typical.  I've seen these steps in many, many other similar patterns.  There was nothing confusing in them.


My likes for this dress are many:
  • The sleeves of view A and C
  • "V" neckline and midriff
  • The yoke back
  • The fullness of the six panel skirt
  • Buttons instead of zipper.  Nice change
Dislikes:
  • None

I made my usual fit adjustments:


  • FBA -  I started out with a much larger adjustment.  I changed it.  So It might be a little hard to follow what was done.  But here is the photo of the front bodice and the facing.

  • Prominent Shoulder Blades - I added about an inch to the width of the back.  Then gathered the excess for more ease at the shoulder blades.  At the waist, I just gathered at center back.  So it slightly change the design.  Excess could also be taken up with waist darts.  I followed the design with gathers. 
  • I used a bias strip of the fabric to finish the keyhole on the sleeve.  It looks better to me. ;-)
  • Skirt Length Change - I just cut it where I wanted between view A and C.

My chest needs some sun. Tee Hee.


Of course, I have to make it again in a solid color next time. I highly recommend this dress to others.  There are a lot of buttonholes to sew and a lot of gathers to make, but it is worth it.  In the end, you will have a lovely dress.

I  am glad I decided to make it.  I think the sleeves of view A and C are adorable, and I will probably mix and match them with other patterns.   

Happy Sewing!
C


Thursday, January 16, 2020

Notes on a Pattern - New Look NL6013 Jacket


New Look 6013

It's time for another "Notes on a Pattern".  I spent last Saturday afternoon/evening working on my first jacket of 2020.  My initial pattern adjustments were made late 2019, and I cut the jacket out the first week of January 2020.  So on Saturday everything was ready to sew.

I became interested in making this jacket last summer when I saw a few projects posted on Instagram.  I've wanted a shawl collar, princess seam jacket for a while.  Jackets are something that I'm lacking in my wardrobe.  This one is a good start to filling the gap.

So, let me start with some basic information about the style of the jacket and pattern information.  This jacket is part of a New Look wardrobe pattern (NL6013).  It is to make an unlined with princess seams, pleated sleeve caps, and a shawl collar.  The closure is one loop at the base of the collar.  It is available in sizes 4 to 16.  I used size 16 with modifications.


The instructions are typical, easy to follow, and no points of confusion that I could see.  My jacket does look like the drawing. But I made a lot of changes to satisfy my own personal taste for construction and sewing techniques.

First, allow me to start with the initial adjustments.  I include this information a lot.  The reason is some of you may need to make similar adjustments and my changes may be helpful to you.    These pattern adjustments are typically the initial adjustments.  Then as I sew, I continue to fit as needed. BTW - I didn't make a muslin. 

So, I begin with some tissue pattern fitting it assess how much more or less circumstance space I'll need.  And to see if the jacket is the right length for me.  Below are two photos with my basic adjustments:


  • FBA 
  • Tucks on the front jacket and the collar at the fullest of the bust.  It helps eliminate gapping along the collar opening.
  • Swayback adjustment.  Both back patterns are adjusted.  
  • Slight Prominent shoulder blade adjustment. Not shown in the pattern adjustment here.  Sorry.
  • Lengthen the entire jacket by 2".  It just needed to be a little longer for me.
  • Not shown.  I lengthen the sleeves by 1.5"
Once I put the body of the jacket together, I continued to fit.  My biggest issue was at the upper and fullest of the bust area.  There was way too much fabric throughout that area.  I tried several times to eliminate the extra with little success.  It wasn't until I ripped out the seam from the upper bust to just below the bust area was I able to get a good fit.  Wish I had done that in the first place.  I literally pinned out the excess with the jacket on one side at a time. Then, I basted the seam to check if the fit was right.  BINGO!  It's a fit!  The other area of  change was the lower back and lower side seam areas.  These changes didn't take much time to adjustment as I often make these changes after the swayback adjustment.

Now onto my other preferred changes for jacket sewing. 

  •  First, lining this style of jacket is a preference.  Secondly, my fabrics dictated the need for a lining.  It's loosely woven and soft.  The lining adds support and stability.  With the lining, the jacket guides on.  Plus, quite a bit of time and effort goes into a well made garment; it's good to make it last.


  • Interfacing the hemlines (not all are shown here), upper back area, and adding sleeve heads for support and stability.


  • Welt pockets.  I change them from mock to real welt pockets.


My fabric is a medium weight tweed wool blend.  That was great to work with.  It's from Mood.  In the online descriptive information, it indicates that it is pre-shrunk.  But I did stream it using the iron on highest steam setting as an added precaution.

I was well pleased once I completed all of the fit adjustments and construction changes. My after thoughts were: 
  • I should have made a muslin.  I spent a lot of time tweaking the fit.
  • Hurry, transfer the changes to the tissue pattern, but leave some room for varied fabric weaves and textures.  Because a tightly woven fabric may require a little more width across the bust and upper back. 
  • My pockets look nice, but the welt could have been an inch longer.


This is the end of this installment of "Notes on a Pattern".  I hope to show you my finished jacket soon.  It needs a hem and a button sewn on.  So, I hope this posts has some helpful information or at least encourage someone to sew a jacket.  It's a great feeling of accomplishment when you are able to complete a wearable, likeable jacket.  I recommend this jacket pattern.  It's cute. ;-)

Happy Sewing!
C


Friday, December 6, 2019

Notes on a Pattern - McCall M8003


Have you ever been so excited about a pattern so much that you envisioned wearing the finished garment with enormous confidence? Or have you ever worked so hard with resolving a fit issue that in the end still did not meet your standards?  Or have you found it too hard to just give up on making it just right for you?  Well, it happened to me.  AGAIN...,

This time with McCall's M8003.  The process started out as always.  I liked the pattern. I cut it out.  I made my pattern adjustments, so I thought. I cut out the bodysuit (at least that's what we used to call them in the 70's).  I put it together feeling like I'd followed all the steps just right.

Now, It's time to try it on minus the neckband, sleeves, and closure.  Multiple issues...,

UGH..,

Okay, Okay, let me give you some of the basic information about the pattern before I continue.

The Pattern Description from McCall's website.  Close fitting tops, or pullover with snap closing, mock collar or neck band, has length variations. B: Contrast yoke.  Sizes:  6-22 in two size groupings.


I used a ITY polyester/lycra knit from Fabric Mart Fabrics.  Love this fabric.  I purchased multiple yards in multiple colors.  Anyway, it was perfect for this bodysuit.

The instructions were clear and very easy to follow and so was the construction techniques.


After I examined my top and noted all of the issues, I looked back at the top modeled on the envelope and saw some of the very same issues.  My initial thoughts were, I didn't allow enough for the FBA.  But the model doesn't appear to need an FBA; yet the issue exist for her as well.

My first and most visible problem was the yoke.  I had adjusted it to include a partial FBA.  When I tried it on, it didn't fit across the upper chest.  My initial adjustment is below.

Yoke over the front top to show adjustment for FBA
 So, I ripped out the yoke.  Removed the adjustment from the yoke pattern, then cut another. To guarantee no gapping, I added clear elastic along the hem edge of the yoke before hemming.  That seemed to work.


Below is a picture of the modeled top on the envelop.  Take a look at the hem of the yoke.  So, it might be good  idea to add the elastic to help keep the shape of the yoke.  Again, another solution, may be to to lengthen it.  Maybe that will resolve the issue.


Next, I have vertical drag lines pointing to the shoulder.  My thought was the FBA and not enough length along the torso could be the cause.  Again, the modeled top has the same issue when the arm is in a relaxed state.

 
On my dress form the bodysuit looks perfect.  But on me a different story. I was talking to my friend, Rhonda, about the fit issues.  She suggested, cutting it off below the waist and then adding a new panty section with a little extra length.  Testing the adjustment to see if that works.  Well, I had already gifted this one to my sister.  She came over, tried it on, and it fit her with no problem. 


Sorry this is not a happy review.  I struggled with this one.  It took me hours to get it to a better state.  And I was still not totally pleased with the results of my efforts.  To complete the adjustment section of this post, my other adjustments are below:  FBA, prominent shoulder blades, and slightly forward shoulder.  No swayback or center back seam added.  It's a bodysuit and will be held close to the body.


I used the Sandra Betzina's FBA (no dart method).

I did make one design change, which I am very pleased. I used Rhonda's shirred wrist design to create a shirred forearm.  It looks great.  That will be the very next post.

I've put a lot of time into the bodysuit already, but I feel like giving it one more try!

Parting Shot:  I was gifted this snap fastener tape over fifteen years ago.  Never knew how I would use it.  So, instead of placing individual snaps on the closure, I used the tape.  Perfect.


Happy Sewing!
C

Wednesday, June 20, 2018

Notes on Two Patterns - Vogue 1498 and McCall 7775


Good afternoon everyone!

I wanted to share some thoughts on upcoming sewing projects.  Today's Notes on "Two" Patterns is about two dresses I plan to make during the spring/summer 2018.  Monday I spent time anaylzing and fitting patterns for my summer wardrobe.  So far, I'm working on two color palettes: one is black and white with a little color here and there and the two shades of green.  These are the basic colors for the wardrobe capsules.  I'm still trying to work out the garment types for each capsule.  So that's a work in process.

I bought McCall 7775 and Vogue 1498.  They have similar upper body style, right?  Yes and no.  McCall's 7775, views A/B are just one front pattern piece, but Vogue 1498 has a two piece bodice front and a front slim skirt.


McCall's 7775- I was skeptical about trying the views A/B because of the neck and bust area.  There is possible gapping at the neck.  The finished bust for size 16 is 40.5".  I need a little more width. I put the pattern against my body to see how it would fit my upper body.  The armhole area is low, the apex was close to the center front seam instead of the center of the pattern piece, and not enough width.  Definitely there are adjustments needed.   Then, I examined views C/D.  The fullness of the bust area for the same size was a few inches wider.  These views have pleats in the neck area, which gives more volume throughout the dress.  I like this view too, but was more interested in making view A/B first.    So back to view A/B.  Initially, I hated the idea of making a FBA.  But it was the only way I could have a dress that fits well.

My next step is to make the required adjustment.


  • I slashed and spread the front dress the desired amount, which includes some wearing ease.
  • The resulting change created a bust dart.  I rotated it slightly, because I think this location looks a little better than a horizontal bust.
  • This change created width as well as length.
  • I added to the armhole area to bring it closer to the pit of my arm.
  • The front facing also required the same adjustments as the front dress.  I used the front dress pattern as a guide to make those changes.  The picture below shows the front facing over the front dress.


Back adjustments.


  • There is a center back seam, which is great for me.  So I didn't have to add one for the swayback adjustment.
  • No prominent shoulder blade adjustment as most of the shoulder area is exposed.  Will see how that works after the muslin fit.
  • Swayback adjustment - tuck across the lower back area, slight curve out at the lower back, and add the amount of the back tuck at the hem (sorry, hem not pictured here.  The pattern was long and this was a minor adjustments).
  • Update - I forgot to raise the armhole on the back dress pattern. I will certainly do that before the muslin fit.
My plan is to make a muslin sometime this week.  When the fit is right, I will make the actual dress.  So stay tuned for the final outcome of my fit of this pattern.

Vogue 1498


Love this dress. It's slimming, sassy and sophisticated all at the same time.  What do you think?  Anyway, it's a winner for me.  This number has a similar neckline of McCall 7775.  A plus is that the bodice is princess seam, which makes the FBA a little easier to fit.  No super wide bust darts to fiddle with.  The details in another post, though.

Coming soon McCall's 7775, View A/B dress.

Happy Sewing!
C


Sunday, May 28, 2017

McCall 7575 - The First Edition


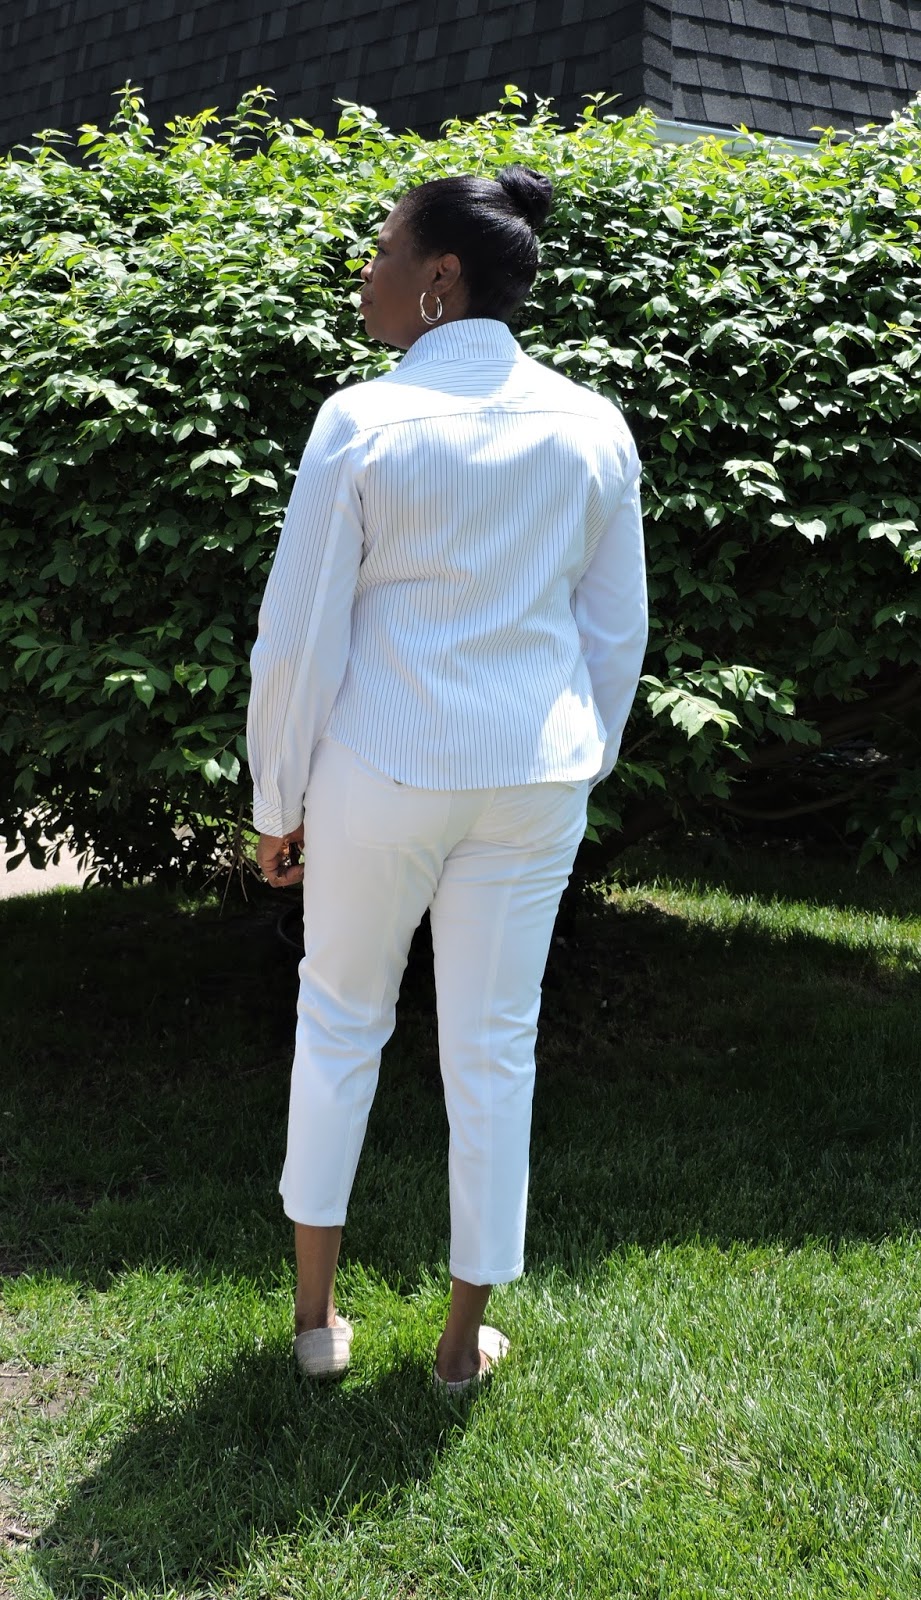
The sun was shining and the sky was bright and clear.  Perfect afternoon to get pictures of my new McCall's shirt.   I called this post "The First Edition" because I can see myself using this pattern over and over again.  The shirt went together smoothly.  No problems or issues.


This is one of the new patterns released this year.  It's described as:  semi-fitted shirts have back yoke, collar, sleeve, hem and length variations. Sizes 8 to 24.  I used size 16 with modifications. The sewing rate is easy.  Yes, it was pretty easy.   I was able to finished it in about four hours.


This is a Palmer/Pletsch pattern, which makes the alterations easier as the adjustment cutting lines are already drawn on the pattern.  I made several adjustments.  The first is the FBA, which is posted here.
My other changes/alterations are:
  • lengthen the sleeves by 1 inch.
  • The vertical darts on the front and back were deeper
  • The lengthen of the shoulder is too long; so I trimmed about 1/2 inch away.
  • After sewing the bust darts, I trimmed them to 5/8" and serged the edges. 
  • Swayback adjustment as usual.
  • After I finished the shirt, I noticed the neck is slightly too large.  The 14 neckline is a much better fit.
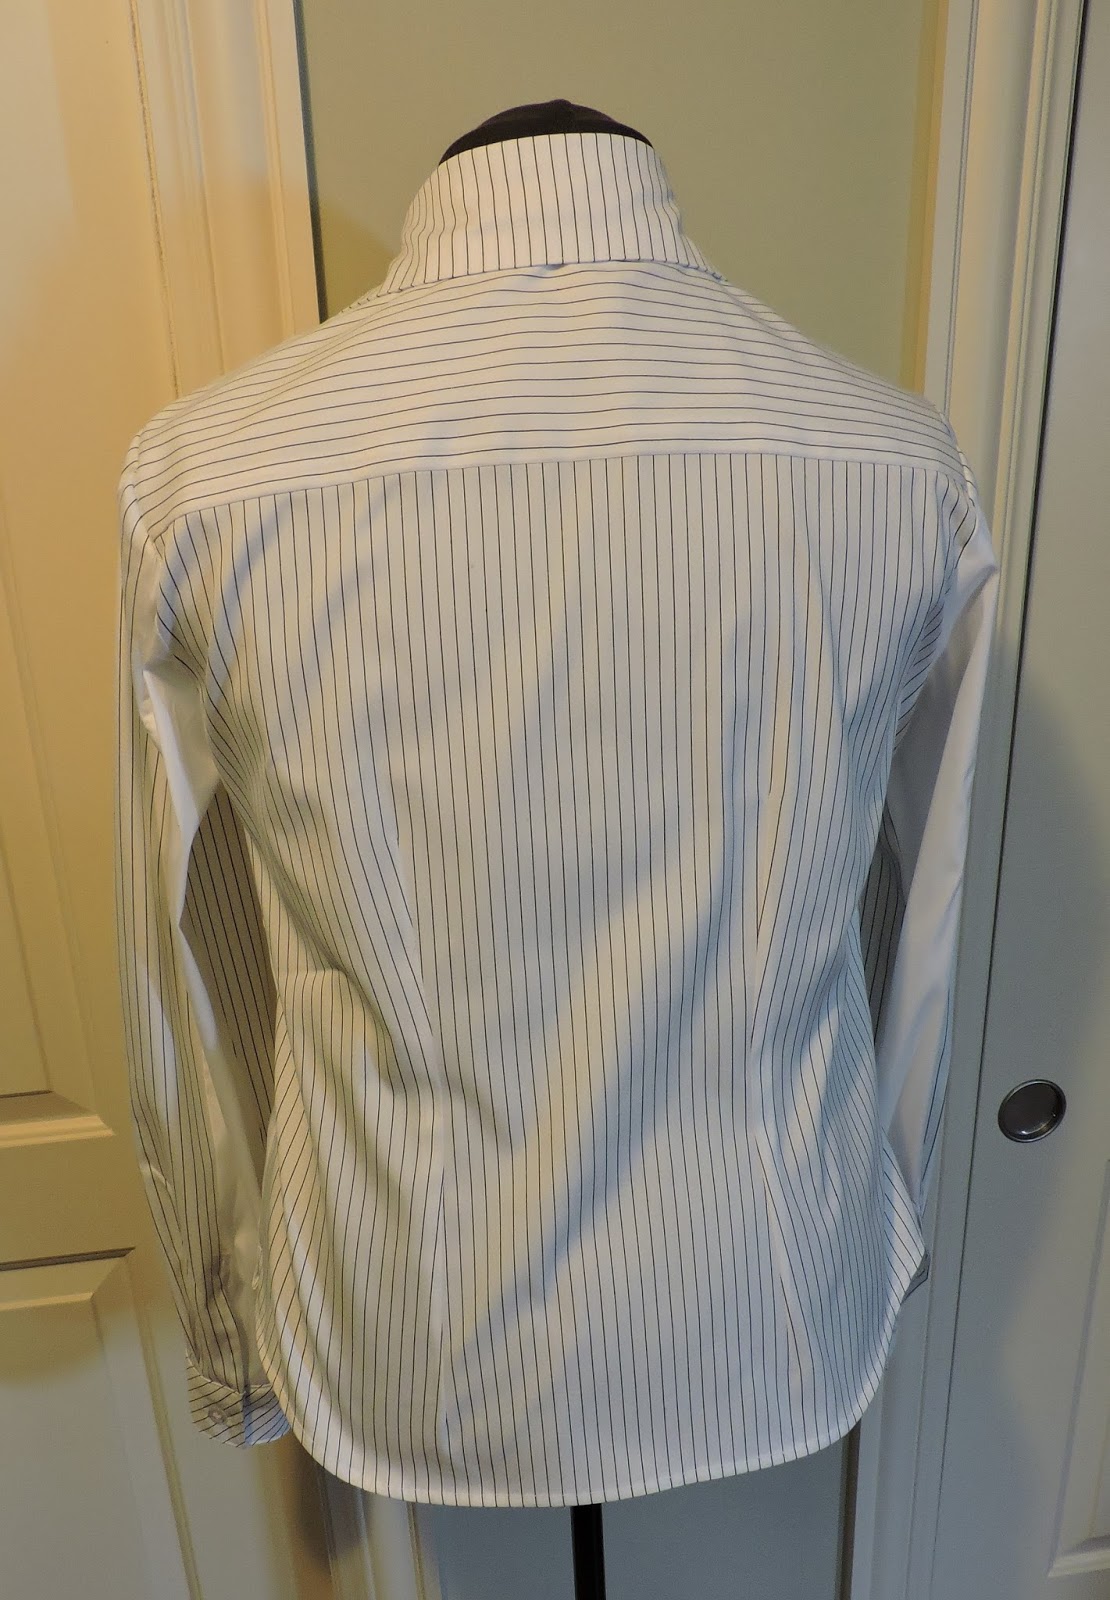
  • I used two fabrics:  The left front and the lower sleeves are white, while the rest of the shirt is a striped cotton blend I bought in Philadelphia several years ago. This was the only design change from View B.  The white shirting fabric is from Mood.  It is a stretch cotton.


That's it for changes and alterations.

The finished shirts looks a little boxier than the drawing.  But it looks like the shirt that the model is wearing.  It is less "semi-fitted" than I expected.

There are no difficult or confusing instructions.  Typical.

My likes:
  • Views B and D.  I loved the use of the stripe fabric of view B.  The length and shape of view D.
  • Fit instructions by Palmer/Pletsch is always helpful.
  • The two piece sleeve and the yoke.
No real dislikes.

I will definitely make this again.  And I recommend it to others.  This is a winner.  I'm happy with the results and will get a lot of wear out of this shirt.

In closing, please go to Rhonda's blog to check out my interview with her.  The link is here. I'm a "Material Witness on May 19, 2017".


Happy Sewing!
C

LinkWithin

Blog Widget by LinkWithin