Wednesday, August 31, 2011

Another Great Pencil Skirt Option with B5566


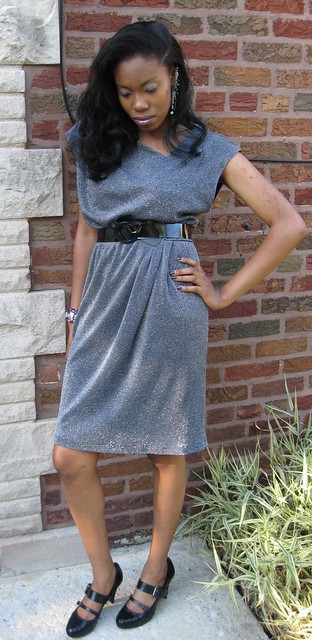
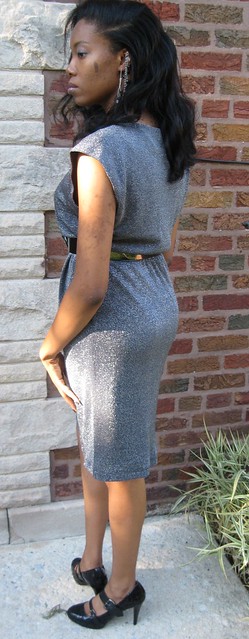
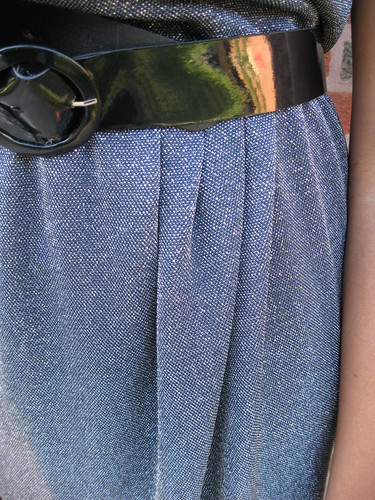
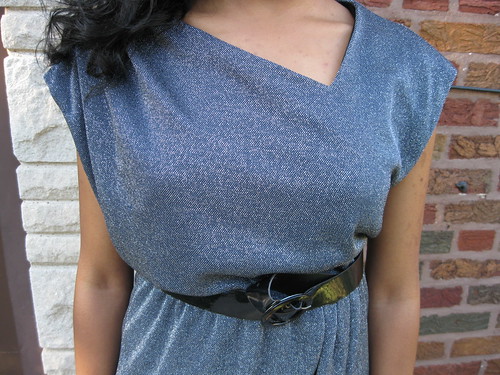
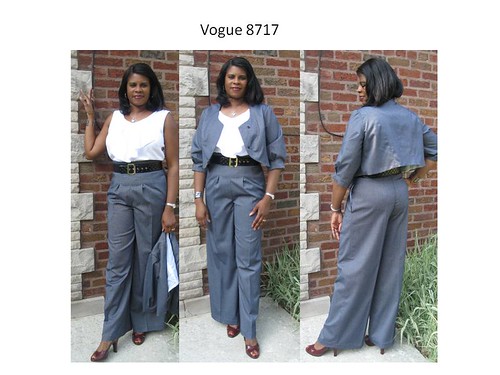
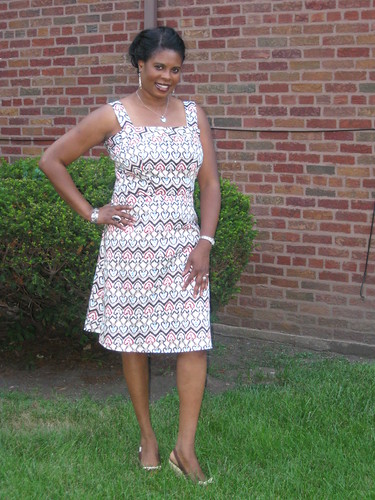
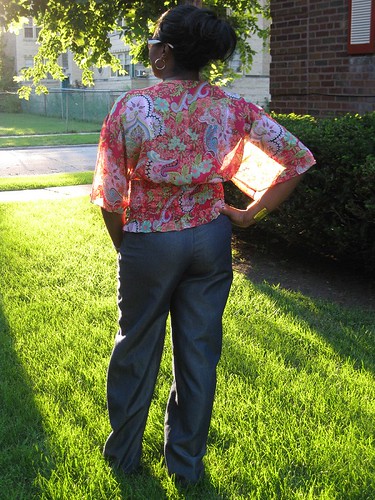
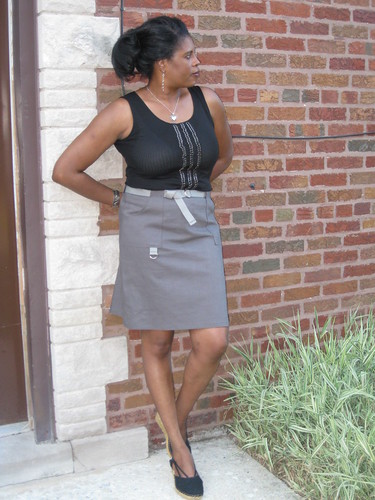
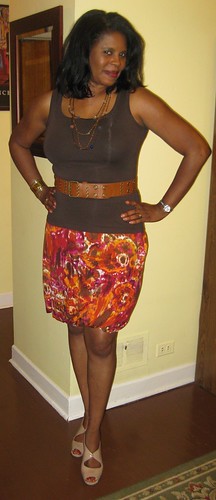
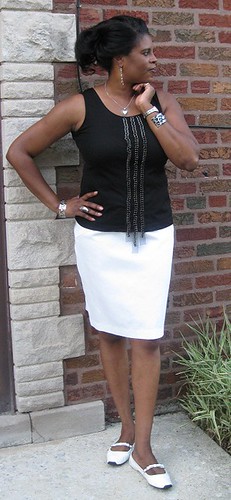
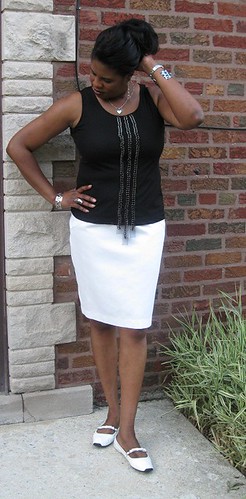
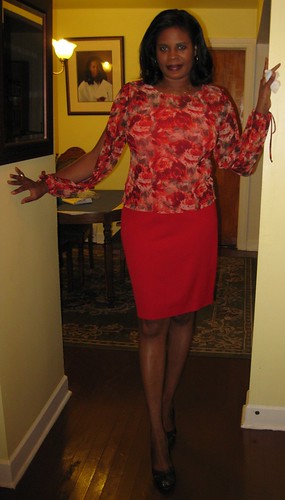
A great pencil skirt comes in handy when you're trying to sew up one yard remnants. Butterick 5566 was a good choice to move some remnants from the fabric stacks to the closet. I made two skirts. There isn't much to review as the pattern has been reviewed many times by other sewists, and it's a simple pattern.


So here goes the short review of my experience.

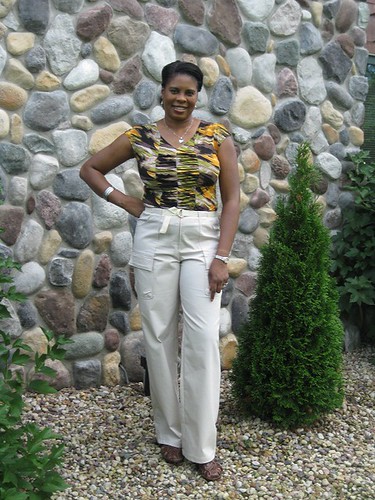
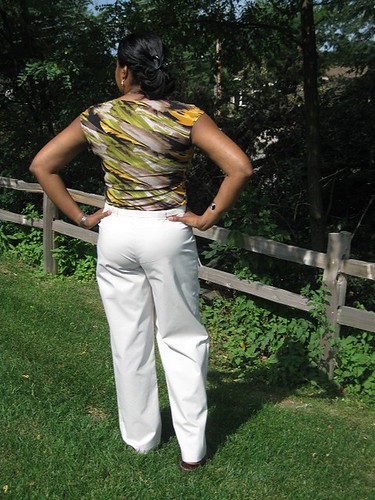
Pattern Description: MISSES' SKIRT: Semi-fitted, above mid-knee skirts A, B, C, D, E have contour waist and back. A: front overlay, outside stitched darts. B, C: front yokes (contrast B). D: contrast sides. D, E: princess seams. B, C, D, E: topstitching.

Pattern Sizing: sizes 6 to 20; I used size 14 with a few modifications.

Did it look like the photo/drawing on the pattern envelope once you were done sewing with it? For the most part. The model view appears to be a tapered at the hem. Not so in the pattern pieces. So I reduced the width of the hemline by 3 inches to get that tapered affect shown on the envelope.


Were the instructions easy to follow? Easy breezy.

What did you particularly like or dislike about the pattern? View B and A caught my attention. Their not your typical pencil skirt designs. No dislikes.

Fabric Used: White linen/cotton blend and Red tropical wool.

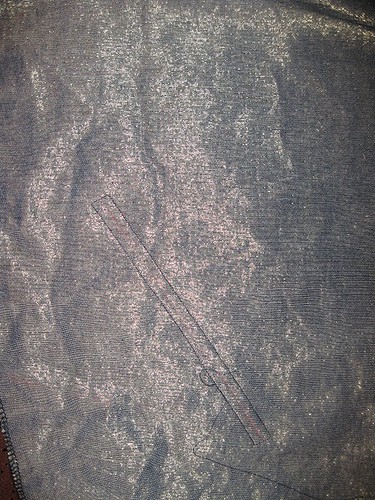
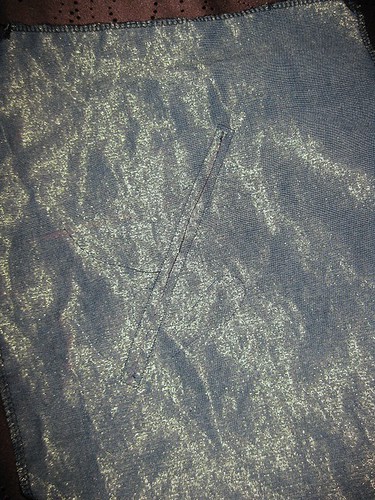
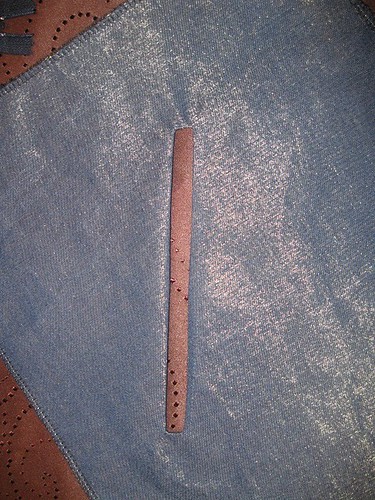
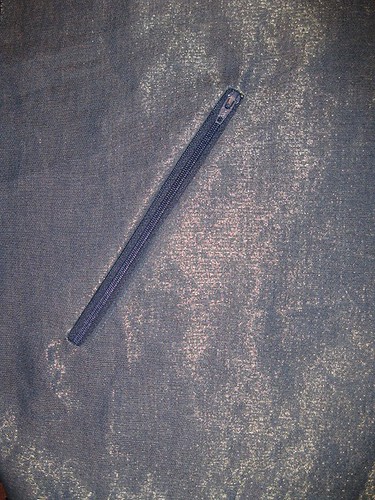
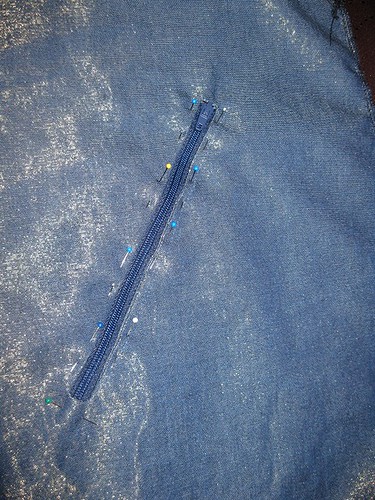
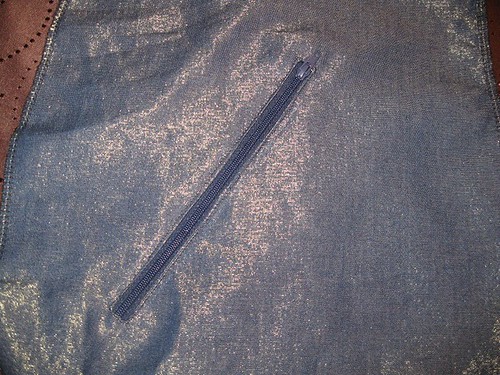
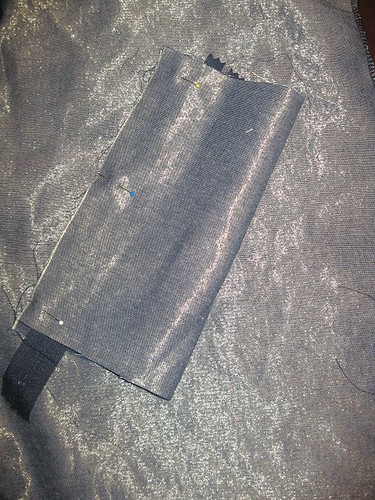
Pattern alterations or any design changes you made: Added 2 inches to the length. White installed an invisible zipper; red installed a lapped zipper.

Would you sew it again? Would you recommend it to others? Yes, I plan to make view B and view A. And yes I do recommend it.

Conclusion:
This is an nice pencil skirt to sew. All levels can make with no problems.


Oops!  Forgot to change my shoes. Lol

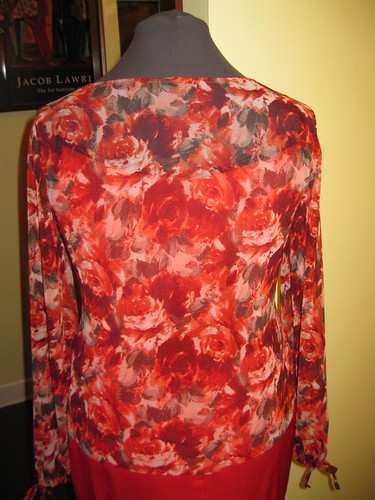
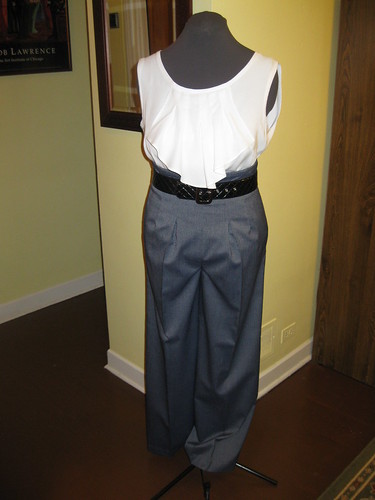
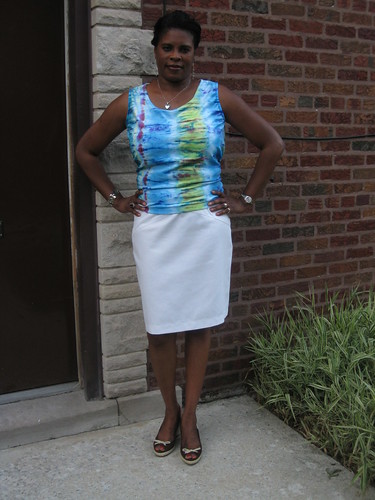
Burda Style Tank 07-2008-126
This is an UFO that I started over a year ago.  All it needed was hemming.


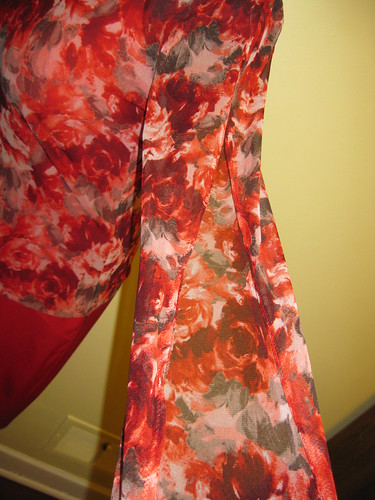
Pattern Description: Tank top with gathering and waist panel at center back.

Pattern Sizing: 36 - 44; 4/6 - 14

Did it look like the photo/drawing on the pattern envelope once you were done sewing with it? Yes.

Were the instructions easy to follow? The instructions were typical Burda Style. The top was simple to make. So this one wouldn't be difficult to make for an average sewist.

What did you particularly like or dislike about the pattern? This style tank reminded me of "back in the day" when as a teenager we knotted our over sized t-shirt for a more fitted look around the waist. I thought this was a cute style. No dislikes.


Fabric Used: Assorted fiber knit from Vogue Fabrics.

Pattern alterations or any design changes you made: I made a swayback adjustment and added a little width at the side.

Flickr

Would you sew it again? Would you recommend it to others? Maybe and Yes.

Conclusion:  Cute little tank that is easy to sew.


Tuesday, August 30, 2011

The Meshing Truth about Simplicity 7013


If you read my pattern reviews, you know I purchase a lot of my fabric from Vogue Fabrics. Frequently, I go to the Remnant section first. To see what pretty fabric I can find at half the price. Of course, the fabrics are short cuts; I haven't seen anything over 2 1/2 yards in length. And that's okay when I'm making separates, especially knit tops, summer knit dresses and slim skirts for myself. DD can get a jacket or a pair of slacks because of her size; it doesn't take as much fabric for her.

This next review is about a top that I recently made using Simplicity 7013 (OOP) and some mesh fabric that I found in the Remnant section. The length of the fabric was only 1 1/2 yards. You can definitely see through it. At the time of purchase, I didn't think about the two great tips/tutorials that Ann Steeves wrote about mesh knit fabric, here and here.

I ended up with a fairly decent knit top, but I have to wear a cami underneath it to "protect" myself. Lol I was lucky to already have a red cami that I had a few years ago, It's trimmed with black fold over elastic and is the perfect concealer.


Pattern Description: Simplicity description only states Misses' knit tops. I'll add six knit tops with sleeve and neckline variations.

Pattern Sizing: sizes 6 - 20; I used size 14.

Did it look like the photo/drawing on the pattern envelope once you were done sewing with it? My version did not look like any of the views on the pattern envelope. I used the front and back of View F and the sleeve of View A. I like the one sleeve look, but always feel like one arm maybe cold while the other is comfortable.


Were the instructions easy to follow? I just looked over them; didn't really follow them because of the changes I made. But they look pretty standard.

What did you particularly like or dislike about the pattern? I liked the many options. And the fact that you can mix and match the pieces to fit your personal style. No dislikes.

Fabric Used: Mesh knit from Vogue Fabrics.

Pattern alterations or any design changes you made:

Construction changes:

I eliminated the facing. I cut a stripe of fabric about an inch shorter than the circumstance of the neckline and about 2 1/2 inches wide. Then sewed the ends together to create a circle. Next I folded to create a bias facing. Pressed. Stitched it in the same manner as a bias tape to a neckline or armhole.

I didn't hem it. The fabric does not fray.

Design changes:

Instead of using the pattern for one particular view, I combined the bodice of View F and the sleeve of View A.

I didn't do a FBA. It's not a bad fit, but there are a few horizontal lines. No pulling or tugging to get the top down though.

Would you sew it again? Would you recommend it to others? I probably will try another view later. And yes, I do recommend it if you have this pattern.

Conclusion:
This is an easy pattern that a beginner can sew.

Next, I review the skirt (B5566).


Monday, August 29, 2011

Evening Meshed in McCall 6319


My obsession with fabric has rubbed off on my DD. These days she is serious about fabric shopping. She's always looking for the best deals. Three years ago on one of our trips to the Textile Warehouse on West 21st Street, she bought this mesh fabric. The store is huge, nearly a block long three stories of fabric and notions.


The silver mesh fabric used to make this dress was bundled with several other pieces and weighted. The bundle was priced at $2.00 a pound. Interesting way to sell fabric. The mesh fabric measured about two yards. It was first used to dress her jewelry table at artist alley. Then one day in June she said to me, "What could you make out of this fabric." I looked and sort of frowned, " I don't know. It's not something I'd want to wear." All the while, I was thinking what could I make. So I turned to the many fashion magazines on my table and started thumbing through them. To my surprise, several pages featured beautiful mesh knit garments. Now, this dress is the result of the inspiration from those garments. My fabric shopping, deal getting DD has a great dress to wear to the Captain's Ball.


So here is my review of this sewing project:
M6319

Pattern Description: MISSES' DRESSES: Fitted dress with tapered skirt has lined bodice and elasticized waist.

Pattern Sizing: 8 - 22; I used size 10 with modifications.

Did it look like the photo/drawing on the pattern envelope once you were done sewing with it? Yes it did.

Were the instructions easy to follow? Very easy; I had no problem with following them.

What did you particularly like or dislike about the pattern? I liked the style of this dress and thought it would be a great way to showcase the fabric. The dress went together easily. I like the soft pleats at the waist and the asymmetric neckline. It's a good knit dress pattern. I only have one dislike which is the lack of lining for the skirt of the dress.


Fabric Used: Silver mesh fabric and black knit lining (Hancock, $6.99)

Pattern alterations or any design changes you made: I made a few fitting adjustments: pigeon chest and square shoulder. Details on that process can be found here. Because you can see through the knit, I added a skirt lining.

Would you sew it again? Would you recommend it to others? I think I may make a top for myself. And yes I do recommend it to others. It stylish and easy.

Conclusion:
This is a nice knit dress pattern that is easy to sew. A beginner should be able to sew it with no problem.

Happy Sewing!

C

Thursday, August 25, 2011

Fall Is In The Air

Still have a few summer projects in the works, it's past time to start working on my fall wardrobe.


At the top of the list are; a black and white hounds tooth coat. The fabric is a gift from Marji. This coat is right in line with the fall collection of Salvatore Ferragamo. Erica B. posted some of his fall collection on her blog. This UFO was started over a year ago. It's cut, ready to sew and would be the perfect alternative to the traditional trench coat. Vogue 1257 is also high on the list. I want to make this before the harsh winter comes. What's on your list?

A few months ago, I received the Pantone color palette for Fall 2011. I like phlox, deep teal, and coffee liqueur. You may see these colors in my fall wardrobe. The color report it below for your convenience.


Happy Sewing!
C

Tuesday, August 23, 2011

Chic Chapeaus - Hats Are Back in Style!

Gene Tiernery - Hollywood Legend from the 30's and 40's
Great matching hat and purse


Ava Gardner - Hollywood Legend from the 30's and 40's


Back in the day, women almost always wore hats and gloves in public. It was an essential part of getting dressed to leave the house. Over time, that all changed. Nowadays it is rare to see women wearing hats in church. Since the courtship of Prince William and Kate Middleton there has been a resurgence of hat-wearing.

Last year, our church Unity Conference Coordinator announced that she'd like the women to wear hats on the climax of the 2011 conference. Of course, I thought about making my own. I wanted it to be unique. Another creative skill to add to my repertoire. The September issue of Burda Style magazine arrived just in time for me to take advance of its feature article on "DIY Trend", which teaching you how to make popular hats and fascinators similar to the whimsical styles worn by Princess Kate.


Essence magazine also featured an article all about the toppers, and how you can incorporate them into your style. I loved every one of them. So for your viewing pleasure hear they are:


That's all for now.  More reviews still to come.

Happy Sewing!
C


Sunday, August 21, 2011

Vogue 8717


This is an outfit that I made about two months ago using Vogue 8717. But I'm still on the fence on whether I like it or not. With that said, let me begin my review. (The top is M5977)


Pattern Description: MISSES' VEST, JACKET AND PANTS: Close-fitting, 1" above waist, lined to edge vest A or jacket B have front slanted seams, back princess seams and snap closure. B: three-quarter length sleeves with stitched pleats. Pants C have high waist, straight legs, front stitched pleats, front and back darts, side seam pockets and back zipper. A, B, C, D cup sizes.

Pattern Sizing: 6 to 22; I used size 14 with a few modifications.

Did it look like the photo/drawing on the pattern envelope once you were done sewing with it? Pretty much.


Were the instructions easy to follow? Yes, they were.

What did you particularly like or dislike about the pattern?

I really like high waist pants, but have been reluctant to make them because my torso is a little shorter than average and my long legs gives the appearance of an even shorter torso. But I decided to try this pattern anyway. It has the multiple pattern pieces for various cups size. Which I also like. The jacket is okay. The pleating on the sleeves is cute.

Okay, now my dislikes: The high waist pants aren't the most flattering for me. And the various cups size didn't provide the best FBA. I feel some pulling at the lower armscye. My prominent shoulder blades make the jacket stand too far away from my back just below my shoulder blades. I am still not in love with back pants zippers.  Surely, all my dislike are based on my personal preference and fitting issues.  If this pattern suits you, try it.  But make a muslin and make sure it's the right silhouette for your figure.

Fabric Used: A rayon blend from Vogue Fabrics.

Pattern alterations or any design changes you made: My usual adjustments: prominent shoulder blades, sway back, lengthen pant leg, and adjust crotch.
For the jacket, maybe I should have worked on the fitting some more to get the right feel and fit at the armscye and at the lower back.

Would you sew it again? Would you recommend it to others? No, I will not sew this again. But do not want to discourage anyone else from trying it.

Conclusion:
I think this style will work better for others. This pattern is not difficult to sew.


Happy Sewing! Still several reviews to go.

Stay Tuned!
C

Friday, August 19, 2011

Sun Dress - Butterick 5351


I wanted a simple sundress for vacation and this one fit the bill. Quite a few ladies had good results using this pattern and my experience was no different.

B5351

Pattern Description: MISSES' DRESS: Above mid-knee dresses A, B, C, D have fitted or loose-fitting bodice, A-line skirt and back zipper. A, B, C: shoulder straps. A, B: front and back band. B: pockets. C, D: elastic casing above bust. D: ruffle. Purchased belts.

Pattern Sizing: 8 -24. I like that it has a wider range of sizes. More ladies will have an opportunity to try this pattern. I used size 14 with modifications.

Did it look like the photo/drawing on the pattern envelope once you were done sewing with it? Yes.

Were the instructions easy to follow? I didn't really read them. I've made similar type dresses. It was easy to put together.

What did you particularly like or dislike about the pattern? I like the simplicity of the style. It's comfortable and perfect for hot weather. No dislikes.

Fabric Used: I used a stretch woven cotton from JoAnn's.

Pattern alterations or any design changes you made: I did a FBA. Oops no pictures. I just slashed through the center of the front bodice dart, pivoted to the right cutting most to the upper edge of the bodice. Then spread the opening to the desired width. I also added about a 1/2 to the side seam just in case. For the skirt, I added a few inches to the length.

Would you sew it again? Would you recommend it to others? Maybe and I do recommend it to others. It's a nice little sundress.

Conclusion: This is a fairly easy pattern to sew. A beginner should be able to sew it with no problems.

Parting shots: These delicious vegetables came from my mom's garden. Home grown veggies are the best.

The day I received these goodies, I rushed home to fry some green (ish) tomatoes.


Here's how - I start with green tomatoes that are starting to turn red, a little pinkish. They are a little juicer at that stage of ripeness. In a skillet (I use a cast iron one) pour about a cup of vegetable oil in it over a mid-high flame. Slice the tomatoes about 1/4 inch thick. sprinkle salt and pepper to your taste. Then coat each slice with cornmeal. When the oil is hot, gently place the slices in the skillet. Brown on each side to your taste. Remove from skillet. Let sit for 5 minutes. Then eat. Delicious.

Happy Sewing!  and cooking too.  Wink, wink.
C


Wednesday, August 17, 2011

Exploring the Cargo of Simplicity 5102


For what it's worth, I've gotten plenty of use out of Simplicity 5102(OOP). I started my projects mid-July and finished the skirt on Saturday after returning from Wisconsin Dells.

I made variations of three of the six views on the pattern envelope. I personally believe you should use the pattern based on your own personal taste mixing and matching different suggested elements plus adding a few of your own.

I decided to make these garments because I am in much need of some "fun" casual wear. The blue pants were almost finished when I decided I needed the beige cargo pants for vacation. Lucky me, both pair were complete before vacation. I envision myself wearing the shinny blue pair for a Saturday night out; or perhaps, weekday dinner engagement. Whatever the event, I'm sure to get wear out of all three garments.


Pattern Description: The descriptions of the Simplicity patterns are so vague. This one simply says, "Misses' pants in two lengths and mini skirt." I'll include: pants with zipper, pocket and draw string variations. skirts feature cargo and side front patch like pockets.

Pattern Sizing: 4 to 18.

Did it look like the photo/drawing on the pattern envelope once you were done sewing with it? Basically, yes. I thought the width of the pant leg for view A were wider than the ones pictured on the envelope, but for the most part the basic look was the same. I excluded four of the zippers from view A, and I made functional zipper pockets for the front. For view C, I made the pant long added a belt and eliminated the elastic hem. For view F (skirt), I only added two pockets instead of the four.


Were the instructions easy to follow? Yes. I had no problems with them.

What did you particularly like or dislike about the pattern? I like all the style variations for the pants. My only dislike is back zippers for the pants. I guess that's more of a personal preference.

Fabric Used: View C - Beige stretch woven twill, a gift from one of my sewing buddies. View A - Blue shinny denim look fabric from JoAnn's and View F - Grey linen blend from the Vogue Remnant's room.

Pattern alterations or any design changes you made: For the pants - I made my usual crotch adjustments and lengthen the pants about 4 inches. For View A - I made functional zipper pockets, eliminate four zippers, and installed an invisible zipper on the left side. For View C - I made a belt for this view and installed a front zipper. Finally for View F - I eliminated two cargo pockets and added a few inches to the length.

Would you sew it again? Would you recommend it to others? Maybe. And yes, I do recommend it to others. I think advanced beginners can sew this pattern with no problems.


Conclusion: I enjoyed making these garments and will get a lot of wear out of them. This pattern is not difficult, but some of the details do take time to sew. It's important to take your time. You don't want your garment to look "homemade".


All photos are on Flickr.

Zipper Pocket

I wanted to write a separate post on how I created zipper pockets. All of the information on "how to" and the photos of the pants are on Flickr. The next post, I will review the pattern and how I used it to create two pair of pants and a skirt.


Some patterns include zippers as a design element on the garment. Sometimes the design element has no other function. It's simply for visual appreciation. The pattern (S5102-View A) that I used had seven zippers: six for "decoration" and the other to get in and out of the pants. I decided to only use three. And all are functional.

The first step to making the two front, hip zippers functional is as follows:

Step 1 - I traced the zipper line on the wrong side of the pants. This is my guide for sewing the rectangle for the zipper. (Sorry it's a little hard to see here, but I hope you get the picture.)


Step 2 - On the right side of the pant, I place the pocket square. (You can determine the size of the square based on the position of the pocket and size of the opening.) This is done before sewing the rectangle for the zipper.


Step 3 - I stitched a rectangle where the zipper would be positioned. (shorten the stitch length 2.0.) Start stitching in the middle of one of the long sides of the rectangle. Make sure you complete the rectangle.


Step 4 - 4. After the rectangle is stitched, cut along the line through the pant and pocket layers stopping about 1/4 inch away from the short sides of the rectangle. At each corner, make diagonal cuts to form a small triangle. Be careful not to cut through the stitching.


Step 5 - Pulled pocket through the opening and form the rectangle with your fingers. Then press.


Step 6 - Place zipper under pant.


Step 7 - When the zipper is correctly positioned, pin it to the opening.


Step 8 - Sew the zipper in place.


Step 9 - Turn pant to the wrong side. Pin the lower edge to the upper edge making a nice little pouch. Sew the two side and the upper edge of the pocket. If the zipper is extended past the pocket, trim the excess.


Step 10 Serge around the stitch edges. Your done.


Next, my review of pants and skirt made using Simplicity 5102.

Happy Sewing!
C


Tuesday, August 16, 2011

A Little Twist on the Bubble Skirt - Burda 07-2010-108


After seeing Amanda and Sonoemi's versions of this skirt, I put it on my "to make" list. I had some reservations about making it for myself, thinking it was a bit on the youthful side. But, what the hey.

Burda Style 07-2010-108


Pattern Description: Above the knee knit bubble skirt with a twist at the hemline. The skirt has a waistband and side invisible zipper.

Pattern Sizing: Sizing 36 to 44; Burda Style magazine pattern 07-2010-108

Did it look like the photo/drawing on the pattern envelope once you were done sewing with it? Yes, it did. This skirt is featured three times in the 07-2010 Burda magazine. I like all three style options of this skirt.

Were the instructions easy to follow? Typical Burda instructions. The only part I paid any attention to was how to attach the lining to the skirt to make the bubble affect. The rest of the construction was pretty simple.

What did you particularly like or dislike about the pattern?  I really like this skirt. Simple with chic style. It can be for work or weekend social outings. This is a comfortable skirt that will travel well. No dislikes.

Fabric Used: Jersey knit from JoAnn's (Global traveler collection). Knit lining from Hancock's.

Pattern alterations or any design changes you made: I used a size 44 initially but had to trim it down to 42.  As usual, I added a few inches to the length.

Would you sew it again? Would you recommend it to others? I will make another skirt. Probably in a navy jersey for the fall. And yes I would recommend it to others. It's a nice skirt.

Conclusion:  This skirt is trendy, but classic at the same time. At first look, you might think it's more for the twenty or thirty-something age group. But it works equally well for a "mature" woman.  The skirt was pretty easy to make.  The hardest part was putting in the zipper.  If this is a style you'd like to try, making the Burda skirt is worth your while.

I wore this skirt to dinner and a concert.  It can be worn to work with a nice jacket or cardigan.

Tidbits on the bubble skirt -

The (balloon) bubble skirt first appear in the Christian Dior 1959 collection. Yves Saint Laurent designed a bubble skirted dress. Since that time the bubble skirt has appeared in stores, on the runway, and in commercial patterns.

Below is the 1959 bubble (balloon) skirted dress.


Jason Wu designed this pricey tulle bubble skirt. You can have it for $1,995. But why pay that amount when you can make it for a fraction of the cost, plus you can feel extra special because you made it yourself.


Here are four ladies on the runway modeling bubble dresses. This is an interesting take on the bubble skirt. Evening wear with ballet slippers.


Closing  Comments on the Sade Concert -

She was exceptional! After an hour of the smooth soulful crooning  of the fabulous John Legend, Ms. Sade graced the stage.  She sang all of her hits from the eighty and ninety with cuts from her latest CD sprinkled in.  Every melody possessed the classy, smooth voice that she is known for.  The band was strategically positioned on stage in front of a huge screen where her fans could see an occasional prelude to some of the her songs.  The visuals were just enough, not a detraction from the "real" action on stage. This was my first time attending a Sade concert and hopefully it won't be the last.  Ms. Sade is a classic beauty who gives an excellent performance.  There were no uncomfortable delays.  The audience never lost interest.  Everyone involved was on point.  The production was definitely a smooth operation.  So I leave you with this video.


LinkWithin

Blog Widget by LinkWithin