Showing posts with label Mccalls. Show all posts

Monday, June 10, 2013

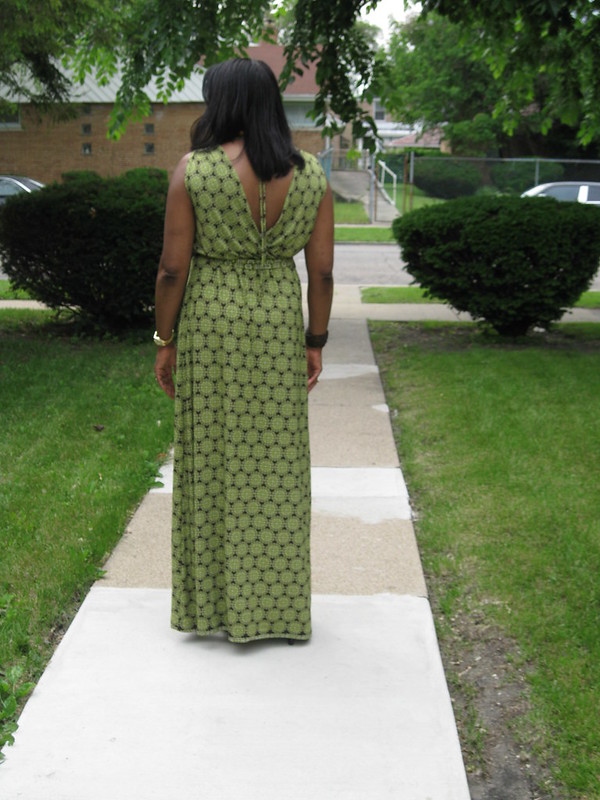
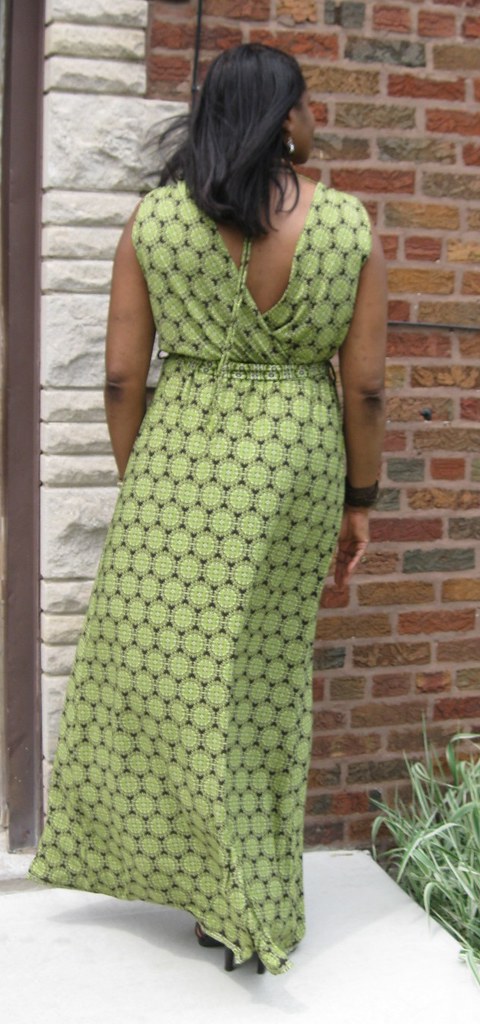
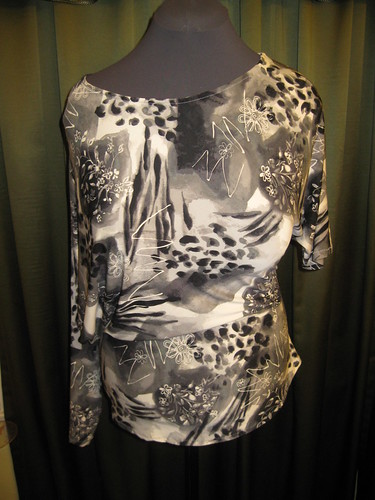
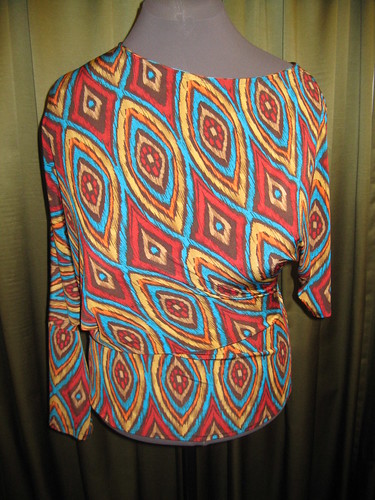
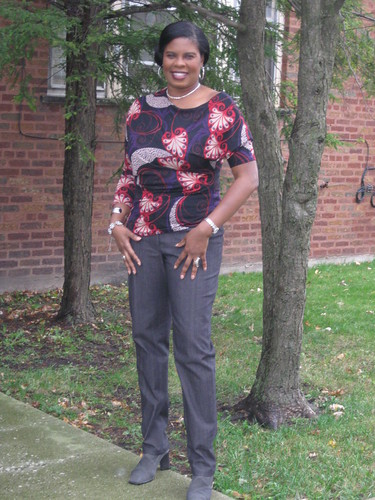
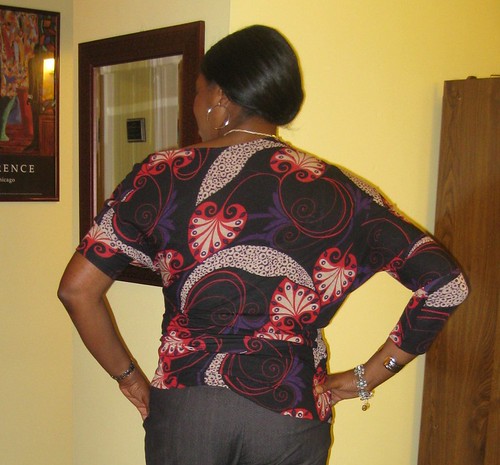
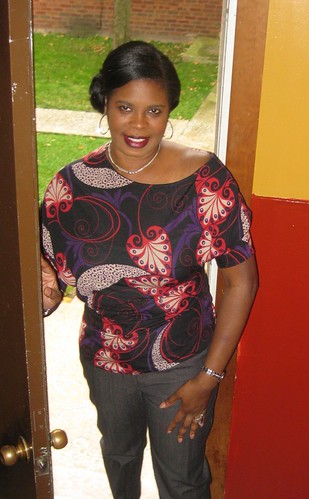
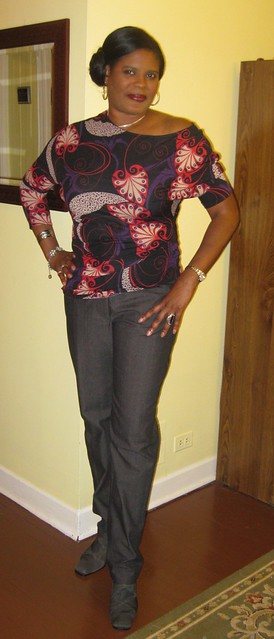
Another Maxi - McCall's 6700


It's been too long since my last post.  I'm having a hard time getting back into the sting of things.  At this point I wondered if it was worth posting those garments made during the winter.  It's almost summer.  Anyway, this is the most recent project finished about three weeks ago.


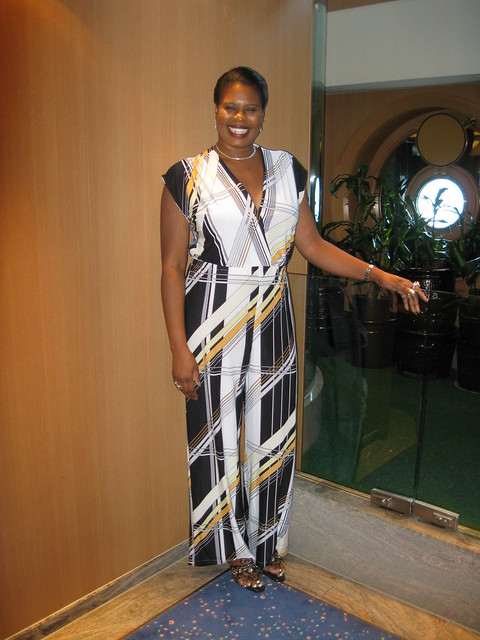
Another maxi (McCall's 6700).  The fabric was purchased at Vogue.  It's a ITY knit.  I grabbed the last three yards of it about two months ago.


No new construction changes.  Just another view of this popular maxi.


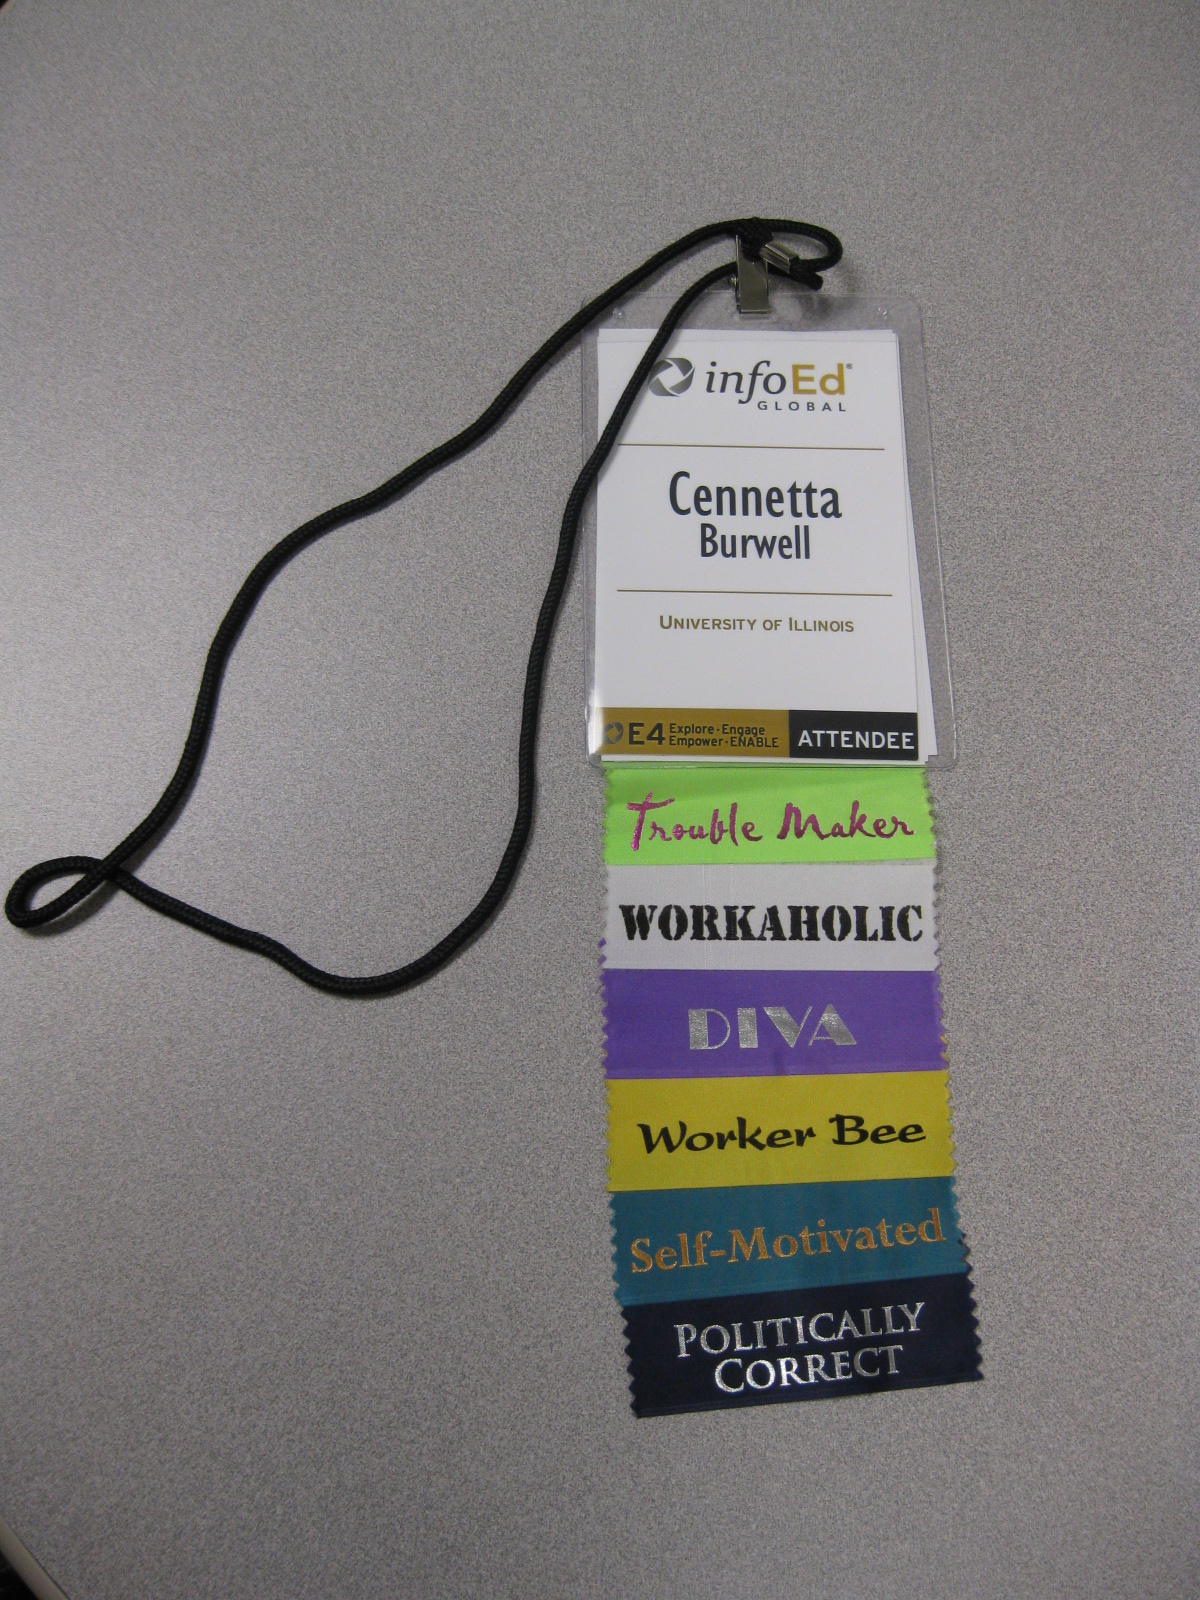
Parting Shots:  My badge from the InfoEd conference that I attended last month.  The conference was held at Disney World, Orlando, Florida.  The conference was great.  For fun, InfoEd provided a bunch of labels to add to your badge.  Of course I got carried away with the idea and decided to add six to my badge.  Seriously, I learned a lot and will be able to use the information in our upcoming server build and upgrade project.  Oh yeah, DD and I had fun at one of our favorite vacation spots.


DD and me at Disney's Animal Kingdom!  Lions, Tigers and Bears OH MY!!!


Have a Great Day! C

Tuesday, July 10, 2012

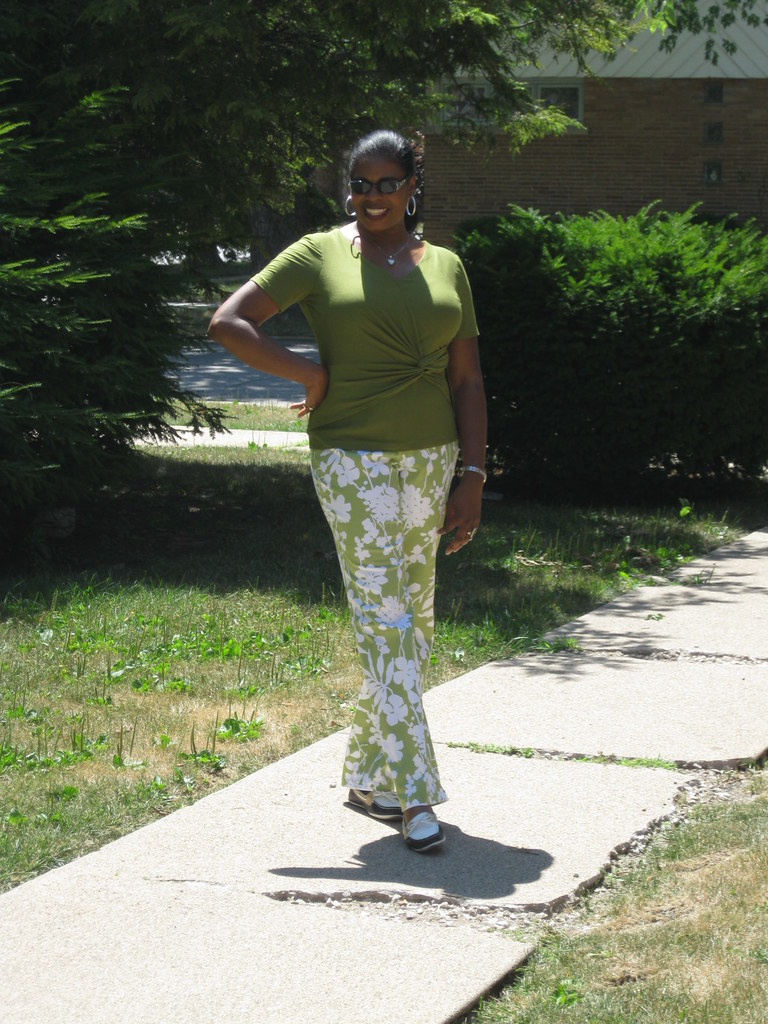
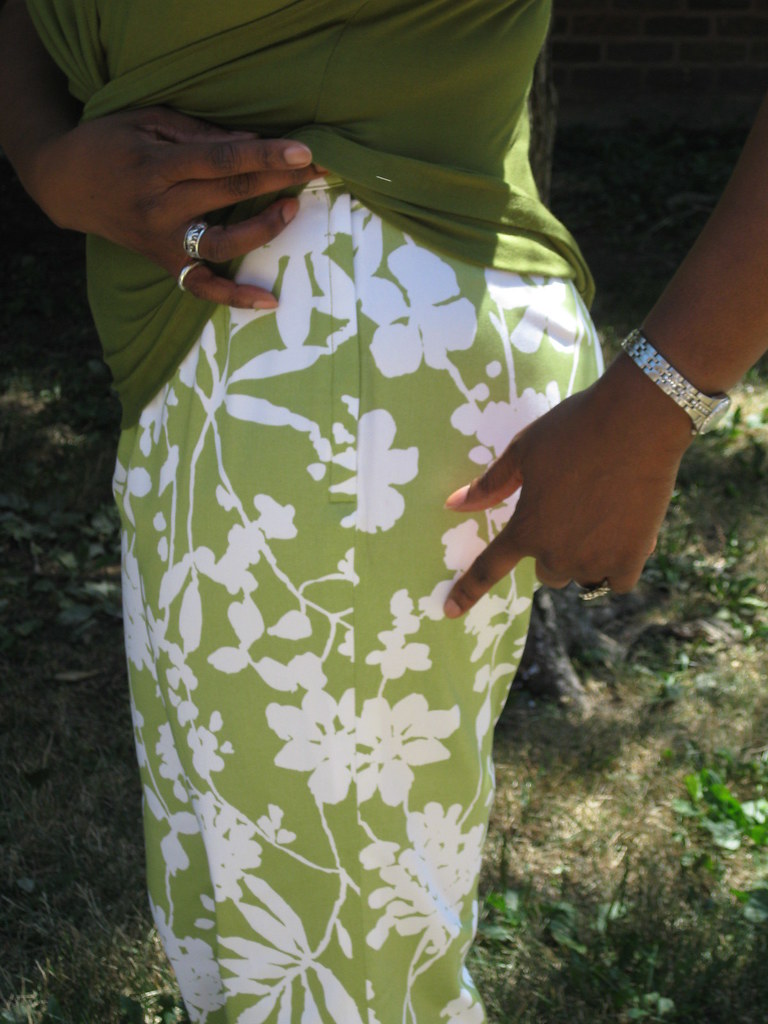
Fancy Pants - McCall 6515


This is one of two pairs of "Fancy" pants I've sewn in the past few weeks.  The first pair were made using Simplicity 2369, which I will review along with the dress, view B.

In the spring, I posted five trends for the coming seasons.  One of the trends is "Standout" pants.  Later I decided I liked Rhonda's description better:  "Fancy" pants.

The daring side of me thought, I would make a pair similar to the last pair of pants in Rhonda's post.  My first choice of fabric was a silky polyester big floral print, similar to the print in Rhonda's post.  Then the modest side of me thought, it reminded me, too much, of pajama pants.  So I decided not to take the risk of a total fashion disaster.  So I opt for this lime and white floral cotton sateen from Jo Ann's Fabrics.

I decided to use this McCall's (6515) pattern because it is simple and has clean lines that would work well with a bold print or texture fabric.

Pattern Description:   MISSES' PANTS: Pants have contour waistband, side zipper, narrow hem and width variations. A: boot-legged, carriers and top stitching. B: straight-legged. C: slightly flared. A, B and C: semi-fitted. D: flared, loose-fitting, front/back pleats. Designed for medium weight wovens.


Pattern Sizing: 6 to 22.

Did it look like the photo/drawing on the pattern envelope once you were done sewing with it?  When I went to the McCall's website to copy the description, I noticed they had linked the wrong technical drawing to the pants.  The drawings look like boot or shoe dressings.  Hopefully, they will correct it soon.

Anyway, my pants look like view A on the guide sheet.

Were the instructions easy to follow?  Typical construction for simple pants.  Very easy and no problems understanding them.

What did you particularly like or dislike about the pattern?  I have a few likes and dislikes:

Likes -
 - Simple flat front pants - perfect for a bold print.
 - Contour waistband - much better fit than the flat, straight waistband.
 - Slightly flared pants - Opportunity for creating a better silhouette for my shape.

Dislikes -

 - I hate easing more than an inch across the front.
 - Side zippers on pants aren't my favorite, but I went ahead with this method of installation.

Fabric Used:  (Stretch Woven) Cotton Sateen

Pattern alterations or any design changes you made:


Pattern alterations:
My usual crotch adjustments; shorten and scoop out the center back seam about 5/8" and add that amount to the side seam.
Moved back dart 5/8" toward the side seams.
 -  Made darts instead of easing the full amount of excess on the front.
 - Lengthen pants 2" where indicated on the pattern and added 2"  at the hem.


Design/construction changes:
 -  Installed a lapped zipper.
 -  Made a deeper hem.
 -  Replaced the small hook and eye with larger ones.
 - Attached belt loops to the waist of the pant and then to the top of the waistband before top stitching.


Would you sew it again? Would you recommend it to others?  Yes,  I plan to make one of the other views.

Conclusion:   Nice and easy pattern to sew.

Sunday, April 8, 2012

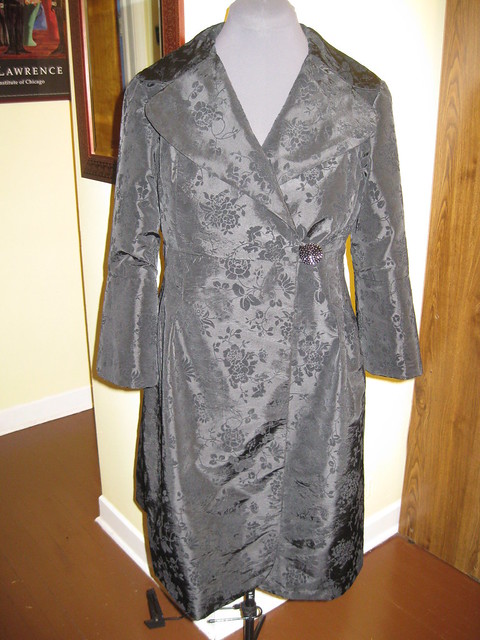
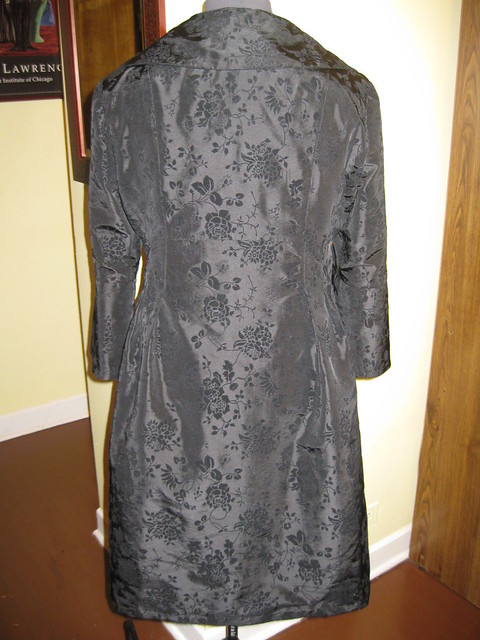
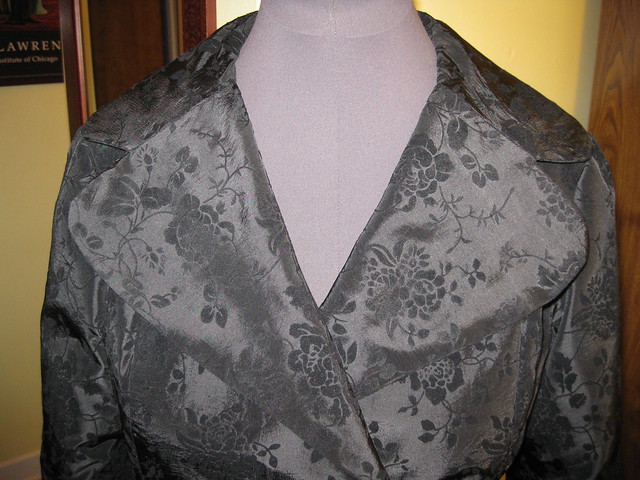
Black Jacquard Coat - M5766


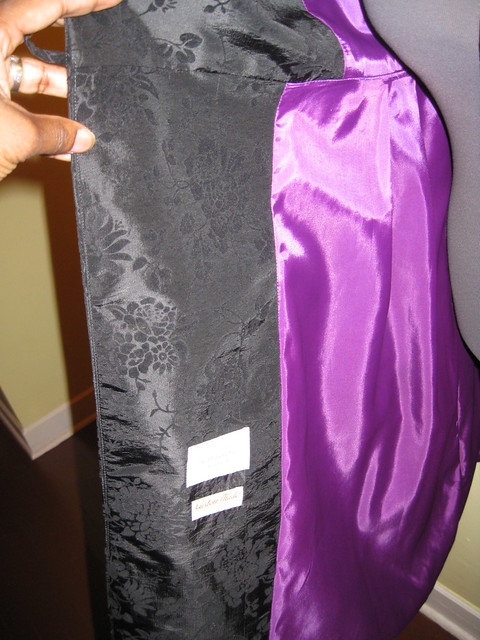
My evening coat was made using McCall's 5766. I was more pleased with how it turned out than the Vogue dress. This one has been in the stash for a couple years. And was the perfect complement to my dress.


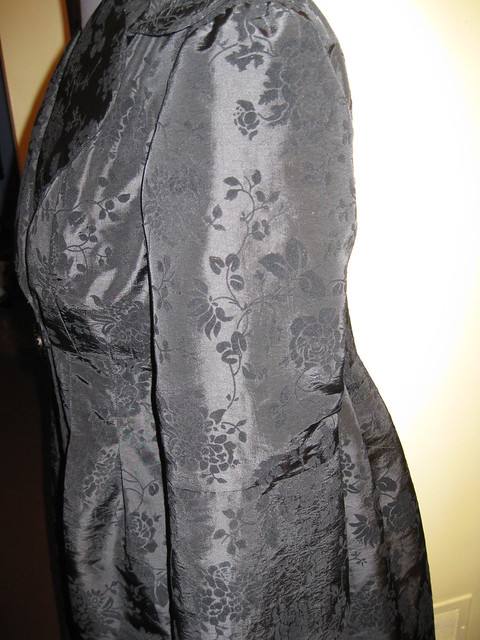
Pattern Description: Misses' lined coats: Fitted across bust coats have empire waist, princess seams with pleated lower section, side seam pockets and sleeve variations; coats are above mid-knee length.

Pattern Sizing: 4-18; I used size 14 with modifications. View A

Did it look like the photo/drawing on the pattern envelope once you were done sewing with it? Yes. Except I omitted the slits in the cuffs and made the pleats a little longer for more shaping.


Were the instructions easy to follow? Yes. No problems following them.

What did you particularly like or dislike about the pattern? Everything about the design of the coat.
- Wide Collar.
- Bell 3/4 sleeve.
- Empire waist.
- Princess seam - easy FBA.
- Pleats
- Big decorative button.


Dislikes - The pockets are about two inches too high.

Fabric Used: Black floral jacquard from JoAnn's.

Pattern alterations or any design changes you made: I simple FBA and I added a few inches to the length of the coat. Plus the two changes mentioned above.

Would you sew it again? Would you recommend it to others? Yes. I plan to make one for my DD. And yes, I do recommend it to others.


Conclusion: I really like this coat. The style and fabric are perfect for a special occasion coat. This pattern was not difficult to sew.

Friday, March 2, 2012

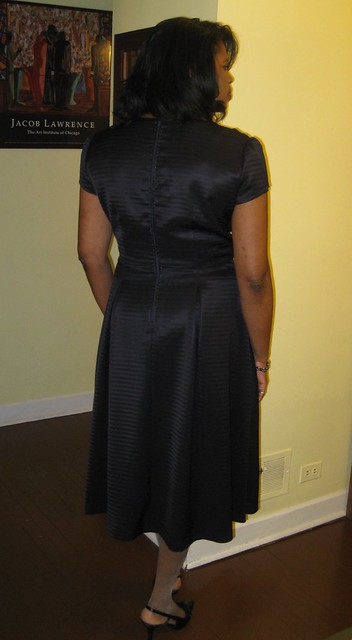
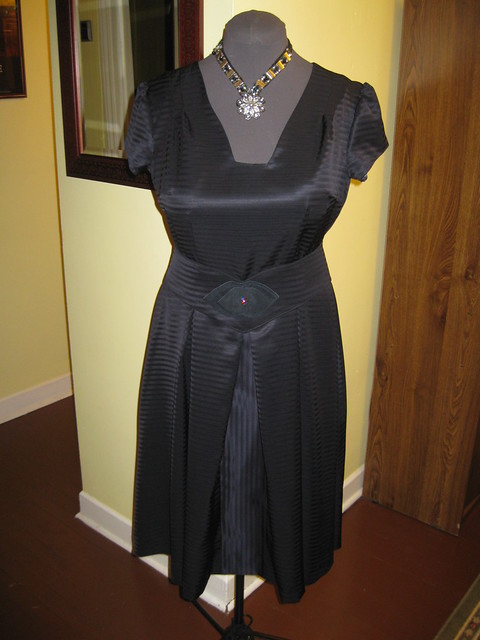
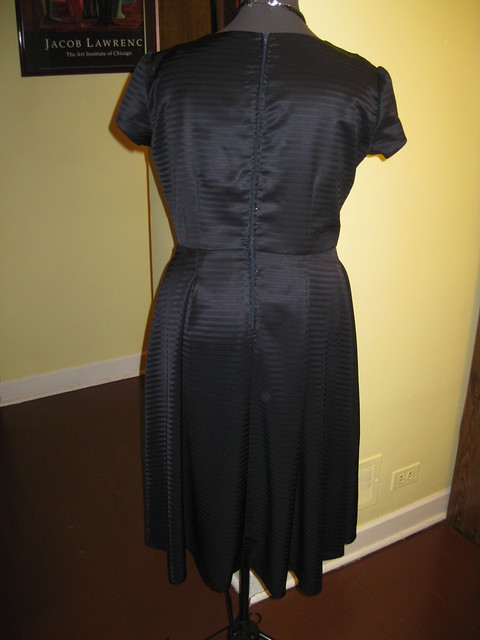
M6433 + V8555 = New Dress, New Design


Warning this post is lengthy with several pictures.
Another striped garment.

It's been over a week since I finished the dress. Before I forget the construction progress, I want to give my review on how I made this dress.

September, 2011 was the first time I tried making a dress from McCall's 6433. I really like the design of the bodice and wanted to give it another try, but with a different skirt. Something different from my usual skirt waist dress. I decided to use the pleated skirt of Vogue 8555. There is nothing new about me mixing and matching pattern pieces. It's been a practice of mine for majority of my sewing years. Right now, I lack the skill to draft my own; but why draft if you have something that works in the pattern collection. And boy, do I have plenty in the pattern collection.

Since there were no major fitting issue, (I worked them out before making the first version) I decided to use at least one couture technique and add a unique belt to finish the look of the dress. Let's begin with the pattern descriptions:

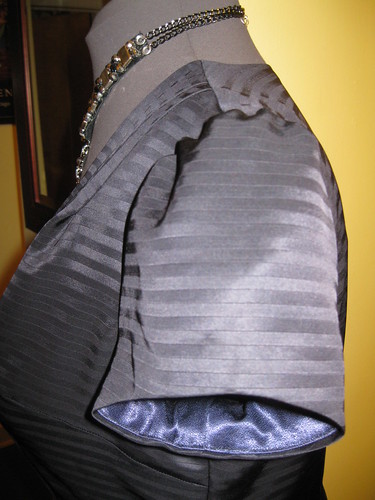
McCall 6433 - Misses' dress in three lengths - fitted, lined bodice, front and back darts, stitched shoulder pleats, back zipper, and self lined cap sleeve. A,B: A-line skirt, stitched pleats: C: Straight skirt, back slit. Optional purchased belt. I used the bodice of View B with some modifications;
and,
Vogue 8555 -Misses' dresses A through F have lined bodice, front pleats, front gathers, back darts, self-faced midriff, back zipper and skirt variation. A - C lined slim skirt in two lengths with front and back darts, back slit, D-F; skirt in two lengths with front and back pleats, pleat underlay and side seam pockets. A; D gathered sleeves with sleeve bands, B; F purchased belt. A, B, D, & E mid-knee length, C; F; below mid-calf length. I used the pleated skirt.


Sizing - McCall 4 - 18 and Vogue 8 -22.

I created a new dress using these patterns. For the most part, I followed the construction process for each part. The changes made were related to design preferences. No problems in the instructions. Pretty typical, standard.

After making the McCall's dress I knew I would make the top again. The bodice has a likable vintage look to it, and the neckline is not commonly seen in recent patterns.  I really appreciate having fitting lines and instructions in the pattern. It helps build my fitting skills.

The skirt is great because it has fullness at the hem but waist pleat bring it closer to the body.  Because I am top heavy, the skirt design and the drape of the fabric helps make this dress more figure flattering.

I have no dislikes about either pattern.

I bought the fabric at Vogue Fabric on Roosevelt last summer. It is made of assorted fibers, for sure some polyester and maybe some rayon. It has a lovely draft and smooth hand. Love it.

Although I spliced two pattern together, I still had multiple alterations and design changes. I made my usual fit adjustments: FBA, prominent shoulder blades, swayback adjustments, and lengthened the skirt a bit. Also the sleeves were a little snug; so I cut them a tad larger than size 14. Lastly I raised the vamp about a inch, still not enough. Lol

I made a few design changes. The sleeve cap has a lot of ease in it. So instead of removing the excess ease I added more; then gathered the sleeve cap. I'm really liking the process of hand-picking a zipper. This was the third time I've done it. It adds a custom touch to the dress. Finally, because I have very little waist-definition, I added a belt, which I will review next.


I think this is the last time I will use these patterns. Remember I said "I think". You never know. Lol If these are your style of dress, I do recommend them both. They are easy to sew and produce a fashionable dress.

You won't be disappointed with the results.  Just make sure you make appropriate fitting adjustments.


Now the belt.

I love this belt. It's a pattern from "Making Vintage Accessories," a book My DD gifted me for Christmas. If you like vintage, you will like this book. It has some interesting, unique accessories.   Ok.. Ok.. this is not the book review. Back to making the belt.

The book comes with instructions and patterns included. You have to enlarge the patterns 200% to get the appropriate size.  There is a line on the belt pattern that allows you to make adjustments based on your waist size. Caution, don't add length to the end of the belt. The curve will be misplaced and the ends won't overlap evenly.

I'd plan to photograph the making of the belt, but forget to do so. Sorry. Maybe next time. I'll try to account for my process in words.

1. Enlarging the pattern. It was Saturday evening and I wasn't about to go Kinkos to make copies. So I did this to enlarge the belt pattern. It's crude, but it worked.

2. Pin and cut fabric (2) for the belt. Cut hair canvas fusible interfacing (2), removing the seam allowance for easy sewing. Cut leather for the applique.

3. Apply interfacing, pressed belt pieces turning under seam allowances.

4. Sew belt pieces together. Press

5. Place the leather pieces on top of the center section of the belt, largest first. Then hand stitched the leather pieces to the belt.

6. I didn't have a vintage button. So I added a swarovski crystal to the center to complete it.

NOTE - I didn't read the instructions.  I just made it based on what felt right to me.

I will certainly make this belt again.

All pictures here.

Tuesday, February 7, 2012

The Many Lines of My Jacket - HCC Stripe Challenge - Part III

Happy Tuesday!

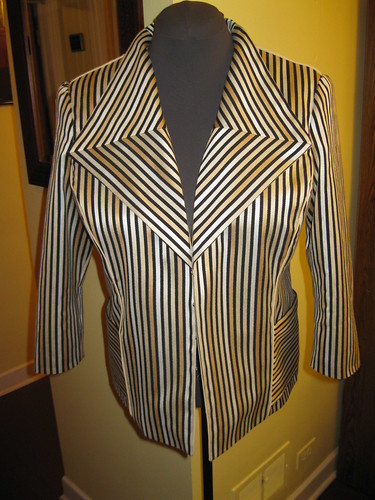
The Haute Couture Club - Stripe Challenge was held on Saturday. There were over a dozen participants. The ladies came up with some interesting outfits.  (All will be showcased at the May fashion show. wink, wink) 

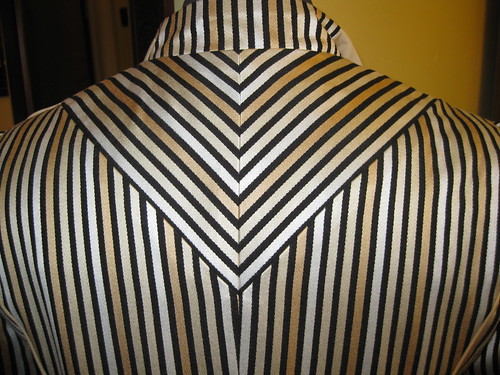
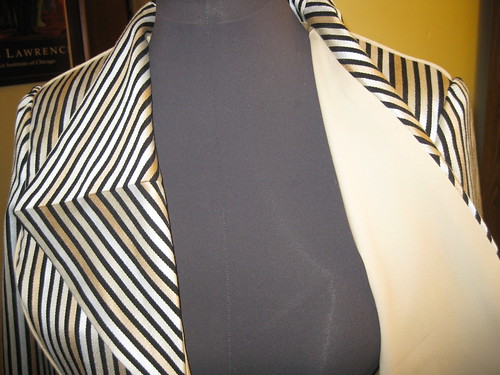
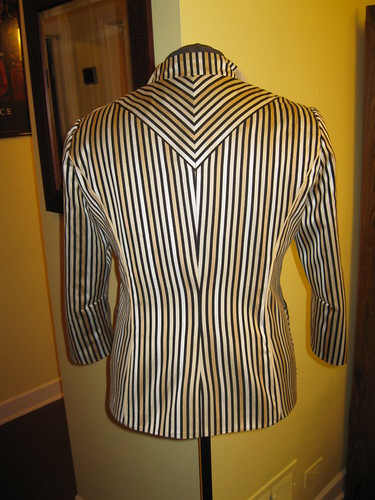
But as for me, I used McCall 6294. This my garment serves a dual purpose:  HCC Stripe Challenge and the Palmer/Pletsche contest.

My review:


Pattern Description:

MISSES' LINED JACKETS IN THREE LENGTHS: Jackets A, B, C have princess seams, back yoke, two-piece self-faced lapels with collar band, sleeves in two lengths with elbow dart, hook and eye closure; jacket A has long sleeves; jacket B has three-quarter length sleeves, unlined patch pockets; jacket C has long sleeves, unlined patch pockets with top stitching.


Pattern Sizing: 4 through 18.  I started out with a size 16; but ended up scaling it down to a 14 with my usual adjustments.

Did it look like the photo/drawing on the pattern envelope once you were done sewing with it? Yes, it look like the basic design as illustrated on the envelope.


Were the instructions easy to follow? Easy.., No problems.

What did you particularly like or dislike about the pattern? The design of the collar and the back yoke. No dislikes.

Fabric Used: The challenge organizers picked this beautiful striped fabric and made it available for members at a previous club meeting. Not sure of the fabric content, but I think it does have some rayon in it. It very easy to work with; sews and presses well. I only bought two yards; and after playing tetris with the pattern pieces on the fabric, I finally admitted I didn't have enough fabric for the entire jacket. So the under collar and the front facing is a stretch woven woolen (Rainbow). My DD gave me about 2/3 yd for my sleeves. The lining is china silk.

Pattern alterations or any design changes you made:

Before cutting into the fabric, I made several adjustments to the pattern:

- FBA – I omitted the small dart in the front
- Sway back adjustment - Then I added that same amount to the bottom of the back and side back pattern. Sometimes when I make the sway back adjustment the jacket/dress is slightly higher in those sections
- Prominent shoulder blade adjustment

Design changes:

- The back yoke was cut along the center. I added 5/8” seam allowance to one of the halves along the cut edge. This created the chevron effect in the back of the jacket.
- Added piping to the shoulder, front, and back seams. The pattern of the stripe was uneven so I wanted to break up the stripe a little bit.
- Contrasting fabric for the front facing and under collar. I had a limited amount of fabric.
- Lined the pockets. I like a clean finish.


For the upcoming fashion show, I will make M5818 (TNT) pants and a simple t-shirt (ivory) to complete the outfit. Of course the ensemble with include the Simplicity purse I had a few months ago.


Would you sew it again? Would you recommend it to others? I don't think I will sew it again, but you never know. I have a few more jackets I'd like to try. But I do recommend it to others.

Conclusion:
This was a great pattern to use for the stripe challenge. It allowed me to create an interesting garment for the Palmer/Pletsche contest as well.

Happy Sewing!
C

Wednesday, January 11, 2012

McCall's 6163 - The First Cut - My Wearable Muslin


McCalls 6163


There another dress that was inspired by you. After seeing so many beautiful renditions of this dress on Pattern Review, I decided to give this dress a try.

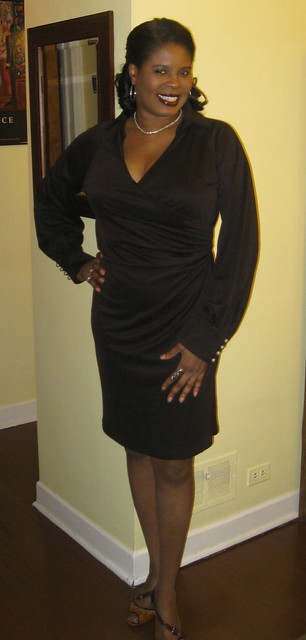
This is my wearable muslin. After finishing the dress, I noted several things to change in the next version. The first is to use a better knit fabric. At first glance, I thought this knit was of fairly decent quality, but as I sewed and handled the fabric, I discovered it didn't have the texture or the durability that I assumed when I purchased it from the store. So I'm calling this my wearable muslin.

McCall's describes this dress pattern as a misses' and women's dresses and sash: Close fitting, above mid-knee length dresses A, B, C, D have mock wrap front, gathered at left side, collar, collar band, raglan sleeves, side zipper and stitched hems: dress A has below elbow length sleeves gathered with elastic; dress B has short sleeves and sash; dresses C, D have long gathered sleeves with cuff; dress D has sash with optional purchased tassels.

Sizing from 8 to 24W; I used 14 with modifications.

My dress looks like the dress worn by the model minus the belt. The instructions were typical and easy to follow. I used a knit jersey from Vogue.

My likes:

  • mock wrap dress - flattering
  • gathering or ruching at the side
  • full, gathered sleeve with cuff
  • loop closure on the cuff
  • center back seam for better fitting
  • belt option with tassel detail

My dislikes:

  • As pictured on the model, the cuff is wide. Note how it falls on the models hand. It's big enough to put your hand through the opening without unbuttoning the cuff. I like the cuff to fit closer to my wrist. Next time I will make the cuff smaller.
  • The vamp is a little low for my taste. I will raise it about a inch and half next time.
  • The collar band is too narrow for me. I'll add 1/4 inch to the next version.
  • The zipper is not necessary. I should be omitted from the design/instructions. I omitted it and was able to put the dress on without a struggle.

These changes (dislikes) will make the dress ideal for me.

I made a FBA following Ann's (Gorgeous Things) tutorial. This dress is short. I added two inches, could have added a few more. I also added elastic to the neck line to ensure a snug fit across the upper chest area. Sway back and a small shoulder blade adjustment as usual.

Like I said earlier, I will make this one again. It's a good one to try. Definitely a winner. It wears easy and not difficult to make.

Tuesday, January 3, 2012

M5860 Jacket Paired with Vogue 7608-A


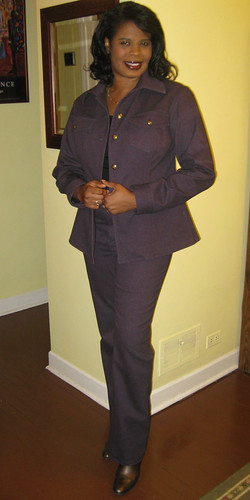
I finished up M5860 in time to wear for a girls night out during the holiday week. A jean jacket that is figure flatting and stylish. I like everything about it: 

patch pockets with flaps
top stitching
longer length (makes me look slim)
fitting along the sides


Pattern Description: Misses' Unlined Jacket: Fitted, unlined jacket has princess seams, patch pockets with flaps, collar and collar band, long, two-piece sleeves with cuffs and optional jewel stone embellishments.

Pattern Sizing: 8-22; I used 14 with my usual modifications.


Did it look like the photo/drawing on the pattern envelope once you were done sewing with it? Yes, it did.


Were the instructions easy to follow? The instructions were great; nothing confusing. Nice pro tips including for resizing the under collar and tip on how to reposition the pocket after making a full bust adjustment.

One of the things I plan to do better in 2012 is to take a serious look at the layout and include comments on that in my review.

What did you particularly like or dislike about the pattern? Like above at the start of the review.

Fabric Used: I used a stretch woven twill fabric from Vogue. The stretch in the fabric made it easy to "curve" the pocket and flap into position after making a full bust adjustment. Great fabric to work with for this project. Stretch woven is not recommended, but it is a good choice. Especially with a FBA.

Pattern alterations or any design changes you made: I made my usual adjustments, which are here. Additionally, I top-stitched around the flap and the pockets twice. I used smaller buttons on the sleeves in an effort to use what I ready had on hand.

Would you sew it again? Would you recommend it to others? I think I will make at least one more version of this jacket for the summer (white or beige).


Conclusion: This is a great slimming jacket pattern. Try it.

I made matching jeans using Vogue 7608. This time I made view A, flare leg pants. I changed the design on the pockets and exclude the design on the pant leg. Now I have a few pairs of jeans for the weekend.

Happy Sewing!

Tuesday, December 6, 2011

McCall 6400 - Two More Tops; It's a Winner

Yes, McCall 6400 is a Winner! I made two more of these quick and easy tops. Both made in less than two hours.


Fabric purchased at JoAnn's Thanksgiving sale. Each piece cost about $7.50. Great deal on pretty knit fabric.


I finished the neckline the same as the first, which was reviewed here..


Need I say more. This is a great little trendy top that sews up quickly with the least amount of effort.

Happy Sewing!
Cennetta

Tuesday, November 22, 2011

McCall's 6400 - Easiest Knit Top Fall 2011 (with Simplicity 2315)


Mc Calls 6400

This is the easiest knit top of the Fall season. Now, I wonder what took me so long to make it up. It's been on the short list since I purchased the pattern in September. The description is as simple as it is to make: Misses' tops: close fitting. That it.

It took me only an hour to make. It comes in two size combinations. I used Y size M adding a little width across the bust area. No other alterations made.

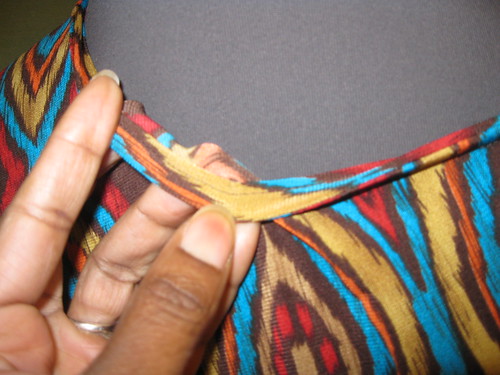
I think my version looks as it was intended, view C. The instructions were super easy. Making this top is akin to sewing the ever popular Vogue 1250 drape neck dress. I finished the neckline by adding a band. This was pretty simple to do. Cut a stripe of fabric about a inch shorter than the circumference of the neck and 1 1/2" wide. Join the ends to create a circle. fold it in half along the raw edges; Divide the band and the neck into four sections; then attach the band putting the band seam at the center back. Trim seam allowance; then fold the band to the inside and stitch in place. This creates a nicer finish.

Likes:

The neckline; you can drape it over to the side to expose a shoulder.
The cut of the top and how it drapes across the waist and hip. It has a slimming affect that we all can appreciate.
It's easy to sew. There are only two pieces. The front is also the back.


No dislikes for me.

The fabric is from my stash. I purchased it from Ann's Gorgeous Fabrics online store about three years ago. Beautiful fabric that was easy to work with. She has some great fun and funky knits that would be perfect for this top. I've already pick a few to buy for more tops.

This is a good one to try. It's easy and stylish; great for beginners.


The pants I wearing were made using Simplicity 2315.  Another pretty easy pattern to sew. The pants are described as slim pants.  My pants aren't as close fitting as the pants on the model.  But that's good for me.  If you want them to be skin tight, you'll have to reduce the width of the pant leg on the outer and inner leg. I made view E without the waist tabs.  I wanted to be able to wear my tops outside the pants.


This pattern comes in sizes 6- 22; I used 14 with my usual modifications:  lengthen the pant leg by 4 inches, adjust the crotch length and curve.  I also add a front zipper fly. I don't like back zippers.  This is an easy change to make.  I simply follow the instructions given in M5818.

The fabric that I used is from Vogue on Roosevelt.  It's a wonderful stretch woven that is soft to the touch on the right side, but on the wrong side it has the look and feel of denim.  Perfect for me and very comfortable.

My likes:

This pattern is perfect for a pair of slim jean like pants that attractive and comfortable.  The contour waistband is the best.  I do plan to make a few more of these pants.  They are perfect for the Chicago snowy winter; boot ready.  You don't have to fold over and tuck them.  They are already very close to your leg.

No dislikes except the back zipper.

I recommend this pattern to all level sewists.  I think I may make View C, skirt as well.

Sunday, November 13, 2011

More Vacation Garments with M6346 and M6083


I'm so far behind. Still trying to review summer garments made for vacation. Well these are the last three. Then I can move on to more new projects.


Can you believe next week is Thanksgiving? Wow! I can't. Time is moving at warp speed. Christmas is around the corner. Don't blink. Lol

Now for the reviews:

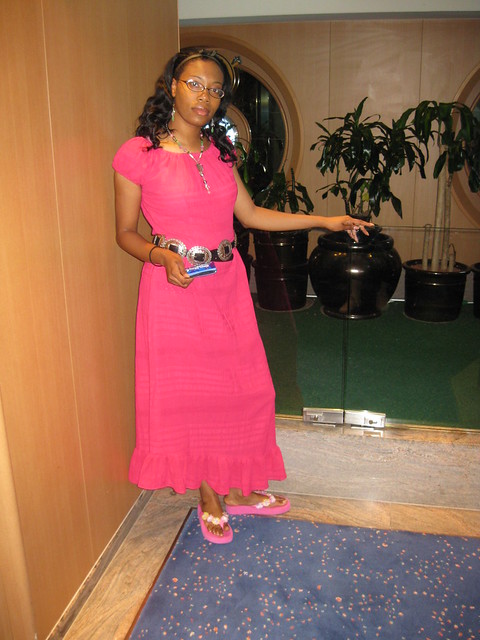
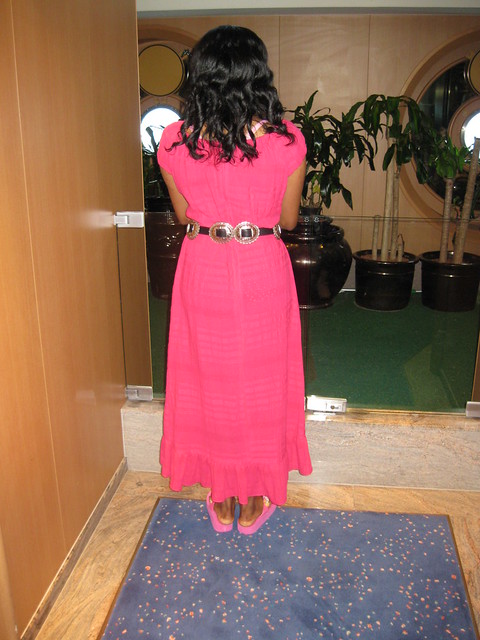
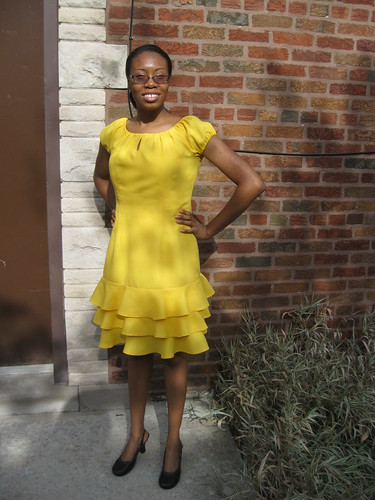
My daughter asked for two dresses made using M6346
.

Pattern Description: MISSES' DRESSES IN TWO LENGTHS: Loose-fitting dress has elasticized neckline and sleeves.

Pattern Sizing: 8 - 22; I used size 10 with.


Did it look like the photo/drawing on the pattern envelope once you were done sewing with it? Yes, it did. I made some slight changes.

Were the instructions easy to follow? Nothing difficult or confusing in the instructions. Very easy to sew.

What did you particularly like or dislike about the pattern? DD picked this one. The ruffled skirt of view C is her favorite. No dislikes.

Fabric Used: Fuschia gauze and yellow cotton blend from Vogue.

Pattern alterations or any design changes you made: No alterations. I eliminated the little tie at the neckline.


Would you sew it again? Would you recommend it to others? No. twice is enough. But I do recommend it to others. It's a quick little summer dress.

Conclusion:
This is a quick and easy pattern to sew. It's great for casual summer wear.


Second, short review:

I decided to make M6083 again. This time view E. I used my gift fabric from Andrea and omitted the pockets and belt. I only make a crotch adjustment and lengthen the pants.


This print is definitely the speaker and the jumpsuit didn't need a lot of details to be noticed.


I wore it the day we were out and about in St. Kitts. It's was just as easy to make as the first. That's it for clothing made for my vacation.

Now back to fall/winter sewing. Upcoming reviews on a few things cut and ready to sew. And to help celebrate Thanksgiving and all the delicious food we all plan to cook, I will post my mom's recipe for Banana Pudding, one of my favorite desserts.

Happy Sewing!
C

Saturday, November 12, 2011

McCalls 6433 - Unity Conference Dress 2011


McCall 6433

It has taken over a month to review this dress. The first photos were grainy and didn't show the details. The second set aren't too much better. So today I was lucky. Saturday morning bright and sunny, about 50 degrees. Perfect for the third photo session.

I'm a fan of the Palmer/Pletsch fitting system, and I love when the instructions are included in the pattern.

Pattern Description: MISSES' DRESS IN 3 LENGTHS: Fitted, lined bodice, front and back darts, stitched shoulder pleats, back zipper and self lined cap sleeve. A,B: A-line skirt, stitched pleats, C: Straight skirt, back slit. Optional purchased belt.


Pattern Sizing: 4-16

Did it look like the photo/drawing on the pattern envelope once you were done sewing with it? Yes it did.

Were the instructions easy to follow? Yes. They were typical; no problems with understanding the instructions.

What did you particularly like or dislike about the pattern? I like the design of this dress. The pleats at the shoulder and waist. My dislike is related to the drafting of the bodice front and back. Two of the views have sleeves, one does not. All three views use the same front and back bodice. The maxi dress is made out of knit fabric, which probably doesn't cause a big issue with the armhole. For me the lower portion of the armhole is too low for the sleeved view (red). I didn't notice this issue until after I set the sleeves. It's not a big problem; but it's noticeable in the feel and wear of the dress.

Note the difference in the fit.

Because I really like the bodice of this pattern, I tweaked the front and back to fit better. I plan to combine this bodice with another pattern. My inspiration is a dress from the Cadena Fall 2011 fashion magazine. But that's another review.

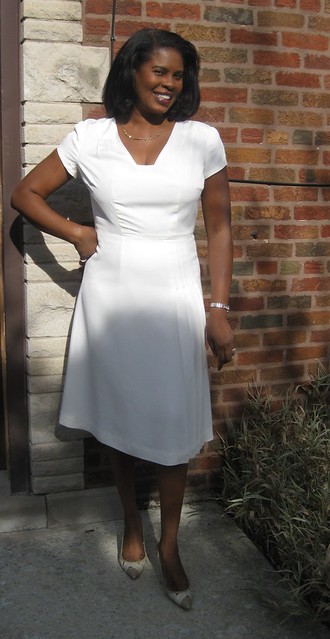
Fabric Used: Cream silk linen from Vogue in Evanston. Polyester lining.


Pattern alterations or any design changes you made: Usual changes, FBA, prominent shoulder blades, sway back and lengthen skirt a few inches. I also added lining to the skirt. To make the front skirt lining, I used the skirt pattern for the maxi. For the back lining, I simply used the back skirt pattern.

The plunging neckline is too low for my taste.  I bought it up about a inch or so.  You might want to do the same as it is still cleavage baring. (This change was made in the cutting process.)

Would you sew it again? Would you recommend it to others? Yes, I will use the bodice for another dress. And I do recommend this pattern. Make sure you make a muslin or paper (pattern) fit the bodice.

Conclusion:
Cute dress that is easy to make. I do recommend it to all level sewists with modifications.

A few more photos here.

LinkWithin

Blog Widget by LinkWithin