Tuesday, March 20, 2012

Spring 2012 - Bold, Beautiful Color

Today is the first day of Spring and what better time than now to talk about color trends.  This installment is bold and beautiful.  Colors that pop!  I would like to include them in my spring and summer wardrobe. So which color do you plan to show off this Spring? Will you tango with tangerine or become green with envy?


Tuesday, March 13, 2012

Dress for Ms. Paulette - V8615

It's that time of year again. Prom season and anniversary dress for Ms. Paulette. She is the banquet chair for our Pastoral Anniversary Dinner. Every year for the past five years, Ms. Paulette has commissioned me to make her dress.

This year she will be wearing Vogue 8615 made in a matalasse fabric, which she purchased at Fishman's Fabrics a few week ago. The muslin is done and the fitting/design adjustments transferred onto the pattern. I'm happy to say there were only minor fitting adjustments needed.  I usually don't make multiple muslin.  One is enough to capture small changes.  If there are more adjustments, I'll make them as I sew and fit the dress.  The next fitting will be later this week.  Next cutting and sewing.


Adjustments:

  • Reduce the 3/4 length sleeves by 1 inch
  • Reduce the amount of ease in the sleeve cap
  • I usually write on the muslin to help me remember the changes needed.
    These instructions on how to reduce the excess ease are published in "Vogue Sewing".
    Here's is my rendering of the change.
    Reduced ease and shorten sleeve.
  • Make a deeper "V" for the back neckline
  • Reduce the length of the bodice by 1/2 inch
  • Adjust shoulder seam to fit closer to shoulder
  • Add bra strap holders to the shoulder seams
  • Deeper "V" for back neckline. Notice that the right shoulder seam stands away from the shoulder. This could be attributed to lack of hook and eye at the top of the zipper. Will see on the next fitting. I can make deeper shoulder seams if necessary. Also the length of the bodice is a tad bit to long. Below is how I made a deeper "V" neckline:
    Original pattern with new neckline drawn on it. I didn't want to cut the original just in case I need to use it again.
    Copied the bodice back transferring the marking and the new neckline.
    Finally a view of the new back bodice over the original pattern. and finally,
  • Only add 2 inches to the length (I added four to the muslin)

Parting Shots: This is my favorite Ms. Paulette project to date. V8355 made in 2008.


This is an easy one. So that's all for now. Stay Tuned and have a great day!
C

Monday, March 12, 2012

Beautiful Fabric and A Little of That and This

Happy Monday!

One of the big fashion trends is big bold graphic prints. They are everywhere and on everything. dresses, coats, pants, purses; you name it. So I purchased a few from Gorgeous Fabrics. Then last weekend I picked up a few more fabrics from JoAnn's. Not bold, but just as pretty. This spring I have many projects in the works. So I'll talk about them intermittently over the next few weeks. But before I dive into all the alternations and modifications, here's my new beautiful fabric.


Pant Weight RPL - British Tan

Feather Your Nest ITY Jersey-Autumnal Tones

Purple Haze Jersey

Bold Swirls Jersey - Green, Black, and White

All were purchased at Gorgeous Fabrics.  I'm thinking about making something from one of the Christine Jonson travel trios (April Challenge - Haute Couture Club).  Haven't decided yet.


Black Floral Jacquard - It has the touch and feel of raincoat fabric.  I'm making a coat M5766.


Poly Satin - V1242.


Next post: Ms. PB.'s dress V8615.

Happy Sewing!
C

Tuesday, March 6, 2012

Inspirational Flickr Picks - Tuesday, March 6, 2012


1. P022212PS-0498, 2. Swarovski crystal and sterling silver bracelet photography by Laila L, 3. Baked Apples, 4. Sigh.....wish I could keep it., 5. Gifts, 6. 25, 7. Untitled, 8. Scissors, 9. Along the 50, 10. Burda 7212, 11. 2/25/2012, 12. A lady needs to protect her hair and hands., 13. A place to hang your hat, 14. Shoes n roses, 15. IMG_5586, 16. Picture 613

There are many things that inspire me:  people, places, animals, color, a work of art, food..,  The list goes on and on.  Things give me inspiration to create something, learn a new thing, grow in skills, become a better human being.  Sometimes a negative situation or activity can also influence me to do something positive.

So today's inspiration comes from my Flickr favorites.   Half of these photos inspire creativity and the other half inspire building virtuous qualities.  For instance, the wall of hats inspire me to make some vintage hats.  The purse next to "25!" inspires/motives me to be kinder.  The ASG Chicago chapter make prom dresses and purses for the "Glass Slipper Project".  This photo is an illustration of compassion, selflessness, dedication, encouragement and goodness.  You might say, "You see all of that in that little black purse?" I would say, "Yes." Because I know the story behind the purse.  It's the manifestation of those qualities mentioned above and more.  Someone took the time to do something for a complete stranger in need.  The donated purses are beautiful.  ASG ladies paid special attention to details making each purse a work of art.  I'm sorry to admit, I didn't contributed to the cause this year.  But hope to next year.

So what kind of things inspire you?


Enjoy!
C  

Friday, March 2, 2012

M6433 + V8555 = New Dress, New Design


Warning this post is lengthy with several pictures.
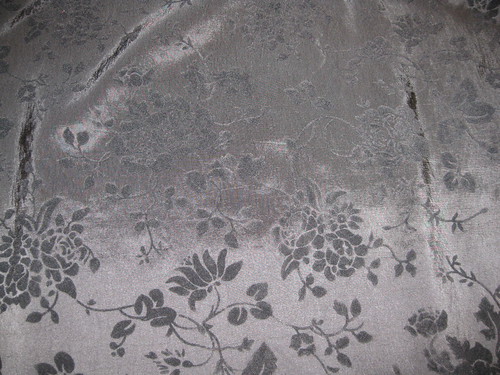
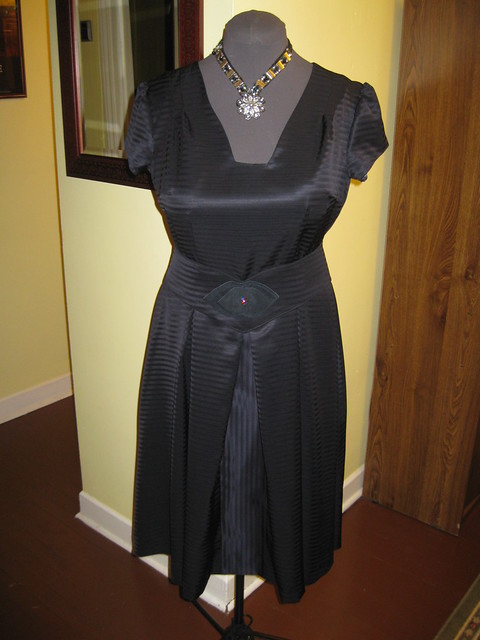
Another striped garment.

It's been over a week since I finished the dress. Before I forget the construction progress, I want to give my review on how I made this dress.

September, 2011 was the first time I tried making a dress from McCall's 6433. I really like the design of the bodice and wanted to give it another try, but with a different skirt. Something different from my usual skirt waist dress. I decided to use the pleated skirt of Vogue 8555. There is nothing new about me mixing and matching pattern pieces. It's been a practice of mine for majority of my sewing years. Right now, I lack the skill to draft my own; but why draft if you have something that works in the pattern collection. And boy, do I have plenty in the pattern collection.

Since there were no major fitting issue, (I worked them out before making the first version) I decided to use at least one couture technique and add a unique belt to finish the look of the dress. Let's begin with the pattern descriptions:

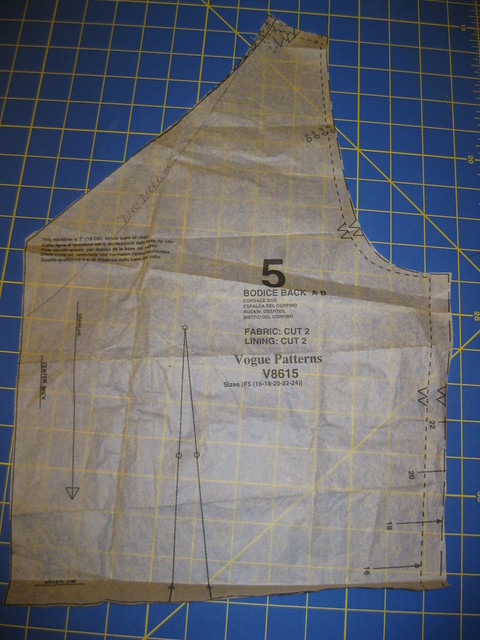
McCall 6433 - Misses' dress in three lengths - fitted, lined bodice, front and back darts, stitched shoulder pleats, back zipper, and self lined cap sleeve. A,B: A-line skirt, stitched pleats: C: Straight skirt, back slit. Optional purchased belt. I used the bodice of View B with some modifications;
and,
Vogue 8555 -Misses' dresses A through F have lined bodice, front pleats, front gathers, back darts, self-faced midriff, back zipper and skirt variation. A - C lined slim skirt in two lengths with front and back darts, back slit, D-F; skirt in two lengths with front and back pleats, pleat underlay and side seam pockets. A; D gathered sleeves with sleeve bands, B; F purchased belt. A, B, D, & E mid-knee length, C; F; below mid-calf length. I used the pleated skirt.


Sizing - McCall 4 - 18 and Vogue 8 -22.

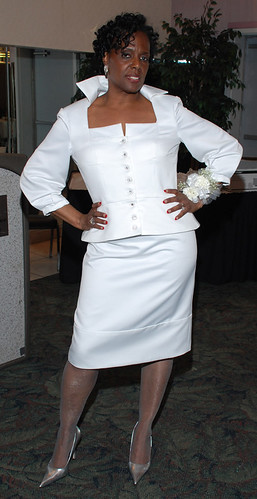
I created a new dress using these patterns. For the most part, I followed the construction process for each part. The changes made were related to design preferences. No problems in the instructions. Pretty typical, standard.

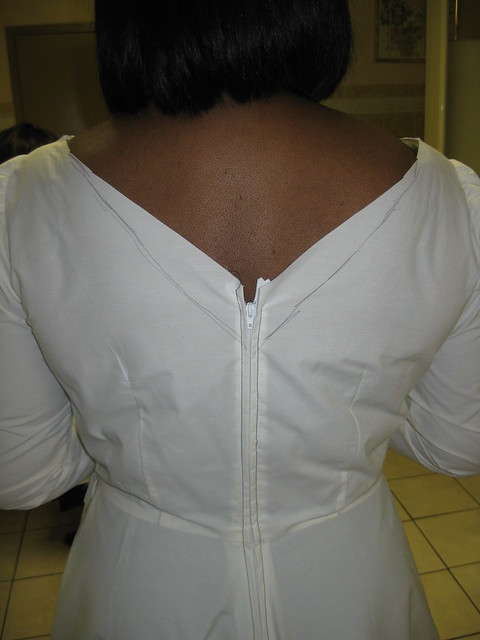
After making the McCall's dress I knew I would make the top again. The bodice has a likable vintage look to it, and the neckline is not commonly seen in recent patterns.  I really appreciate having fitting lines and instructions in the pattern. It helps build my fitting skills.

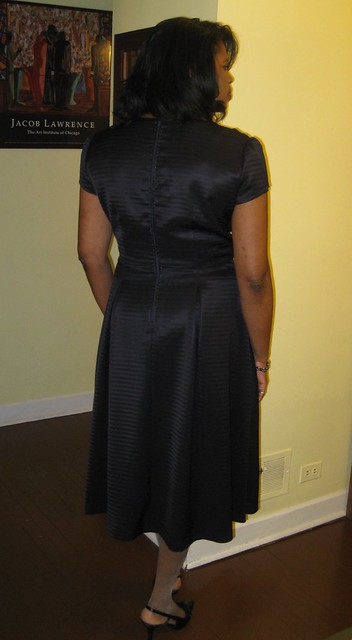
The skirt is great because it has fullness at the hem but waist pleat bring it closer to the body.  Because I am top heavy, the skirt design and the drape of the fabric helps make this dress more figure flattering.

I have no dislikes about either pattern.

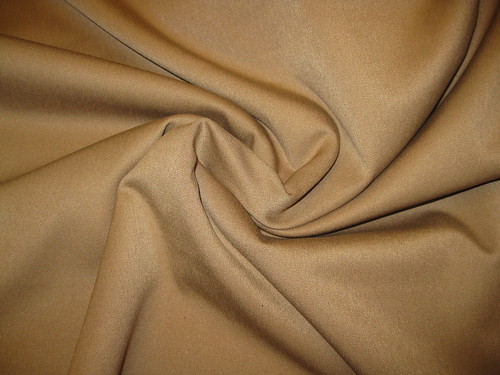
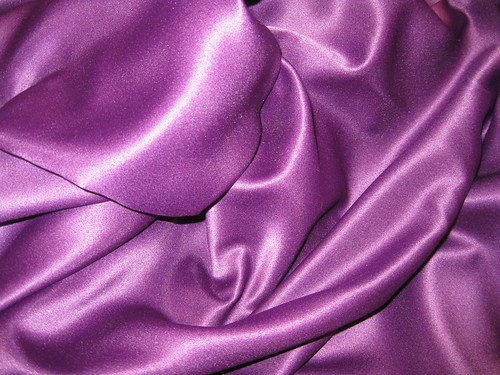
I bought the fabric at Vogue Fabric on Roosevelt last summer. It is made of assorted fibers, for sure some polyester and maybe some rayon. It has a lovely draft and smooth hand. Love it.

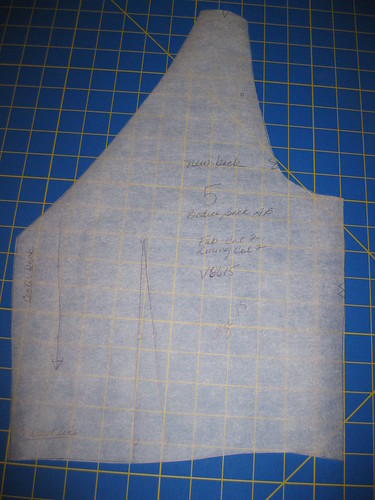
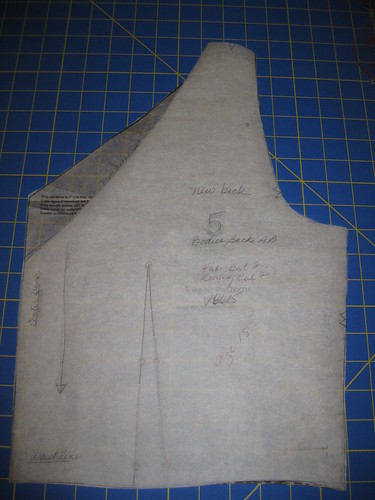
Although I spliced two pattern together, I still had multiple alterations and design changes. I made my usual fit adjustments: FBA, 
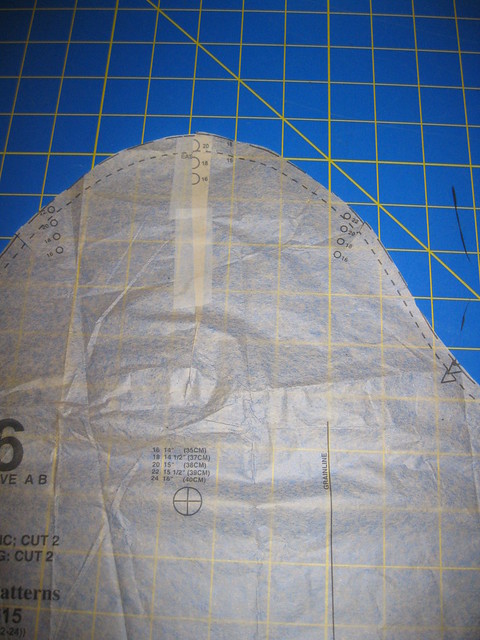
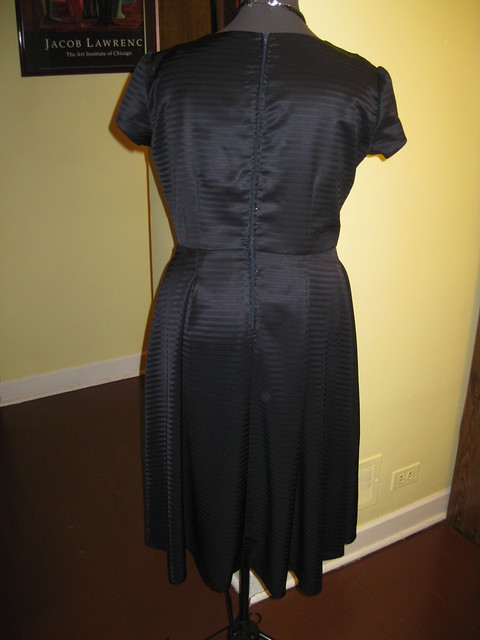
prominent shoulder blades, swayback adjustments, and lengthened the skirt a bit. Also the sleeves were a little snug; so I cut them a tad larger than size 14. Lastly I raised the vamp about a inch, still not enough. Lol

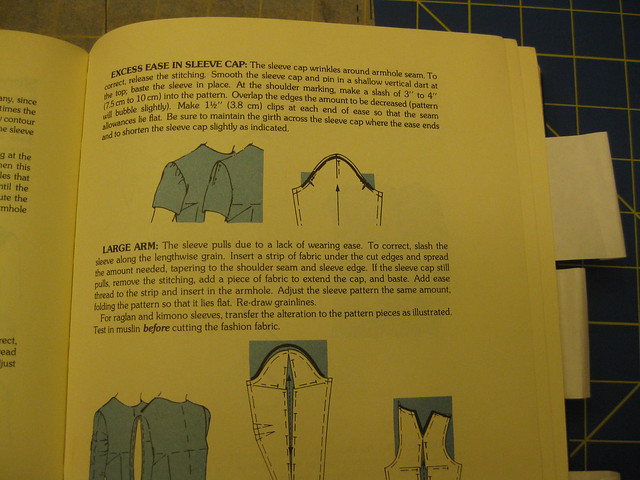
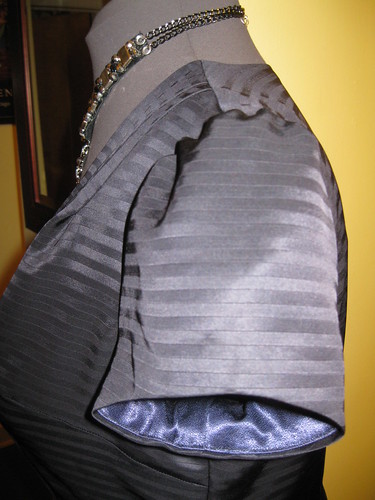
I made a few design changes. The sleeve cap has a lot of ease in it. So instead of removing the excess ease I added more; then gathered the sleeve cap. I'm really liking the process of hand-picking a zipper. This was the third time I've done it. It adds a custom touch to the dress. Finally, because I have very little waist-definition, I added a belt, which I will review next.


I think this is the last time I will use these patterns. Remember I said "I think". You never know. Lol If these are your style of dress, I do recommend them both. They are easy to sew and produce a fashionable dress.

You won't be disappointed with the results.  Just make sure you make appropriate fitting adjustments.


Now the belt.

I love this belt. It's a pattern from "Making Vintage Accessories," a book My DD gifted me for Christmas. If you like vintage, you will like this book. It has some interesting, unique accessories.   Ok.. Ok.. this is not the book review. Back to making the belt.

The book comes with instructions and patterns included. You have to enlarge the patterns 200% to get the appropriate size.  There is a line on the belt pattern that allows you to make adjustments based on your waist size. Caution, don't add length to the end of the belt. The curve will be misplaced and the ends won't overlap evenly.

I'd plan to photograph the making of the belt, but forget to do so. Sorry. Maybe next time. I'll try to account for my process in words.

1. Enlarging the pattern. It was Saturday evening and I wasn't about to go Kinkos to make copies. So I did this to enlarge the belt pattern. It's crude, but it worked.

2. Pin and cut fabric (2) for the belt. Cut hair canvas fusible interfacing (2), removing the seam allowance for easy sewing. Cut leather for the applique.

3. Apply interfacing, pressed belt pieces turning under seam allowances.

4. Sew belt pieces together. Press

5. Place the leather pieces on top of the center section of the belt, largest first. Then hand stitched the leather pieces to the belt.

6. I didn't have a vintage button. So I added a swarovski crystal to the center to complete it.

NOTE - I didn't read the instructions.  I just made it based on what felt right to me.

I will certainly make this belt again.

All pictures here.

LinkWithin

Blog Widget by LinkWithin