Thursday, May 29, 2008

New Look 6561E


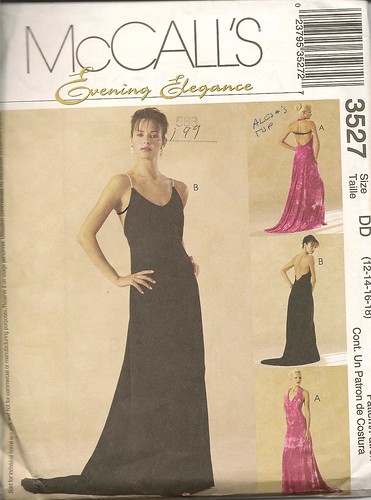
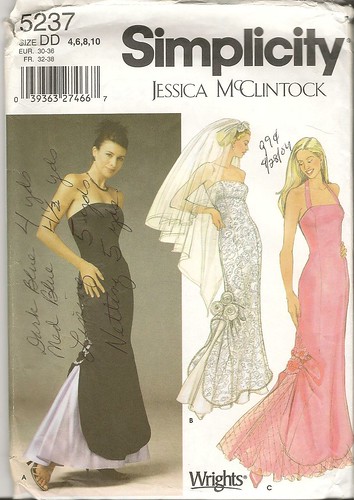
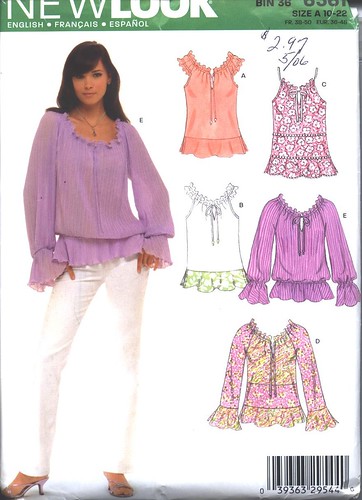
Pattern Description: Pullover tops with sleeve variations.

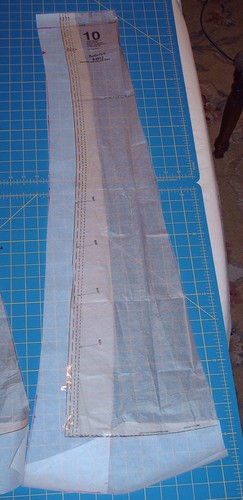
Pattern Sizing: 10 -22. I used size 14; View E

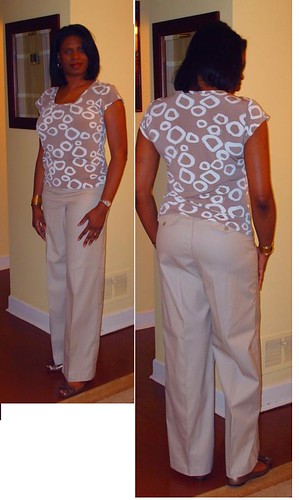
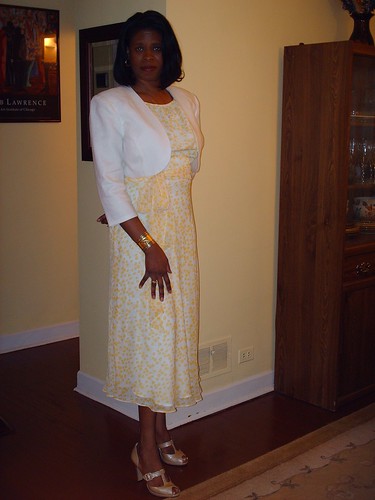
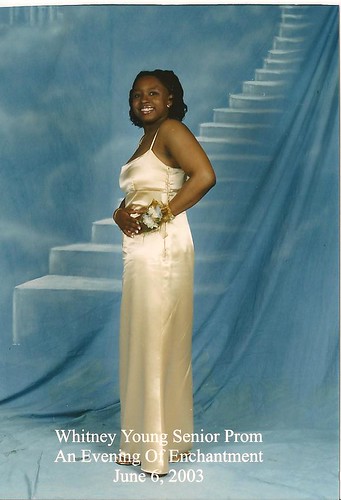
Did it look like the photo/drawing on the pattern envelope once you were done sewing with it? Sort of. View E looks longer and fuller on the model.

Were the instructions easy to follow? Yes.

What did you particularly like or dislike about the pattern?I like the sleeves and the neckline.

Fabric Used: polyester georgette.

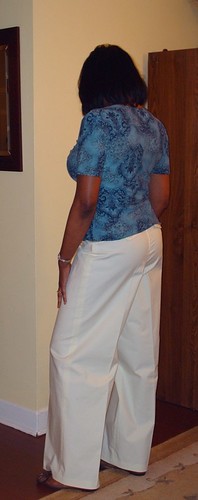
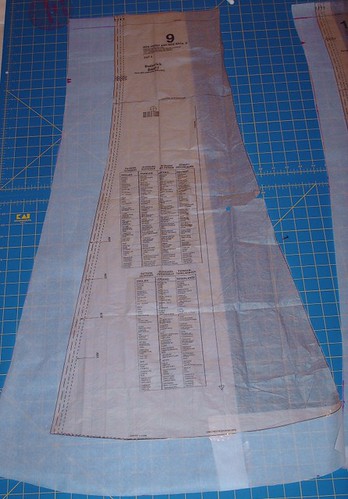
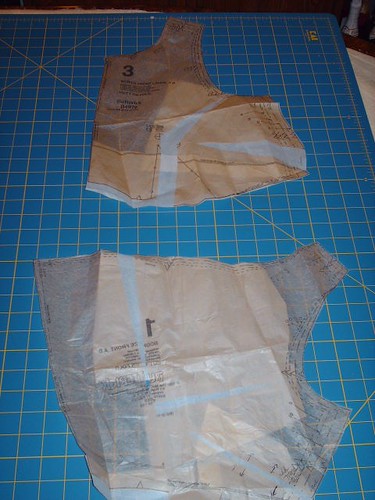
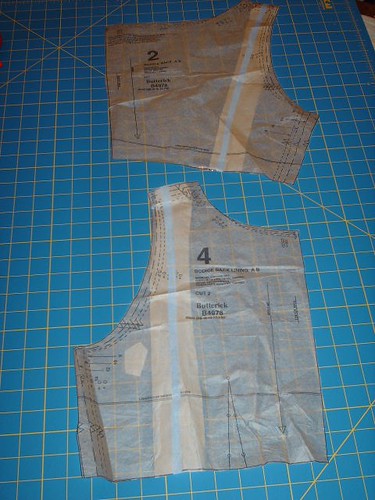
Pattern Alterations or any design changes you made: I didn't change or alter any thing. From the photo the top appeared to have a lot of ease. After completing the top, that was not the case. My version is wearable, but I should have added length and width. The neckline is very low in the back, which is something I'm not used to. When I tried it on, I thought about gifting it to my sister. But my mom thought it looked fine. I still may pass it to her; it fits a little closer to the body than I expected.

Would you sew it again? Would you recommend it to others? Yes. I plan to, but with the changes mentioned above. And yes I would recommend it.

Conclusion: Fun top that isn't difficult to make. Don't be deceived by the photo. This top doesn't have as much style and wearing ease as illustrated.

Travel Mini Wardrobe

Finally..., I'm able to post some of the sewing projects that I have completed over the past month and half. The pictures still aren't that great but good enough to get an idea of how well the projects turn out.

As mentioned earlier, me and two colleagues will be travel to Naples, Florida, for a conference soon. I wanted to have a few pieces to complement some outfits that I ready have. I used M5597 to make the pants. Then I picked several top patterns to make the five tops shown. I probably won't take everything, but wanted enough to pick and choose from. I didn't create this mini wardrobe to compete in a wardrobe contest. My only goal was to create some comfortable piece to take on this trip as I will spend a lot of time sitting, learning, and talking about our vendor's product.


Tan and white top is made from Simplicity 4076. This pattern has been reviewed on PR many times and is one of my favorites. I've made view D and view A several times with only slight modifications.


I used Kwik Sew 3378 for the white and blue tops. Another one of my favorites. This makes the four and fifth version of this fav.


Simplicity 5875, view F with sleeve from view D. I didn't do my usual FBA on any of the tops. Most of the knit used had at least 30 percent stretch in them so I thought I could for-go the FBA. This turned out fine for the most part, except for the yellow matte jersey top. I noticed a few drag lines from the bust to the lower trunk area.


This woven top is made from New Look 6561. This is a wearable muslin. I expected more ease (style and wear). I'll try this one again.

I hope to make one jacket from either of these patterns this weekend.


My full review on Patternreview.comm.

Wednesday, May 28, 2008

Sizing Up A Pattern - M4817


My friends sister asked me to make this skirt several weeks ago. Being an unexperienced fabric and pattern shopper, she inadvertently picked up the wrong size. So I had to scale the pattern size up to her body measurement. Occasionally, I find myself doing this type of pattern alteration when my/the size is sold out or the pattern is from the period when there was only one size included in the envelope.

There is how I did:


I evenly divide the needed amount at the seam allowance. This technique is easily done for skirts and pants, but can be a little tricky for blouses, dresses and jackets. But it's doable. It just takes a little time.


The finished skirt. She's a happy lady.


Butterick 4978 - View B & McCall's M5093 View E


Dress talk

I purchased this pattern last year not knowing when I would make it, but knew I'd make it some day.

It's still relatively cool in Chicago. Average temperature is 60 degrees. And when it gets hot, every building will be freezing. I made McCall's 5093 to wear with it.


Forgive the facial expression. This was the best photo of all taken with the jacket and dress.


Pattern Description: MISSES’ DRESS: Semi-fitted, flared, lined dress, below mid-knee or above ankle has bodice with neck binding, front opening slit and slightly cut-a-way armholes, midriff, bias skirt and back zipper. B: tie ends.

Pattern Sizing: 8-22. I made size 14.

Did it look like the photo/drawing on the pattern envelope once you were done sewing with it? The dress did look like the pattern illustration.

Were the instructions easy to follow? Yes. No problems. The instructions (4, 12 & 31) for finishing the darts, seams of the bodice and skirt lining I didn’t particularly care for. I followed them for the darts, but I decided not to for the side seams. I overlocked the seam allowances instead of stitching two seams and trimming the excess.

What did you particularly like or dislike about the pattern? Like: the feminine style of this dress. No dislikes.

Fabric Used: polyester georgette from Vogue Fabrics. I purchased the floral last year at the end of the season sale for $1.99/yd. White georgette was used for the lining and underlining.

Pattern Alterations or any design changes you made: Alterations: I altered the four bodice pieces: the FBA and broad shoulders. I added a few inches to the length of the skirt.


Design Changes: These are design misfortunes. I don't know how I did it, but I had two accidents while making this dress. First, mistook the stitching line at the center front opening for the cutting line. So the opening is off by 1/8 inch. Then while trimming the skirt and lining to an even length I accidentally cut too much off the lining. The dress is wearable, but these mistakes almost made me give up on the finishing the project. Now "real" design changes: I eliminated the belt loops on the side of the midriff. I didn't think they would add any value. There is one thing I notice, though, the belt doesn't stay in place. Looking at the model, her belt is tightly tied around the waist. Second, this fabric is very sheer so I decided to underline the bodice to eliminate the "see-through" affect.

Would you sew it again? Would you recommend it to others? Probably not. I have hundreds of dresses to try.


Conclusion: Pretty feminine dress that would be a nice addition to most wardrobes. It's not difficult to sew and I would recommend it to others.

Jacket talk - Another view


Another forgive..., the unhappy smile. This was a difficult photoshoot.


Pattern Description: JUNIORS’ LINED JACKETS: Fitted, lined jacket, above waist has princess seams, shoulder pads, with or without collar, and sleeve and length variations; jackets B, D, E have purchased trim.

Pattern Sizing: 15/16 which is equivalent to size Misses 14.

Did it look like the photo/drawing on the pattern envelope once you were done sewing with it? Yes, as for as the style lines.

Were the instructions easy to follow? The instructions were easy to follow, but I chose to follow a slightly different method. Instead of leaving an opening at the bottom of the jacket, I partially sewed the back center seam (3" at the top and 2" at the bottom). Attached the jacket (circumstance) completely to the lining. Pressed seam allowance toward the lining and understitched. Next I pulled the sleeves through the opening and sewed the lining at the lower edge of the sleeve. Pulled them back to the right side; pressed. Closed the CB seam by stitching seam allowance together on the right side.

What did you particularly like or dislike about the pattern?
Nothing to dislike. Simple jacket. Wardrobe builder.

Fabric Used: Left over medium weight linen (about 1 yard). I purchased it at Vogue Fabrics. I pre-washed and dried it. Lining: polyester purchased at JoAnn's Fabrics. I buy white and black lining in bulk when it's on sale. So it's always on hand.

Pattern Alterations or any design changes you made: FBA and broad shoulder adjustment. At the bottom edge (back) I tapered the seam allowances to 12/13 to eliminate the gapping at the bottom back. Design changes: I didn't add the trim. I wanted to be able to wear this jacket with other coordinates.


Would you sew it again? Would you recommend it to others? Probably. Yes.

Conclusion: This is a nice wardrobe builder. The jacket can be worn with various outfits. In the summer I always wear or carry a jacket. Every commercial, public, private building has the air conditioning on "north pole" setting and I can't stand it.

Tuesday, May 27, 2008

Memorial Week End - ReCap

I hope everyone had a great holiday weekend. Long weekends are such a treat. I’m always grateful for an extra day off work.

Weekend Re-cap:

Thursday I received an invite to the Friday night Kanye West (with featured artists Rihanna, NERD, and Lupe Fiasco) concert. This was definitely not my scene. There are only a few rap artists that I like: Grand Master Flash, Curtis Blow, Will Smith, Common. .., I’m so old school. Any way…, Kanye West did his thing! He is definitely a showman.

Saturday: A little shopping, cooking, cleaning, and sewing.

JoAnn’s and Hancock’s had pattern sales. I picked up ten or so. It’s crazy because I’m supposed to be on a pattern diet. Lol I was able to get five tops made over the weekend: four knit and one woven. The only one that I will review is the woven. The others have been reviewed on Patternreview many times already. Most of them I've made at least twice before. These tops are options for the Naples, Florida mini-wardrobe. So far, I’ve finished three pairs of pants and the five tops. If time permits I want to make one jacket. The plan is to take a few of the new pieces to compliments two suits that are already in the suitcase. The attire for the meeting is business casual. I really don’t need to “suit up” for the conference as I’m not a presenter; my boss is.

Sunday: Church, cooking and sewing.

Monday: DD and I had a photo shoot of all the pieces including a jacket, suit, and dress. Unfortunately, most of the photos aren’t good. So we have to redo them. I was hoping to post them today. Tonight, if I’m not too tired will re-take a few.

In the afternoon we had a family Bar-b-que at my sister’s home to celebrate my niece’s 13th birthday. Great time with the family.


Happy Sewing!
C

Thursday, May 22, 2008

Adding Rhinestones as an Embellishment

Yesterday, everyone asked how did I attach rhinestones to the bolero jacket in the previous post?

My response:

I hand sewed the rhinestones on. The rhinestones come linked by very heavy white thread. Each link has space enough between to stitch. I use the same color thread as the garment or filament thread so it will easily blend in. At the ends, I pull a few rhinestone off the chain and fold back the thread then glue them to the back of the chain. Where the two ends meet, I try to secure as well as possible to the garment. I also try to put the joining ends in a place on the garment that isn't highly visible.


There are a variety of rhinestones trim that you can purchase. Some come with stiff netting attached that can be sewed between the dress and lining or facing. This type is more difficult to sew. It's hard to get close to the stones without breaking needles.

If anyone has more suggestions, please feel free to comment.

Thanks,
C

Tuesday, May 20, 2008

No Prom Dresses for Me This Year

Over the years, I have made many prom dresses for friends, family, and referred clients. This year I chose to pass up the excitement. Last week I heard a few reports on "Prom Dresses Gone Wrong". When I take on a prom dress project, I try to stress to the young lady that the prom is a princess ball and the style of the dress should be in line with "princess" and should be flattering for "their" body type and structure. Most of the time the talk hits home, but there have been an occasion or two where it didn't.

In celebration of prom dressmaking, here are a few dresses for which I sewed and was very pleased with the results. So many I didn't take pictures of due to exhaustion or relief that everything turned out well.

I made this dress (garter) for my baby sister. Currie Prom 1992. This dress worked me, but it turned out beautifully. I was careful to follow the instructions given. There were a lot of new techniques involved with making this dress. The detachable skirt required netting between the lining and the skirt. It was completely concealed. I think the bodice was one of my first attempts at underlining. I took me about 30 hours to make this dress.


Me Attaching skirt to dress. I put hooks and eyes on each side of the dress to attach the skirt. My DD blotted out the background of this picture. The room was a hot mess. lol


I used the top of one pattern and the bottom of the other to get the desired style for the next prom dress. Fitting this dress was a challenge because the pattern style and sizing was slightly different so I had to blend the pieces together. Ms. LCD wanted the dress to "sparkle" a little. So I added rhinestones across the waist and hip area. These were glued on one by one.


Ms DH wanted a simple classic dress. This one fit the bill. I also made a shawl and purse (not shown).


Finally, my DD..., I made the dress, jacket, and garter. Of course I have more photos of DD's prom dress. Too many to post though.


Happy Sewing!
C

Monday, May 19, 2008

Maximizing Your Cutting Time

Like most of you who sew, life can sometimes cut into sewing time. My grandmother, Louise, often shared tips, techniques, stories about projects and making your "gift" work for you. Boy, do I miss those days. There was a time when my grandmother worked in a garment factory, and they cut multiples of a garment type at the same time. This is one of my favorite time savers.

Most of the time I wear pants to work due to the nature of my environment and occupation. My office (IT unit) is located in the basement of the administrative building and I do travel from campus to campus with an occasional trip to another state. Fitting my pants has been somewhat of a challenge. So after I find a pattern that I like and make the necessary adjustments, I cut multiple pairs at the same time.

Here is how:

When I completed the skirt for, M5597, I liked it even more. So I decided to make the pants as well. I selected three different fabrics (1 -rayon/linen blend and 2 stretch woven) that I wanted to make them up in.

The fabric cuts need to be the same width - this makes for easy cutting

Lay the fabric cuts evenly on top of one another

Pin the pattern pieces and cut


That's it!

Consideration - the weave of the fabric needs to be similar. The "give" of the fabric will play into the wearing ease of the garment. I sometimes make the outer seam allowances 1" instead of 5/8".

With cutting M5597 I could only cut two at the same time. The two stretch woven pieces were 60" wide and the other was 54" wide. A few inches can make a world on difference when cutting wide leg pants.

Happy Sewing!
C

Saturday, May 17, 2008

I'm Still Here!

I've been extremely busy these days: work, life; you name it. I've got several reviews on the way. Two of my projects almost made it to the trash can though. Prom season is here and the reports of the worse dresses are starting to surface. For shame! For shame! A few of my sewing buds are coming to the close of their prom dress making season. I decided not to partake; that's another post. Ms. CB gown has been put on the back burner, but I will turn up the heat next week. Her event is in July. Someone asked me to make a jean skirt for a upcoming trip, and I started working on my mini wardrobe for my upcoming business trip to Naples, Florida.

That's it for now.

Happy Sewing!
C

Saturday, May 10, 2008

A Virtuous Woman - Happy Mother's Day


Proverbs 31:10-31

10 A wife of noble character who can find?
She is worth far more than rubies.

11 Her husband has full confidence in her
and lacks nothing of value.

12 She brings him good, not harm,
all the days of her life.

13 She selects wool and flax
and works with eager hands.

14 She is like the merchant ships,
bringing her food from afar.

15 She gets up while it is still dark;
she provides food for her family
and portions for her servant girls.

16 She considers a field and buys it;
out of her earnings she plants a vineyard.

17 She sets about her work vigorously;
her arms are strong for her tasks.

18 She sees that her trading is profitable,
and her lamp does not go out at night.

19 In her hand she holds the distaff
and grasps the spindle with her fingers.

20 She opens her arms to the poor
and extends her hands to the needy.

21 When it snows, she has no fear for her household;
for all of them are clothed in scarlet.

22 She makes coverings for her bed;
she is clothed in fine linen and purple.

23 Her husband is respected at the city gate,
where he takes his seat among the elders of the land.

24 She makes linen garments and sells them,
and supplies the merchants with sashes.

25 She is clothed with strength and dignity;
she can laugh at the days to come.

26 She speaks with wisdom,
and faithful instruction is on her tongue.

27 She watches over the affairs of her household
and does not eat the bread of idleness.

28 Her children arise and call her blessed;
her husband also, and he praises her:

29 "Many women do noble things,
but you surpass them all."

30 Charm is deceptive, and beauty is fleeting;
but a woman who fears the LORD is to be praised.

31 Give her the reward she has earned,
and let her works bring her praise at the city gate.

Friday, May 9, 2008

I've Been Tagged

I've been tagged by Carolyn.

Here's the rules:

1. Pick up the nearest book.

2. Open to page 123

3. Find the fifth sentence.

4. Post the next three sentences. (I posted four instead. It's the forth sentence that is most important.)

5. Tag five people, and acknowledge who tagged you.

Stolen Lives by Malika Oufkir and Michele Fitoussi

"One of our male nurses gave me aspirin, the only remedy available. Seeing that my condition was not improving, the camp commander pain, before falling into a coma. When my temperature subsided, I had grown painfully thin and lost all my hair. But I survived."

I'm tagging Toni, Alethia, Faye, Kat, and Karen

Monday, May 5, 2008

Fitting Vogue 1015 - Ms. CB


This weekend I worked on several projects. Some for myself, my DD, and Ms. CB's gown. Saturday I completed the muslin, and Sunday after church I was able to work on fitting the muslin.

When I make a muslin for a client, I usually select the recommended size based on the measurements taken. Ms. CB measurement coincided with size 14. The pattern was up to size 12. So I graded it up to what would be size 14. One of the benefit of sewing the muslin is I get an idea of where the challenges are in the construction of the garment. First noted was the multiple pieces of the skirt, some pieces requiring gathers while others requiring pleats. The joining of these sections with careful handling of the thickness of the final seam. And the joining of the lower bodice (cut on the bias) to the front of the skirt.

Sunday's fitting did not include the fitting of the foundation. I'll work on that once I've had the adjustments to the shell/lining of the dress.

Ms. CB is petite about (5'3")

Alterations needed:

Shorten the lower bodice by 1"
Lower bust dart by 1"
Shorten Straps 3/4"
Increase width of back bodice by 1 1/2" from bust to waist
Shorten skirt by 2"
Decrease width at neckline 1"; gaps at center front


Pricing is always a challenge for me. Most of the people that I sew for are friends, family or church family. I always log the amount of time spent for each item made for clients. (I'm slow). The final price divide by the hours gives me a rate per hour, which in most cases very little considering the amount of time spent. (I've got to work on my speed).

Log to date:

4/19/08 Reading instructions and cutting pattern 4:30p- 5:52p
5/3/08 Sewed Muslin 5:15p-7:24p
5/4/08 Fitting the Muslin 2:00p- 2:30p

I took several photos which I'll display later with the adjusted views.

More Later...,

Adding Functional Pockets to Vogue 2812


This is the second pair of jeans cut from Vogue 2812. I decided to make functional front pockets for these. First Pair


Here is the process that I followed:

1. For the pocket facing, I used the pattern piece 1 for the upper edge to match curve of the front of the pants at the pocket opening.

2. For the side front pocket, I used pattern piece 4 for upper edge. Then followed the line for the rest using the "new" pocket facing.

3. Cut pocket out of the desired fabric, broadcloth or lining, which ever you prefer.


4. Attached the pocket facing to front of the pants wrong sides together. Then turned, pressed and topstitched.


5. Adding small pocket. Pressed upper edge; then top stitched. Pressed side and lower edge of small pocket as instructed. Pinned small pocket to side front (4) and top stitched sides and lower edges.


6. Sewed side front to new side front for pocket bag.


7. Attached side front to front pants. Basted top and side edges.


Conclusion: This is my first time I attempt at this. The next try I'll make the seam allowance wider along the outer edge of the pocket. Other than that I was satisfied with the results.


Sunday, May 4, 2008

Working My Spring Sewing Plans

Over the past few weeks, I have managed to get some sewing done. I've completed a UFO V2812, nearly done with two jackets, finished a skirt, and sewed/fitted a muslin for a client V1015 (this is intense), and started to sew a dress for Mother's Day. More later...,

LinkWithin

Blog Widget by LinkWithin