
Tuesday, September 3, 2013
Haute Couture Club of Chicago - 50th Anniversary 2013-14

Tuesday, August 20, 2013
Inspiration - My Fall Color Pallet: Color No. 2 Mustard
Mustard is a favor color of mine. But the funny thing is I don't have much of it in my wardrobe. Well this fall I decided to make a point to add a few mustard colored pieces to my wardrobe. It looks great with navy and rust. Here are a few of my inspiration photos that I've collected over the past several months.


 What is your inspiration color of the season?
C
What is your inspiration color of the season?
C


Friday, August 9, 2013
Getting Ready for Fall - Transition with Vogue 1262
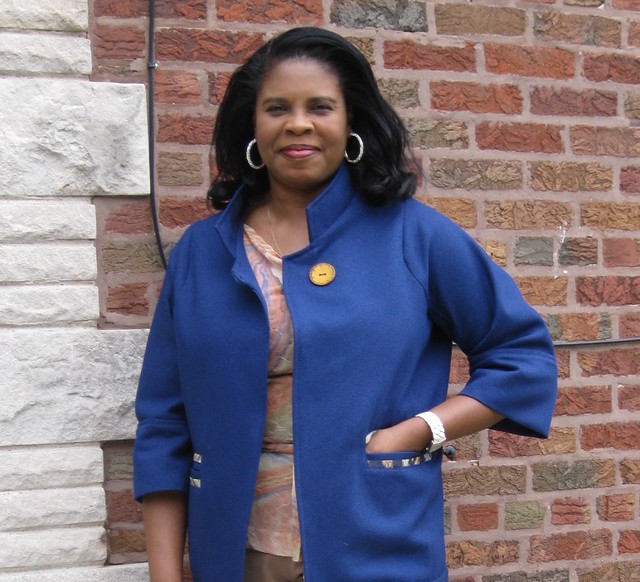
This August feels like fall in Chicago, and it is the perfect time to start working on my fall wardrobe plans. Today's review is on Vogue 1262, another Sandra Betzina pattern. It's been on my list since last September, and last weekend I spent most of Saturday working it.
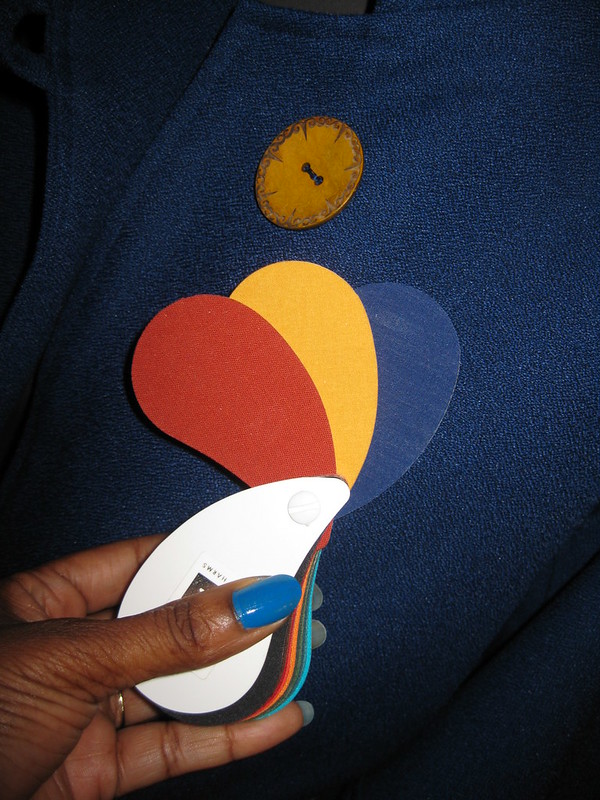
I had my color palette analyzed last year. This blue is one of the color that works well with my skin color. It is also one of the Pantone colors for Fall 2013.
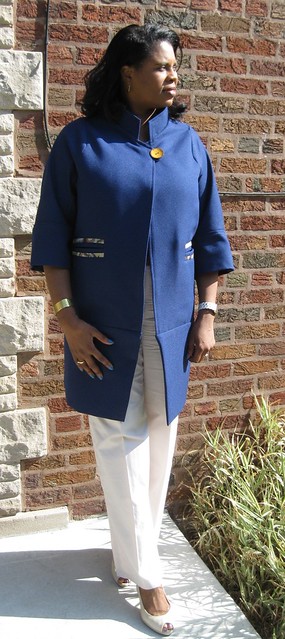
This jacket is described as unlined, loose fitting jacket with three-quarter length sleeves, self-faced sleeve bands (side forms underarm), flat felled seams, double welt pockets, optional button and loop closure. Self-faced lower edges. Yes, it is all of that. Those details are what I like most about this jacket.
The available sizes are from A(32) to J(55). I used size E(40 1/2). I thought I'd try making this without doing a FBA.
My jacket looks like the one worn by the model on the front of the envelope. But the drawing on the back shows the center front edge as a straight line. It's not. It curves and swings open below the bust. After I finished it (poo poo on me), I noticed the pockets are a little on the high side.
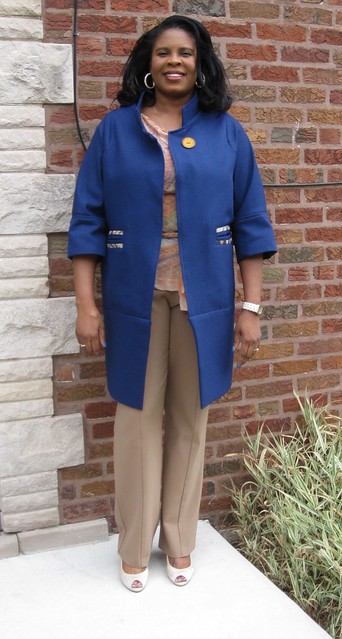
The instructions were great; very easy to follow. I did deviate from them a few times but my changes didn't change the look of the jacket.
There are several things that I like about the jacket. For starters, I liked the shape of the front armholes, the 3/4 length sleeves and how the jacket falls open below the bust. But the thing that I like most about it is the double welt pockets. The double welts were an opportunity for me to try another construction method for welt pockets.
At the Sandra Betzina retreat I had an opportunity to try on test garments of various sizes. When I tried on the recommended size for my upper body measurements, the garments fit my neck, shoulder, arm and bust areas. No FBA required. The adjustments needed were below the bust and the length of the sleeves.
I used a dark royal/black crepe poly/rayon reversible fabric is from the FabricMart. It's heavy enough to double as light weight coat fabric, perfect for fall. This weight of fabric was not on the recommended fabric list. But I wanted something a little beefier for the fall. I pre-washed and dried the fabric. But I will have it dry cleaned as needed.
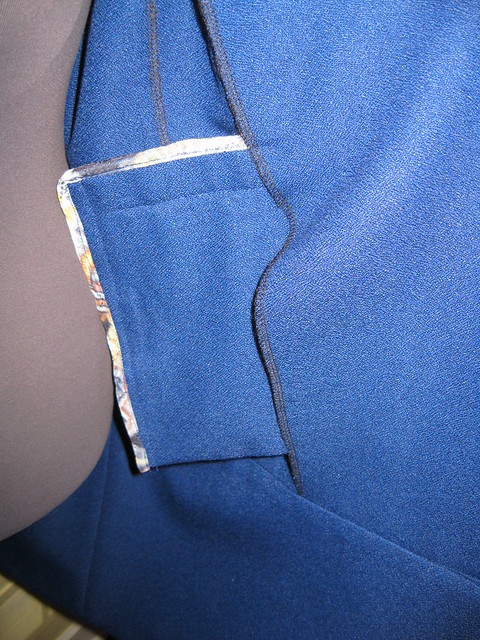

 I didn't make any pattern alterations. It wasn't overly loose fitting, so I didn't make any alterations below the bust. The changes were in some of the construction methods. There are a lot of flat felled seams in this jacket. I didn't make any. Because of my fabric's weight and fiber content, it was difficult to get crisp, flat felled seams. Polyester doesn't roll and press as easily as natural fiber fabrics. Instead, I elected to trim one seam allowances and press the other over it. Then top-stitch it in place. So on the outside it looks flat felled, which is good enough for me. I didn't want to finish the lower back section as instructed (48). Instead, I attached the lower section in verse (46). Then finished it on the inside. In anchoring the facing, I tacked it down at the shoulder seams and at the top of the pockets.
Not certain that I will sew it again for myself. I have so many jackets patterns to try. But I do recommend it to others who are interested in trying something interesting. I'm really pleased with my new jacket.
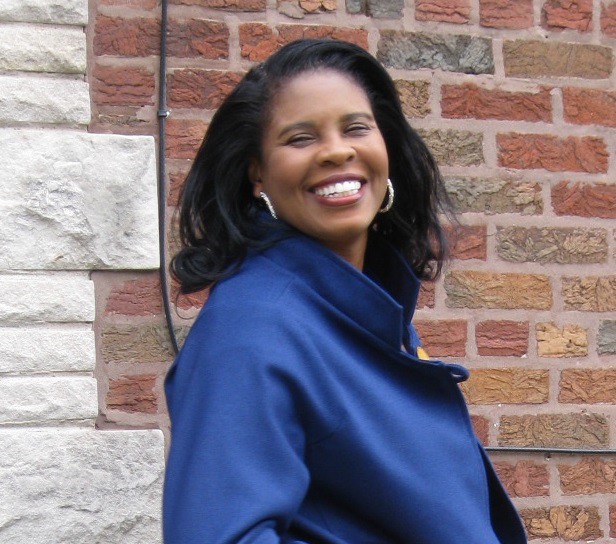
The instructions and style are great. The welt pockets turned out pretty good. I will certainly use this method again. Now that it is finished and ready to wear, it reminds me of those cocoon coats. All photos on Flickr.
That's all for now! Have a great weekend!
C
PS - It took forever to get a few decent pictures. I still wasn't completely satisfied, but at least you can see the jacket on me.
Tuesday, July 16, 2013
Simplicity 1651

Finally, I was able to get a few okay pictures of me wearing Simplicity 1651. Most of the review is posted here:
Pattern Description: It's described as misses' dress with bodice and skirt variations. Vague as usual. This pattern is inspired by project runway. It has a twisted yoke with peek-a-boo front. The second bodice options has a "v" neck front bodice. The back bodice also has two variations: option one has waist dart and covers the back completely and the other has a deep "V" that ends about three inches above the waist. Two horizontal bands make a peek-a-boo affect for the back view. So you can safely wear a bra with this view. The skirts options are half circle and slim with a slit on the left side. There are also three sleeve options: cap, double cap, and 3/4 length with ruching. The closures is an invisible zipper on the left side. The designer can mix and match the sleeves, bodices, and skirt variations to create different looks.
Pattern Sizing: 4 to 20; I used 14 with modifications.
Did it look like the photo/drawing on the pattern envelope once you were done sewing with it? Yes, the green print option at the bottom of the envelope.
Were the instructions easy to follow? Very easy. Nothing confusing in the instructions or construction of the dress.
What did you particularly like or dislike about the pattern? The double sleeves, twist bodice and the gathered slim skirt. No real dislikes.
Fabric Used: Floral Dana Buckman Taffeta from the Fabric Mart. Great fabric to sew.
Pattern alterations or any design changes you made: I made a few alterations as noted in my previous post referenced above.
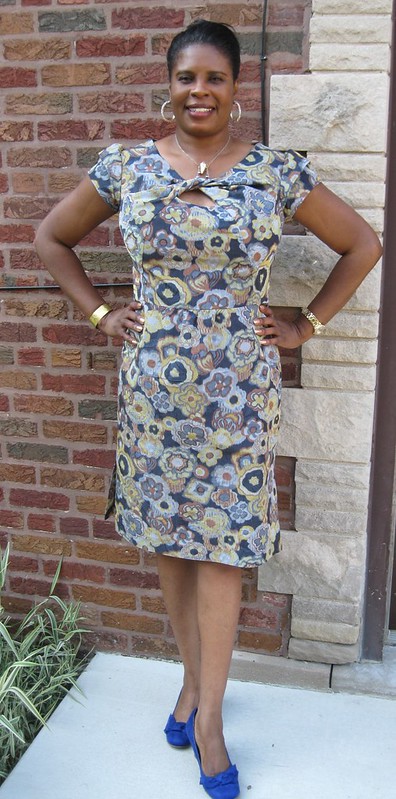
Would you sew it again? Would you recommend it to others? Yes and yes. This pattern has good bones. You can create other style from the pattern. Plus you can mix and match the bodices, skirts and sleeves with other patterns. I think experienced beginner can sew this with no problems. Check the fit first.
Conclusion: This is a cute little dress that is easy to sew.
Friday, July 12, 2013
Making it Fit: Simplicity 1651

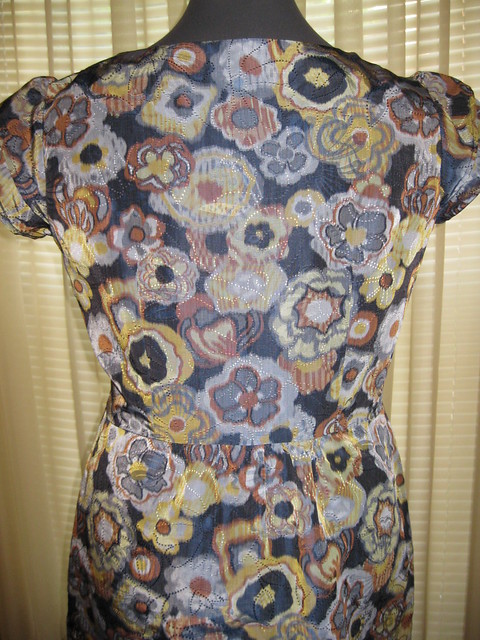
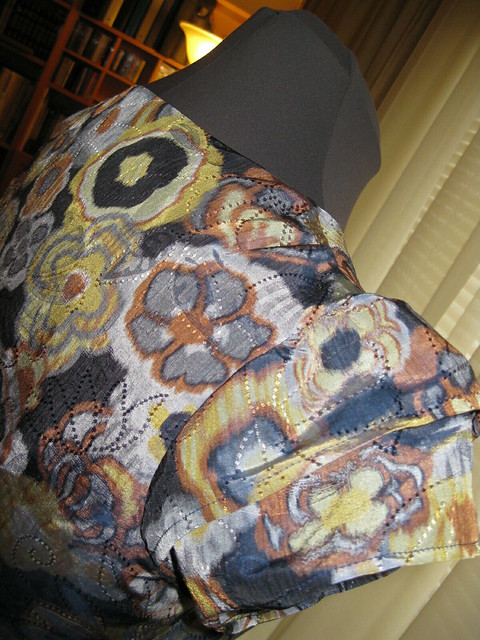
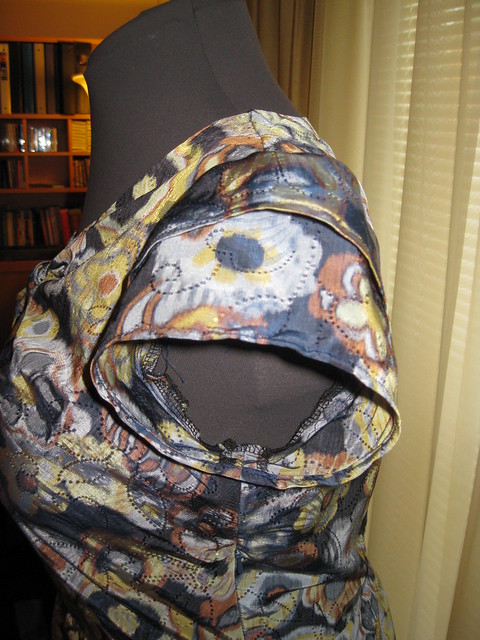
 I really like the design options of Simplicity 1651. The peek-a-boo back panels can conceal a bra strap. The soft gathering at the waist of the slim skirt, double layered sleeves, and the twist yoke bodice sold me on this pattern.
 My first dress is like the green print dress at the bottom of the pattern envelope. Early last month, I purchased "too much fabric" from the Fabric Mart. One of the fabrics was perfect for this dress. (My daughter absolutely hates this print and wonders why I like it. Tee Hee.) Anyway, this is a Dana Buchman taffeta, 60% rayon and 40% polyester. It sewed up beautifully.
Many of the colors can be found of the Pantone color palette for spring and fall 2013. This fabric looks more like fall the summer. It's a good transitional garment the can be worn alone or with a jacket on cooler days.
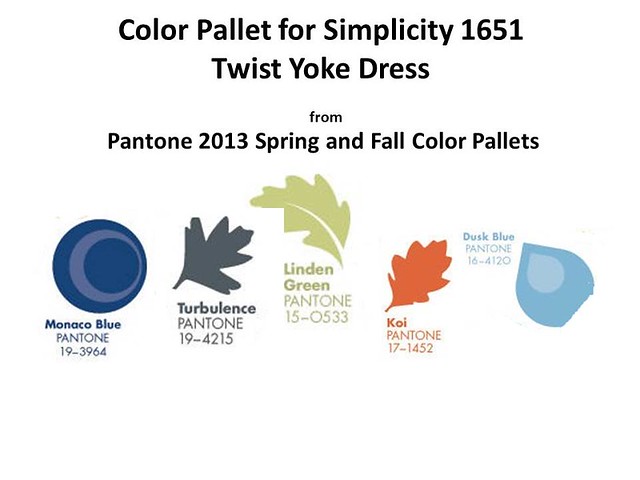
I had to make a few adjustments. The full bust adjustment was the first to tackle. My biggest concern was excessive fabric at the center front bodice. I wanted to ensure a good profile as well as a good front view of the dress.
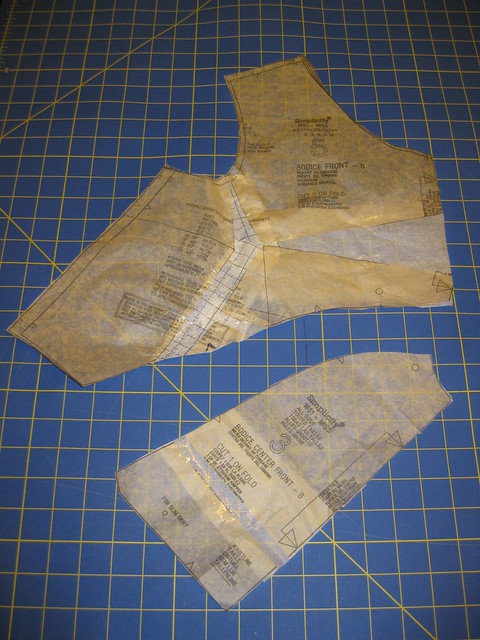
The Full Bust Adjustment probably looks weird, but it works for me. After making a basic FBA for a princess seam side bodice, I had to reshape the center front edge and the seam line adjacent to it. Adjusting the bodice center front was easy, I just added the length needed to match the added width of the bodice front. Additionally, I trimmed about an 1/8" from the upper edge of the curved seam ending a zero at the first notch. Of course, a picture is worth a thousand words.
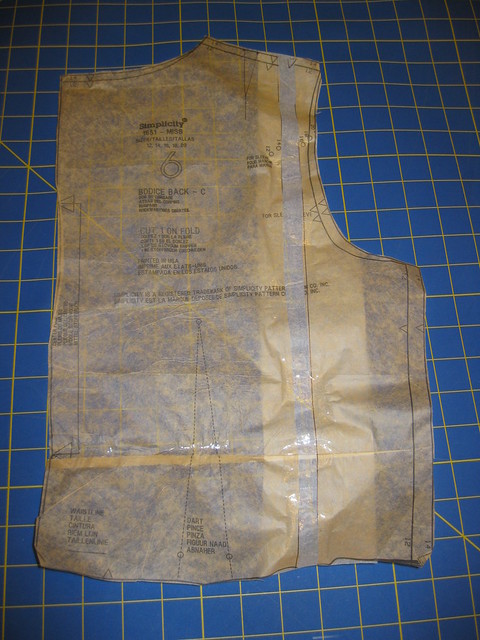
The prominent shoulder blade and sway back adjustments were super easy. Instead of doing my usual PSB adjustment, I decided to follow the Palmer Pletsch method, which is to add width the length of the bodice; then ease or make a shoulder dart. Finally, the excess below the shoulder blade can be adjusted as I sewed. This method worked out just fine.
My mistake, though, was I didn't adjust the amount of ease in the sleeve cap. So I used the excess to my advantage. I made gathers along the cap. This further accentuated the double sleeves, which I liked even more.
The dress has one slit on the left side. I made a slit on both sides and added a few inches to the length of the skirt, not shown today.
That completes today's installment. Have a fantastic weekend.
Happy Sewing!
Cennetta
Thursday, July 11, 2013
Gorgeous Fabrics - Simplicity 4428-B and Butterick 5566

Good afternoon all,
Today's post is long overdue. Both garments were made in January. Yeah.., that's how far behind I am with posting garments and reviews. Last year, Ann Steeves, owner of Gorgeous Fabrics, came to Chicago for the Haute Couture Fashion show. She bought several yards of "Gorgeous Fabrics" to share. I was the lucky recipient of the black ponte knit and the red and black taffeta.


Shortly after the holidays, I sewed a jacket (Simplicity 4428-B OOP) and a skirt (Butterick 5566-D). Both patterns were used for previously projects. So I won't give a full review, only some highlights.
The jacket sewed up with no problems. I serged the hems and added length to the lower back for a little more derriere coverage. Didn't make a FBA. That's it. Easy sewing project.
The skirt - I put a little more time into it. I handpicked the zipper and added ruby seed beads. I also added black pipping along all of the vertical seams and added lining.

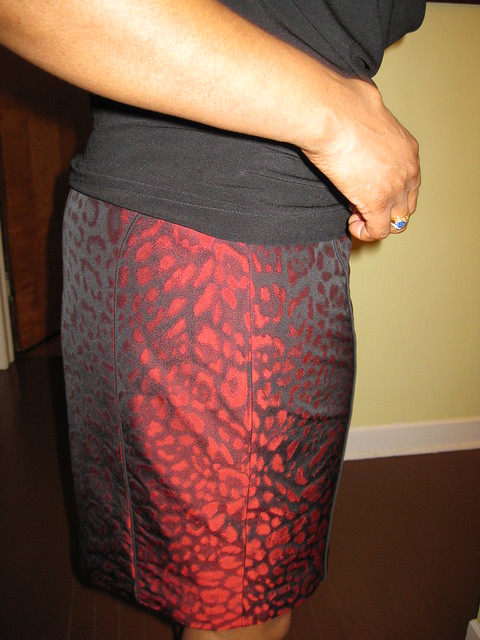

Both pieces are great wardrobe builders made with "Gorgeous Fabrics". That's all for now.
Happy Sewing!
Cennetta
Wednesday, July 10, 2013
It's a worthy cause! MBCH Pillowcase Project
About an hour ago I mailed pillowcases to Rhonda Buss. Lauren and I wanted to contribute to this worthy cause. I'm happy that my daughter was able to make ten pillowcases of her own (very new to sewing) and graciously cut five for me to sew yesterday. It took me less than an hour to make five. If you want to help Rhonda, please go to her blog for instructions.
Lauren found some really fun cotton prints; and when I saw her finished cases, I wanted to keep them. But no, they are on their way to Rhonda's house.
Below are my favorites:

 Happy Sewing!
C
Lauren found some really fun cotton prints; and when I saw her finished cases, I wanted to keep them. But no, they are on their way to Rhonda's house.
Below are my favorites:


C
Subscribe to:
Posts (Atom)
LinkWithin
