Thursday, January 9, 2025

Wrap Top- Butterick B5101


This wrap top was made in October 2024.  It has been on my "to make" list for ages.  Butterick B5101 Lifestyle Wardrobe pattern, with several views to literally make a complete wardrobe with endless outfit options.  The copyright year is 2007.  So it is OOP.


Pattern Description:  Misses' top, dress, skirt and pants:  wrap front top and dress have all-in-one sleeve, pleated collar extending into front neckline, side tie, sleeve length and hem variations.  Mock wrap front skirt and straight leg pants have casing and elastic yoke.


Pattern Sizing:  SX, S, M, L, XL .  I used size medium grading it up somewhere between a medium and large with fit adjustments.

Did it look like the photo/drawing on the pattern envelope once you were done sewing with it?  Yes,  my top does look like the drawing on the envelope.

Were the instructions easy to follow?  The instructions were typical, but not difficult to follow.  

What did you particularly like or dislike about the pattern?  I liked that it is a wrap top/dress with some pleating around the mid section with a tie.  

I do have a few dislikes, though.  The tie is slightly wider than what I'd like for this top/dress.  And I prefer it to be a little longer since I'm so tall.  My other dislikes is the thickness of the belt loop.  It could be thinner.  I'll make these adjustments on my next version, which is already in the making. :-)  No other dislikes.
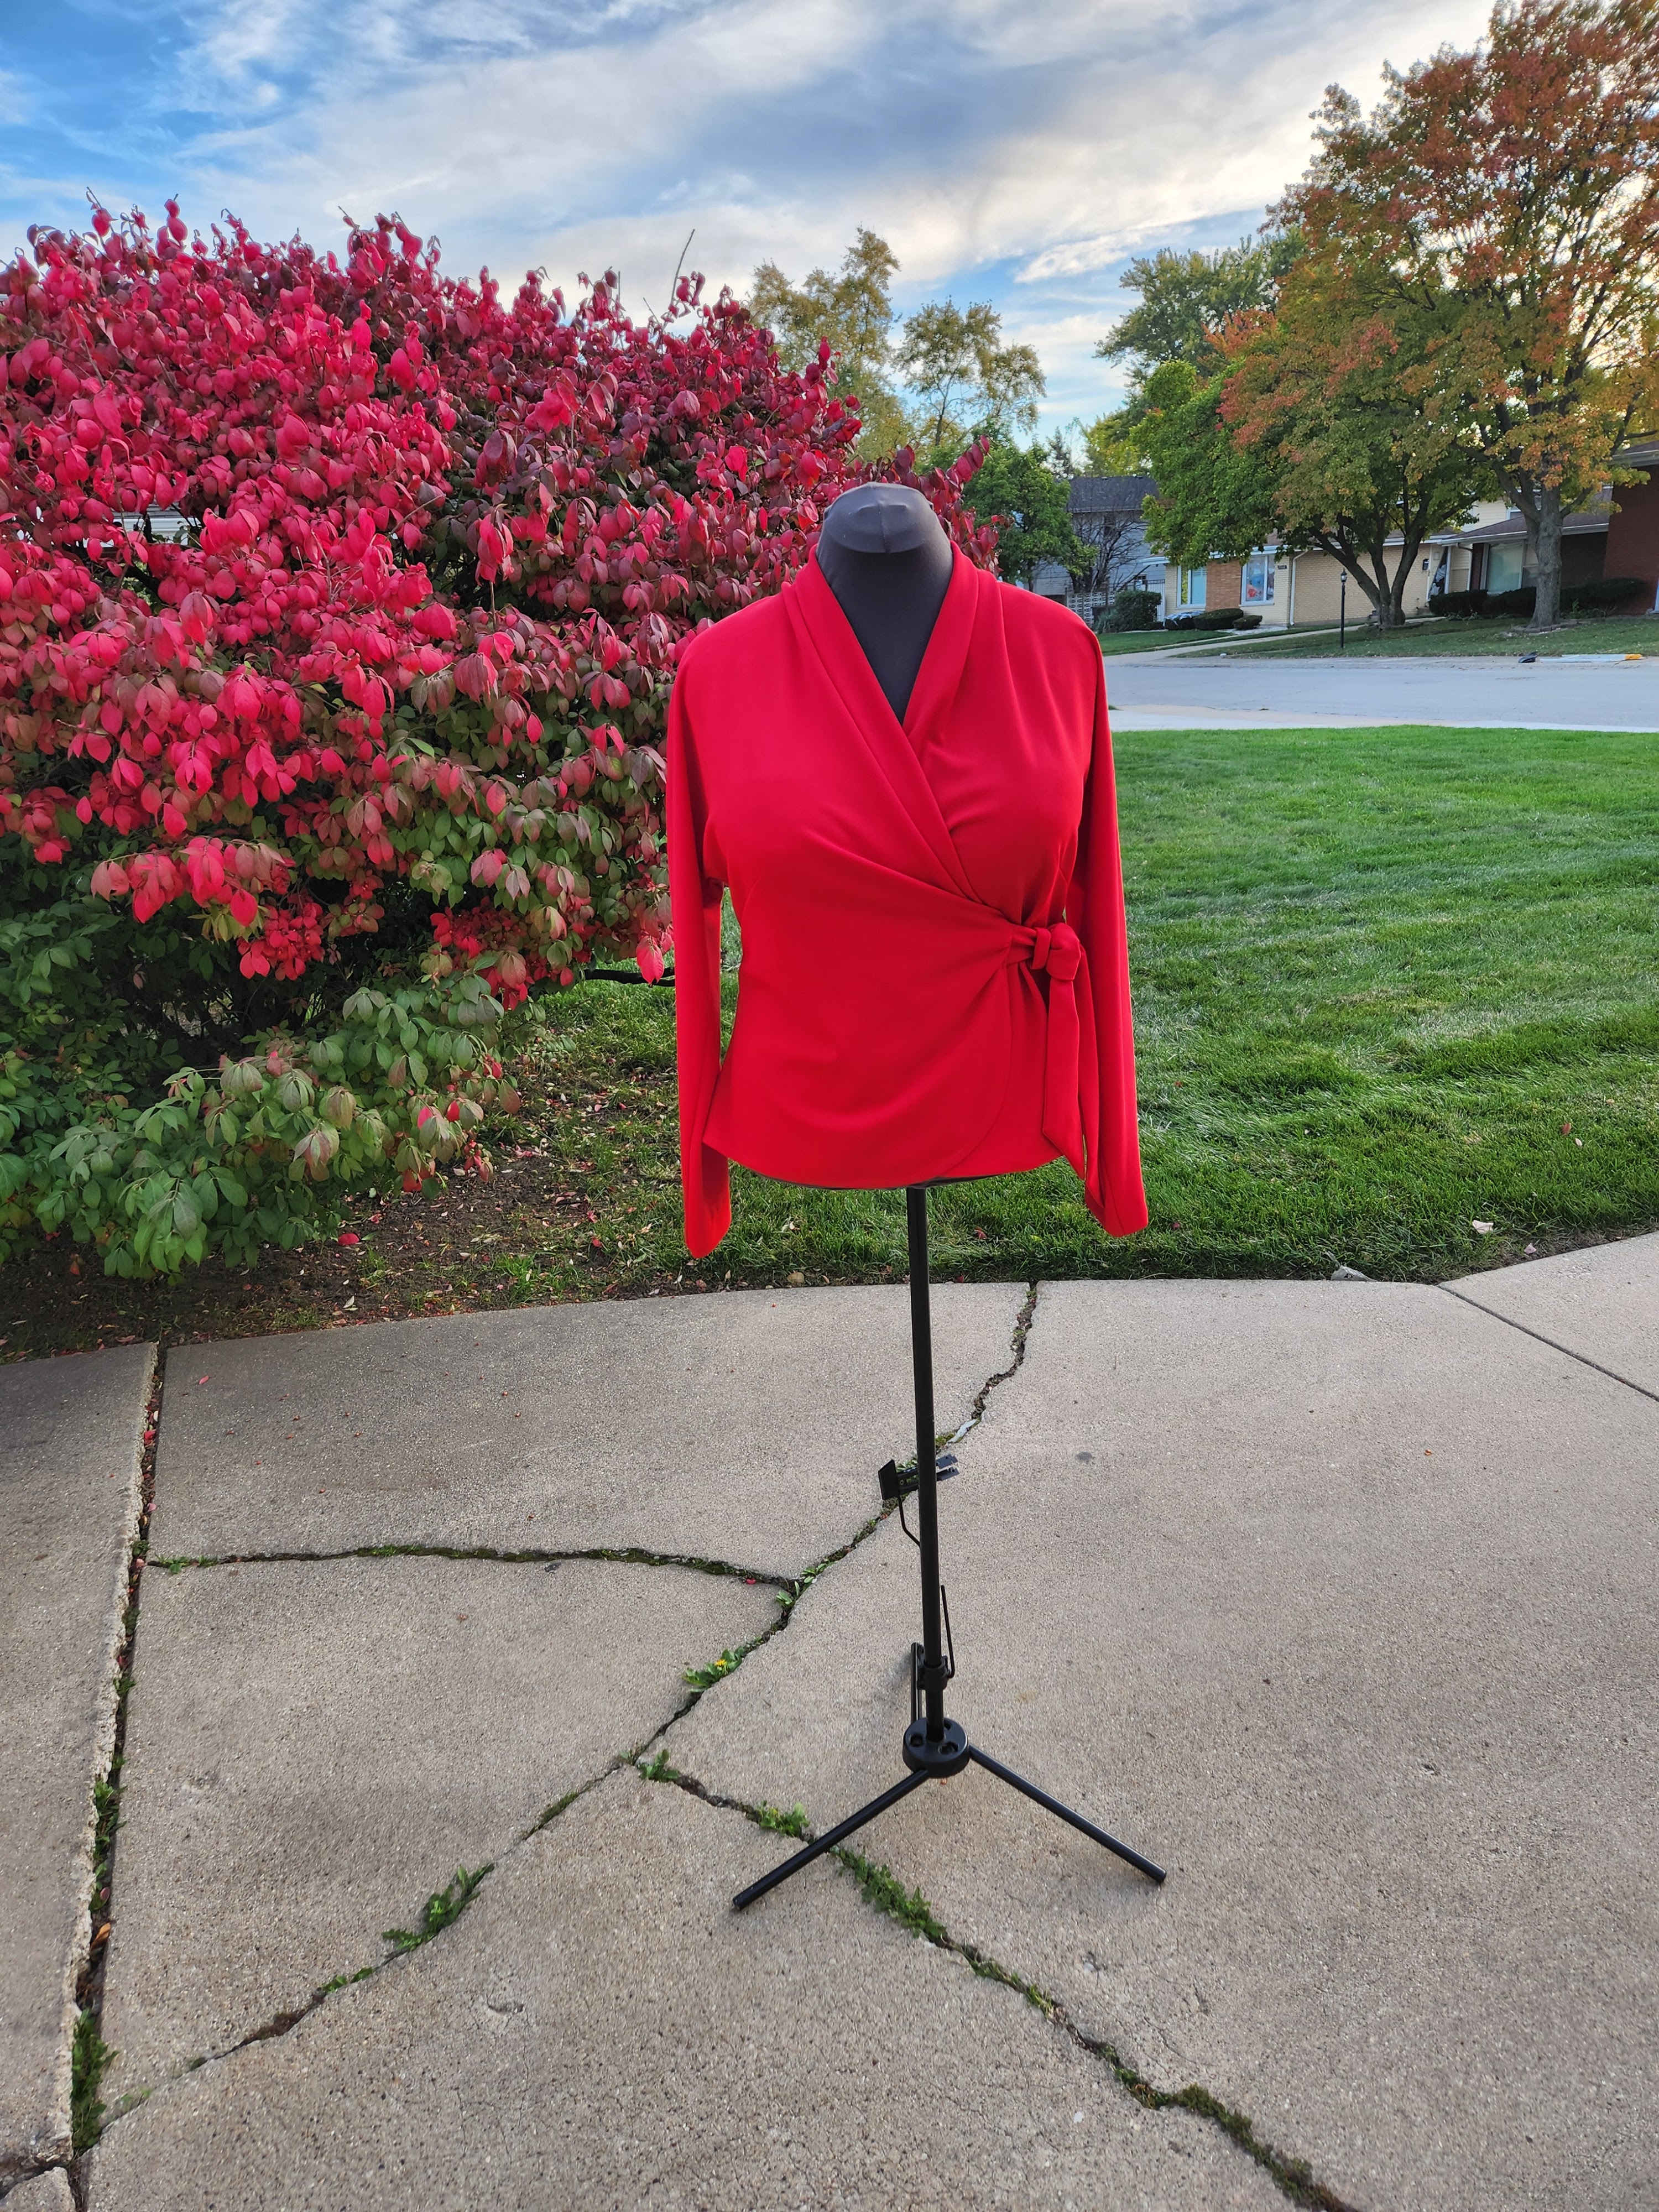


Fabric Used:  My knit jersey came from New Rainbow Fabrics on Roosevelt Road in Chicago.  It is a vibrant tomato red with a dry hand.  It is easy to work with and is wrinkle free.  I pre-washed and dried it as soon as I bought it home.


Pattern alterations or any design changes you made:  Okay, it may be boring, but I had to make my usual full bust adjustment.    Definitely necessary for the level of stretch of my fabric choice and the style of the top.  Because the sleeve is cut-on, I started the process with removing the sleeve.  Then I made the FBA.  Finally, reattaching the sleeve. See the photo below for the finished fit adjustment. Also, I lengthen the sleeve by an inch.  


Would you sew it again? Would you recommend it to others?  Yes, I will.  I'm in the process of making the pants and the top.  I hope to finish it by the end of this week.  If this is your style, of course, I recommend it.  The pattern is easy to sew and it offers a lot of style options in one pattern.

Conclusion:  This is a good wardrobe pattern that offers many outfit options.  It is easy to sew for all level sewists.  The hem of the top/dress may be a little challenging for beginners, but doable.  Take your time.


Happy Sewing!
C

Happy New Year!


Happy New Year everyone!

Here we are nine days into the new year.  It's great to be alive and well.  I hope everyone had a fantastic holiday season.  It's one of the busy time of year; but it is a good time of year at least for me and my family.  I always look forward to spending time with family.

This month I plan to post the last projects of 2024 on my blog starting today.  I just didn't make time for it during the holiday season.  So, I'm playing catch up again.  I probably won't do a year review for 2024 as I want to start on projects for this year and there is only so much time to do that.

Anyway, stay tune for my projects made from October to December 2024.  Some good and others not so good.


Saturday, November 2, 2024

Minerva - Caftan - Challis Prints Butterick B6900


Last week, I was finally sewed up this lovely caftan.  It has been quite some time since I've sewn anything using Minerva fabric.  I'm so glad I was able to finally finish it.


Pattern Description:  V-neck caftans have drawstring waist with hem and length variations.  View A has ruffled collar.

Pattern Sizing:  8 - 26.  I used size 16, view B.


Did it look like the photo/drawing on the pattern envelope once you were done sewing with it?  Yes, it did.  Big and floaty. Lol

Were the instructions easy to follow? Very easy.  Nothing confusing about them.  Typical.

What did you particularly like or dislike about the pattern?  I like that the caftan was a very easy make.  At the time, I thought I would make it up immediately after I cut it out.  But, that didn't happen.  Also, I thought the pattern was perfect for showcasing the beautiful rayon challis.  Who doesn't like a beautiful house dress.

No dislike.

Fabric Used:  Rayon challis from Minerva.  It is soft, fluid, and easy to work with.  Love how it presses.  Unfortunately, it wrinkles just as easy.


Pattern alterations or any design changes you made:  I didn't make any changes.  Perfect. 

Would you sew it again? Would you recommend it to others?  Yes, I would like to make view B for a swim suit cover-up.  Yes, I do recommend it to others.

Conclusion:  I'm pleased with how the caftan turned out.  I will certainly get a lot of wear out of it.  Also, this was a super easy sewing project that I recommend to all level sewists. 

Parting Shot:  Me admiring our tomatoes plants that are still producing.


That's all for now!

Saturday, October 26, 2024

Inspiration Strikes Again - Burda Style 6322 Dress


Good evening everyone,

I hope everyone is enjoying this lovely weekend.  It has been sunny and the air is crisp.  I love this time of year.  

Yesterday afternoon I was finally able to get some photos of me wearing my first dress of the fall season.  It's becoming more and more difficult these days to get photos of me wearing my newly sewn garments.  My daughter is my photographer, and our schedules don't always allow for photo shoots.  I'm lucky when our schedules do.

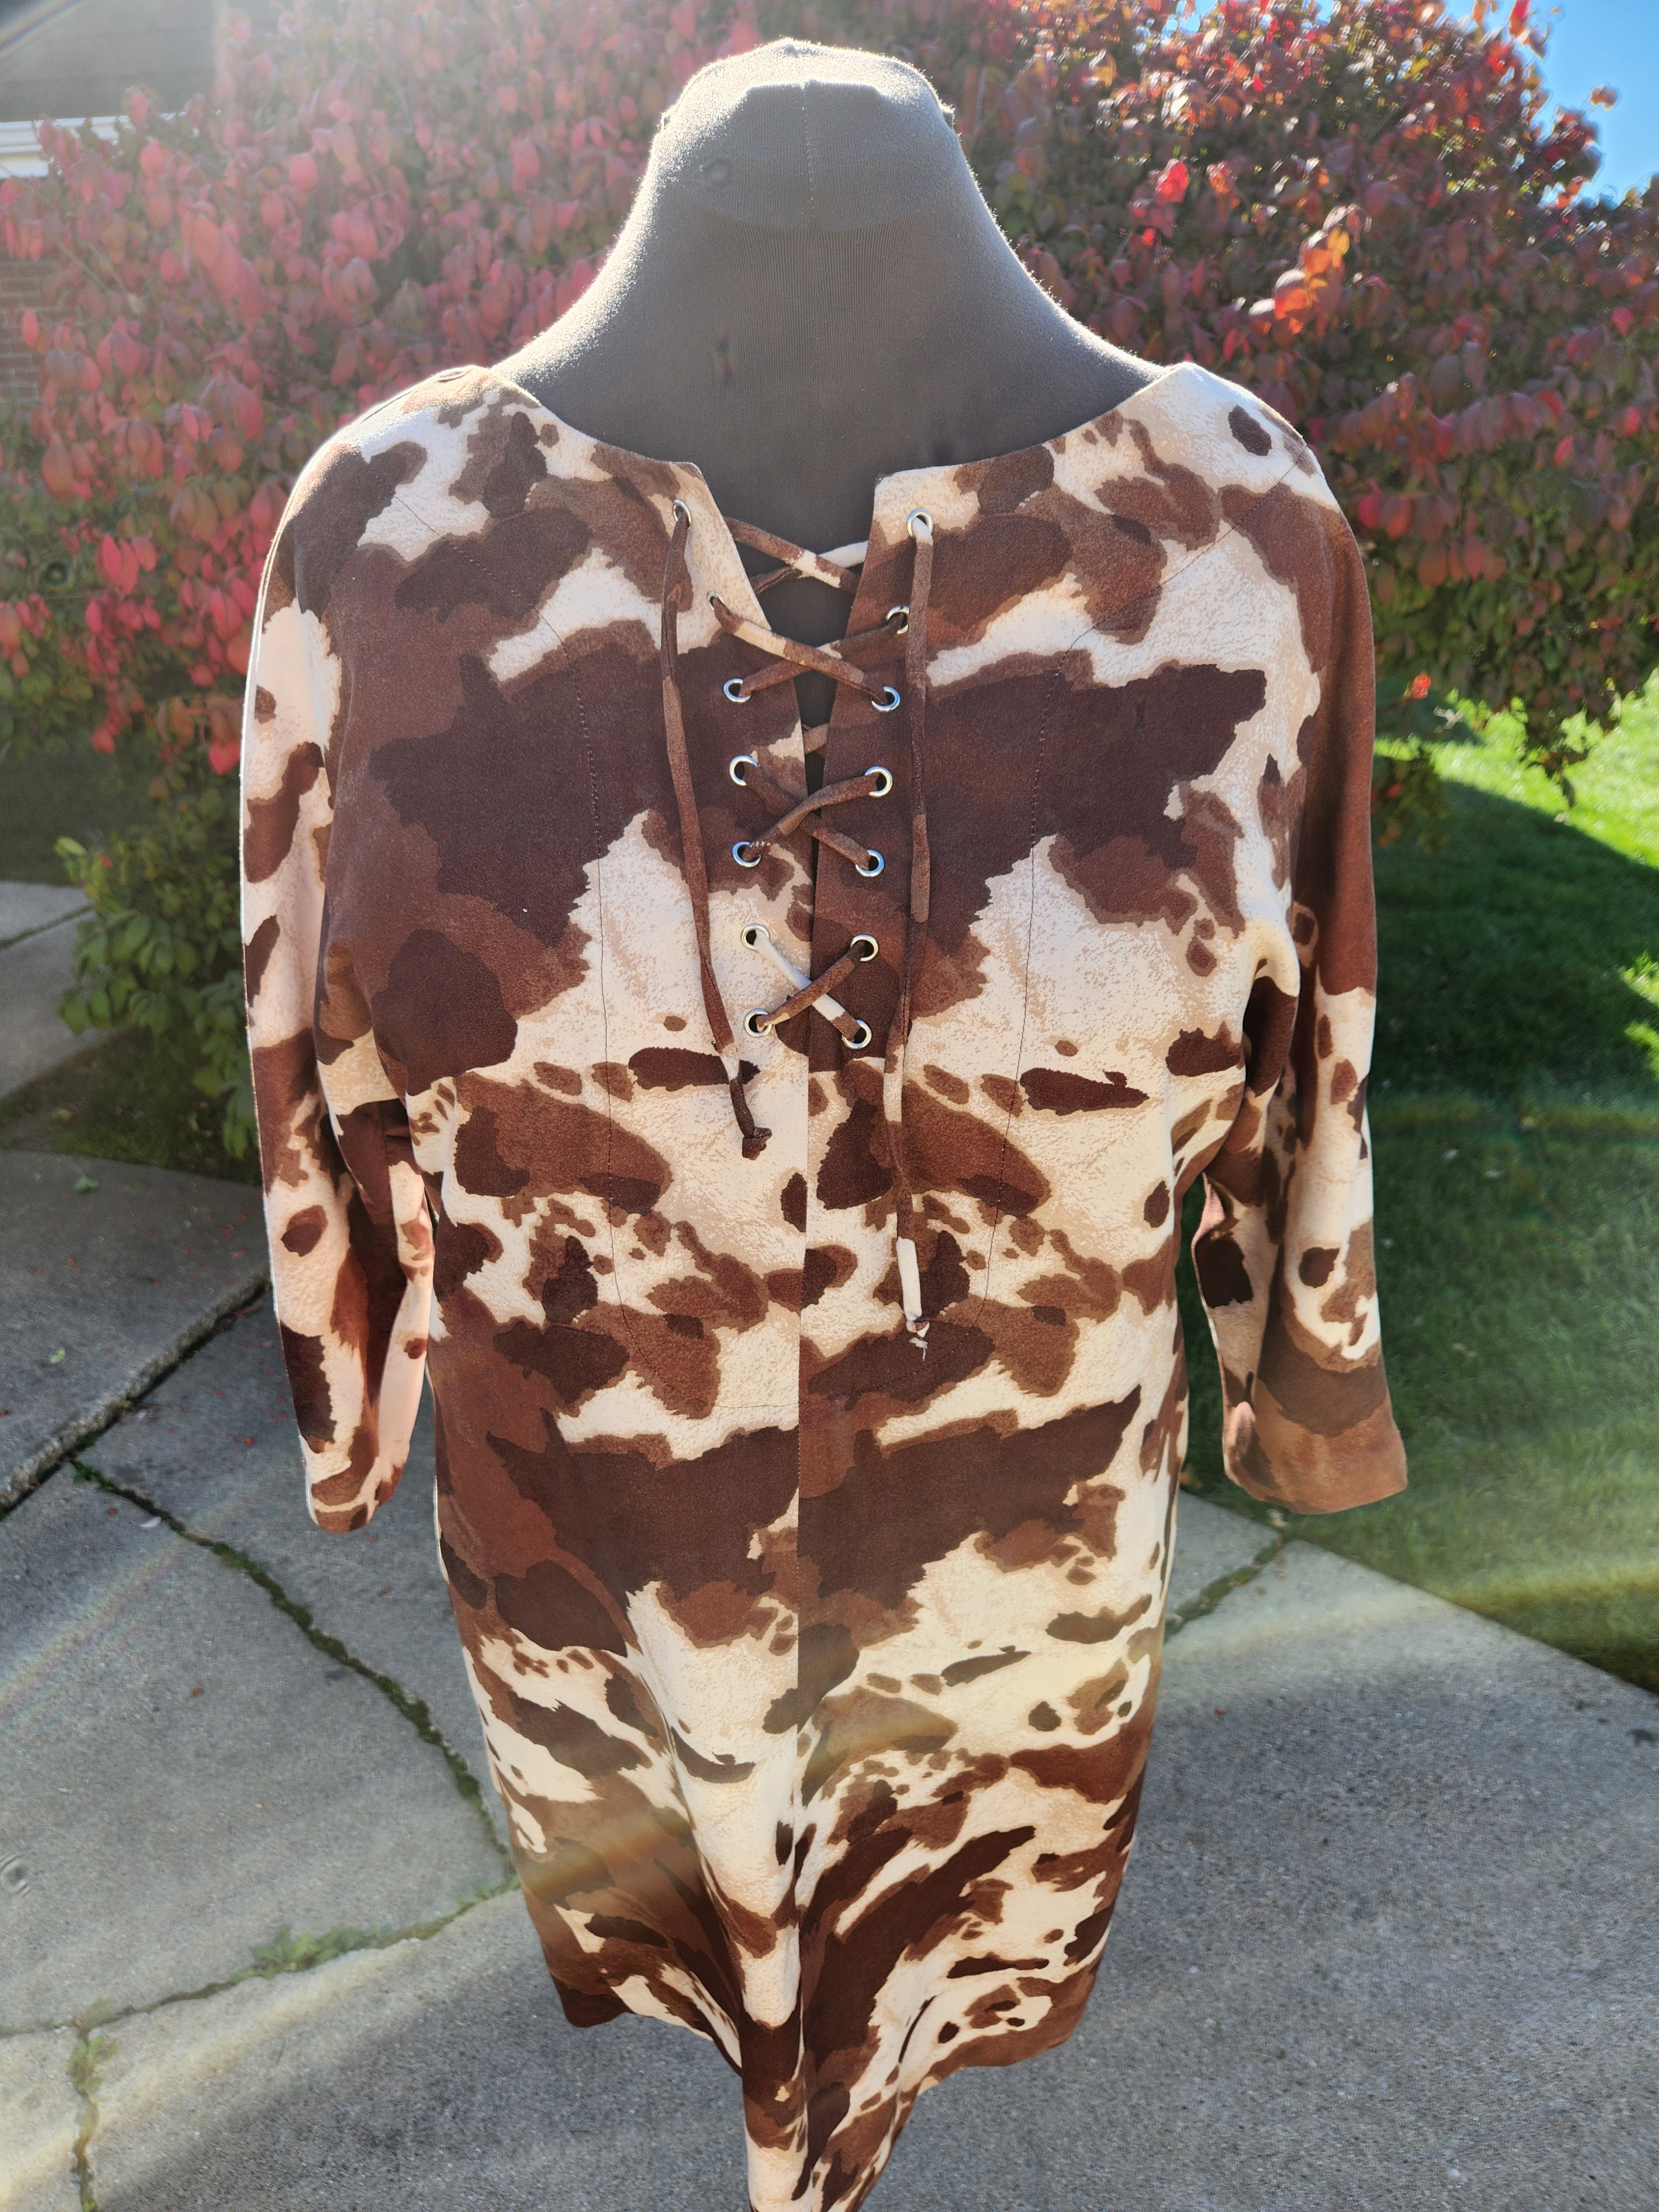
I love my new pony print dress.  Early summer, I saw this photo of Vivica A. Fox on Instagram wearing a cute little dress.   Her outfit inspired me to make this dress.  Of course, Ms. Fox's dress is a whole lot sexier than my version.  Lol.  So, let me start with my review of the process of constructing my inspiration dress.


Pattern Description:  Burda's description is just as poor as their instructions at times. Lol.  So, I'll give my little two cents of a description.  A shift dress with cut-on sleeves (long or short).  It has a high scoop neck.  The dress has a center back seam with invisible zipper.  View A has a slit and belt.  This pattern is rated super easy. 


Pattern Sizing:  8 to 18.  I used 16 with modifications.


Did it look like the photo/drawing on the pattern envelope once you were done sewing with it? The silhouette looked like the dress.  I did make several changes so that it looked more like the inspiration dress.

Were the instructions easy to follow?  This pattern is exactly as stated, "super easy."  And the instructions were easy to follow.

What did you particularly like or dislike about the pattern? I have several likes and only one dislike.  First the likes.

 Likes -

  • The silhouette was perfect for the inspiration dress.  
  • The dress pattern was only five pattern pieces and a quick sew.
  • The pattern is versatile.  Once I finished my dress, I started dreaming about other projects and uses for the patter.  I plan to make a tunic and top.  
  • All the design changes that I added to make this dress special.

Dislikes -

  • The scoop neck is a little too wide for me.  I will adjust it for the next project.


Fabric Used:  This year I purchased a lot of fabric from Hobby Lobby.  They have a 40% off sale nearly every other week.  Anyway, My fabric is a polyester pony print fabric that has the hand of faux suede.  I pre-washed and dried it before I cut out my dress.

Pattern alterations or any design changes you made:  Here's is where the review gets lengthy.  I made several changes.  But here again, I didn't make a FBA, swayback, or broad shoulder adjustment.  Below is what I did change:


  • Center Front Seam - The easiest change was to add the center front seam.  All was needed was to add seam allowance instead of cutting on the fold.


  • Re-Draft Front Facing - The front facing was extended and also has a center front seam.  After I tried the dress on with the belt, I realized that the front facing was just a little too long.  This is easily corrected.
  • Eyelets were added to the front of the dress to copy the design of the inspiration dress.
  • Drawstring was added to the front of the dress.

Application Process - Eyelets

Every time I add buttonholes, eyelets, snaps, etc., to any finished garment, my hands get a little sweaty. Lol  I get nervous.  I’m scared of ruining the entire project.  So I must do a test before I do anything.


1.     Test applying an eyelet on a piece of scrap fabric.


2.     Measure the length of the area where the eyelets will be applied.  Determine the distance between each eyelet based on the length and number of eyelets to be applied.

3.     Mark the placement for each on both sides.

4.     Punch the holes.


5.     Carefully, install each eyelet as directed.


6.     All done.


Dress Belted

Would you sew it again? Would you recommend it to others?  Yes and yes.  I will sew this pattern again.  This is a good pattern for beginners as well as other level sewists.

Conclusion: I'm really happy with how my dress turned out.  Though it isn't exactly like the inspiration dress, it is how I envisioned it for my life style.  The dress was very easy to sew and I got exactly what I wanted out of this project.


Happy Sewing!

C


Wednesday, October 23, 2024

Black and White Color Blocked Easy Coordinates with Simplicity S9690


When you are short on fabric, try color blocking.  It is a great way to use fabric remnants.  I was able to make a coordinating top for two pair of pull-on pants that I made using Simplicity S9690.


Pattern Description:  Cold shoulder top A has scoop neckline with long sleeves.  Top B is short sleeved.  Both pants C and D have knit contrast on waistband.  Jogger pants D has ankle cuffs and pin tucks.  I made views top A and pants C with a few modifications.

Pattern Sizing:  size groups (8 - 16) (18-26).  I used size 16.


Did it look like the photo/drawing on the pattern envelope once you were done sewing with it?  Pretty much.  I did color block the top and I made little pleats in front of the pants.

Were the instructions easy to follow?  The instructions were super easy, and there was nothing in them that was confusing.

What did you particularly like or dislike about the pattern? I liked that the pattern was easy to sew.  In the early part of summer, I was sewing really basic patterns and garments trying to jump start my sewing mojo.

Fabric Used:  These are two more fabrics that I purchased at Hobby Lobby.  They really have some deals on basic fabrics.  Great place for beginners to shop.  The fabric is a knit crepe.  I pre-washed and dried it before starting my project.  It came from the dryer softer and bouncy.

Pattern alterations or any design changes you made: I made some changes.  Most of them were due to fabric shortage. Lol.


  • Top A - I decided to color block the top using the remnants from the two pairs of pants that I made.  
  • For the sleeves I added separate pieces to make the sleeves long enough.  I also added some topstitching to make the add on look intentional.  
  • Instead of using binding to finish the neckline, I used the fashion fabric to finish it.

Surprisingly, I didn't make my usual fit adjustments.  I thought the style ease in the top would be enough for the "fit adjustments" that I normally make.


  • Pants C - I added little pleats to the front of the pants.  I did not want all the gathers across the front caused by the elasticized waistband.  Also, I reduced the length of the waistband.
  • Lengthen the pants a few inches so that they would be long enough.


Would you sew it again? Would you recommend it to others?  Yes and yes.  This is an easy, quick pattern to sew.  Great for beginners.

Conclusion: Sometimes you need a few super easy projects to jump start your sewing mojo.  This one is great for that.  It is also a great beginner pattern that offers some creative designs.

Happy Sewing!

C

Tuesday, October 22, 2024

Denim Tote Bags - Simplicity S9618


I'm still working on my summer project posts.  It is a challenge trying to get everything posted before I start posting the fall garments that I have already made this and last month.  My goal this week is to get all summer projects posted.  

This post is all about tote bags.


I used Simplicity S9618.  This was a "Sew Your Own View" project of the Instagram page of the same name.  I believe the challenge was last year.  Anyway, this summer I finally was able to make two totes, Views A and C with modifications.


Neither tote is for me: view A is for my DD and view C is for my niece.

So let me begin with the descriptive information on the pattern envelope. Lol  It’s one sentence: tote bag in three sizes.  No information about the straps, handles, or binding.  Typical. Lol

Of course the size you choose is up to you. I also think that the details are also based on your preference.  You can mix and match them according to your own taste and design.

For the most part, view A does look like the drawing.  I added a little patch on the front.  I didn't make the strap, but I did attach the loops to the inside side of the bag.  For the large tote I chose not to use seam binding for the outer edge.  I finished the outside much like view A.

The instructions were easy to follow and there was not anything confusing in them.


There are a few things I like about the pattern and the views that I made:


  • the tote is an inspirational design for the Marc Jacob tote bag 
  • the style of the tote
  • that the bag comes in three bag sizes
  • easy to make

Now, I do have a few dislikes, which are related to the construction of the bag:

  • using the heavy denim fabric, it was very hard to sew through all layers.  So at the very top of the bags I wasn't able to do the finishing stitches.  They don't look as polished as I would like.  Next time, I will trim some of the bulk away.
  • The base of the bag does not have the support that I want.   Maybe a piece of cardboard in the bottom will help.  I need to figure something out to make it better.

The denim fabrics were purchased at JoAnn's.  I grabbed them from the remnant bins for a reduced price.  Both denim are tightly woven and sturdy.  Perfect for a tote bag.  For the lining (small tote), the floral cotton comes from a wholesaler that my DD found on etsy.  I can't remember the name.  The cotton for the large tote came from JoAnn's.  Simple cotton novelty fabric.


I did make a few changes:


View A.

  •  I didn't make the strap
  • for the top flap with the zipper closure, I lined it for a polished finish
  • for the handles, I pressed them in half and turned in the seam allowance.  That was easier than following step 1.

View C.

  •  I pretty much sew this bag the same as the small tote
  • I changed the way I finished the handles.  Instead of the instructed method and the method used for view A, I decided to press the seam allowance toward the middle of the handle then turning in the allowance for a clean finish.  This helped reduce the bulk on one side of the handles.  See photos below.
  • The fold of the handles are turned inward instead of outward.
Prep for strap for view C -


I enjoyed making these totes, with the exception of a few construction obstacles.  I do plan to make at least one more tote for myself.  This is a great tote to try, and I do recommend it to others.  Be ready to use a heavy sewing machine needle (18) on those really bulky areas.


Overall I think the totes turned out pretty good.  Next time I'm hoping for better results.  These are a great gift idea.  


Happy Sewing!

C


LinkWithin

Blog Widget by LinkWithin