I didn't want another day to go by without letting everyone know how much I appreciate all of your daily visits to my blog. For those of you who continue to comment, I'm especially grateful to you. Your comments make me smile, laugh, and sometimes cause me to think about how I can improve on my sewing ability.
The past few weeks many of you sent notes and comments congratulating on winning the Palmer/Pletsch "Win a Workshop Contest". Honestly, I didn't think I'd win first prize. There are so many great sewists/designers out there. So you could imagine how thrilled I was when I got the news.
My DD has seriously taken up sewing. She made her first complex skirt, McCalls 6402. It was a big challenge for her, but I was at her side helping every step of the way. Fitting is not a big issue for her. She is a little curvy with almost no fat. We only made an adjustment to the front center panel of the skirt. We removed some of the length from the top of the panel because her stomach is so flat. The biggest challenge for her was piecing together the various sections of the skirt. That's were I came in, teaching her how to preserve the shape of the skirt while making sure to sections intersect as designed. She plans to make this skirt again. It's perfect for a color blocking.
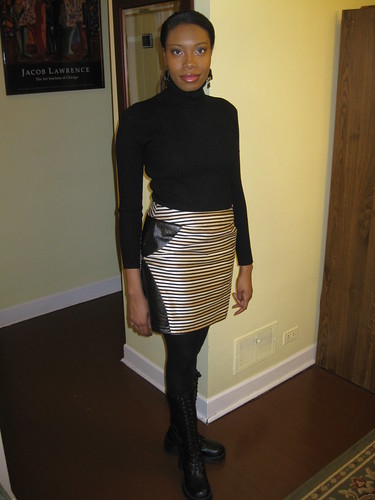
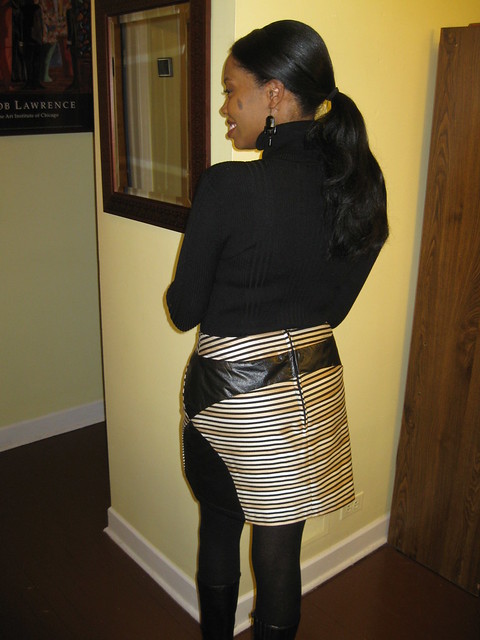
The Haute Couture Fashion show is fast approaching and I haven't completing all that I want modeled in the show. With only a few weeks left before the final garment review, I need to finish the top and pants for the striped jacket. And I want to include at least one more dress and something for the travel segment. I need to get busy.
So what's keeping me from sewing and blogging? School and work. My studies for class are starting to get intense. So it's taken up a lot of time that would be spent sewing. Work is picking up as well. We are in the process of selecting a new application for Research Administration. Also, we have some new initiatives at UI that involve training and participation. All great things, but they are pulling me away from sewing and crafting.
American Sewing Guild - The program for January 2012 was all about silk. We learned about various weights and textures as well as how to treat and sew it. There were a few sites shared. More on silk later. I'll probably incorporate some information as I sew more silk garments.
What I'm working on now. On Tuesday, I finish a dress made using M6433 (bodice) and V8555 (skirt). I wanted to do another hand-picked zipper. This dress was perfect for that. It's dark navy or midnight blue. So I thought a beaned zipper would spruce it up a bit. This dress was inspired by a Cadena dress in the fall 2011 issue. Saturday I made a matching belt using a pattern from "Making Vintage Accessories".
Upcoming client projects: Three clients on the horizon: 2 prom dresses - my niece and cousin. 1 evening dress for Ms. Paulette. Last week she purchased a beautiful matalasse fabric for it. My niece selected a bright yellow dutchess satin for her Vogue gown. My cousin is still undecided. All are great projects. I'm glad they chose me to make their dresses.
So that's all for now. More later this week. Have a fantastic Monday.
C
Monday, February 27, 2012
Wednesday, February 15, 2012
Inspirational Wednesday - 2-15-2012
Not much blogging or sewing going on. I have a mid-term on Thursday. In the meantime, here is a little inspiration from my Flickr contacts. Enjoy!
Monday, February 13, 2012
Celebrating the Life of Whitney Houston 1963-2012
On Saturday evening my daughter told me that Whitney Houston died. I screamed! So today I'm celebrating the life of the very gifted Ms. Whitney Houston.
Tuesday, February 7, 2012
The Many Lines of My Jacket - HCC Stripe Challenge - Part III
Happy Tuesday!
The Haute Couture Club - Stripe Challenge was held on Saturday. There were over a dozen participants. The ladies came up with some interesting outfits. (All will be showcased at the May fashion show. wink, wink)
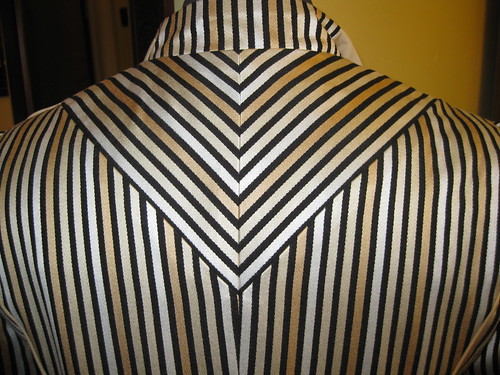
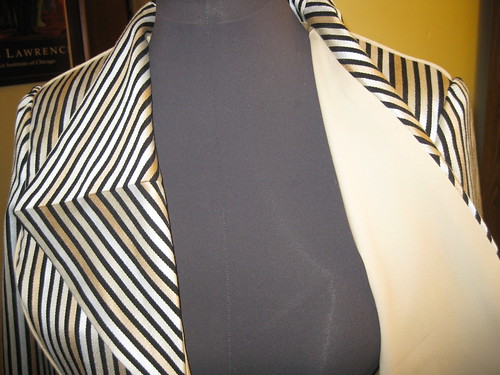
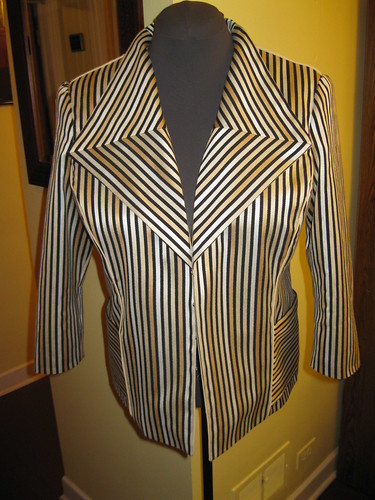
But as for me, I used McCall 6294. This my garment serves a dual purpose: HCC Stripe Challenge and the Palmer/Pletsche contest.
My review:
Happy Sewing!
C
The Haute Couture Club - Stripe Challenge was held on Saturday. There were over a dozen participants. The ladies came up with some interesting outfits. (All will be showcased at the May fashion show. wink, wink)
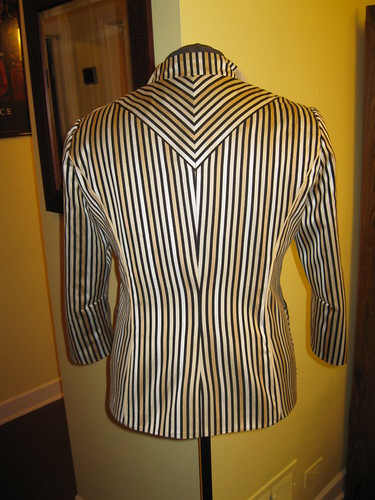
But as for me, I used McCall 6294. This my garment serves a dual purpose: HCC Stripe Challenge and the Palmer/Pletsche contest.
My review:
Pattern Description:
MISSES' LINED JACKETS IN THREE LENGTHS: Jackets A, B, C have princess seams, back yoke, two-piece self-faced lapels with collar band, sleeves in two lengths with elbow dart, hook and eye closure; jacket A has long sleeves; jacket B has three-quarter length sleeves, unlined patch pockets; jacket C has long sleeves, unlined patch pockets with top stitching.
Pattern Sizing: 4 through 18. I started out with a size 16; but ended up scaling it down to a 14 with my usual adjustments.
Did it look like the photo/drawing on the pattern envelope once you were done sewing with it? Yes, it look like the basic design as illustrated on the envelope.
Were the instructions easy to follow? Easy.., No problems.
What did you particularly like or dislike about the pattern? The design of the collar and the back yoke. No dislikes.
Fabric Used: The challenge organizers picked this beautiful striped fabric and made it available for members at a previous club meeting. Not sure of the fabric content, but I think it does have some rayon in it. It very easy to work with; sews and presses well. I only bought two yards; and after playing tetris with the pattern pieces on the fabric, I finally admitted I didn't have enough fabric for the entire jacket. So the under collar and the front facing is a stretch woven woolen (Rainbow). My DD gave me about 2/3 yd for my sleeves. The lining is china silk.
Pattern alterations or any design changes you made:
Before cutting into the fabric, I made several adjustments to the pattern:
- FBA – I omitted the small dart in the front
- Sway back adjustment - Then I added that same amount to the bottom of the back and side back pattern. Sometimes when I make the sway back adjustment the jacket/dress is slightly higher in those sections
- Prominent shoulder blade adjustment
Design changes:
- The back yoke was cut along the center. I added 5/8” seam allowance to one of the halves along the cut edge. This created the chevron effect in the back of the jacket.
- Added piping to the shoulder, front, and back seams. The pattern of the stripe was uneven so I wanted to break up the stripe a little bit.
- Contrasting fabric for the front facing and under collar. I had a limited amount of fabric.
- Lined the pockets. I like a clean finish.
For the upcoming fashion show, I will make M5818 (TNT) pants and a simple t-shirt (ivory) to complete the outfit. Of course the ensemble with include the Simplicity purse I had a few months ago.
Would you sew it again? Would you recommend it to others? I don't think I will sew it again, but you never know. I have a few more jackets I'd like to try. But I do recommend it to others.
Conclusion:
This was a great pattern to use for the stripe challenge. It allowed me to create an interesting garment for the Palmer/Pletsche contest as well.MISSES' LINED JACKETS IN THREE LENGTHS: Jackets A, B, C have princess seams, back yoke, two-piece self-faced lapels with collar band, sleeves in two lengths with elbow dart, hook and eye closure; jacket A has long sleeves; jacket B has three-quarter length sleeves, unlined patch pockets; jacket C has long sleeves, unlined patch pockets with top stitching.
Pattern Sizing: 4 through 18. I started out with a size 16; but ended up scaling it down to a 14 with my usual adjustments.
Did it look like the photo/drawing on the pattern envelope once you were done sewing with it? Yes, it look like the basic design as illustrated on the envelope.
Were the instructions easy to follow? Easy.., No problems.
What did you particularly like or dislike about the pattern? The design of the collar and the back yoke. No dislikes.
Fabric Used: The challenge organizers picked this beautiful striped fabric and made it available for members at a previous club meeting. Not sure of the fabric content, but I think it does have some rayon in it. It very easy to work with; sews and presses well. I only bought two yards; and after playing tetris with the pattern pieces on the fabric, I finally admitted I didn't have enough fabric for the entire jacket. So the under collar and the front facing is a stretch woven woolen (Rainbow). My DD gave me about 2/3 yd for my sleeves. The lining is china silk.
Pattern alterations or any design changes you made:
Before cutting into the fabric, I made several adjustments to the pattern:
- FBA – I omitted the small dart in the front
- Sway back adjustment - Then I added that same amount to the bottom of the back and side back pattern. Sometimes when I make the sway back adjustment the jacket/dress is slightly higher in those sections
- Prominent shoulder blade adjustment
Design changes:
- The back yoke was cut along the center. I added 5/8” seam allowance to one of the halves along the cut edge. This created the chevron effect in the back of the jacket.
- Added piping to the shoulder, front, and back seams. The pattern of the stripe was uneven so I wanted to break up the stripe a little bit.
- Contrasting fabric for the front facing and under collar. I had a limited amount of fabric.
- Lined the pockets. I like a clean finish.
For the upcoming fashion show, I will make M5818 (TNT) pants and a simple t-shirt (ivory) to complete the outfit. Of course the ensemble with include the Simplicity purse I had a few months ago.
Would you sew it again? Would you recommend it to others? I don't think I will sew it again, but you never know. I have a few more jackets I'd like to try. But I do recommend it to others.
Conclusion:
Happy Sewing!
C
Labels:
fashion show,
fashion trend,
Haute Couture Club,
jacket,
Mccalls,
Sewing,
stripe challenge
Sunday, February 5, 2012
Gloves - A New Exploration
If you remember last September I participated in a purse making workshop taught by John Koch. Well, John is a jack of all trades. This winter John has offered glove and flower making workshops. I've bought at least four glove patterns, but was afraid to try them. John Koch dispelled all my fears when I attended his January glove making workshop. It was a day long hands on workshop were sewists had an opportunity to learn to make gloves.
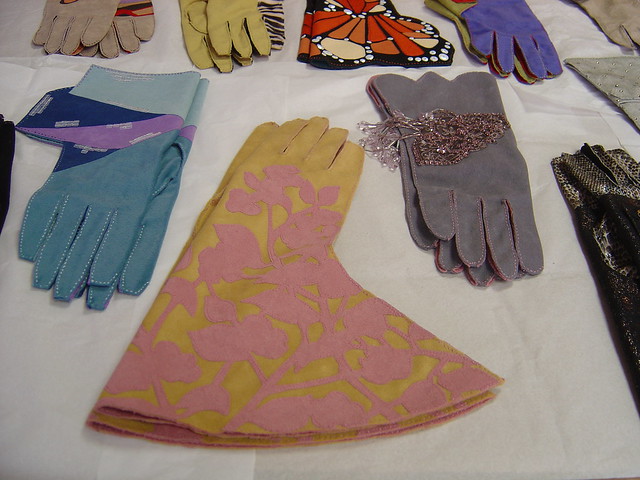
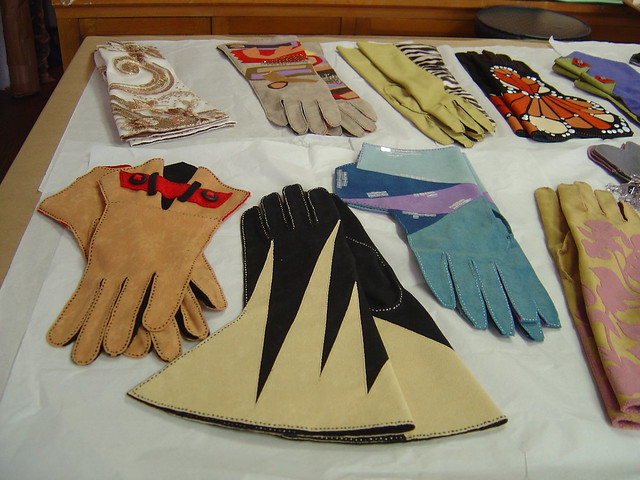
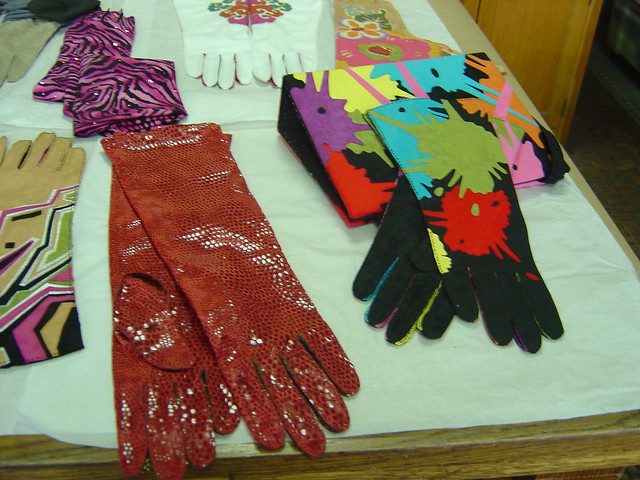
When I came through the studio door, John's display table had dozens of beautifully, hand created gloves on exhibit. Many designs I would have never thought of. Each glove is entirely hand sewn using embroidery floss.
After the lecture, we were able to pick out fabric and thread for our very own pair of gloves. For each participant, a basic instruction book and patterns were provided. Getting started, John measured our hands using pre-made, pre-sized muslin gloves. It was an incredible experience. We learnied about the various parts of the glove and how each part may need to be sized differently based on your hand and the style of glove you want to make.
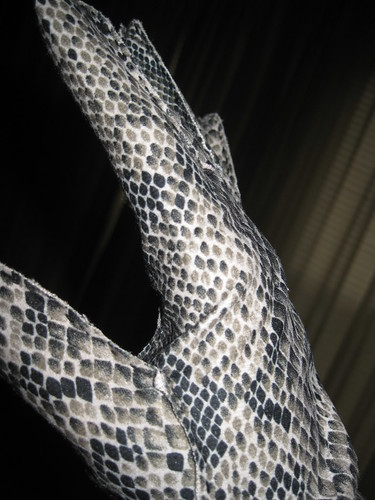
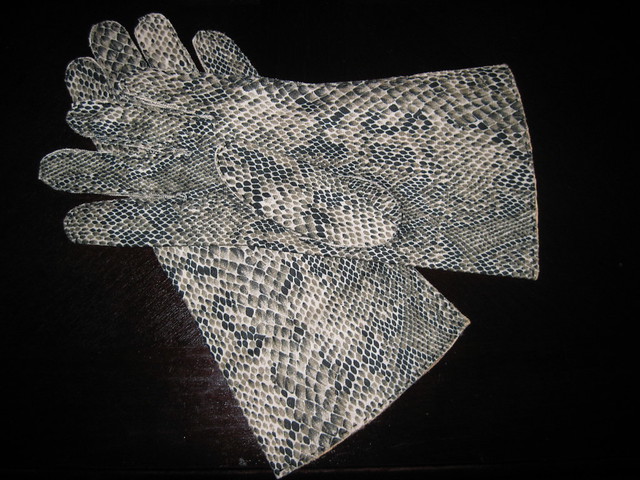
The basic parts of a glove are the trank, thumb, and fourchettes. Each part can be reshaped and sized accordingly. My first pair of gloves is nothing fancy, but is the starting point of making beautiful gloves. This pair is standard with kind of blunt finger tips, size MM (medium trank and thumb). Next pair, I need to extend the thumb about 1/4" for a slightly better fit. I can also choose to get a little fancy, like the ones John made. Not too much too fast. A little at a time.
I'm certainly glad I was able to take advantage of the glove making class. And if you are in the Chicago land area and have four to six people who want to learn how to make them, Give John and call to schedule a workshop.
Janice - Thanks for the pictures. (I'm always forgetting my camera.)
Happy Sewing!
C
Friday, February 3, 2012
Mixed Materials - Burda Style 7303
Today, is the first time in a long time I was able to get some blogging done. I've missed going to my favorite places for inspiration and motivation. So I am grateful to have a few hours to post about a few projects that were finished in January.
This first one, I contemplated throwing in the trash. I had a few fitting issues and construction woes. Then on Monday, I decided to remove the hem of the jacket, for the third time, hoping to get it to lie flat. It's better, but still not 100 percent. I think part of the problem may be due to the loose weave of the fabric and how I attached the lining to the armhole of the sleeve. That's my best guess.
So on Wednesday, I decided to wear my trendy, mix media outfit to work. Here's how I wore it.
Burda Style 7303 - complete review:
Pattern Description: Collarless princess seam jacket with pocket welts and sleeve variation. An almost A-line skirt with center seam option.
Pattern Sizing: This pattern comes in sizes 10 to 20. I used a size 14 with modifications.
Did it look like the photo/drawing on the pattern envelope once you were done sewing with it? It does look like the photo minus the trimming.
Were the instructions easy to follow? There is nothing confusing in them. I don't like attaching the interfacing to the lining. I skipped that. It didn't really need it; the skirt is faux leather. I did, however, add seam binding to the waist of the skirt for stability.
What did you particularly like or dislike about the pattern? I like the classic style of the suit, and I thought it would be a good pattern to try my first mix materials garment. No serious dislikes.
Fabric Used: remnant boucle from Vogue, faux leather from Hancock's, red polyester lining from my stash, and black polyester charmeuse from Rainbow Fabrics.
Pattern alterations or any design changes you made:
Of course I made my usual adjustments: FBA, prominent shoulder blades, and lengthened the skirt a few inches. I also took most of the ease out of the sleeve cap, but later realized I should have left it in. The faux leather does not have much give and is snug around the upper part of my arm.
My design changes include:
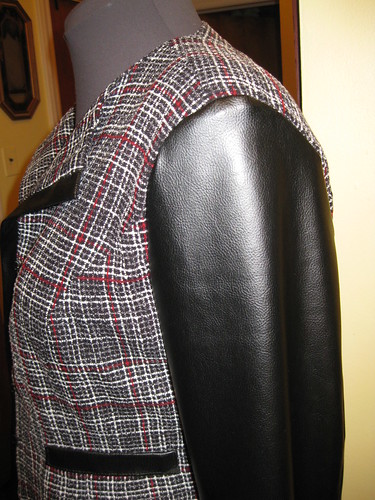
- faux leather sleeves and pocket welts for the jacket.
- exposed zipper on the skirt.
- I like the front center open with the front facing folder down. It's the opposite of how the model is wearing the jacket.
Mishap #1 - While trying to get that final press before wearing the outfit, I touched to faux leather welt with the iron. So it lost some of the shine and "plastic" too. lol
Mishap #2 - I used a pressing clothe, but there are some areas of the faux leather that lost it's shaping and some luster. I probably had the iron too hot. So this is a point that you should consider if you plan to make a faux leather garment.
Would you sew it again? Would you recommend it to others? Not sure. I have many patterns to try. But I do recommend it.
Conclusion: Although I had a few mishaps with this sewing project, I received a lot of compliments. It's not hard to sew. And I think the jacket is good for making a Chanel style jacket.
All photos can be found here.
Labels:
fall trend 2011,
faux leather,
jacket,
Sewing,
skirt
Subscribe to:
Comments (Atom)
