
With almost every pattern I choose to sew, I must make pattern adjustments. This is true with most blogging sewists. Most of the time. I usually include a snap shot of the completed change that I made to show the results of my personal fitting adjustments. Those pictures don't show the step by step process taken to arrive at the final adjustment.
Weeks before the "prom dress" series, I received a few emails from some of my followers who wanted to get more details on the process of making adjustments. During the same time, I had several conversations with friends about the full bust adjustment (FBA).
So I decided to write a few blog posts detailing the steps I take to make adjustments to the pattern. This post will include details on the full bust adjustment for a princess seam dress (M6028), prominent shoulder blade, raising the armhole of a sleeveless dress, and sway back adjustments. All will be made using M6028. I selected this pattern for three reasons: it's been on my to-make list for a while, it's Palmer/Pletsch (includes the adjustment lines, and it has princess seams.
The Palmer/Pletsch patterns make it easy for you to make most adjustments because the adjustment lines are drawn on the pattern and the guide sheet includes construction details on how to make those adjustments. Princess garments provide many opportunities to make adjustments. You can add width and length to all or some of the pieces to easily fit the various regions of your body.
I must add a disclaimer:
These adjustments are based on fitting adjustments that work for me and should not be viewed as the "standard". They may not work for you. I use the Palmer/Pletsch tissue fitting instructions to help me understand and determine how I can make the best fit adjustment for me.
That being said, I will start the adjustment process with raising the armhole of a sleeveless dress.
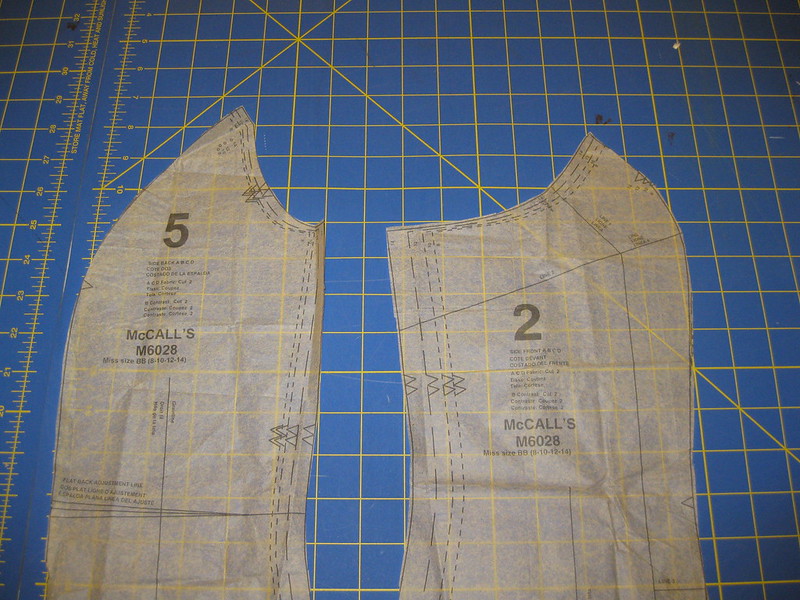
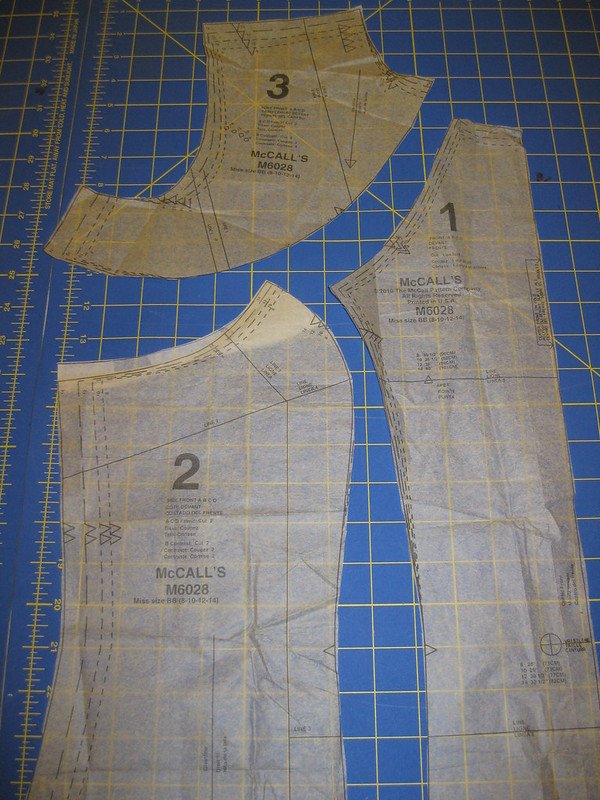
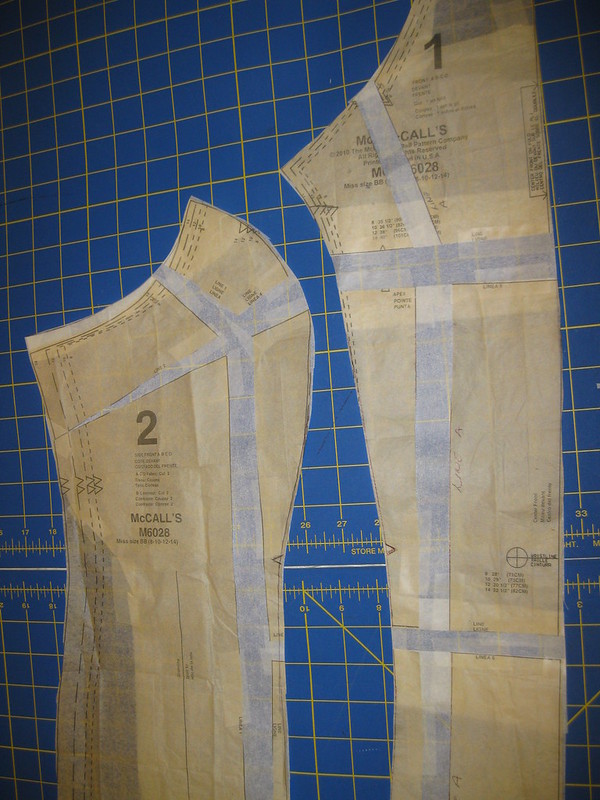
This first picture displays the front and back sides of a princess
seam dress. I like to raise the armhole to conceal side boobage. It
looks much nicer without the exposure.
NOTE: These instructions are not found in the guide sheet.
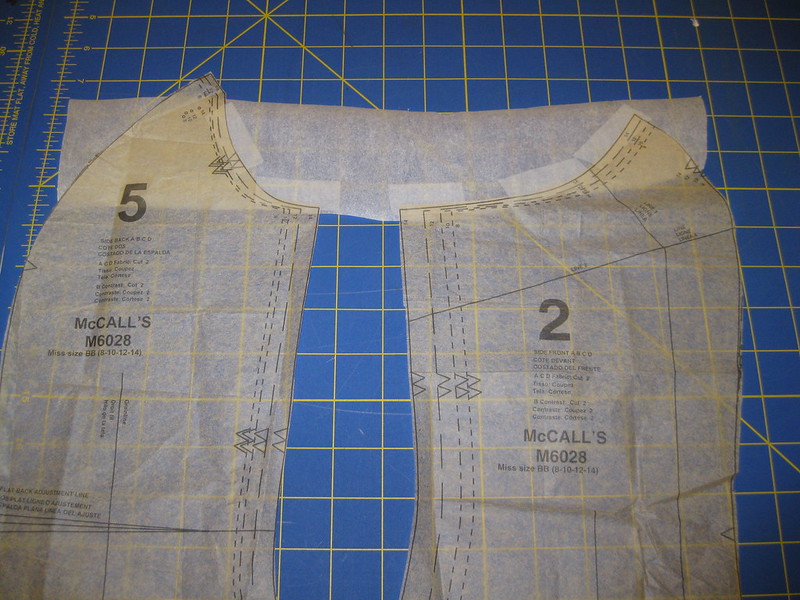
Step 2 -
Next place pattern tissue paper under both pattern pieces having the
tops even.
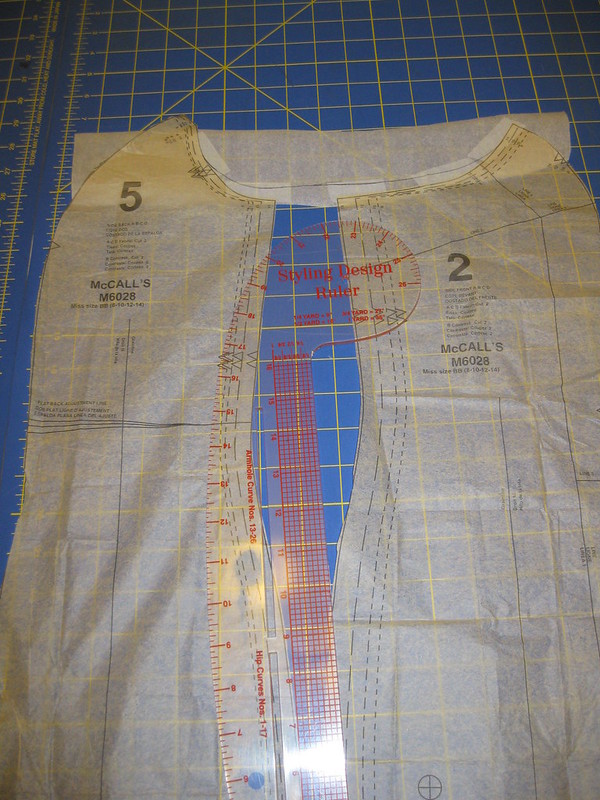
Step 3 - Next draw a new lower armhole line.

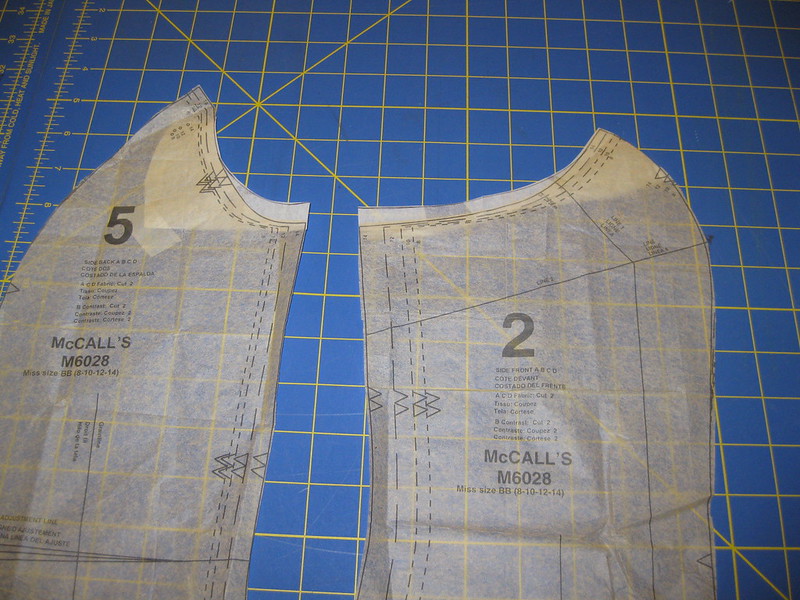
Step 4 - Finally trim away the excess tissue paper.
Full Bust Adjustment (FBA)
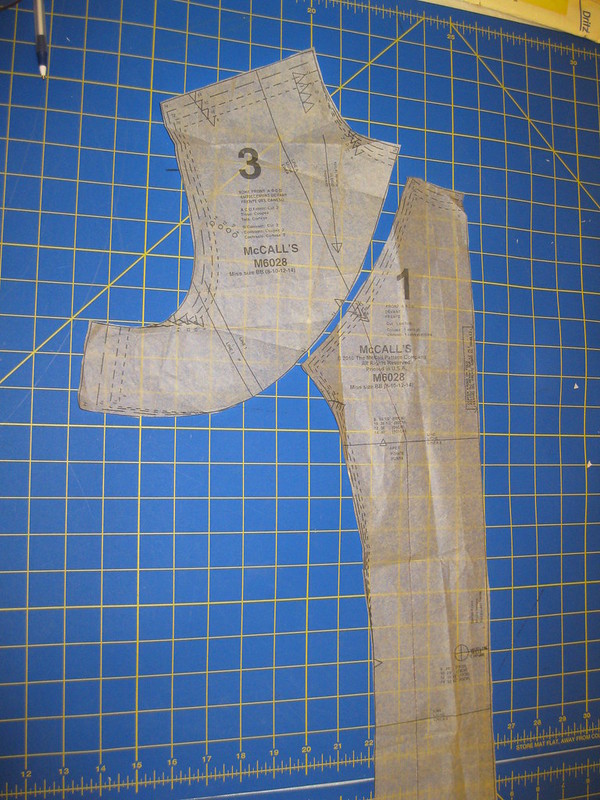
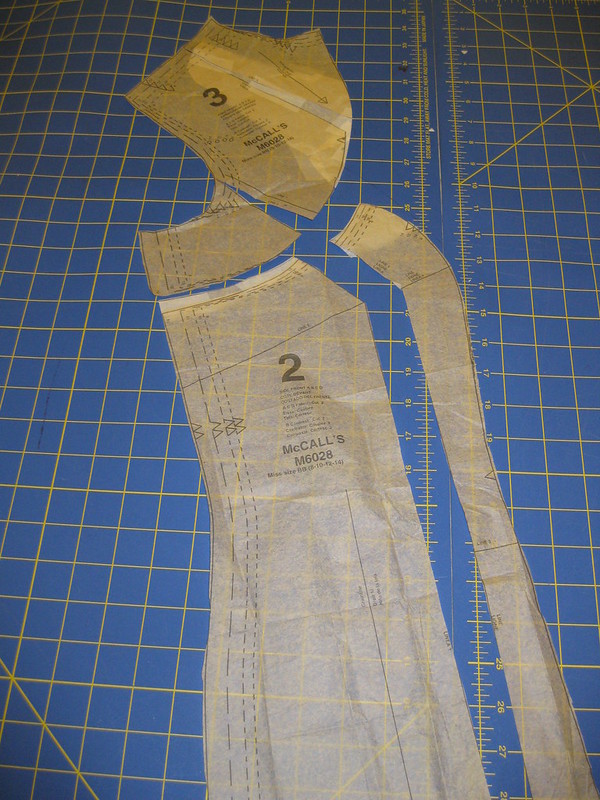
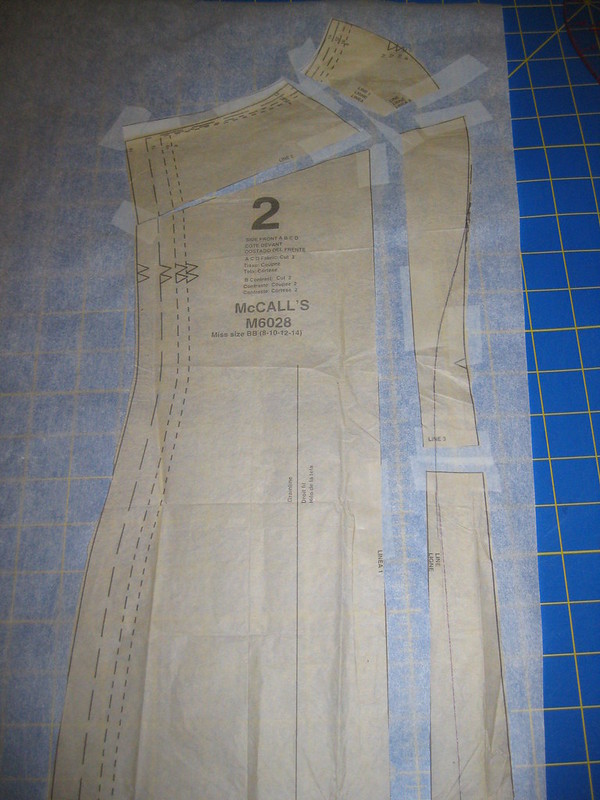
Step 1 - With the armhole adjustment already made, layout pattern 1,
2, 3 to make the Full Bust Adjustment (FBA). Palmer-Pletsch patterns include cutting lines for making most pattern
fitting adjustments.

The FBA is a lengthy process, but it is easy to achieve. Just
take your time. Let's start with the front yoke and the front of
McCall's 6028.
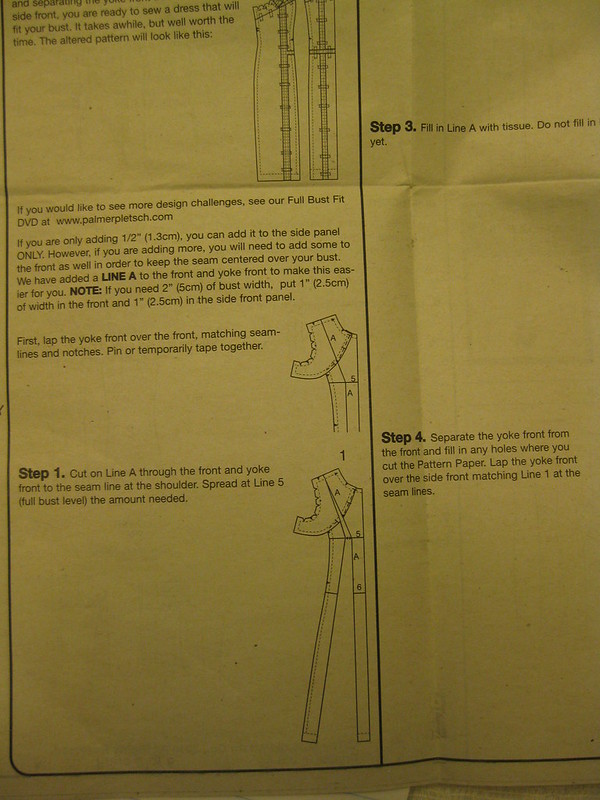
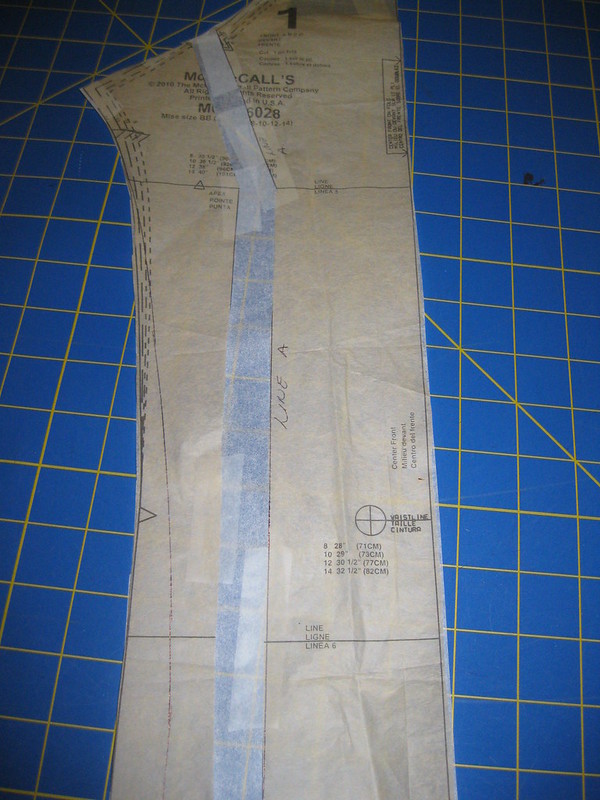
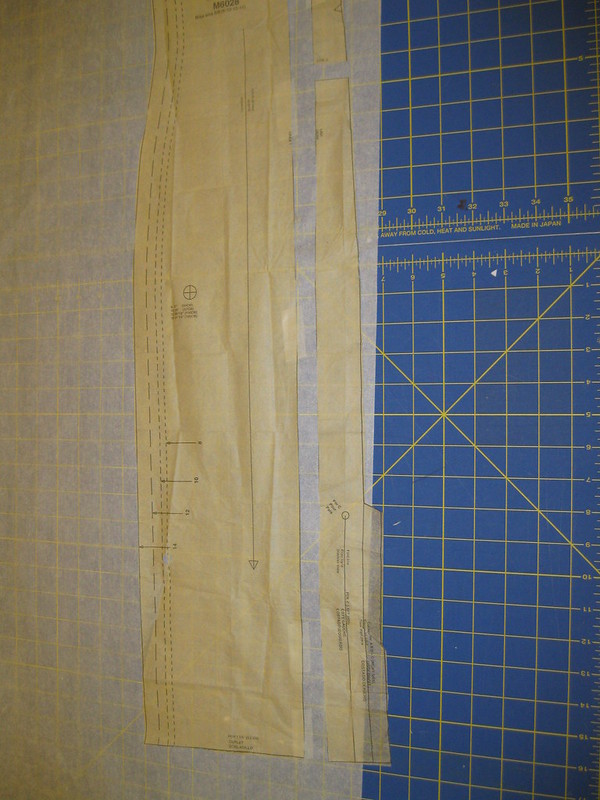
This picture shows Line A on the yoke front 3. But Line A is missing
from front 1.
FBA - Here I drew the Line A on the front 1 pattern.

FBA - Slash Lina A on both front yoke 3 and front 1. Spread the desired amount as illustrated in step one of the guide sheet for McCall's 6028.


FBA - The slash and spread should continue through the hemline on front 1.
FBA - Before trimming the excess tissue paper, true up the upper edge where the front is to join the front yoke 3.
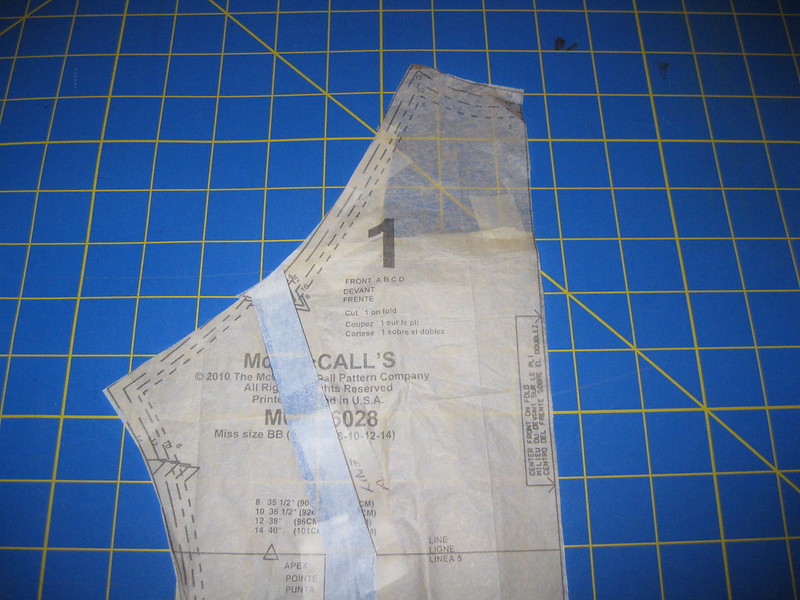
FBA - The added width below the bust area makes the dress too wide for me. So to eliminate that width, I remove the excess from the left side of the pattern by drawing a new line to the end of the hemline. Transfer the notch to the new edge before cutting away the excess tissue.

FBA - This picture shows the new line at the bottom of the pattern (front 1).
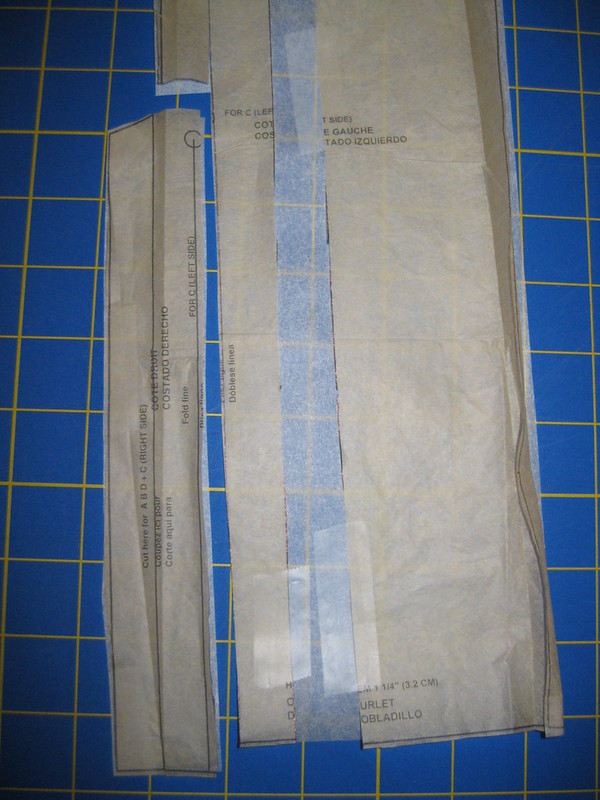
FBA - To maintain the slit at the lower section of the pattern, cut along the new line and then across the top of the slit. Save this section so it can be relocated after the remainder of the excess width is cut away.

FBA - After removing the excess width, place the slit section at the lower section lining it up with the cut edge.

FBA - Now let's work with the side front 2, before completing the rest of the adjustment to the front 1. This picture shows the affect of the slash and spread of Line A on the front yoke 3.
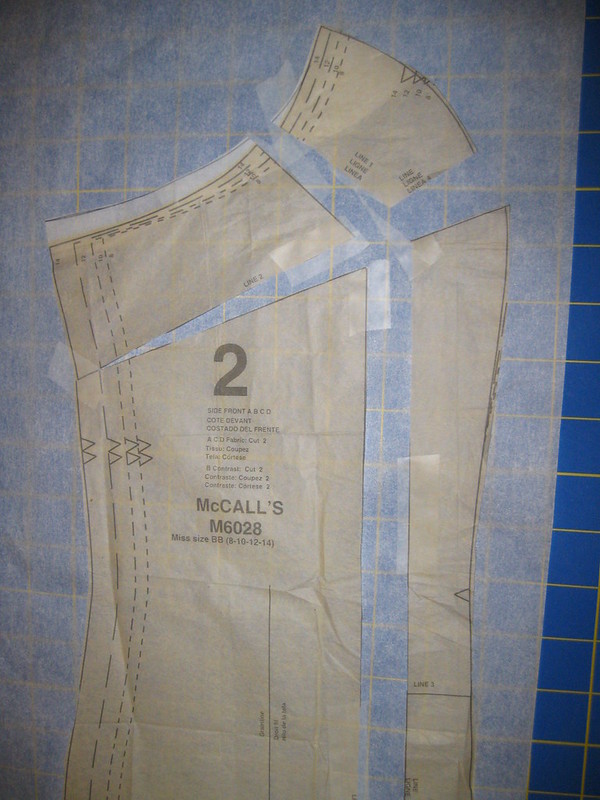
FBA - Pictured here is the spread through the hemline. NOTE: slash at hip area to realign the lower portion of the dress.
FBA - Another view of the spread. Also, note the new line drawn under the bust area of the side front 2.
FBA - Now spread the front 1 is the same sections making sure it is the same as on the side front 2.
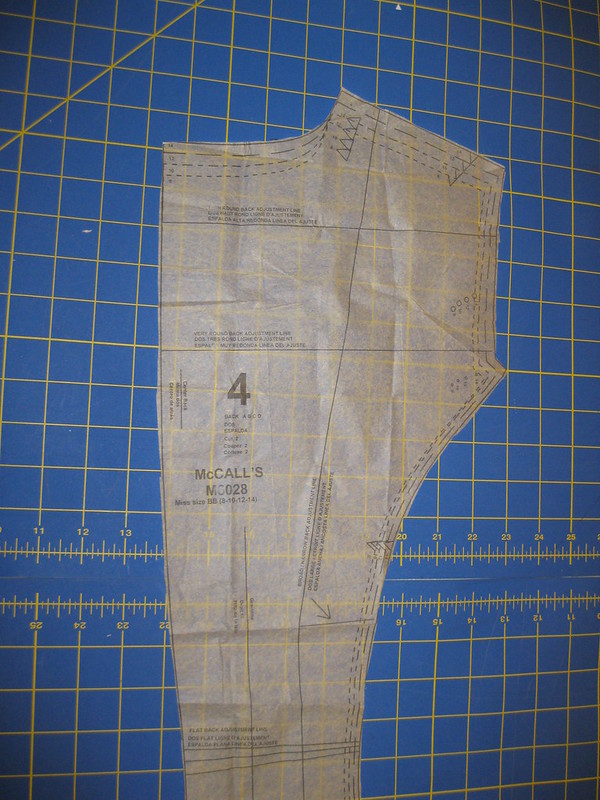
PSBA - There is no line drawn on the pattern for this adjustment.
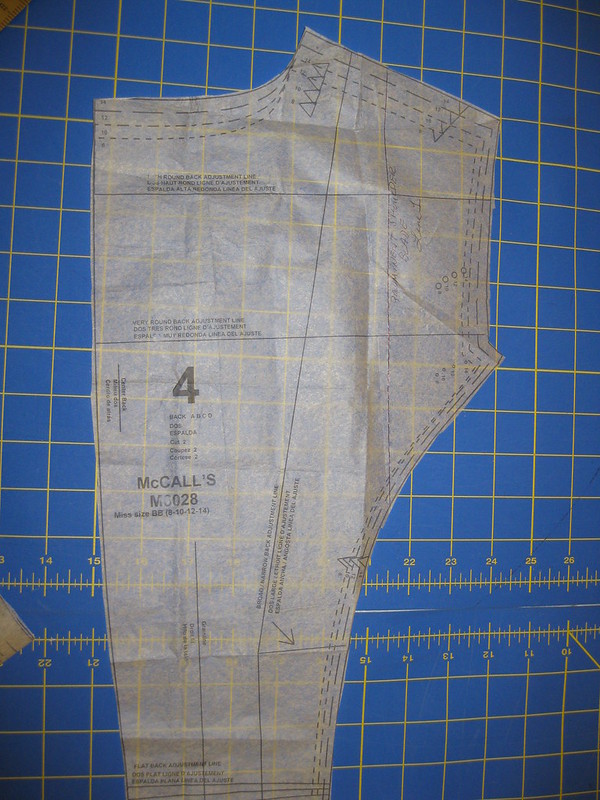
PSBA - I typically place a vertical line about 21/2" from the edge of the back pattern at the should seam. Here it is identified as Line 1.

PSBA - Slash the back 4 starting at the base of the PSBA line. Spread the desired amount. True up the spread by drawing a new line. Then cut away excess tissue paper.

Sway Back Adjustment - SBA

My apologies, I didn't include a photo of the sway back adjustment. Please scroll up to the last picture of the PSBA. There you can clearly see the sway back adjustment lines on the pattern. These lines help you make SBA.
That's it! I hope this was helpful and not confusing.
Happy Sewing!
Wow! Such a thorough tutorial! Incredible, step by step. Clearly explained. Appreciate that!
ReplyDeleteWith a recent weight-loss-- from the face down to the feet-- I don't need any FBA, but this tutorial has opened my eyes about a few things. Thinking them through with patience is key, isn't? And practice obviously makes "perfect."
Thank you so much....this post was extremly helpful. Now I can use this as a reference for my adjustment.
ReplyDeleteAmbitious sewer
Great post, Cenetta. What is really funny is that I just pulled out this pattern this evening while digging through my stash, and put it in my 'to do this summer' pile. Can't wait to see your finished dress, as well as the process. Everything you create is beautiful.
ReplyDeleteThanks for presenting the step by step pattern alterations that you make before you even begin to cut out the fabric. Learning which alterations are necessary to get a good fit is one of the most important parts of sewing.
ReplyDeleteGreat post! This post was extremely helpful..
ReplyDeleteNot confusing at all. I've been looking for a reference for an FBA on a princess seam for a whole now.
ReplyDeleteGreat review! And, I agree with Carolyn, it is so important for the alterations process in order to have a great fitting garment.
ReplyDeleteI will say that when I read about the hem issue, what immediately came to mind was the fact that you cut it on the bias. I don't know if you thought about this, but usually when you cut a dress or skirt on the bias, you must let it hang for a day or so in order for the stretch to fall out ( so to speak). If you tried to hem it right away or without hanging it up, is why it probably sagged like that. However, your alternative worked wonderfully, because looking at it you don't suspect a thing. I love it!
Although I don't need many of your alterations (my body goes the other way - smaller bust and wider hips), the manner in which you explained and also showed what you did is a lesson that applies to any pattern alteration. Thank you for taking the time to educate others!
ReplyDeleteThanks everyone,
ReplyDeleteI'm glad this is helpful.
Alethia - I thought about that before hemming. So I waited a day and half. It did not help very much. Lol
It's so great to see how truly experienced sewistas do this! Many thanks!
ReplyDeleteGreat post, I think the Palmer and Pletsch patterns are a good choice for an intermediate sewist wanting to try this adjustment. Very nice of you to document.
ReplyDeleteThanks for that thorough step by step tutorial. I know it will be extremely helpful.
ReplyDeleteWow, that is very extensive work! However, you make it look so easy! I agree with you and Beth, Palmer Pletsch patterns are very helpful in their instruction for making adjustments!
ReplyDeleteThank you so much for showing the detail. It is very helpful. Your sewing is absolutely inspiring!
ReplyDeleteThank you
Marie
Wow gorgeous job, and when I see the work you put into it I can see why. Thanks for all the detailed information
ReplyDelete