Thursday, May 16, 2013

McCall's 6700 - The "It" Maxi Dress of 2013

Last year's "It" maxi was M6559. Everyone made it at least two times. All I did was buy the pattern two times. Anyway, it too shall be reviewed soon.


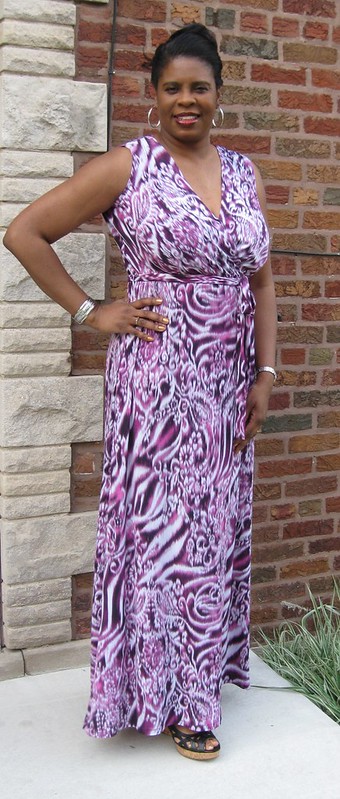
This review is about McCall's latest "It" maxi dress, M6700. I've seen at least five gorgeous maxi dresses on PR and in blog land. Each one a winner, and I would love to have (in my size of course). Wink, wink. So I moved this to the very top of the list, pushing aside all those UFO's sitting in the closet.  

Pattern Description:
MISSES' DRESS AND BELT: Pullover dress has fitted, mock wrap bodice, shoulder ties, elasticized shoulders and raised (seamed) waist, fitted, narrow hem, thread carriers and self belt. This is a Fashion Star pattern that can be used to design a top or knee length dress. So there are some additional options to take advantage of if a maxi dress is not your style.

Pattern Sizing:
8 to 24; I used 14 with modifications.

Did it look like the photo/drawing on the pattern envelope once you were done sewing with it?
You bet it did. I noticed that the armhole come pretty high on the model, which is a good thing. The pattern is also drafted with a high armhole, but I added my usual 3/4 inch just in case. In retrospect, I think I'll not add for the next version just to give a little move. Mind you, it's not tight, just a little higher than necessary.

Were the instructions easy to follow?
Very simple to follow. A beginner would have no problem making this dress. Very simple.


What did you particularly like or dislike about the pattern?
Oh my goodness, what is there not to like. My likes: - Mock wrap bodice - shoulder ties - fullness of the skirt - easy to sew - design options - versatility of wear; dress it up or down - cute summer dress No dislikes.  


Fabric Used:
I purchased this knit from Gorgeous Fabrics about a year ago. Ann called it Purple Haze; when I read the name, it reminded me of Jimi Hendrix's song of the same title. I bought it to make different dress, but changed my mind when I decided to move this dress to the top of the list. It's perfect for it.

Pattern alterations or any design changes you made:
Although this dress has some wearing ease, I still made my usual FBA. I did not want to take a chance with having fit issues in the bust and shoulder blade areas. It was necessary.
 - FBA - The FBA added about 2" to the width of the dress, which I did not need. To get it to fit the width of the front skirt, I folded a 1" pleat at the waist below the apex. For the skirt, I cut it 1" wider to absorb the rest of the width. Once attached and the elastic inserted, the pleat disappears into the gathers formed by the elasticized waist.
 - Prominent Shoulder Blades -NOTE: The front and back skirt are one pattern. If you do not make any width adjustments to the back, cut them separately to ensure the appropriate length for each section of the waist.
 - In the sewing directions for the ties, #8 - slipstitch the ends together. I didn't follow this. I sewed cross one end of each tie; pivot; then sewed the long end together; trim at the corner. Then I used my loop turner to turn the tie to the right side. If you don't have a loop turner, it is a good idea to get one. It makes sewing ties and straps easy.
 - For the narrow hem at the lower edge of the dress, I used steam a seam to help stabilize the hem while sewing. I love this stuff and always use it on hems of my knit garments.
 - Loops for the belt. I prefer fabric loops to the thread loops. So I used the width of the tie as a guide for the thickness of the belt loops. The length of the piece of fabric was about six inches long. After sewing I cut two loops about 2 1/2" long and attached them to the sides of the waist where the bodice and skirt are joined. Then I stitched the side closest to the dress along the side seam of the skirt so the loops would not stick out from the side of the dress.
 - I did not have enough fabric to make the belt as suggested. So I made the best of the straps. I was able to cut two belt halves and join them to make a belt long enough to get a similar look as on the pattern illustration.

 
Would you sew it again? Would you recommend it to others?
Yes and yes. I cut the second dress the day after I made this one. It's ready to sew. This is a easy pattern to try for a great summer maxi.

Conclusion: This is definitely the "It" maxi dress pattern of the season. This dress is super cute and a beginner can whip it up in no time. I highly recommend it, short or long.

More Reviews to come.
Happy Sewing!
C
Wednesday, May 15, 2013

The Ever Popular Vogue 8787


I still have quite a few pattern/project reviews to post. There are a few from Dec/Jan and April. So the next few entries will be on reviews. I do have some inspirational posts that I'd like to share before the end of the month.

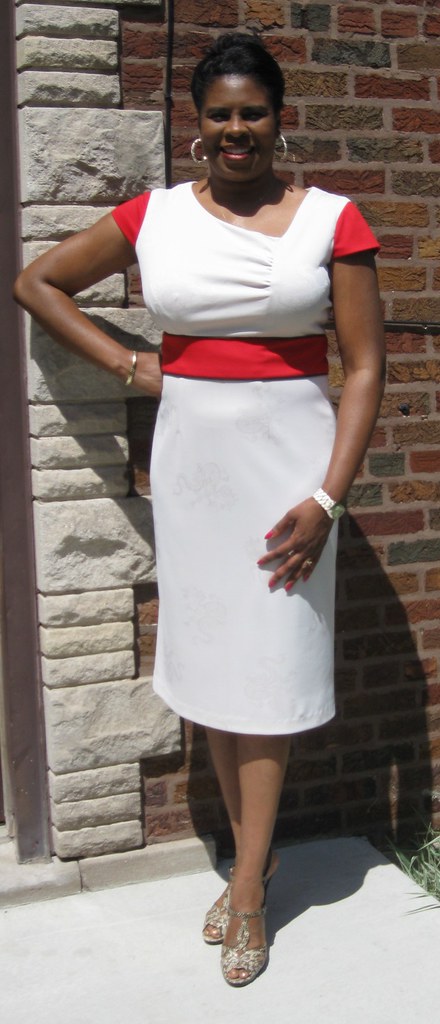
Today's review is on Vogue 8787. Here again, this one has been reviewed several times. I hope I can help by sharing my adjustments or inspires you to give it a try. It's very popular and some sewing fashionistas have sewn it more than once. This dress offers seven options as illustrated on the pattern envelope. I came up with another option on color blocking the sleeve and midriff.

Here is my review:  

Pattern Description:
MISSES' DRESS: Lined dress has fitted bodice variations, midriff, tapered or flared skirt and back zipper. C and E: side front and side back seams, and side pockets. A, B, D and F: semi-fitted skirt and back slit. D, E and F: bias front bodice with fold-back facing.

Pattern Sizing:
6 - 22; I used 14 with several modifications.

Did it look like the photo/drawing on the pattern envelope once you were done sewing with it?
Yes, both dresses look like the designs illustrated.

Were the instructions easy to follow?
No problems with the instructions of the pattern. They were pretty straight forward.

What did you particularly like or dislike about the pattern?
I have several likes about this dress.
 - Options. That's always a plus. Having more than one skirt and bodice choice gives me a reason to sew it again sooner.
 - The drape neckline. This is a good look for me.
 - The straight skirt. Again, I think this silhouette is good for my body type.
 - Easy, easy to sew. Lately, that's all I want is something easy to sew. No dislikes.

Fabric Used:
I used Ponte Roma knit for both dresses from Vogue. Both fabrics were remnants that cost less than $20.00 total. The red fabric is straps for my Vogue 1205 project.

Pattern alterations or any design changes you made: I made my usual changes.

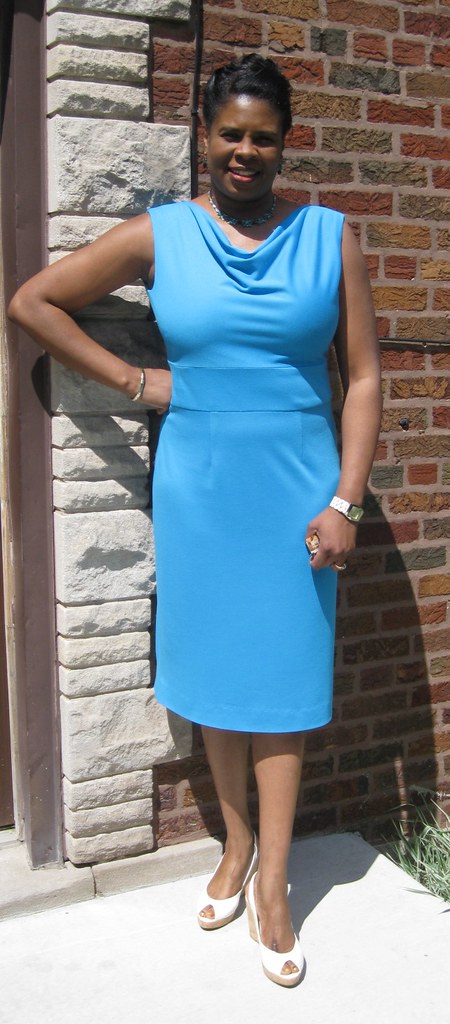
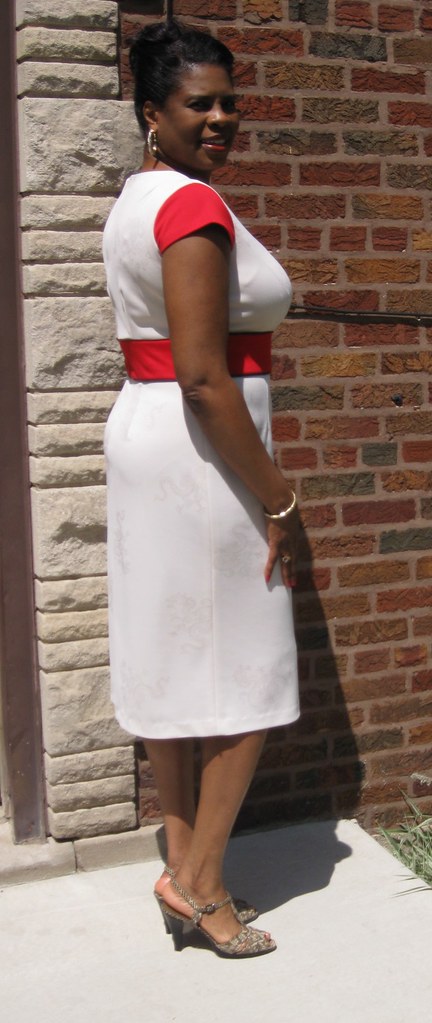
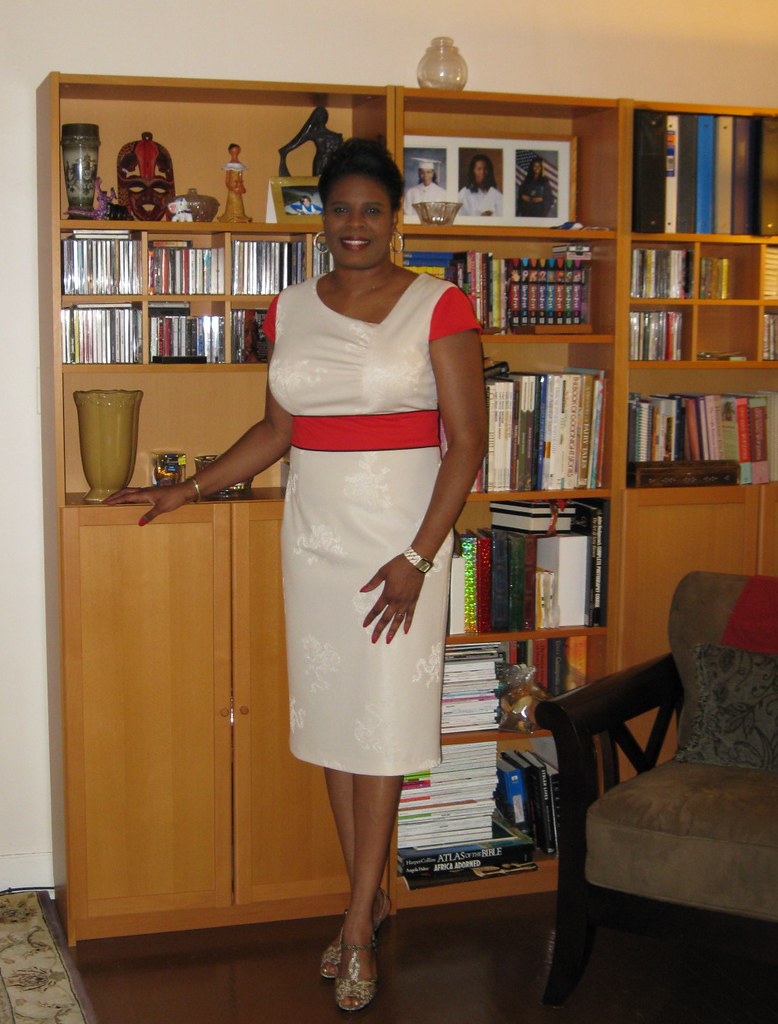
Cream dress - FBA; adding a dart on the right bodice. Used red fabric for sleeves and midriff.  Added brown piping above and below the midriff.

Blue dress - FBA - Step 1 I folded the pattern in half then folded it again. Step 2 Next I cut a square from the folded pattern. Step 3 I slashed from the waist to the armhole then spread the desired amount of width. The spread is filled with tissue and the rectangle is placed accordingly.


Both dresses
 - Added a few inches to the length of the skirt.
 - Raise the armhole 3/4 inch
 - Prominent shoulder blades and sway back adjustments.
 - Somehow I lost the midriff. Maybe I threw away the pieces by accident. I guessed the length and made it 3 1/2" long and measured the bottom of the front and back bodice to determine the width; then added the 5/8 seam allowances to all sides.
 - I only lined the bodice and midriff. The weight of the ponte roma was enough for the skirt portion.

Would you sew it again? Would you recommend it to others?
I don't think so. I may use the full skirt with a bodice from another pattern. Yes, I do recommend it to others.

Conclusion: I now have to nice dresses that can be worn three seasons out of the year. This dress was easy to make and gives the sewists several design options.

Tuesday, May 14, 2013

Vogue 8742


This Vogue dress has been reviewed many, many times by bloggers and pattern review members. It's definitely a winner. I thought about making it for a long time. And when I saw ArtAttack's version, I decided to move it to the top of my to sew list.

My first version was made in early January. But I wasn't satisfied with it. I used a ponte roma knit. Wrong choice of fabric. I didn't compensate for the lack of stretch or built in ease. The ruching looked bad in the bust area. I did a FBA, which included more ruching along the bust area. Not good either. Vogue describes this dress as close fitting, but, it's also princess seam with ruching along the side front; mid-knee length with long or no sleeves. It was designed for two way stretch knit.

The sizes available are 8 through 22. I used size 14 with modifications.

Both version looked like the drawing, but the first one had fit issues in the bust and arm areas. I did notice that in the drawing the ruching started at the lowest part of the bust. My first dress has ruching along the entire bust area. Initially, I thought this may have caused some of the horizontal lines near the arm hole. So, I decided to try moving some of it down an inch. There are still horizontal lines, but the print fabric hides them. The sleeves were snug in the ponte knit version, no stretch, remember. For the second version, I cut the sleeves between 14 and 16 to add more width above the elbow. No problem with fit the second time. I ended up taking the extra width out. In the first version, there is a horizontal line across the center of my chest below the neckline. Second version, no pulling or line.

Fabrics used:  First version - Ponte Roma knit from JoAnn's  Second version - four way novelty knit from Sheila Powell.

I liked the simplicity of the pattern. The princess seam design offers many options to make fit adjustments. The dress is "very easy". But you should use the recommended fabric. If not, make a muslin first.

No real dislikes about the pattern. I think my issues were due to my fabric choice, the amount of the FBA, and the placement of the ruching. I wanted the ponte roma knit to work for this dress, and I think it can with some work on the fitting.

I made a few changes and alterations:
 - FBA - reduced in the second version.
 - Sleeves 3/4 length sleeves; increasing the width above the elbow; then remove it(second version).
 - Added a few inches to the length. 
 - Instead of using bias tape to finish the neck edge, I cut a stripe of fabric (bias) 2"W X the length of the neckline minus 1".
 - Sway back adjustment.

I definitely plan to make it again. This is a nice staple to have in your wardrobe. Two or three wouldn't be overkill as there are so many fabric prints, solids, and combos you could try. It's a great basic dress that is easy to sew and would be good staple in most wardrobes. I recommend it to all level sewists. No zipper or buttonholes to install. The hardest part is the ruching and some possible fit adjustments.

All pictures are on Flickr.


Monday, May 13, 2013

After Thought ..,

First of all Happy Mother's Day to all of you.  I didn't get a chance to say that yesterday.  Today I wanted to talk a little bit about my thoughts on the fashion show and other life situations.

On the drive home from the fashion show, I let out a long sign of relief. This event marked the end of one of my busiest times of the year. Finals were over, Pastor's Anniversary was over (Media Services), my time as fashion show chair was drawing in on a close and the warm weather was energizing. I was relieved and almost immediately started thinking about things I'd like to sew this spring and summer.

 On my very long list are several UFO's and new projects:

V1356
V1355
1260
V1307
Rhonda's Perfect Travel Dress
B5753
B5645
M6565
V8805
B5893
S1617
V8846
a few things for my DD

Short list right? I'm planning a sew-cation so I can realistically get it done before classes start at the end of August.

I had other thoughts as well. Personally, I felt the fashion show was a success, but wondered what others "really" thought. There were so many tasks to complete. I was thankful to have a committee of hard working, talented people. Everyone that I asked to help or lead a team graciously accepted and did an excellent job. As I've said before, the Haute Couture Club is comprised of a phenomenal group of women. I feel privileged to be a part of this club. There were three members that really made my job less tedious: Sandra Young, Rhonda Buss and Dolores Panek. The three of them represent a combined membership of over 50 years and tons of experience with the annual fashion show. I called them my special consultants. They really were. I love these ladies and working with them made this incredible task a lot less scary. Next, there is Sue Heiss who was willing to help with just about everything. From garment reviews, staging, and other activities, she helped with it all. These ladies were supportive and faithfully helped me over the course of the entire year.

The rest of the fashion show committee worked just as hard in their respective teams. Other committee members: Patricia Ferguson, Debra Latimore, Tara Fowler, Evelyn Cummings, Kathie McCallister, Bonnie Girsch, Lauren Walker, Wendy Grossman, Norma Neuswanger, Sheril Hughes, Kevin Sullivan.  I also have to thank all of our contracted staff: Barbara Martin, Jeanine M. Clarke, Donald Witthoft, Colleen Davick, Robert Ingham, Venu Mallipeddi, Kitt Lyles, Curtis Boysen, Joaquin Garcia, and Roy McGrath. We had over 35 raffle prize contributors, vendors, and other businesses that supported the club through ads and prizes (scholarship proceeds).

Last but not least, the models and designers. There were about 30 people involved in designing, sewing, and modeling the garments on the runway. These people and our guests helped make the fashion show a success.

Would I do it again? "Yes, maybe four years from now." Ms. Karen Harder has the privilege of being the fashion show chair next year. She will do well.

I can't remember if I mentioned the show theme here: "Elements of Glam!; celebrating the earth through fashion". This year's theme was ripe with opportunity for inspiration. With all the work I was responsible for as the fashion show chair, a student and an employee, I couldn't sew something for each segment. At some point, I'm hoping to do so.

Our segments were:

Shades of Blue - Water and Sky
Wind, Water, and Fog - wispy, floating fabrics (chiffon, georgette, etc.)
The Tundra - cold and barren (embellished coat)
Rhonda's Any Way You Want It top (group project)
Shaking It Up -earthquakes, volcanos, avalanches (multiple layers, fringes, ruffles)
Flora and Fauna - floral and/or animal Precious Metals and Stones

Last week I blogged two of my show garments. These were made specifically for the show. My sister modeled two other outfits that were blogged here and here.  I only modeled one outfit, blogged in December.

My thoughts turn to other projects and responsibilities related to the home and work. It's time for spring cleaning: windows, carpets, walls just to mention a few things. My duties at work are changing a bit, and I'll be traveling again soon. I'm especially thankful that the traveling did not start before the fashion show ended. And I'm hoping it will end before school starts up again.

And, I still need a vacation. I'm tired. It would be nice if I could take off an entire month. I miss going to the movie, concerts, plays, and out to dinner.

So these are the things on my mind. In the meantime, Happy Sewing and have a fabulous week! Cennetta

Wednesday, May 8, 2013

Blocked in Vogue 1329 Kay Unger


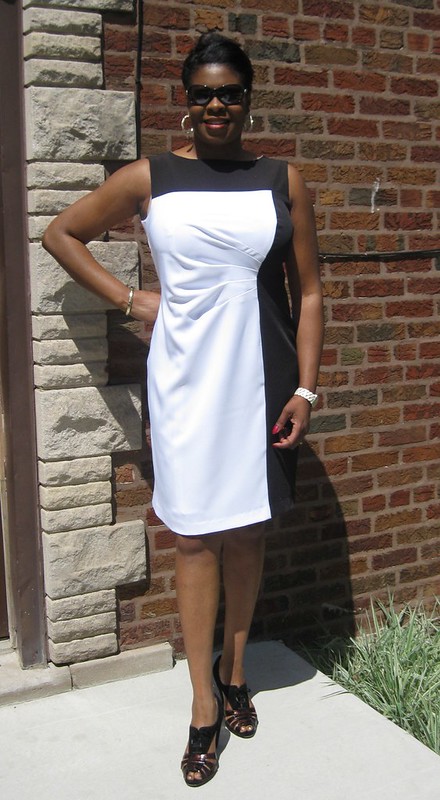
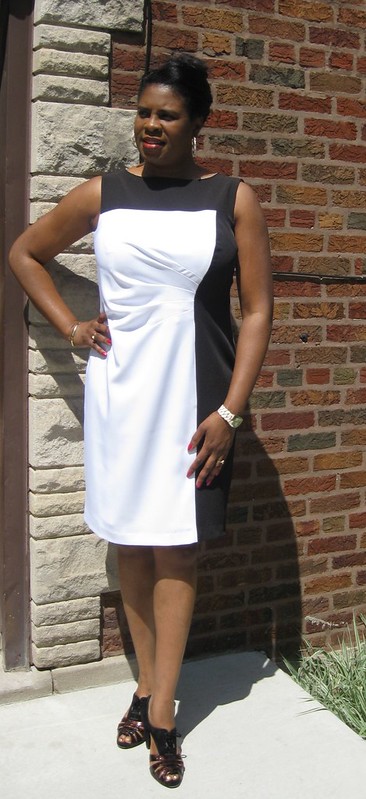
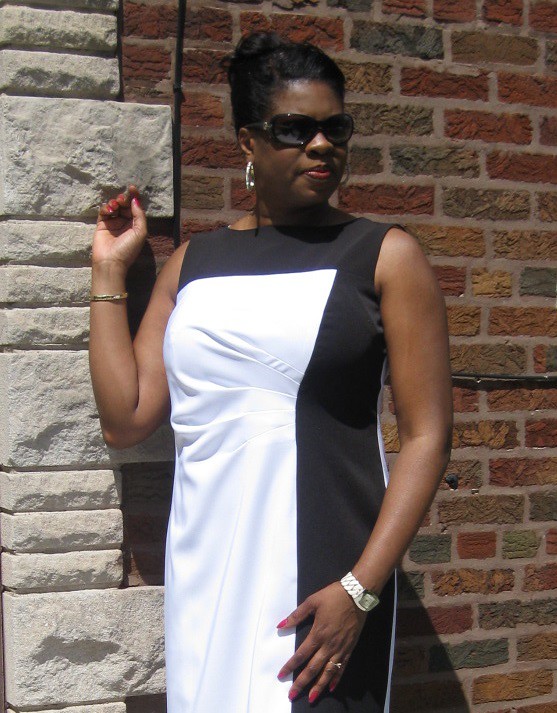
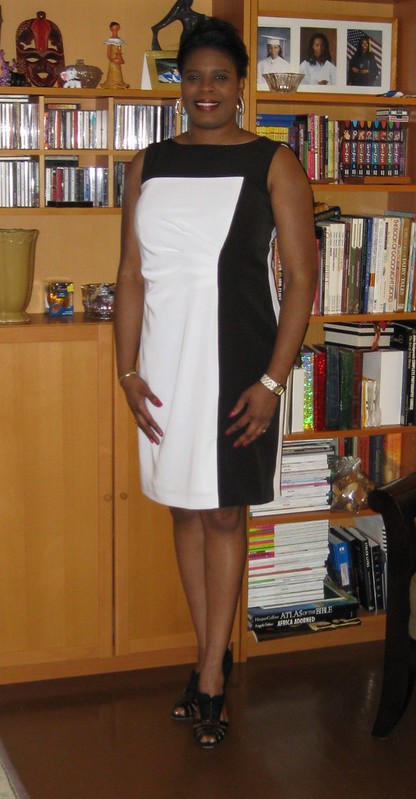
Color blocked dresses are still on trend. White and black are very popular this season. Initially, I thought I'd take a pass on the Kay Unger black and white dress, but after a conversation with Sandra Young (HCC), I decided to give it a try. Then I questioned whether or not I wanted another black dress as I have four in my closet ready. So I followed Erica B's lead making the dress in the opposite color combination.

Vogue 1329  

Pattern Description:
MISSES' DRESS: Close-fitting, lined dress (fitted through hips) has yokes, right front with pleats, back princess seams, and invisible zipper.
 

Pattern Sizing:
8 to 24; I used size 14 with modifications.

Did it look like the photo/drawing on the pattern envelope once you were done sewing with it?
Yes, except for the switch in the color combination.

Were the instructions easy to follow?
The instructions were easy to follow.


What did you particularly like or dislike about the pattern?
I like the pleating across the front of the dress and the color blocked style. No real dislike, but when this pattern was first released, I thought I'd pass on it because the Figure Flattery symbol did not include my body shape. In hind sight, I still think the girls are way out there in this dress.

Fabric Used:
My fabric is a stretch woven gabardine from Hancock's. It sewed together with no problem. The stretch in it is almost non-existent. The lining is poly/cotton blend that I got from Vogue.


Pattern alterations or any design changes you made:
I made my usual alterations:
FBA - I rotated the dart into the three lower front pleats. The lining is princess seam. So I followed standard Palmer-Pletsch adjustment for that.
Swayback adjustment - folded out the excess along the lower center back and curved out that same section of the back for a closer fit.
Lengthen - as usual added a few inches to the hem. I wanted the hem to be mid knee.
Broad Shoulder adjustment and rise the underarm hole about 1/2 inch to ensure full coverage.


Would you sew it again? Would you recommend it to others?
I'm not sure. If I do, I think I'll extend the yoke past the bust area for a more flattering look. Yes, I do recommend it to others.

Conclusion: This is a fairly easy trendy dress to sew. Happy Sewing! C
Tuesday, May 7, 2013

Haute CoutureFashion Show - Vogue 1305


Today's review is on the second dress that I made for my sister. At first sight, I knew I'd make this dress for the show. It's not your typical dress. And that's what I was going for. I showed it to my sister; she liked it. So it was a winner.

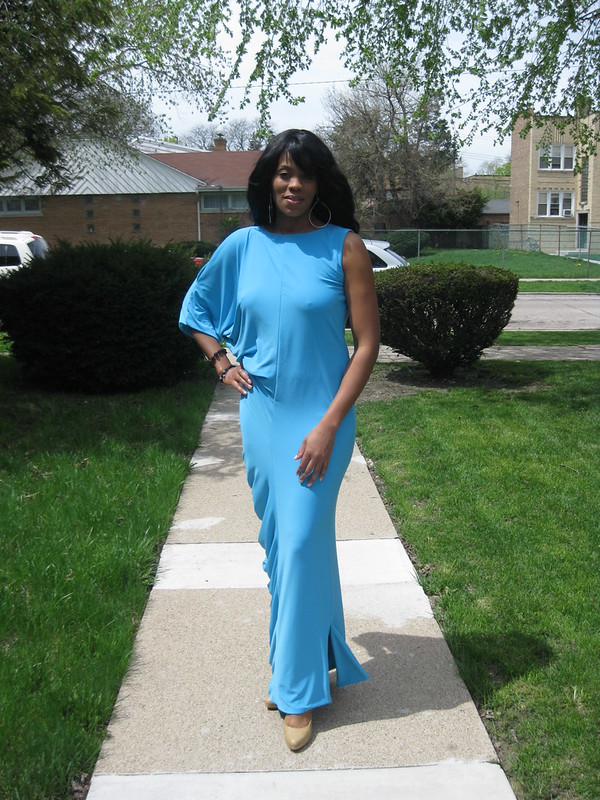
The very first segment of the show was the Sky and Water, the blue challenge. Each participating member was challenged to make a garment that was primarily blue. Any shade: teal, navy, midnight, turquoise, any blue was fine. I selected a beautiful turquoise blue jersey knit from Supreme Novelty Fabrics.

Anyway.., here is my review of  Vogue 1305.  

Pattern Description:
MISSES' DRESS: Semi-fitted, lined, pullover dress (fitted through hips) has a draped right side extending into sleeve, left side slit, shoulder opening, and back opening with button/loop. Note: shoulder opening can be worn as neck opening.

Pattern Sizing:
6 to 22; I used size 12.

Did it look like the photo/drawing on the pattern envelope once you were done sewing with it?
For the most part, it did. There was an issue with the draping though. I will discuss that in the alterations section.

Were the instructions easy to follow?
There was absolutely nothing confusing in the instructions. It went together fairly easy.

What did you particularly like or dislike about the pattern?
I like everything about this dress. It made me think of a Grecian Goddess strolling along a topical shore line. I thought it was a perfect design to showcase a beautiful shade of blue.  However, when my sister put the dress on and I saw that there were design flaws with the dress's drape.

Fabric Used:
I used a matte jersey knit for the dress and lining. The pattern says to use a stretch chiffon or stretch charmeuse for the lining. I ignored that suggestions which attributed to the heaviness of the dress.

Pattern alterations or any design changes you made:
This dress fit perfectly except at the fullest part of the hips. I had cut this area about 1/4" wider on either side. So I had a little room to play with. I noticed that the center back and front seams were not perfectly centered. So I looked at the model to check the fit of her dress. Same affect, it pulled slightly off centered. When I let out the hip area, it was closer to being in the center. I think this was a side effect of the draping. I asked my sister to walk around in the dress. We even went outside (pictures of course). The draping did not stay in place.   I wondered why the draping wasn't ruched. So I decided to add little pleats along the draping to keep the draped affect. That worked. The dress is still quite heavy. This is a pretty, low motion dress. Cocktail party, yes. Dancing, no. Special note: My sister is 5'10" and I didn't have to add any length to this dress. It's very long.


Would you sew it again? Would you recommend it to others?
This was a one time sewing project. This dress is so unique. Who would need more than one? Don't get me wrong; it is beautiful. Yes, I do recommend it for that special event.

Conclusion: This is a easy dress to sew. It is unique and definitely an eye catcher. You should choose a lighter weight fabric for the lining to keep the dress from becoming too heavy.  Also, consider ruching or pleating the draped side to maintain the draped affect. All in all, it is a beautiful dress.

Monday, May 6, 2013

Haute Couture Fashion Show - Rhonda's Hanging on a Cliff Dressing


It’s so good to be blogging and reviewing patterns again. I hope I never have go this long without it again. Yesterday was the Haute Couture Club Annual Fashion Show. This year, I was honored to be the fashion show chair. The past month has been one of the busiest times of my life, and I’m glad its over. I need some down time.

For a half of a second I contemplated taking a summer course, but that would be bananas; I mean crazy as h*ll. I need a slow relaxing summer full of sewing, movies, get-togethers, just plain ole summertime fun. My daughter said to me, “You need to read something other than application manuals and text books." So on my read list is “Lincoln the Unknown”, recommended by Rhonda.


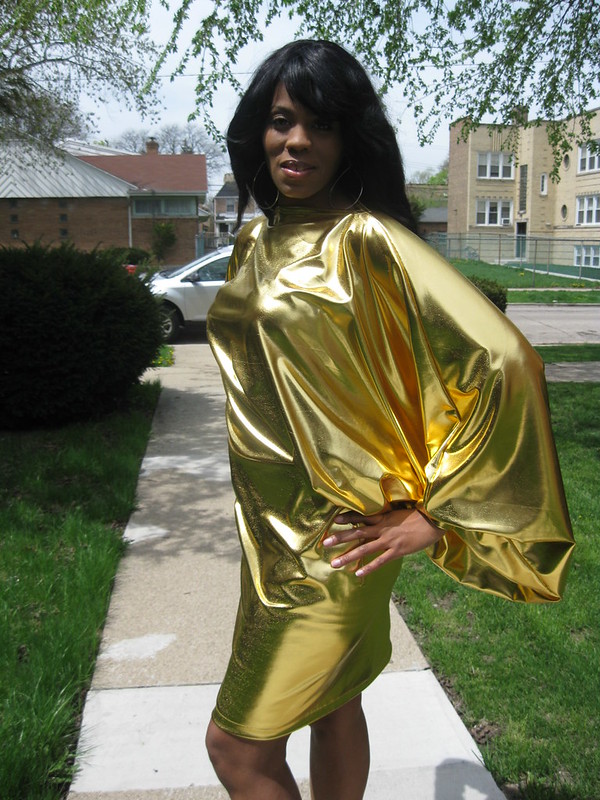
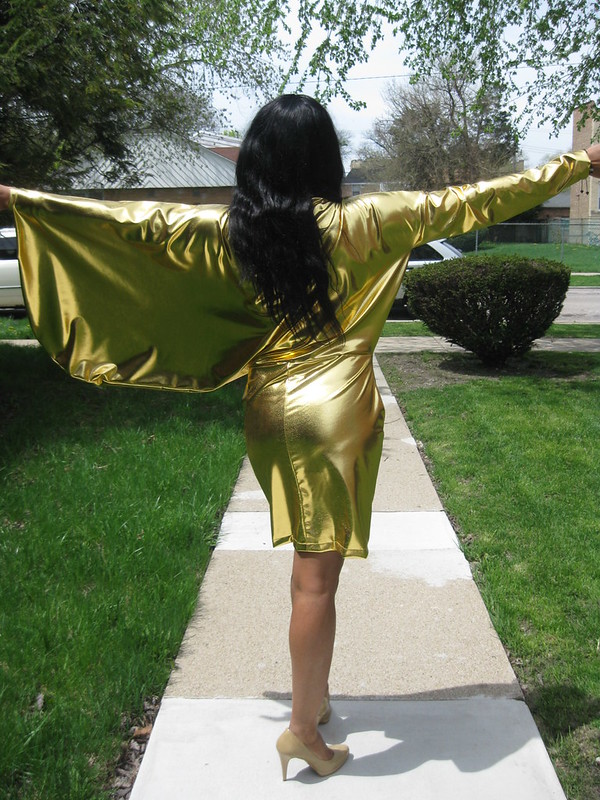
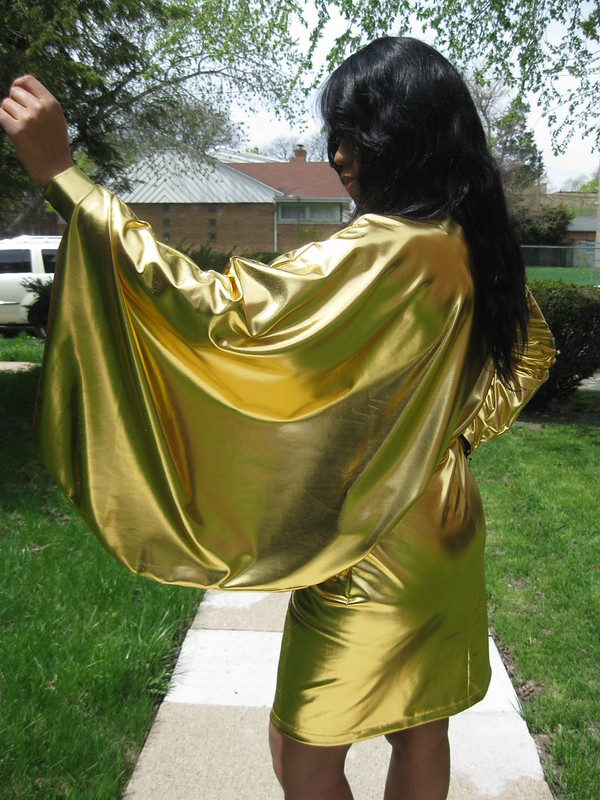
Okay, let me get back on topic. Today I am reviewing the first of my most recent sewing projects. It’s called the Hanging on a Cliff Dress designed by Rhonda Buss. I like the fact that Rhonda names her designs. My sister, Latricia, modeled this golden frock during the “Precious Metals and Gemstones” segment of the show.  

Pattern Description:This is a Rhonda Buss original design that is featured on her blog for Fabulous Free Pattern Friday. It consists of five rectangles. The dress has a long sleeve on one side and a very deep drape on the other side that acts as a sleeve with a small cuff. The skirt is straight and can be worn above or at the knee.

 
Pattern Sizing: The sizing is based on the length of your torso plus three inches, hip, bicep, and fist measurements. That sounds odd, but it's an accurate description. Rhonda basis her pattern drafts on simple shapes and draping techniques.

Did it look like the photo/drawing on the pattern envelope once you were done sewing with it?
Yes, except my drape was on the opposite side.


Were the instructions easy to follow?  Yes they were. It is best to take it one step at a time.


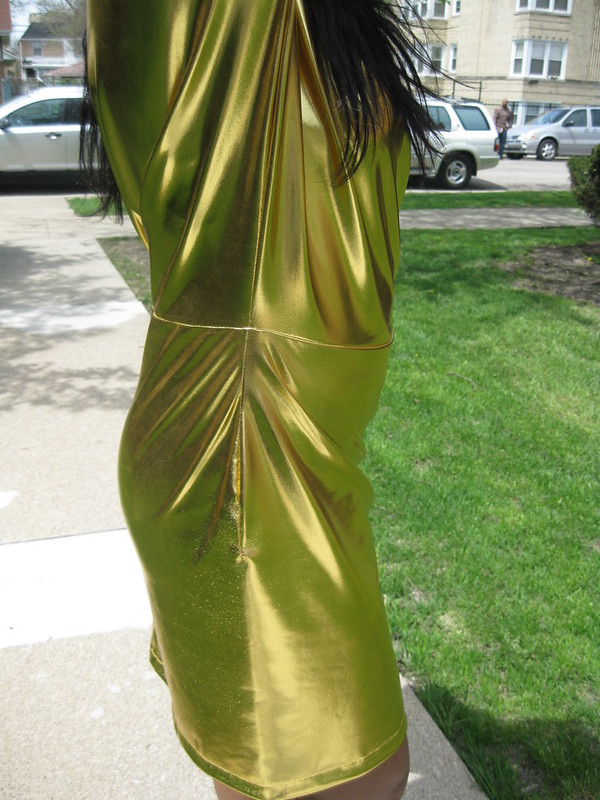
Pattern alterations or any design changes you made: After I followed the basic instructions for drafting the pattern, sewing it together was very easy. Once I had it sewn together, I had my sister try it on. It looked like a bag. We laughed about it. Then we quickly moved into the second phase of making the dress: examination. First, I examined the neckline and the shoulder area. Both looked good. Next step – I examined the fit of the sleeve and cuff. Both needed to be taken in a little bit. Now on to the drape, Rhonda removed quite a bit of it. I think I cut off about 9 or so inches as well. I didn’t want to pluck out the stitching of the cuff. So I just made a new one, smaller than the original cuff. We didn’t like to point on the drape so I rounded off. Moving to the skirt of the dress, based on the instructions it sits three inches below the waist. I moved it up on the waist. I added darts of both sides of it for shaping. I also removed fabric along the sides of the bodice to create more shaping. See illustration here. I did not make a facing for the neck. I just turned the seam allowance to the wrong side and stitched it down. Finally, we chose a length that my sister liked.

What did you particularly like or dislike about the pattern? I like the design of the dress. I thought it would be perfect for a golden dress for the Precious Metals segment of the show.


 Fabric Used:  I selected an audacious fabric to tie in with the theme of the segment, precious metal. It looks like liquid gold. The fabric is a two way stretch knit for Supreme Novelty Fabrics on Fulton in Chicago. They really have some nice fabrics. You should check them out.

Would you sew it again? Would you recommend it to others?  Yes and yes. I’m going to make it again for my sister in a less "gaudy" fabric. This dress was strictly for the runway. Well, maybe a New Year’s Eve party. The next one will be for everyday life, brunch or date with your significant other.

Conclusion:Loved making this dress. Seeing it come to life was fun and exciting. Drafting my own pattern isn’t as hard as I thought it would be. I can really appreciate seeing how simple rectangles and squares can be used to form interesting and unique silhouettes. I will sew more Rhonda Buss designs in the future.

LinkWithin

Blog Widget by LinkWithin