Showing posts with label muslin. Show all posts

Wednesday, June 25, 2025

The Brocade Makes The Jacket - Butterick B6915


A little over a year ago, I briefly mentioned my work on the muslin for the jacket of this pattern.  Since that time, I did more tweaking of the pattern and decided to use a beautiful brocade that I purchased from Mood Fabrics several years ago during a visit to New York.  

I thought the style of the jacket was the perfect match for the brocade.  Granted I did want to reduce any chance of something going wrong or turning out wonky before I cut into my fabric.  I really love the fabric and wanted to make something special with it.   


We are now in the hot, muggy days of summer.  It was 94 degrees when I took the photos of me wearing my outfit.  Though the coloration of my new suit is bright and cheery, it is perfect for the fall/winter season.  

Pattern Description:  Classic two-piece suit with a twist.  Lined jacket draws asymmetrically across the body and fastens with three buttons.  Jacket features flap detail at front.  Pants come in ankle length and includes invisible zipper on the side.  View C are wide leg pants.  I made view A and B.


Pattern Sizing:  It comes in two size groups (8 - 16) and (18 - 26) I used size 16 with modifications.

Did it look like the photo/drawing on the pattern envelope once you were done sewing with it?  Yes, my outfit does look like the drawing and the suit that the model is wearing.  

Were the instructions easy to follow?  The instructions were typical and easy to follow.  There was nothing confusing about them.

What did you particularly like or dislike about the pattern?  

Likes -

  • The asymmetrical style line of the jacket.
  • The pleats at the neckline of the jacket
  • The princess seam.
Dislikes -
  • The one piece sleeve.  I prefer a two piece sleeve for a suit jacket.  These sleeves were snug and there was too much in the sleeve cap for my fabric.  When I made the muslin the amount of ease in the sleeve cap was easy to work into the armhole.  But in the brocade it was slightly difficult.  I had to set the sleeve three times.


Fabric Used:  My fabrics were purchased at Mood Fabrics during a trip to met up with several sewing friends (Carolyn, Andrea, Gaylen)  in New York.  My jacket fabric is a silk brocade and the pants is a medium weight polyester satin.  

 
Pattern alterations or any design changes you made:  I made several pattern adjustments beginning with the full bust adjustment and my usual back adjustments.  I also lengthen the sleeves and added an inch width to the upper arm area.  For the pants I had to lengthen the leg and crotch.  Sorry no photo of that adjustment.


After making the adjustments and a muslin, I still needed to make a few tweaks as I sewed.  Below is a photo of me fitting the lower half of the jacket along side of photo of the finished outfit.  See the difference in the flare of the peplum.  I ripped it all out and reduced the peplum along the sides. 


Would you sew it again? Would you recommend it to others?  I think once is enough.  But, I do recommend this pattern to others.  You should make a muslin before cutting into your fashion fabric.

Conclusion: I'm pleased with how this suit turned out.  I'll probably wear it the first chance I get when cooler weather returns.  This pattern is not difficult to sew. It's time consuming and you should take your time and enjoy the process.


Saturday, May 10, 2025

Question: What Do You Do With All Those Muslins?


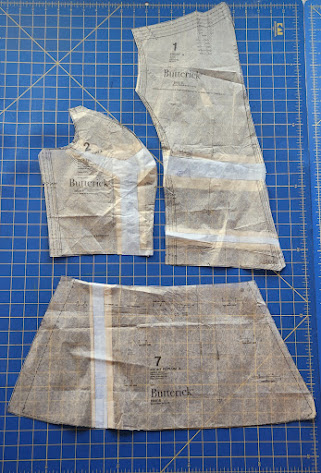
This is the year of purging.  I'm seriously purging everywhere in my home.  I want to reduce any clutter.  Here is a pile of  muslins that I made over the past few years. It looks like a pile of something worth keeping, but why? I don't need them anymore.  So, I'm throwing them in the trash.  

What do you do with all your muslins?  How long do you keep them?  Do you recycle the fabric? Or just toss them?

Do share.


Happy Sewing!

C

Friday, August 20, 2021

McCall's M8115 - Something New


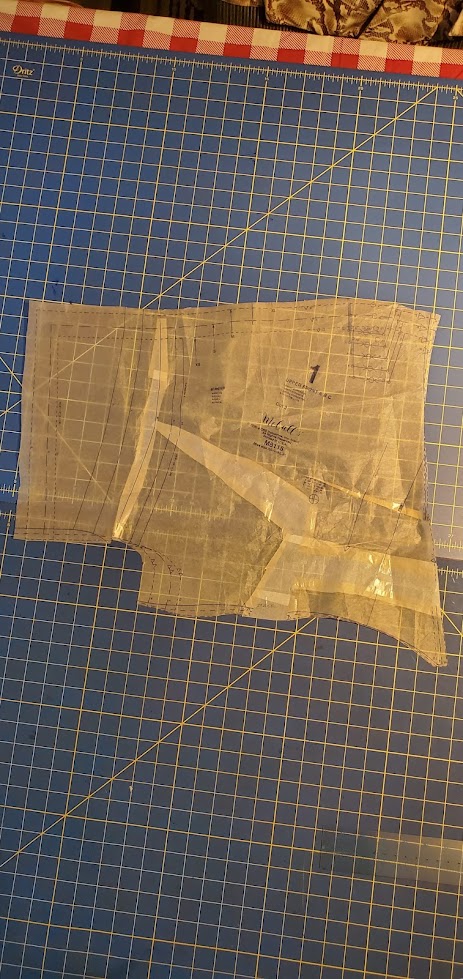
This month, so far, I've made four new tops.  I'm in "need" of some new ones. Lol.  So I decided to try McCall M8115.  This is one of the newer patterns that also has a name, Sierra.  


The pattern is designed for woven fabrics.  But I decided to used a knit that I purchased at JoAnn's a few months ago.  I made this my wearable muslin.  This top helps me with fit adjustments for my woven fabric version. 

McCall's description is:  Pull-over dolman faux wrap top with hem variations.   It's available in sizes XS to XL.   I sewed View C using between sizes medium and large with a few other modifications.

My version looks similar to the photo and drawing.  The difference is I used a knit and the FBA resulted in a few gathers below the bust.  

The instructions were easy and the top went together with no problems.  I was able to sew it up in a few hours.


I like few of the design elements:
  • faux wrap - flattering on my figure type
  • flared lower bodice - also flattering on my figure type
  • Dolman sleeves
Nothing to dislike.

I made a few of my usual fit adjustments:
  • Sway back tuck, added length of tuck to the lower back to balance the hem.
  • FBA - Slashed and spread, soft gather of the lower edge of upper front bodice
  • Lengthen facing accordingly.
Now, I need to decide on a woven fabric for the second version. I do recommend this pattern to other sewists, all levels.

BTW - I didn't find any reviews on Pattern Review, and only a few people posted their versions on Instagram.  I guess this pattern is not a favorite or sewists haven't gotten around to making it yet.  Anyway, I think it is worth a try.  

More to come soon.  Happy Sewing, my friends!
C


Wednesday, April 8, 2020

Notes on a Pattern - Butterick B6090


Way, way back in November of 2014 Rhonda  helped me fit Butterick B6090.  It was a workshop that she and Susan Khalje hosted in Chicago.  Oddly, I never made the dress, but I knew one day I would.  At the beginning of every year, I review my list of unfinished projects and decide which ones to add to my list of things to finish the first half of the year.  I pulled this muslin from the closet to try on to see if all the adjustments were still valid.  Luckily, they were. 


Prior to coming to the workshop, I made this muslin.  It was made with my initial pattern adjustments listed below:

  • FBA
  • Prominent Shoulder Blades
  • Swayback Adjustment
  • Lengthening of the Sleeve

FBA

Lengthen Sleeve

Prominent Shoulder Blades and Sway Back


My goal was to see if Rhonda or Susan could help me get the best fit for this dress and to provide my with the best approach for fitting a non-princess seam bodice. I love the way Rhonda talked through all of the changes as she made them and show me how the change affected the look and fit of the dress. 

Below are explanations of the changes.

Please note: this post is mainly to express the importance of making a muslin and to provide some explanation of the fit process.  Some of you may need similar adjustments. So these details may or may not help you with your fitting process.   By no means am I an expert, but this process helped me get the best fit for this garment.

  • The full bust adjustment is usually the first thing I tackled. I start with examining the pattern and determining how much more width is needed to make the front bodice fit.  My adjustment can be anywhere between 1.5" to 2.5".  With this adjustment I decided to make two waist darts instead of one.  The FBA extended into the yoke pattern as well.  When I tried on the muslin, Rhonda saw a few more adjustments needed in the yoke, the side, and the armhole.


  •  The yoke had to be adjusted above the bust at the armhole and on the side of the bust at the armhole.  So the front armhole was decreased by 1/2", 1/4" in each area.  See above pictures.  Next, the side seam needs to be taken in starting 2" below the armhole almost to the waist.  The front sleeve was fine.
  • The prominent shoulder blade adjustment.  I made a 3/4" adjustment.  At the left shoulder seam I made a small dart and at the right shoulder seam I eased the excess to fit the front yoke shoulder seam.  This was a test to see which construction technique looks the best.  And the small shoulder dart was the winner giving a smooth seam and curve at the shoulder.

Left shoulder seam with dart.


Right shoulder seam with ease.


  • As Rhonda worked her way around the upper back, she indicated that more room was needed in the upper back sleeve area.  She pulled out the stitches and re-pinned the upper sleeve to secure the change.
  • Next, she said that the shoulder seam was not aligned and that I needed to add about 1/2"to the back along the shoulder seam near the armhole and reduce the same amount on the front yoke.  I think this is a forward shoulder adjustment.  The shoulder seam should be parallel to the ear.  You can see the marked adjustment in the picture above. 
  • My initial swayback adjustment was not enough.  Starting from the right side front all the way around the back, I need to reduce the length at the waist.  So that the waist remains parallel to the floor all the way around.  The reduced length now needs to be added to the hem of the skirt so that the dress hangs evenly.

These changes were transferred to the tissue pattern to finalize the fit adjustments for this dress.  Now, this dress pattern is ready to make into my fashion fabric.

This process is so important.  Making a muslin gives you the experience of making the garment, testing not only the fit but also the construction.  You will be able to identify any challenges with making the garment.  Without the expense of cutting into your fashion fabric, you can determine whether or not you like the style. So many benefits of the muslin making and fitting process.


My next step for this project is to choose a fabric for the actual dress.  Hopefully, I can decide this week.  I think for sure I'll make two dresses.  A lot of work went into getting the fit right.  I'll be able to benefit from this exercise for future projects of similar style lines.  I'll use the muslin and the pattern as a point of reference.  That will save me some time with future adjustments.

I hope you find something useful in this post.

Happy Sewing!
C


Monday, December 22, 2014

Hello There!


News Flash!!

It's been so long since my last post.  A lot has happened in my little world.  
  • Khalje/Buss Sewing Workshop was fabulous.  I need to write my review.
  • Working on plaid jacket with leather bound buttonholes and trim.
  • Working on several muslins for dresses and tops.
  • Made a few things:
    • plaid skirt
    • knit dress
    • cardigans
    • knit tops
  • Member of the Haute Couture Club of Chicago Fashion Show Committee 2015.
  • Spending too much time on Instagram.
  • Submitted my letter of retirement on December 3rd.
  • Happily celebrating my new lease on life.  Oh, what will I do with all that time? :-)
  • Cleaning my office.  It is amazing the amount of "stuff" you collect over for years.  I hate to give up my university computers :-(
  • Preparing for a prosperous new year. 
So, I hoping to post the workshop review by Christmas Eve.

In the meantime, Happy Sewing!
Cennetta


Wednesday, January 11, 2012

McCall's 6163 - The First Cut - My Wearable Muslin


McCalls 6163


There another dress that was inspired by you. After seeing so many beautiful renditions of this dress on Pattern Review, I decided to give this dress a try.

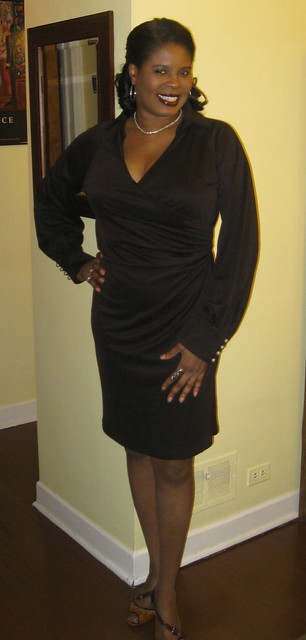
This is my wearable muslin. After finishing the dress, I noted several things to change in the next version. The first is to use a better knit fabric. At first glance, I thought this knit was of fairly decent quality, but as I sewed and handled the fabric, I discovered it didn't have the texture or the durability that I assumed when I purchased it from the store. So I'm calling this my wearable muslin.

McCall's describes this dress pattern as a misses' and women's dresses and sash: Close fitting, above mid-knee length dresses A, B, C, D have mock wrap front, gathered at left side, collar, collar band, raglan sleeves, side zipper and stitched hems: dress A has below elbow length sleeves gathered with elastic; dress B has short sleeves and sash; dresses C, D have long gathered sleeves with cuff; dress D has sash with optional purchased tassels.

Sizing from 8 to 24W; I used 14 with modifications.

My dress looks like the dress worn by the model minus the belt. The instructions were typical and easy to follow. I used a knit jersey from Vogue.

My likes:

  • mock wrap dress - flattering
  • gathering or ruching at the side
  • full, gathered sleeve with cuff
  • loop closure on the cuff
  • center back seam for better fitting
  • belt option with tassel detail

My dislikes:

  • As pictured on the model, the cuff is wide. Note how it falls on the models hand. It's big enough to put your hand through the opening without unbuttoning the cuff. I like the cuff to fit closer to my wrist. Next time I will make the cuff smaller.
  • The vamp is a little low for my taste. I will raise it about a inch and half next time.
  • The collar band is too narrow for me. I'll add 1/4 inch to the next version.
  • The zipper is not necessary. I should be omitted from the design/instructions. I omitted it and was able to put the dress on without a struggle.

These changes (dislikes) will make the dress ideal for me.

I made a FBA following Ann's (Gorgeous Things) tutorial. This dress is short. I added two inches, could have added a few more. I also added elastic to the neck line to ensure a snug fit across the upper chest area. Sway back and a small shoulder blade adjustment as usual.

Like I said earlier, I will make this one again. It's a good one to try. Definitely a winner. It wears easy and not difficult to make.

LinkWithin

Blog Widget by LinkWithin