Tuesday, March 25, 2025

Notes on a Pattern - Full Bust Adjustment Tutorial McCall's M8240


This is my muslin


It has been a while since I did a Notes on a Pattern.  

This top is all over social media.  I hesitated to make it for fear of the front placket not being perfect.  To help myself, I researched for some tutorials to get a flawless placket.  I did find a few on Instagram that were helpful.  An easy fit.  My other concern was with the FBA adjustment.  Could I get away without adjusting?  So for my wearable muslin, I decided to use the molly t-shirt front pattern as a sloper for the FBA. 


Well, it didn't exactly work to my liking.  The center front hem is slightly higher than the rest of the hem. So, I did the next best thing:  I made a traditional FBA for the best fit.  Today, I am posting a FBA tutorial for this McCall's pullover.

Below is my tutorial:


Step 1 - Draw the lines to prepare for the slash and spread of the pattern sections.


Step 2 - Cut along the line 1 and spread the desired amount of the adjustment.  In this instance, the amount is 1".


Step 3 - Cut and spread line 2 at the bust area to bring balance back to the side.


Step 4 - fill in with tissue paper along line 1 and 2.  Tape in place except for the lower right portion severl inches above the hem.


Step 5 - Cut and spread line 3 to true up the hemline.  Then fill in with tissue paper.


Step 6 - trim tissue paper all except for the bust area.


Step 7 - Fold the dart in half to trim tissue paper.  True up the bust dart along the side seam.

That's it for the basic traditional full bust adjustment.  I hope this information/tutorial is helpful.

Happy Sewing!
C


Monday, March 24, 2025

Vogue V2049 - Quick Post of Me Wearing the Bodysuit


Happy Sewing!
C

Joggers To Love - Vogue V8909


Yes, these are joggers to love.  I've made them about four times.  So, this pattern is a TNT.  My first pair are reviewed here.


There isn't much more to say about these other than I did a little leg treatment at the bottom of each of my latest pair.  The green pair is my favorite.

I will certainly make several more in the coming years.  So that's all for now.  


Parting Photos:

Here are a few pictures of me and Bonnie (one of my sewing students) on our February field trip to Vogue Fabric warehouse.


Monday, February 17, 2025

Vogue V2049 - New Pattern Release in Review


When I saw Vogue V2049 bodysuit pattern in the catalog, I had to have it.  And a few weeks ago, I was finally able to purchase it at the JoAnn's pattern sale.  Days later I cut it out and begin to make the fit adjustments.


At times making the fit adjustments can take just as much time as it does to sew up a simple t-shirt.  For this top, I got the brilliant idea to use my Molly Tee pattern as a sloper in hopes of speeding up the process.  Low and behold, it was spot on with the adjustments.  

I was extremely happy not to do the entire process of slashing, cutting, and taping. So, here is my review:


 Pattern Description: Misses' Bodysuits:  close-fitting bodysuit has asymmetric neckline stabilized with 1/4" elastic, bust darts, long sleeves and fastens with snap closures.  View A has front and back gathered drape pulled through loop.


Pattern Sizing:  8 to 26.  I used size 16 with modifications.

Did it look like the photo/drawing on the pattern envelope once you were done sewing with it? Yes, it did.  

Were the instructions easy to follow?  One of the things that I love about sewing Vogue patterns is that they sometimes have some very interesting techniques for constructing a garment.  The construction of the right top at the arm was one of those cases.  To my surprise, it went together very well.  

What did you particularly like or dislike about the pattern?  I have some likes and dislikes.

Likes

  • The style of the bodysuit.  I love the drape about the neckline and the scarf. And the asymmetric stabilized neckline is a winner. too

Dislikes


  • Now, the way that vogue instructs on how to finish the leg hole and the snap area, I didn't appreciate at all.  It did not make sense to me.  But for the sake of following the instructions for this wearable muslin, I finished the leg hole and snap area as instructed.  Next time I will probably add a little more to the edges and sew on elastic to finish the area.


Fabric Used:  My fabric came from Walmart.  I got it out of the 2 yard discount bend.  I only paid $4.00 for it.  It is a soft, light weight knit with 75% crosswise stretch required for this top.  Note:  having enough crosswise stretch is key.  Make sure you take the amount of stretch into consideration if you plan to make this top.

Pattern alterations or any design changes you made:  I used what I'll say is a short-cut on the FBA.  If you've been following this blog for at least a year, you know that I love making the Molly Tee and have made several of them throughout the years.  It comes with bust cup sizes, I think, up to G.  I have my pattern at the ready at all times.  So, I placed my Molly Tee under the front of the Vogue V2049 to determine the FBA.  I totally ignored the darts.  Then I added the "curved width" needed to make this new top fit.  When I constructed the bodysuit, I did make darts as instructed.  It worked out perfectly.


I'm hope  I'll be able to take of picture of me wearing it soon.  But for now, I'm showing it on the dress form.

Would you sew it again? Would you recommend it to others?  Yes, this was my wearable muslin.  I think that I will make it as a top, though.  We will see how that goes later.  I do recommend it to others.  Caution, this is not a typical t-shirt pattern.  I can sew up a simple t-shirt within an hour and a half.  This bodysuit took about 3 hours to make minus putting on the snaps.  It takes time and patience on the neckline and drape.

Conclusion:   I really like how this bodysuit turned out with the exception of the finishing of the leg hole and snap area.  The attractive neckline is a winner.  


Happy Sewing!


C


Monday, January 27, 2025

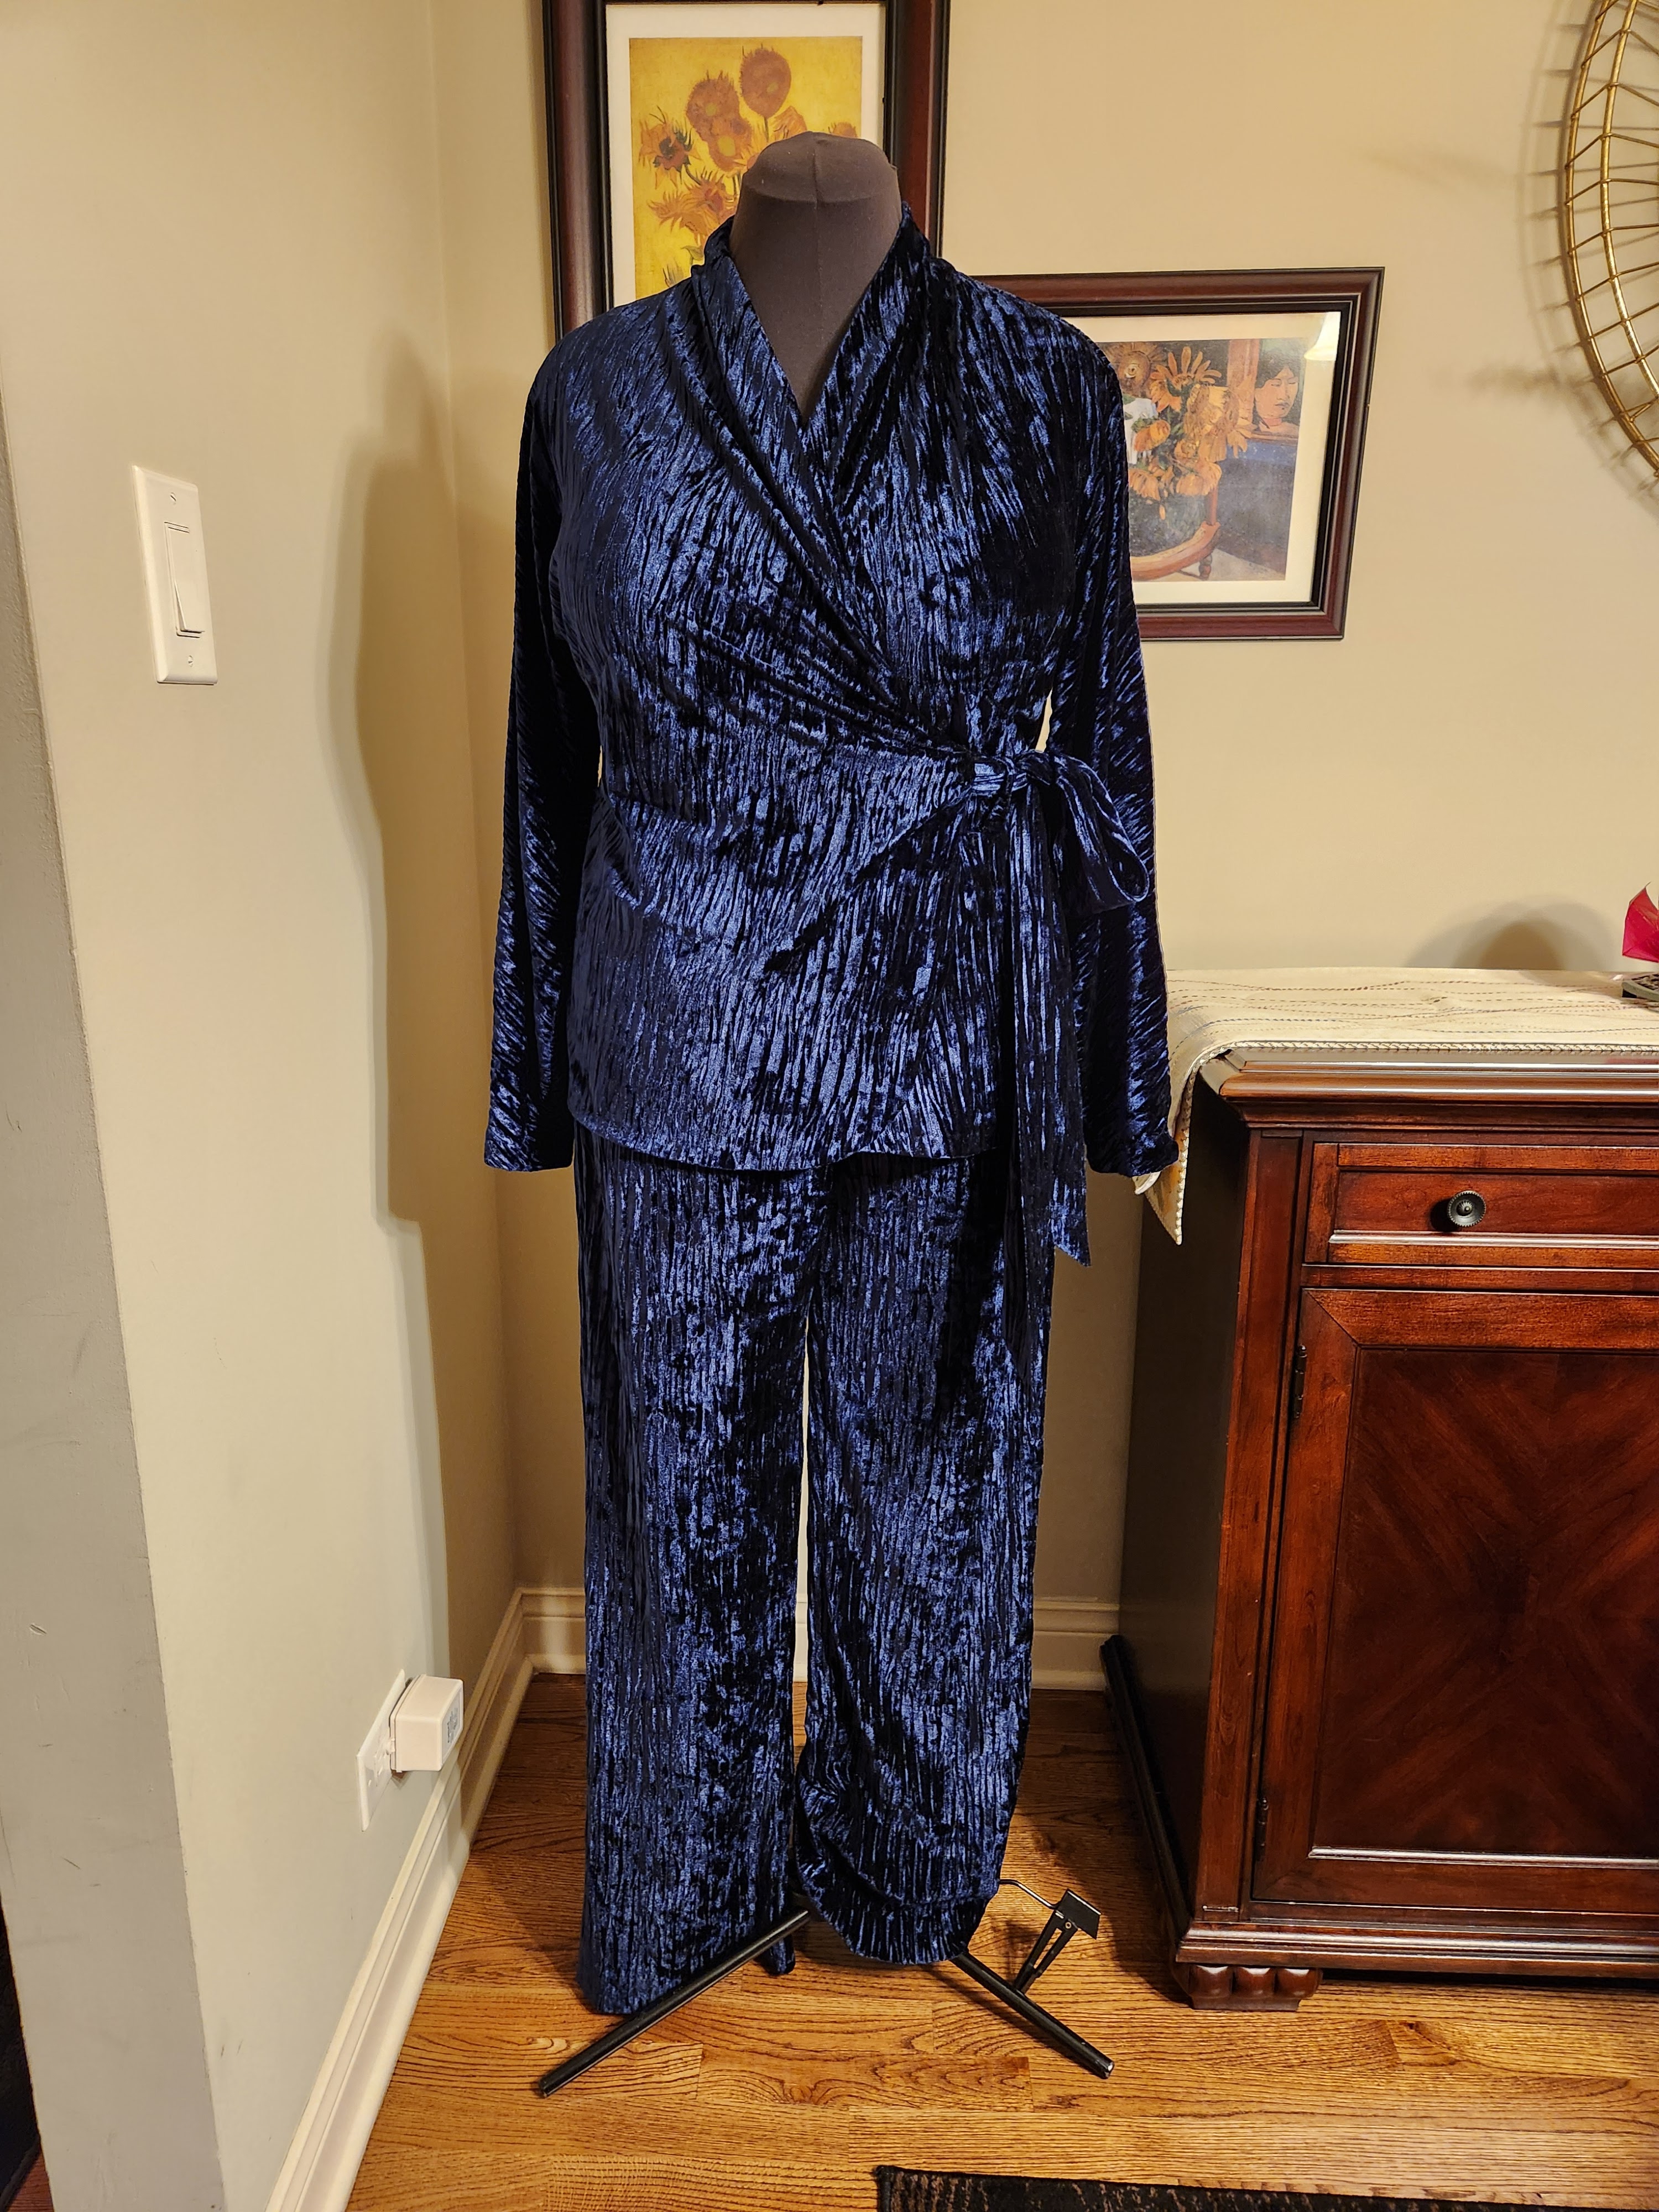
Midnight Blue Crinkle Velvet and Butterick B5101


Hi sewing friends, 

Today I'm blogging my first 2025 sewing project.  I wore this pant set to an 80th birthday celebration a few weeks ago.  


I wanted something easy and quick.  So I choose to make something that I'd already adjusted and tested.  Butterick B5101 was perfect.  The fit of the wrap top was pretty good and the pants were a simple pull-on pant with a yoke.  


The crinkle velvet was purchased at JoAnn's.  It was so easy to sew. The crinkles ran horizontally from savage to savage.  I wanted them to be vertical.  So I cut off the garment pieces perpendicular to the savage. This change gave some added "fake" stretch  around the body.  This affect, in my opinion, gave the illusion of a slimmer, sleek body.   Lol

My review of the wrap is located here on my blog.

As mentioned in my previous post, I did add a few inches to the bottom of the top. I was it to look more like a jacket.

Making the pants were as easy as making a pair of pajama pants. Easy.   So, that's it on the pattern review.


Happy Sewing!

P.S.

I have a few more 2024 reviews to go.  

Sunday, January 26, 2025

Another 2024 Project In Review - Simplicity S9716


Talk about easy to sew, this pattern is just that.  I made the cardigan, which is perfect for pairing with other simple staples.  Here, I'm wearing it with a ribbed mocked turtle top from JC Penney and a pair of Vogue V8859 pull-on pants that I made a few years ago


Simplicity gives a very basic pattern description:  Misses' knit top, cardigan, and skirt.  It is available in sizes 4 through 20.  I used size 16 with modification. 


This simple cardigan does look like the drawing on the envelope.  I looked closely at the duster that the model is wearing to determine if the shape of the sleeve, the placement of the shoulder seam, and the drape along the side of the cardigan were the same as mine.  I wanted to achieve the same relaxed look of the cardigan as pictured. 

The instructions were typical and nothing difficult in them.  I think this is a great pattern to help beginners start to sew knit fabrics.

What I like most about this pattern is the simplicity of it.  It's super easy and stylish at the same time.  I don't have any dislikes.


The double knit that I used was purchased at New Rainbow Fabrics last fall.  It is a soft but sturdy knit that is perfect for a cardigan.  

I really only made two small changes:

  • Added belt loops to the sides using the fashion fabric
  • At the side bust area I "kind of" curved out that area for added room for a fuller bust.  I hope that makes sense.  I didn't take any photos.
I hope to make at least the duster.  It just a longer cardigan.  As I said earlier, this is a great pattern for beginners.  It can be used to create a mini wardrobe.  A good basic pattern for wardrobe staples.

So that's all for now.

Happy Sewing,
Cennetta


LinkWithin

Blog Widget by LinkWithin