Wednesday, December 19, 2018

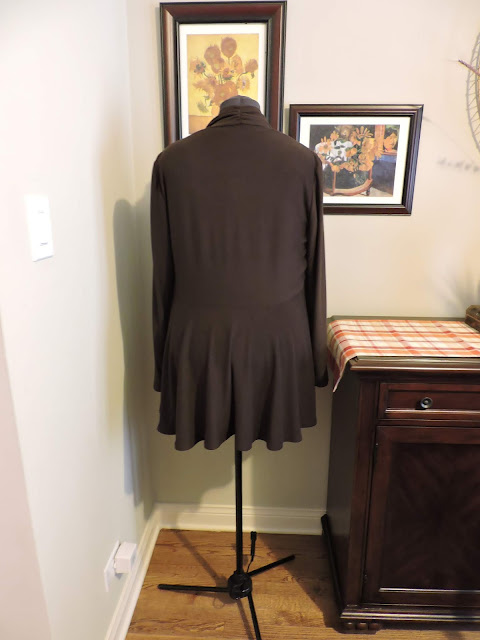
McCall 7726


It's funny how things grow on you.  In October I blogged about review my least favorite projects for the sake of acknowledging that I made them and sharing the review of the project.


Today I want to talk a little about McCall's high-waist,trendy pants that every other sewists made this year.  Last spring I made these and decided, at the time, that they were not a good look for me.  So I hung them in my secondary closet.  No I didn't give them away.  Because I just might start to like them. ;-) Like right now.


My sister convinced me to think about wearing my pants.  So, I looked at the photos again to see if I can see what she sees that these are not a bad look for me.


There isn't a whole lot to my review.  I only made very minor changes and the construction process was very easy.


So this one is short and sweet.  Hopefully, I'll find the perfect top to wear with it in the coming months.


Happy Sewing!

C


Friday, December 14, 2018

Separates - Mood's Black Brown Twill, French Terry Cloth, and Brown Hacci Sweater Knit


That title is a mouth full!


The post is all about mixing and matching different fabric textures and coordinates. Three separate pieces seemed like a good number to talk about today. I selected Mood's Black brown Poly Twill Blend for a simple pair of Vogue 1570 pants (without the drape), Mood's Red Polyester-Rayon Stretch French Terry Cloth for New Look 6735 Cardigan, and Mood's Brown Hacci Sweater Knit for McCall 6996 Cardigan.


These textiles are great for building mini wardrobe capsules or to add some great staples to your wardrobe. The twill is smooth; it sews and wears beautifully. I've already worn the pants three times since I made them. I'm embarrassed to admit that the red cardigan was sitting in a bag for over a year with two other cardigans. Finally, I sewed them all last month. The french terry is no longer available.


I so happy to report that the Brown Hacci Sweater knit is. The Hacci knit comes in four lovely colors.


Each pieces took about two hours to make after cutting. Both the Vogue 1570 Pant and the McCall 6996 Cardigan I've made/reviewed before. So there no need to review the construction process again.


The New Look 6735 cardigan I made twice before but didn't review it. It's fairly simple to make using five basic pattern pieces. So here's to wardrobe staples.  (Note:  All tops shown were made by me as well.  My new Mood fabric coordinates are perfect for mixing and matching pieces I already have.)


Happy Sewing!
C

Wednesday, December 12, 2018

The Black and Red of McCall's 7288 Jacket


Today, I'm happy to show you my latest jacket, McCall 7288.  The links with my notes of fitting, likes, dislikes, and sewing process are:


Notes  on a Pattern - Part I

Notes on a Pattern - Part II


I think it turned out well with the exception of a few adjustments for the next version.  One is the reduction of the neckline just above the bust.  In the collar area, this one doesn't fit as close as I would like.  Also, I think the sleeve head needs just a little tweaking.  Maybe a sleeve head will do the trick


This jacket was not designed for shoulder pads.  I added some 1/4" inch that I made myself.


Just in time for a holiday event.  I'll wear a different top and bottom with it.  The pants are Vogue 1570 which I made earlier this year with a black and white top.  I think a simple red or black dress will go well with this jacket.  Sometime quick.  We will see.

Thank you for following along on this project.  Next week, I'll review a few more projects before I start posting on a new one.

Happy Sewing!
C

Tuesday, December 11, 2018

Heather Purple Solid Coating - Cold Buster


We are well into the coat wearing season.  But there is still time to make that special coat you've been dreaming of.

This is the second coat that I made using Butterick 6385.  The first was finished at the end of January. So the review of the pattern is in that post.


 My daughter's coat was made way back in April.  I decided to wait until now to post it since April is spring time and who wants to see a winter coat after all the cold and snow.


Last week was the first time she wore it, and it was the perfect answer to the mid-western bone chilling winter frost.  Temperatures are in the 20's.  Burrrr!  Good thing I chose another great coat fabrics from Mood:  Heather Purple Solid Coating and the Warm Olive Twill Viscose Lining.   A great match for beauty inside and out.


The heather coating is 100% wool.  I love working with natural fabrics.  This wool is easy to press and to shape into the desired form.  The olive twill lining is crisp and tightly woven with a beautiful sheen finish.  Both textiles were a joy to work with.

Unfortunately, both are sold out.  No worries though.  Mood has a vast array of coat and lining fabrics to choose from.  Don't wait though.  Designers and sewists, alike are snapping up their outwear textiles like nobody's business.


For this coat I used snaps instead of buttonholes and I eliminated the bust darts  Those are basically the only changes to the construction of the coat.  Anything else is pretty much the same as the first coat.  Because I had been down this road before, it went together quickly.  And my DD was very happy to have a new coat before the winter season started. 


Happy Sewing!
C

PS - Hat and scarf also made by me. ;-)

Monday, December 10, 2018

Custom Clothing Labels - Dutch Label Shop


Good morning everyone,

I hope you had a fantastic weekend.  It's been super busy around here.  The Christmas season is here and I'm exciting about sharing the season with family and friends. 


Today I'd like to extend a special order to you from Dutch Label Shop.  They make the most fabulous custom labels for all your custom design needs.  For the next 32 days (January 12, 2019) you can get a 15% discount on your order of labels.  All you need to do is use the code themahoganystylist15 when you place your order.

Before placing your order you'll want to spend a little time thinking about how to design your custom labels.  The website is very easy to navigate.  Just go to the Dutch Label Shop and create an account. 

On the portal page, there are three links to help you navigate and create your labels:  with inspiration, with guidance, and with quality.  Once you have created your labels  and submit your order, you will be asked to confirm your order before the labels are shipped to you.  This is very helpful in the event something is misspelled or missing from your design.


The labels are of the high quality.  I am looking forward to including them in my clothes.

So hurry while the offer is available.  You won't be disappointed.


Friday, December 7, 2018

Notes on a Pattern - McCall 7288 Part II


Today I'd like to share a few more tidbits  I purchased this pattern a couple of years ago, not knowing what fabric or what view I would make.  What I did know is I like the styles and hoped that the multiple cup patterns would eliminate some of my fit issues.

So, I decided to used this really cooll gradient fabric that I purchased from Fabric Mart last March.  It was sold by the panel and I only purchased three.  So I was a little short on fabric for cutting two back yokes and two collars on the fold.


No worries, though.  There was enough to cut one of each as two pieces.  I used the two-piece collar as the under collar and the two-piece back yoke for the inside yoke facing.  So it worked out.


This is such an easy pattern to sew, I thought of adding triangle shaped bound-buttonholes.  I had a couple of test.  But decided to just make regular ones.


The surface of the fabric is really beautiful.  Half of the panel has a raised gradient pattern from red to black.  The other half is solid black with a faux quilted texture.  In hind site, I wish I had gotten another panel for a skirt.


My likes include style and construction.

  • Collar variations 
  • Pleated back with band, view D
  • Length of views B and D; both elongate the body.  So I look slimmer.
  • The slight flare below the waist.  Gives the illusion of hips for me.
  • Back yoke added interest 
  • Princess seam front; added ease to making adjustments.
  • Sewing was super easy.  The jacket went together with no problem with the exception of the sleeve cap.  I fiddled with it and still was no able to get it as smooth as I would like.
My dislikes style:
  • One-piece sleeve.  I prefer a two-piece sleeve.  
  • Unlined.  
  • Too much ease in sleeve cap
Stay tuned for the final post of me wearing my jacket.

Parting Shots:  My nearly completed jacket.


Happy Sewing!
C


Wednesday, December 5, 2018

Notes of a Pattern - McCall 7288 Part I


I really didn't want another day to go by without posting something.  So today, I decided to do a "Notes on a Pattern."  for McCall 7288, view B with collar of view D.

During my recovery I had a little time to work on some new sewing projects, in additional to the UFO's I finished. What I haven't had much time to do is take pictures.  It's gloomy and cold in the midwest.  Too cold for me to really go outside with or without a coat on.  Picture taking is challenging right now.  Maybe this weekend I'll have better luck.

It is a multiple size/cup pattern with collar and back variations.  The jacket is unlined with front princess seam, self-lined front and yoke back.  I made a muslin to help me get the FBA fitting right.  Additionally, I wanted the upper back and sleeves to have enough room.


Sewing the muslin - 

I started by simply selected my size, cutting it with no changes to see if my adjustments were consistent with what I typically need minus the cup size.  The fitting revealed most of my usual changes:
  • swayback
  • deeper back darts
  • prominent shoulder blades 
  • lower bust apex
  • lengthen sleeve  
plus a few more:
  • tight sleeve
  • shorten neckline 

Let's start with the back.  I made my usual swayback adjustment.  This adjustment includes a tuck across the lower back, starting with a center back tuck of 3/4" and reduced to 1/16" before the side seam.  The second step is to add the amount of the tuck to the hem of the back jacket to balance out the hem.  After trying on the muslin, I noticed that the fish eye dart needed to be deeper.  This is one of the adjustments you can make as you sew.   So I don't worry about this until I make the actual jacket.

To the back yoke I added about 1/2" to the outer shoulder seam to give me room cross the upper back area.


The whole idea behind the multiple cup size patterns is to reduce the amount of adjustments needed.  And the multiple size does help, in this case; but there is still some tweaking to do.  First, I moved the apex down about 1" and trued up the edges of the front and side front patterns.  Also, on the front I made a tuck in the neckline to reduce gapping.  Unfortunately, this pattern change was made after I cut the jacket out.  I didn't notice/see it in the muslin.  Does that ever happen to any of you?  Anyway, the change was made on the collars as well.


Typically, I don't have a problem with tight sleeves; but the one piece sleeve was a little tight (muslin) and not long enough.  Below is that adjustment.  I simply made a vertical and horizontal cuts in the center almost to the cutting edge and spread the pattern about an inch.  Next, I added about 2": 1" in the upper and 1" in the lower arm.  If I use the pattern again, I may substitute the one piece sleeve for a two piece one.

Sewing -

The sewing was easy.  Nothing confusing or difficult.  That's always welcome after laboring over the fit.

Next, more details on making the actual jacket.

Happy Sewing!
C


LinkWithin

Blog Widget by LinkWithin