Showing posts with label fur. Show all posts

Wednesday, October 19, 2016

Red Is One of My Favorite Colors - Vogue 8871 and Butterick 5727


Every once in awhile I inventory my closets to see what needs to be retired and what needs to be added.  I noticed that I only have only red dress in rotation.  That was kind of odd, since red is one of my favorite colors.  So I decided it was time to add a little warmth to my wardrobe.


This is the perfect time.  The holiday season is around the corner, and I may as well get a head start.  So I began with a simple princess seam red dress.  Vogue 8871 is perfect:  it's simple; it's fit and flare; and it's cute.  Mood's red stretch rayon-nylon ponte knit is a perfect match for this dress.

Initially, I made view B adding the sleeve from Vogue 1314. I tried it on several times before and after hemming it.  Something wasn't right.  So I call in my little consultant, my darling daughter.  Immediately, she said, "It's too long.  Take a few inches off."  Still I was trying to make the length work, trying on various belts.  I didn't want to cut it off after all that hemming.  Tee hee.  So finally I gave in, cutting about 3.5 inches off the dress.  Now, I'm happy.

I made a few more changes:
  • Full bust adjustment
  • Sway back adjustment by adding a center back seam, folding out the access at the waist and curving the center back seam to fit.
  • I don't like to do a narrow hem at the neckline. So I made a neck band about two inches wide and two inches less than the length of the neckline.
  • I didn't top stitch around the armhole, nor did I double stitch the seams.  I stitched once and finished the edges with the serger. 
In the end, the dress did look like view A with long sleeves. I barely looked at the instructions, as this is a very easy dress to make.  The instructions were less than a page after the layout information.

My only dislike was the narrow hem for the neckline.  I like a narrow neck band that is attached then turned in for a clean sturdy finish.

Call me crazy, but I think I will try View B in a print, like the one the model is wearing on the website.  ;-)


This is a very easy pattern that beginners can sew, and it is flattering on most body shapes.  It's worth a try.


Part II:  Adding Interest to a Simple Classic Silhouette - Butterick 5727 Fur Collar

Medium Brown Lamb Shearling, Chocolate/Black Iridescent Twill Lining, and Butterick 5727.

So sorry the medium brown lamb shearling is sold out.  I was able to grab two pieces around this time last year.  Way back then, I did not know what I'd do with it.  When I saw it, I wanted it; so I got it.  The good news is, Mood has other shearlings that may interest you.  You can see them here.   As for the Chocolate/Black Iridescent Twill Lining, they have it in stock and it is perfect with the lamb shearling fur collar.

You can easily make it without a pattern, but I had it on hand.  So why not use it. ;-)  I made size medium.  The only change made: I double the ties.  It looks much nicer then the narrow hem method.
So you never see the wrong side of the fabric.

Easy..,

That's all for now.

Happy Sewing!
C

Sunday, February 13, 2011

Fur and Leather - A Good Match S2617 Part III


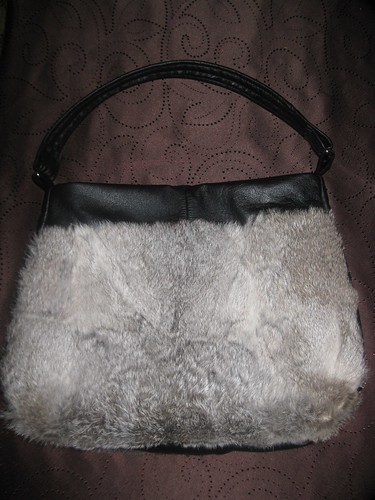
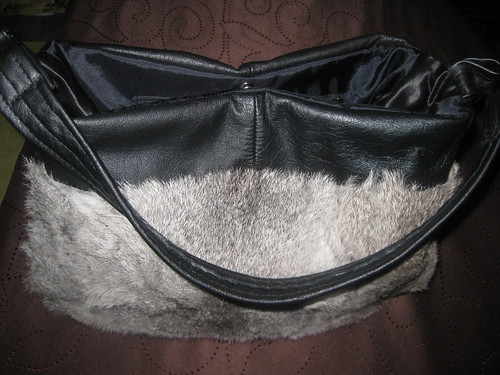
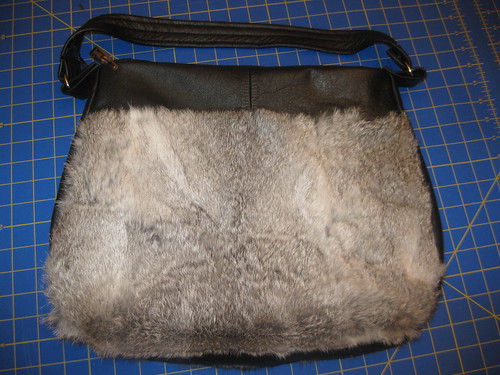
The fur and leather refashion purse is finished. One of my goals is to make something made of leather. This year that goal was met. The project was fun. It allowed me to experiment with refashioning two different materials.


At the beginning of the salvaging process, I thought I would be able to get three fur and leather purses. But most of the fur was falling apart. So I was only able to get one purse of fur and leather. The second purse is leather which I will finish later using the same steps written in the three posts on this refashion project.

Simplicity 2617

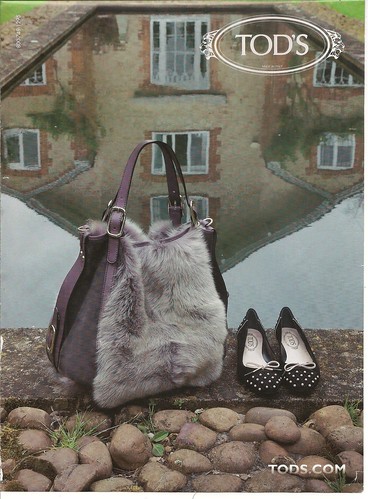
Pattern Description: patchwork bags. I picked this pattern because it was the basic shape that I was looking for. This project has been on my to do list for two years. I was inspired by a TOD'S bag advertised in Marie Claire magazine. My bag does not look the TODS bag. The inspiration was fur and leather in a purse.


Pattern Sizing: Large, middle and small patchwork bags.

Did it look like the photo/drawing on the pattern envelope once you were done sewing with it? The only thing that resembled the bag on the envelope was the shape of it.

Were the instructions easy to follow? I only used the instructions to complete the foundation of my purse project. The rest was learn as you go and create the best steps to finish it with good results. But at glance, there didn't appear to be anything difficult about them. See first and second blog posts for all the details.

What did you particularly like or dislike about the pattern? As I said earlier, I selected this pattern because I like the shape of purse A. There was nothing I disliked about the pattern. But there were a few things about the construction of the bag that I will try to resolve before I complete the next bag.

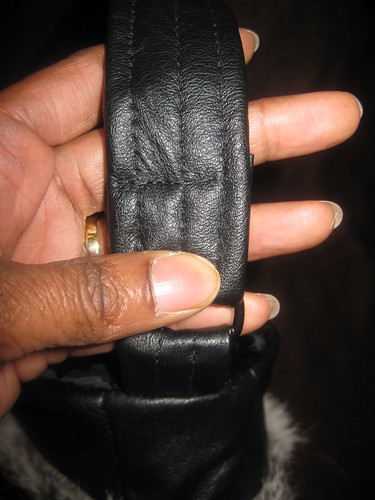
Strap - The leather plus padding was really, and I had a very difficult time trying to secure the strap to the "D" ring. I'm not satisfied with the stitching. Sometime this week I will take it to a shoe repair shop to see if they can better secure the strap. I used a pack of leather needles size 14. I also used upholstery strong and heavy thread to secure the lining to the leather and to secure the straps.


Facing for the opening of the purse - I wish I had thought to make a facing for the top of the purse. I think it would give it a more polished look. For this bag it's okay. Since this is my prototype. Now, that I confident in my ability to make a nice bag, I will make bags using different fabrics and skins.


Fabric Used: Recycled fur and leather. Lining remnants from my stash.

Pattern alterations or any design changes you made: There were a few changes. They are written in the two previous posts on this project.

Would you sew it again? Would you recommend it to others? Yes, and yes. Make it as intended. Then be creative. Do something different and unexpected with the pattern. Make the design your own.


Conclusion: This was a very fun project, and it feels good to met goals with hopes of using those achievements as stepping stones for the next creative project.

All photos for this project are on Flickr.

Saturday, February 12, 2011

Refashion using Simplicity 2617 - Part II


I'm very pleased with my progress on my refashion project. Today I was able to almost complete one of the fur purse, but didn't have the snap and couldn't secure the strap to the "D" ring. Aside from that I only have a few more inches of the lining to sew.

Like I said, I'm pleased with the results. Many of the instructions given by simplicity were not followed because of my vision of how I wanted the purse to look. As I sewed the purse together I discovered that the thickness of the leather could be a challenge as well as the flying fur. So I made a few more changes.

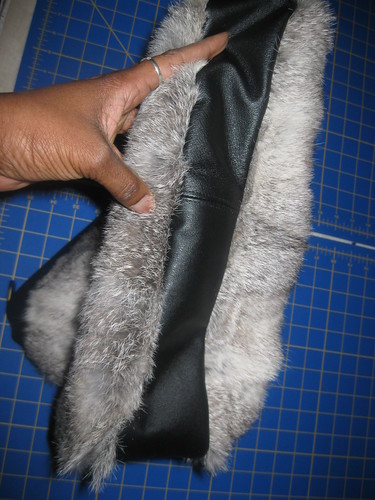
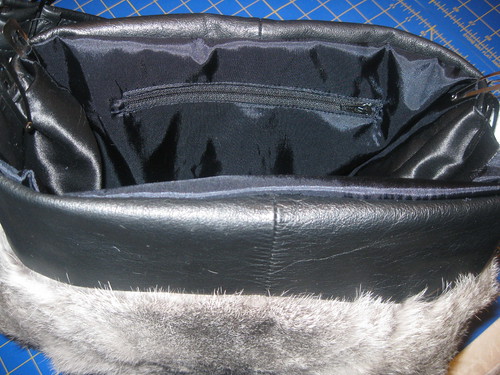
Today I wanted to share a few more details of my process for completing the fur and leather purse. In the photo above, the upper band has two sections. The pattern is for piece. This is a design element that I decided to incorporate. The leather jackets had multiple sections. So I used two of those sections for this piece of the purse.

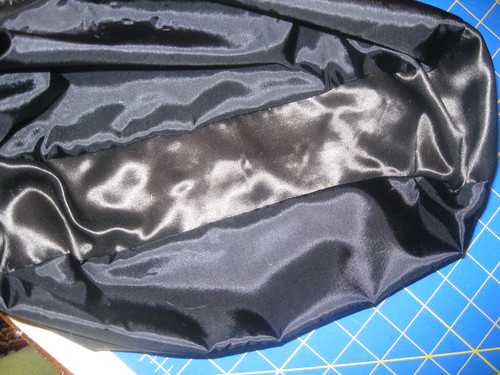
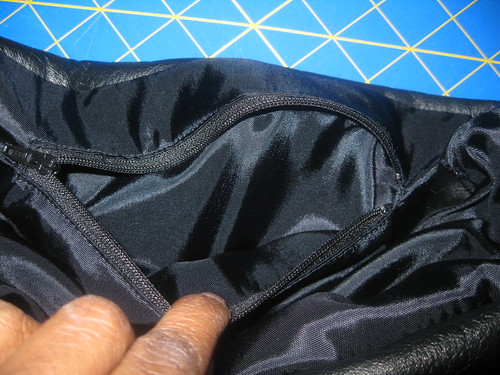
Next, the lining for the bottom and side is a heavy coat lining. I thought it would hold up better. Every piece of the lining is interfaced.


The bottom and side section is divided into two pieces joined at the middle (bottom). On the inside I added interfacing to reinforce the seam. Then I top stitched on each side of the seam.


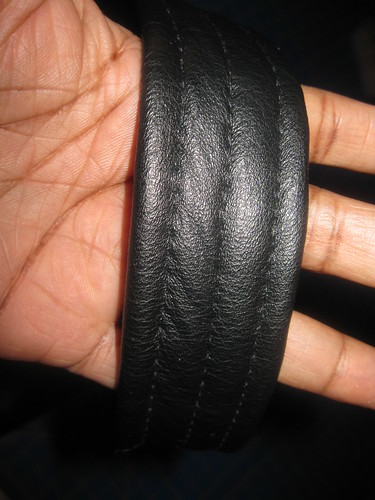
The instructions said to interface the strap. To add stability I added padding and trimmed about 1/2 inch from the width; then turned the allowance under and sewed the first seam. Then I turned the other side and sewed. Finally, I made a seam down the middle to secure the allowance. The leather and the padding were too thick to follow the recommended steps for completing the strap. Not Pictured - I trimmed about 3/4 from the width of the tab for the "D". So I finished it same as the strap minus the padding.


A few more pictures to show the details of the purse.
Side panel -


Inside pocket -


Top view -


More later!
C

Wednesday, February 9, 2011

Salvaging the Goods - Fur and Leather

Before I could start sewing the purses I needed to salvage the goods. I had three jackets, two leather and one fur, for this refashion project. To begin the process, I cut into the leather and fur near the seams. I didn't want to spend too much time ripping them out.

The salvage process is a bit tedious but also educational. It allowed me to see the inner workings of the fur and leather jackets.

Let's start by looking at the leather jackets - (Heavy pictures)

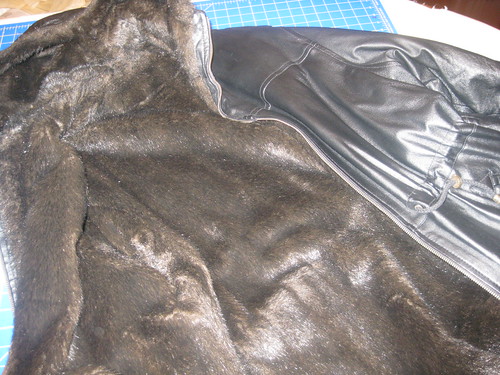
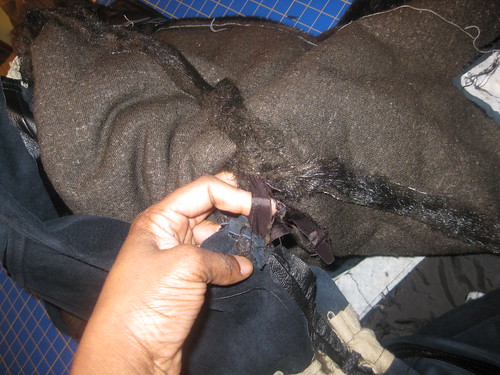
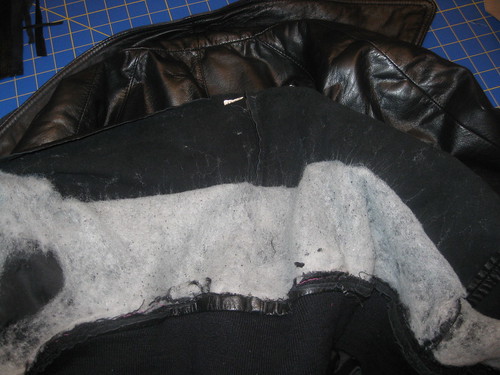
The first leather jacket was lined with faux fur (not the best quality). I only wanted the leather and the hardware from it.


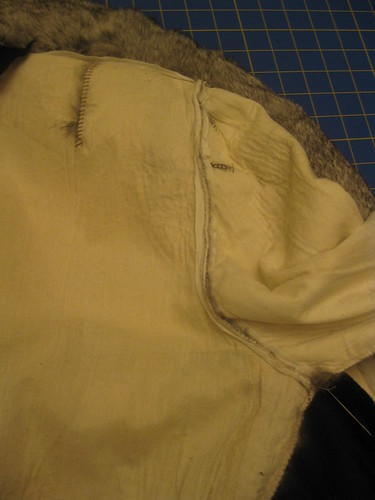
There were ribbons attached to the leather jacket and the faux fur lining at the shoulders and underarms to prevent the two from shifting and separating.


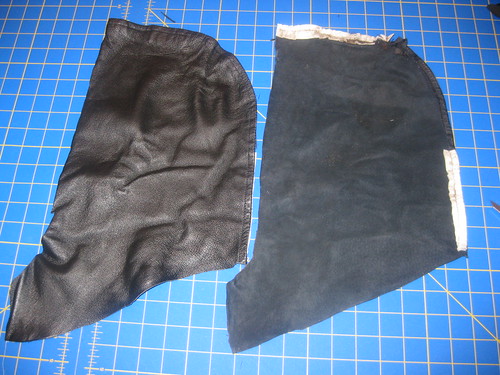
These two pieces were once the hood of the jacket. Here you can see where the manufacturer reinforced the hood at the front and neckline. The material used is a heavy interfacing.


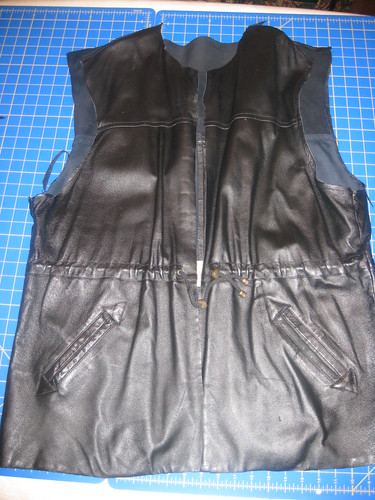
Here is the body of the jacket. Notice the nice hardware.


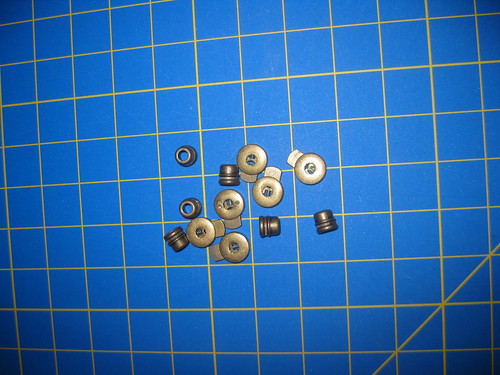
Hardware salvaged for future use.


The second leather jacket (bomber) was insulated with padding. It was fused to the lining and leather.


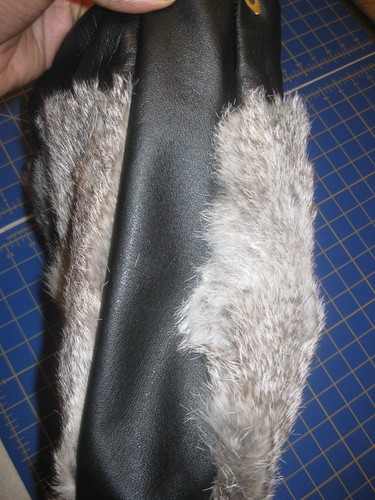
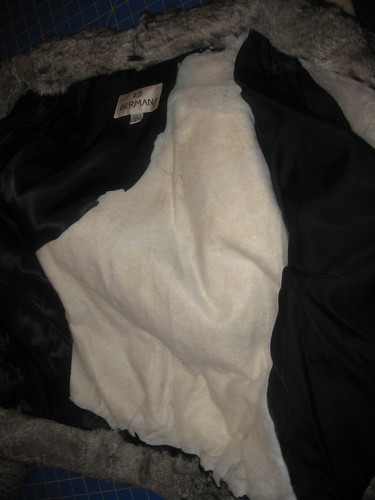
The rabbit fur jacket -

I started salvaging by cutting into the middle of the lining. This was a messy process. DD was standing by with the vacuum as I cut. We both wore little surgical masks to protect our airways from floating and flying fur.

Inside the jacket was a fleece like layer of insulation.


Down to the skin.
Here you can see how the manufacturer stitched the pelts together. Also, they added darts to form and shape the jacket. Seam binding was sewn to stablize the seam.


After getting to the skin, I noticed that most of the body area of the jacket had thin spots or dry rotting. So most of it was unusable. I was only able to salvage the fur from the sleeves.


Now I can use some of the salvaged pieces. Here I'm measuring to see how I can cut the pieces of the purse. Using S2617-


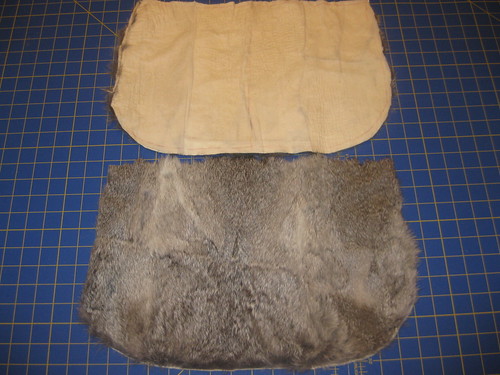
Main body for fur purse

The body was cut 5/8 larger than the pattern pieces. I wanted a single main piece for the front and back. I traced the pattern onto the skin side; then cut each piece.


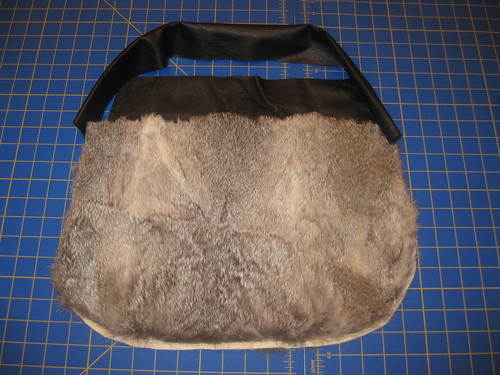
This is how the pieces will be stitched together. The strap is about two inches shorter than the pattern. Most of the jackets were in small sections. eg., the sleeves were in four or eight pieces. So it was a challenge finding section long enough for straps.


The leather purse: The strap is in two pieces. I'm going to try the reinforcement technique used on the hood.


I have both bags cut (fur, leather, interfacing, and padding) Next, I'll start sewing them together. Handling the leather was surprisingly easy. It cuts much like faux leather. Easy... The only challenge with the fur is the flying fur. Otherwise, easy...,

Caution -many projects underway. I will post as work is completed on each. But stay tuned.

Happy Sewing!
C
Ramblings and New Projects

Hello lovely ones,

It's been a loonnng week, but we survived the Blizzard of 2011. Thank you for your well wishes and comments. I finally got the snow removed and am able to think about and do other things. Joy...

I was able to get out and attend the Haute Couture meeting on Saturday. It was a major to-do. The meeting was jam packed with fashion show business and other great sewing related activities. If you are in the Chicagoland area, you should join. I promise, you will be glad you did. It is a phenomenal organization.

No pictures this time..., I'm working with Tara Fowler on ticket sales and seating arrangements for the show. For the February issue of Tailored Tales I wrote two articles. It was a pleasure. I'm thinking of topics for future articles.

Currently, I'm working on multiple sewing projects: some for the fashion show and others just because...

While recuperating from shovelling snow, I started working on my refashion projects. Three coats (leather and fur) turned into two purses for starters.

Next post, details on the process of salvaging the leather and fur.

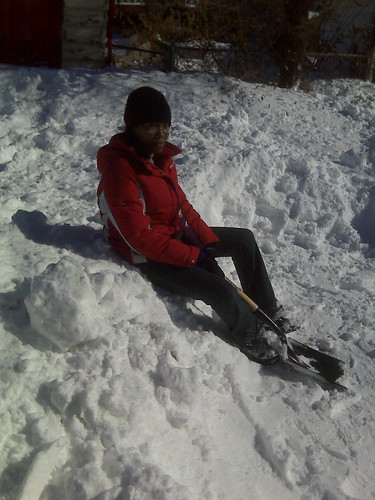
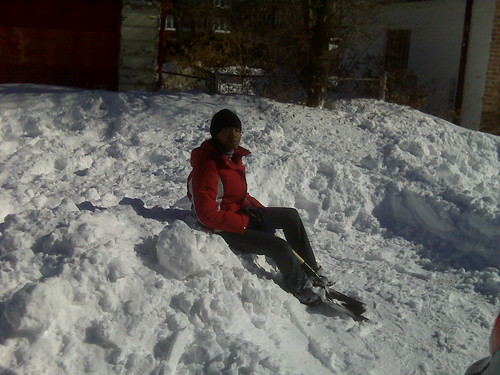
Parting shots: DD sitting amidst the snow after shovelling. The job was too big for one person. On Friday, the city reported that no alleys would be plowed. So Wonderful Wendell helped me and a few neighbors clear the snow from the alley. Then Trustworthy Thomas replaced the bolts ripped from the splash guard that protects the motor of my car. Big thanks and big love to those MEN that helped me.


LinkWithin

Blog Widget by LinkWithin