Monday, February 28, 2011

The Inspiration - Where Does It Come From?


Many of us have vision boards that show what we plan to make and the steps we will take to produce an inspired garment. I have my vision boards, but they show other goals and ideas about the home, life, and family. So where do I put the magazine clippings and sketches for things I hope to make? Most are on a bookshelf in my bedroom or in a notebook kept on the night stand. The pages in my inspiration portfolio are motivation for some of the things I make and which accessories I choose to compliment an outfit.

Many of the things pictured don't necessarily inspire me to copy them, but to try a new look; try a new color combination, use a particular detail or finish on a garment. Last week, as I thumbed through the the portfolio, I noticed the dates at the bottom of the pages: 2004, 2006, 2001, etc. Many styles are over ten years old; but in my mind, they are fresh, a great platform to come up with a new wearable creation.

So, here are a few ideas about some of the designs that I like:
In 2007 Marie Claire did an expose' on Black and White, Hi and Low (price).


I like white and black outfits, but looking closer I also found small details that I liked as well:

The polka blouse with the silver leather cuffs. I like this concept but I decided that I wouldn't make a blouse like this. I bought four yards of red and white polka-dot fabric from Vogue a few years ago. Two years ago, I thought I would be making a dress. Today I'm still undecided about the style of the dress.


The floral jacket and the ruffle blouse are the speakers of this outfit. The thing that I like most is the ring on the models right hand (I want one.)


The abstract print of the dress was the inspiration for the fabric that I purchased to make my sister a dress last year.


The white trench made me think of white dresses with full skirts. I've purchased several yards of white fabric (linen, georgette, and lightweight twill) to make white dresses.


Finally, this page has a collection of black and white pieces, most of which I could easily see myself in. The white dress trimmed in black is the inspiration for a dress I'm making for the fashion show. My version is red and black. The pattern has only two pieces. Claire Danes's dress has a princess seam bodice with a multi-panel skirt.


So that's it for this installment of "what inspires me". Currently, I'm working on several fashion show garments and a few client projects. Oh yes, a few "me" projects here and there.

Stay tuned!
C

Friday, February 25, 2011

Spring 2011 Fashion Trends

I'm still sewing fashion show and winter clothing. But that does not stop me from looking ahead for fashion ideas for Spring 2011. People StyleWatch reports the following top ten fashion trends. How many are on your list of to make and/or to wear?


Coral Dress


Woven Bracelet


T-Strap Heels


Floral Print Peasant Blouse


Trench Coat


Floral Print Dress

Crossbody Bag


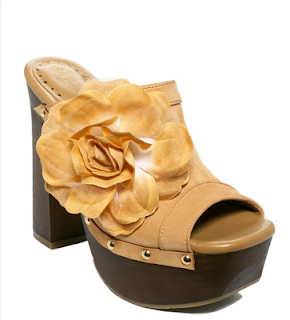
Clog Sandals


Chambray Jacket


Floral Necklace

Thursday, February 24, 2011

What Are Your Favorite Colors for Spring 2011?

The color trends for Spring 2011 are soft and pretty, warm and cool. Honeysuckle is at the top of thi list of colors for women this spring. But my favorite is Ragatta. I may try to incorporate one or two of the other colors into my wardrobe as well. So, What are your favorite colors for Spring 2011?

Saturday, February 19, 2011

Vogue 2237 - Fabric Woes - Part I


The second dress for the fashion show proves to be a bit of a challenge. Not the pattern; it's easy. The fabric is hateful!! It's a type of sequinned knit. I've tried sharp and ballpoint needles. All produce skipped stitches. Any suggestions??

Thanks,
Cennetta

PS - If you are in the Chicagoland area and would like to attend the fashion show (Haute Couture Club of Chicago). Send me an e-mail.

Friday, February 18, 2011

2nd Fitting - BWOF 10/2010 128 Dress - Part III

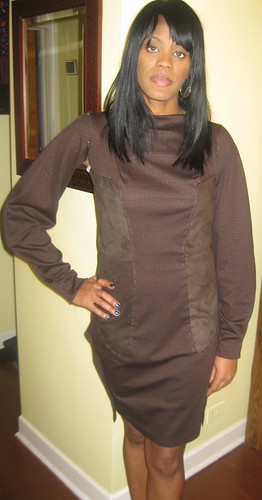
After making the adjustments, my sister came by for another fitting. It fits much better. Now I can do the top stitching.


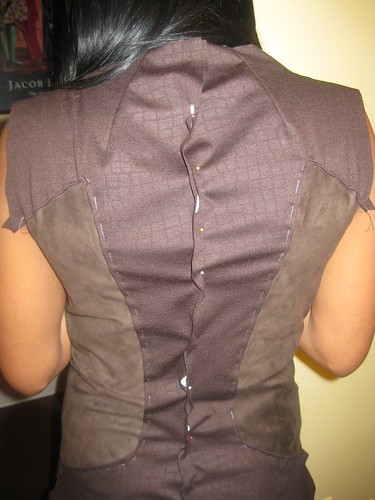
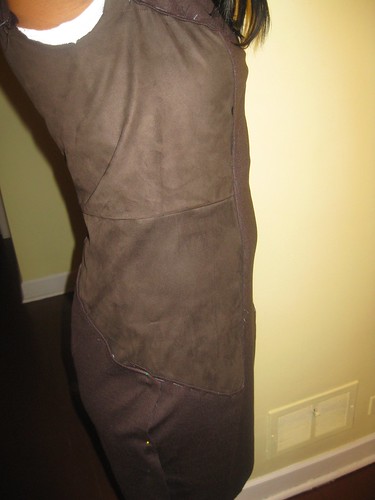
Previously, I thought the side panels didn't quite match and my be a problem with fitting in the waist area. But after I made the size adjustments, the fit issues disappeared.


I wanted to see how the sleeves would look. We slid them on to get an idea. It looks okay. They are a little long. I added about two inches to the length. That plus the hem allowance is tucked in. NOTE: There is some pull across the chest; This will disappear. She wearing a lot of "winter gear" underneath the dress.

Sunday, February 13, 2011

Fur and Leather - A Good Match S2617 Part III


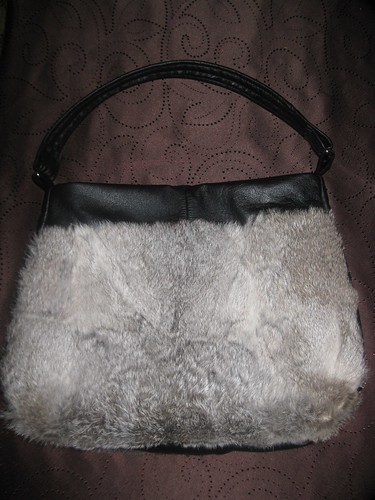
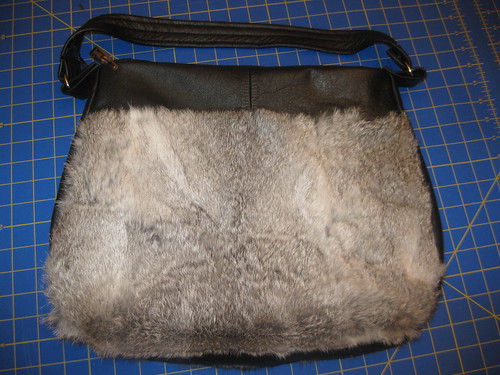
The fur and leather refashion purse is finished. One of my goals is to make something made of leather. This year that goal was met. The project was fun. It allowed me to experiment with refashioning two different materials.


At the beginning of the salvaging process, I thought I would be able to get three fur and leather purses. But most of the fur was falling apart. So I was only able to get one purse of fur and leather. The second purse is leather which I will finish later using the same steps written in the three posts on this refashion project.

Simplicity 2617

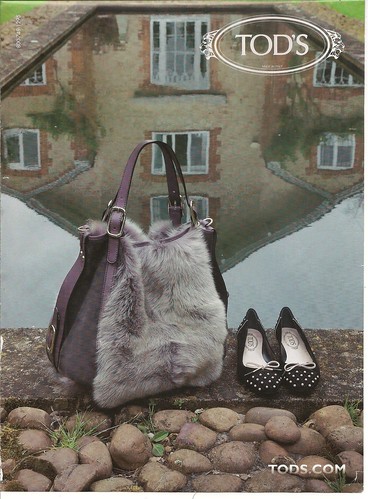
Pattern Description: patchwork bags. I picked this pattern because it was the basic shape that I was looking for. This project has been on my to do list for two years. I was inspired by a TOD'S bag advertised in Marie Claire magazine. My bag does not look the TODS bag. The inspiration was fur and leather in a purse.


Pattern Sizing: Large, middle and small patchwork bags.

Did it look like the photo/drawing on the pattern envelope once you were done sewing with it? The only thing that resembled the bag on the envelope was the shape of it.

Were the instructions easy to follow? I only used the instructions to complete the foundation of my purse project. The rest was learn as you go and create the best steps to finish it with good results. But at glance, there didn't appear to be anything difficult about them. See first and second blog posts for all the details.

What did you particularly like or dislike about the pattern? As I said earlier, I selected this pattern because I like the shape of purse A. There was nothing I disliked about the pattern. But there were a few things about the construction of the bag that I will try to resolve before I complete the next bag.

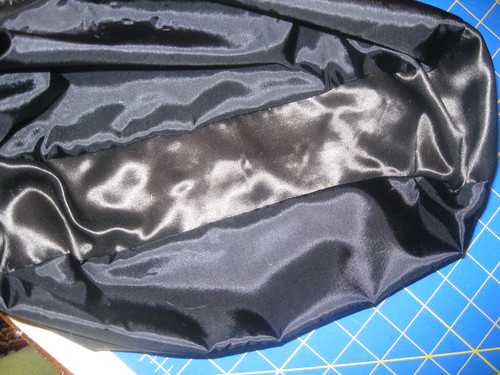
Strap - The leather plus padding was really, and I had a very difficult time trying to secure the strap to the "D" ring. I'm not satisfied with the stitching. Sometime this week I will take it to a shoe repair shop to see if they can better secure the strap. I used a pack of leather needles size 14. I also used upholstery strong and heavy thread to secure the lining to the leather and to secure the straps.


Facing for the opening of the purse - I wish I had thought to make a facing for the top of the purse. I think it would give it a more polished look. For this bag it's okay. Since this is my prototype. Now, that I confident in my ability to make a nice bag, I will make bags using different fabrics and skins.


Fabric Used: Recycled fur and leather. Lining remnants from my stash.

Pattern alterations or any design changes you made: There were a few changes. They are written in the two previous posts on this project.

Would you sew it again? Would you recommend it to others? Yes, and yes. Make it as intended. Then be creative. Do something different and unexpected with the pattern. Make the design your own.


Conclusion: This was a very fun project, and it feels good to met goals with hopes of using those achievements as stepping stones for the next creative project.

All photos for this project are on Flickr.

Saturday, February 12, 2011

Refashion using Simplicity 2617 - Part II


I'm very pleased with my progress on my refashion project. Today I was able to almost complete one of the fur purse, but didn't have the snap and couldn't secure the strap to the "D" ring. Aside from that I only have a few more inches of the lining to sew.

Like I said, I'm pleased with the results. Many of the instructions given by simplicity were not followed because of my vision of how I wanted the purse to look. As I sewed the purse together I discovered that the thickness of the leather could be a challenge as well as the flying fur. So I made a few more changes.

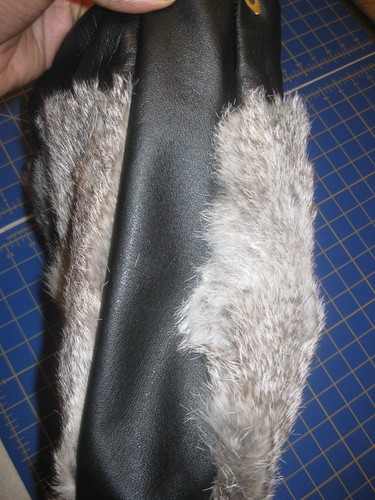
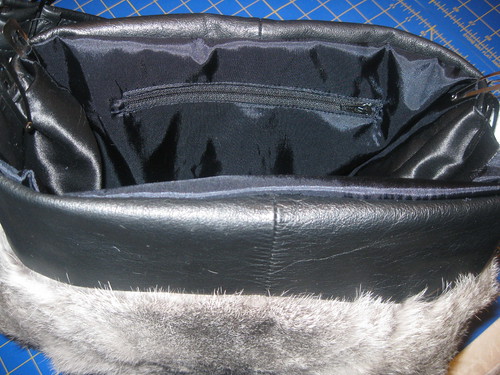
Today I wanted to share a few more details of my process for completing the fur and leather purse. In the photo above, the upper band has two sections. The pattern is for piece. This is a design element that I decided to incorporate. The leather jackets had multiple sections. So I used two of those sections for this piece of the purse.

Next, the lining for the bottom and side is a heavy coat lining. I thought it would hold up better. Every piece of the lining is interfaced.


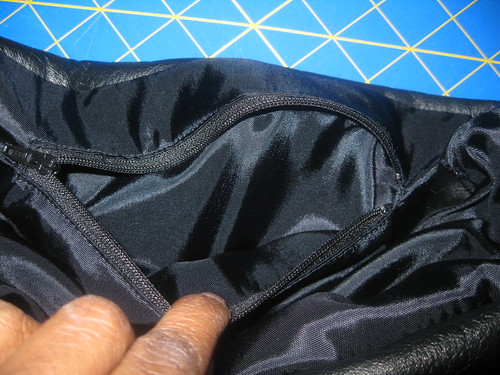
The bottom and side section is divided into two pieces joined at the middle (bottom). On the inside I added interfacing to reinforce the seam. Then I top stitched on each side of the seam.


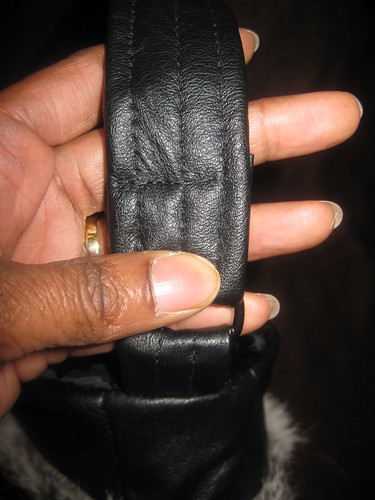
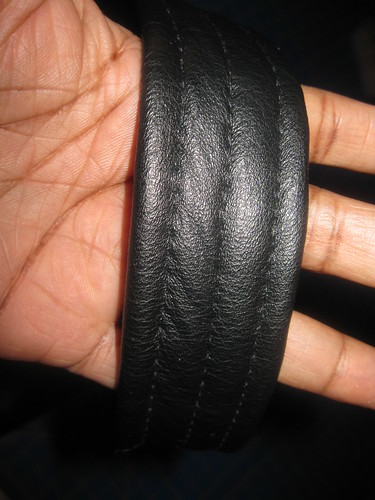
The instructions said to interface the strap. To add stability I added padding and trimmed about 1/2 inch from the width; then turned the allowance under and sewed the first seam. Then I turned the other side and sewed. Finally, I made a seam down the middle to secure the allowance. The leather and the padding were too thick to follow the recommended steps for completing the strap. Not Pictured - I trimmed about 3/4 from the width of the tab for the "D". So I finished it same as the strap minus the padding.


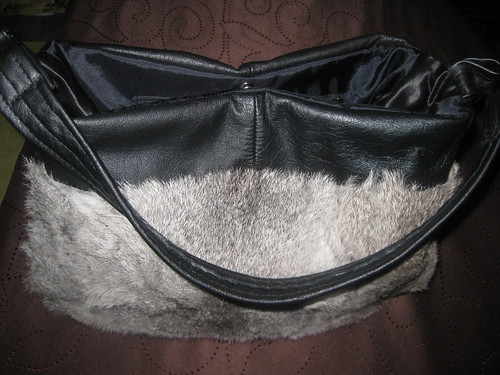
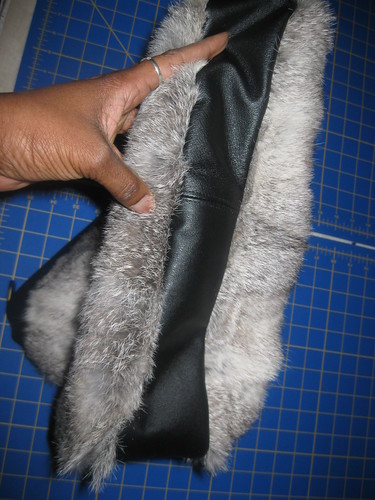
A few more pictures to show the details of the purse.
Side panel -


Inside pocket -


Top view -


More later!
C

Friday, February 11, 2011

BWOF 10-2010 128 Dress - Part II

Update on the BWOF Dress 10-2010 128 -

Thanks for all your suggestions on how to resize and fit this dress. Last week I retraced a smaller size and trimmed off the excess fabric to match it.

Next, I sewed the side panels together, pressed. Then I stay stitched the dress front and back along the side seams, clipped corners and pressed the seam allowances to the wrong side. On a flat surface, I laid the side panels then placed the dress front over them, pinned, and handstitched. Followed the same process, I attached the back dress to the panels. I decided that I would be best to complete these steps before sewing the lower side seams and the shoulder seams. After fitting I will sew the side seams then stitch along the panels. There is quite a bit of allowance on the side dress.


So far so good.

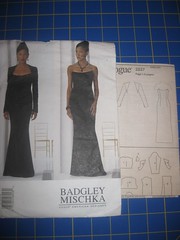
Parting Shots: Dress #2 for the Fashion Show will be made from Vogue 2237.


Stay Tuned!
C
Wednesday, February 9, 2011

Salvaging the Goods - Fur and Leather

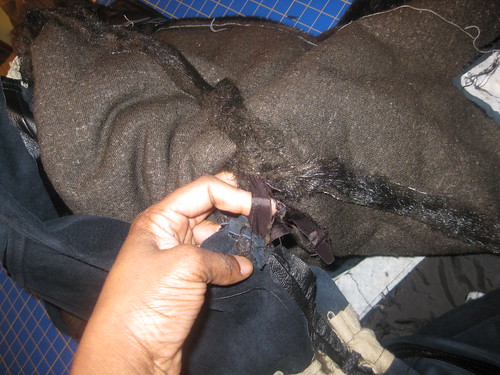
Before I could start sewing the purses I needed to salvage the goods. I had three jackets, two leather and one fur, for this refashion project. To begin the process, I cut into the leather and fur near the seams. I didn't want to spend too much time ripping them out.

The salvage process is a bit tedious but also educational. It allowed me to see the inner workings of the fur and leather jackets.

Let's start by looking at the leather jackets - (Heavy pictures)

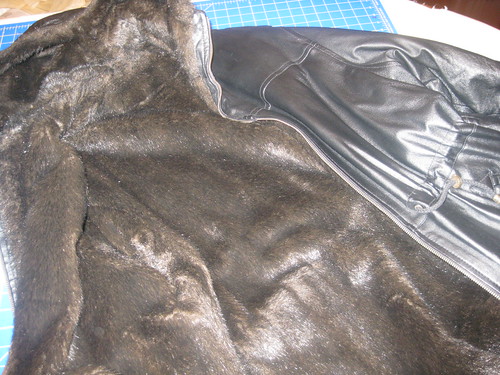
The first leather jacket was lined with faux fur (not the best quality). I only wanted the leather and the hardware from it.


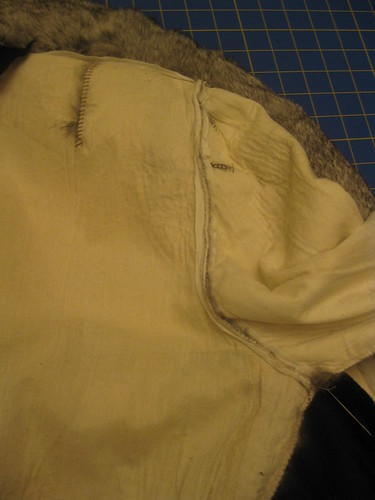
There were ribbons attached to the leather jacket and the faux fur lining at the shoulders and underarms to prevent the two from shifting and separating.


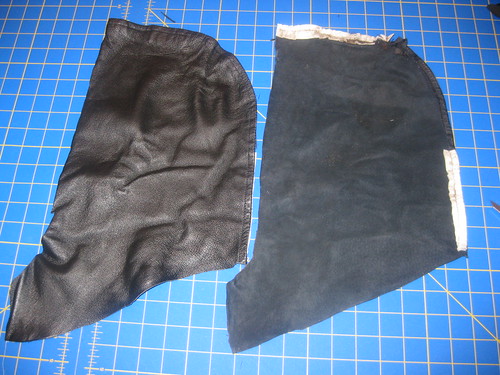
These two pieces were once the hood of the jacket. Here you can see where the manufacturer reinforced the hood at the front and neckline. The material used is a heavy interfacing.


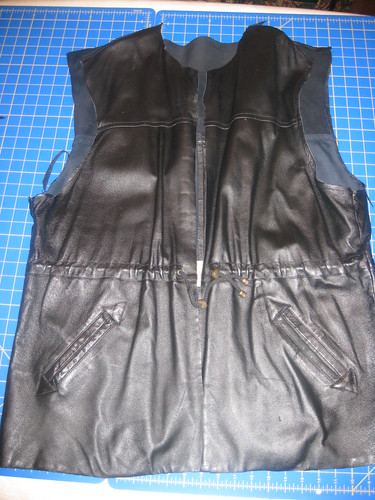
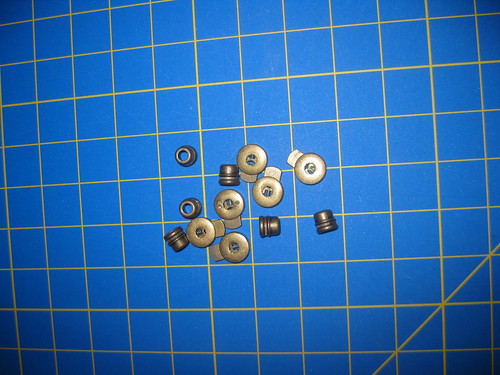
Here is the body of the jacket. Notice the nice hardware.


Hardware salvaged for future use.


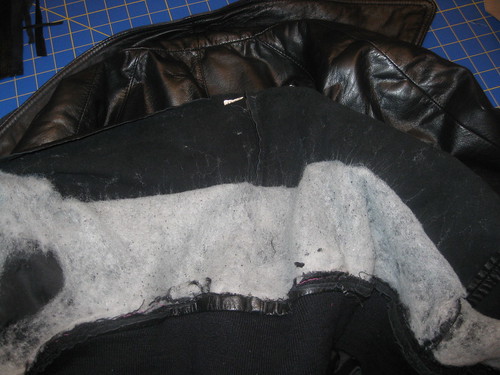
The second leather jacket (bomber) was insulated with padding. It was fused to the lining and leather.


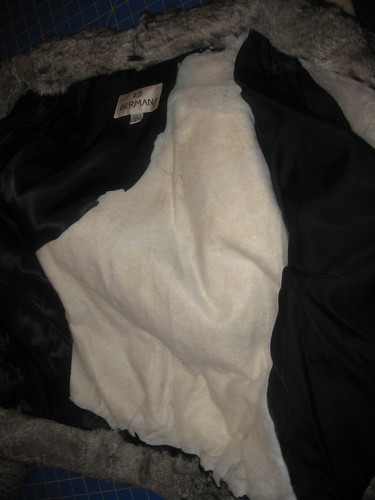
The rabbit fur jacket -

I started salvaging by cutting into the middle of the lining. This was a messy process. DD was standing by with the vacuum as I cut. We both wore little surgical masks to protect our airways from floating and flying fur.

Inside the jacket was a fleece like layer of insulation.


Down to the skin.
Here you can see how the manufacturer stitched the pelts together. Also, they added darts to form and shape the jacket. Seam binding was sewn to stablize the seam.


After getting to the skin, I noticed that most of the body area of the jacket had thin spots or dry rotting. So most of it was unusable. I was only able to salvage the fur from the sleeves.


Now I can use some of the salvaged pieces. Here I'm measuring to see how I can cut the pieces of the purse. Using S2617-


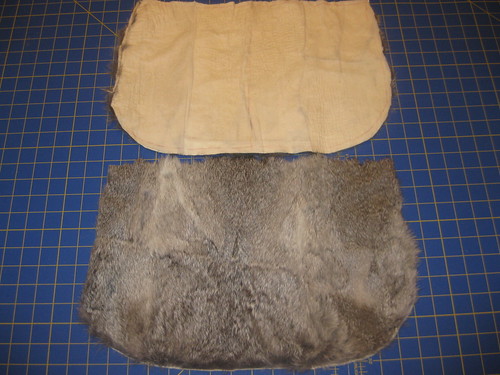
Main body for fur purse

The body was cut 5/8 larger than the pattern pieces. I wanted a single main piece for the front and back. I traced the pattern onto the skin side; then cut each piece.


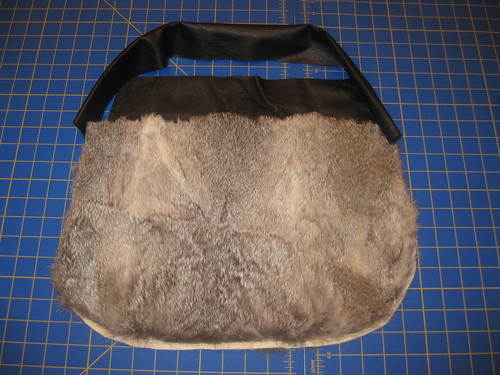
This is how the pieces will be stitched together. The strap is about two inches shorter than the pattern. Most of the jackets were in small sections. eg., the sleeves were in four or eight pieces. So it was a challenge finding section long enough for straps.


The leather purse: The strap is in two pieces. I'm going to try the reinforcement technique used on the hood.


I have both bags cut (fur, leather, interfacing, and padding) Next, I'll start sewing them together. Handling the leather was surprisingly easy. It cuts much like faux leather. Easy... The only challenge with the fur is the flying fur. Otherwise, easy...,

Caution -many projects underway. I will post as work is completed on each. But stay tuned.

Happy Sewing!
C
LinkWithin

Blog Widget by LinkWithin