Denise Colhoun of The Blue Gardenia was so kind to give me a Versatile Blogger Award. And now I have an opportunity to give this award to other fabulous bloggers.
The rules are:
- Display the award logo.
- Thank you person who gave the award and provide a link to their site.
- Give the award to fifteen fabulous bloggers.
- Share seven things about me. (I think I covered this one already just by having this blog, but I list some things in the post for the sake of following the rule.)
First, my seven things about me:
- Andrea P. and Sheila P. are wonderful friends, whom I met in blogland. In the past year, we have become great telephone buddies. Talking about everything, but mostly about sewing. Sometimes we talk for two hours plus.
- At our last Haute Couture meeting, I was elected Fashion Show chairperson for 2012-2013. A lot of work, but with plenty of help.
- For this year's Fashion show, I had the pleasure of working with Rhonda Buss on garment review. She is phenomenal. I have eight outfits to showcase. Most have been reviewed here.
- Carolyn Norman, Diary of a Sewing Fanatic, is coming to Chicago for the Fashion Show. I can't wait to meet her in person. There are at least one table (10) of fellow bloggers coming to the show. I'm looking forward to partying with the ladies the Friday before the show.
- I love the community of creative bloggers. I've learn so much. They are a great source of inspiration and creativity.
- Finals are next week. I'm hoping to get an "A" out of the class (statistics). No summer school for me, though. Relax..,
- I'm 1 1/2 years away from retirement eligibility. Imagine that. I'm no where near retirement age.
Okay, That's it. My seven things.
Now for the fifteen fabulous bloggers:
Diary of a Sewing Fanatic
Rhonda's Creative Life
Gorgeous Things
Paco Peralta
Stitches and Seams
Sigrid - Sewing Projects
Green Apples
Irene's Studio
Kadiddlehopper
Life Happens Be Positive
MADE
Sheilaz-CTK
La Sewista!
Smoking Needles
Knit-Knac
Thanks all for now.
Happy Sewing!
C
Wednesday, April 25, 2012
Tuesday, April 17, 2012
Tracy Reese Inspired Dress Part II- Butterick 4443
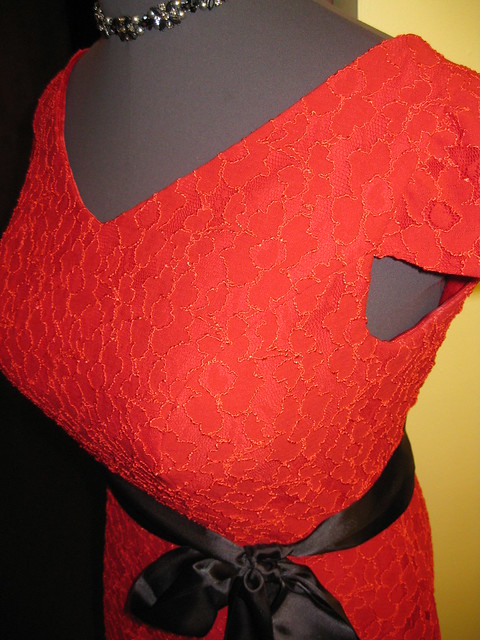
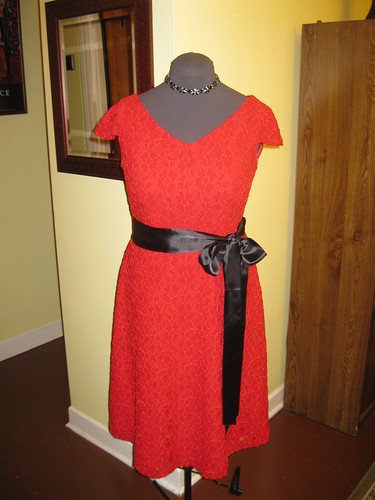
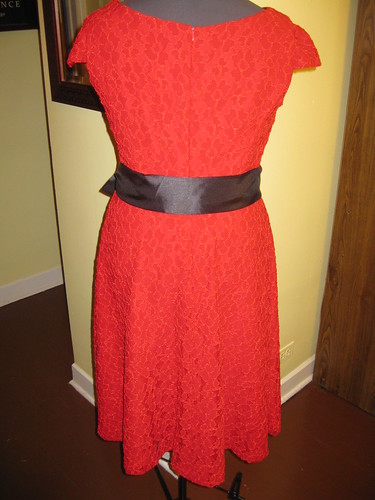
Last night I was able to take a few photos of the finished dress on Rochelle. No pictures of me wearing until later.
Now for my final review -
Pattern Description: Misses'/Misses' Petite Dress - Dress is close fitting bodice and slightly flared skirt has bodice variations, back zipper and is below mid knee length. B: contrast band, tie belt and purchased flower. C: tie belt. D: purchased ribbon and bow trim. E:purchased ribbon bow.
Pattern Sizing: Sizes 8 - 22; I used 14 with my usual modifications.
Did it look like the photo/drawing on the pattern envelope once you were done sewing with it? Yes, except for the small changes that I made.
Were the instructions easy to follow? I piece of cake. Nothing confusing or difficult to follow.
What did you particularly like or dislike about the pattern? This pattern fits the silhouette I wanted for my Tracy Reese inspired Dress. The princess seams makes it easy to do a FBA and the slightly flared skirt looks good on my figure. No dislikes.
Fabric Used: Lace (stable knit) and polyester charmeuse from Fishman's Fabrics. Love the color and texture of this lace. It a tomato red, orange-yellow base. The charmeuse perfectly matched the tone of the lace.
Pattern alterations or any design changes you made: There were many. most are posted here. The rest are as follows:
- Lined (1 1/4" shorter the the skirt) the skirt. It (lining) was sewn so the right side would be the crepe side. The finished skirt has the wrong side facing the right side of the lining. The inside of the dress is the shining side of the charmeuse fabric. To finish it, I made a rolled hem.
- Added satin ribbon sash.
- invisible zipper.
- Cap sleeves are slightly gathered. There was too much ease in the sleeve. If you want a smooth sleeve cap, take out some of the ease.
Would you sew it again? Would you recommend it to others? This is a good sloper. And the pattern is simple enough to create other inspirational dress. The skirt and the bodice can be interchanged with other patterns. So yes, I probably will use this pattern again as a basis for other dress with a similar silhouette. And yes, I recommend it to others.
Conclusion: I'm pleased with the outcome of this dress and will certainly enjoy wearing it. To complete my outfit, I wear some 4" black ornamented pumps. In my hair, a fascinator made by DD and/or me.
This pattern is easy and sews up quick once you have to fit issue (if any) resolved. Perfect little dress that can be dressed up or down.
Monday, April 16, 2012
Tracy Reese Inspired Red Lace Dress - B4443
Tracy Reese's red lace dress is the inspiration for my latest frock. I love the silhouette of it and wanted to make my own version. It made it to the list last fall when I saw it in Essence magazine. PR later came up with a red dress contest. I thought I would have it made by the deadline. NOT.., Then I thought I would have it done before Easter. Not again..,
Last weekend, I was finally able to finish it and include it in the upcoming Haute Couture Fashion Show.
So today's post is background information on how I started the process of making this dress.
I searched several stores for the right fabric. First at Hancock's. I even purchased some knit lace and tricot only to return it a week later.
Then while shopping for prom dress fabric, my sister (she wants my dress. wink, wink) spotted the red lace at Fishman's. At last, I found the perfect lace for my dress. So I bought all that they had on the roll (4 yards) plus a equal amount of polyester charmeuse for the lining.
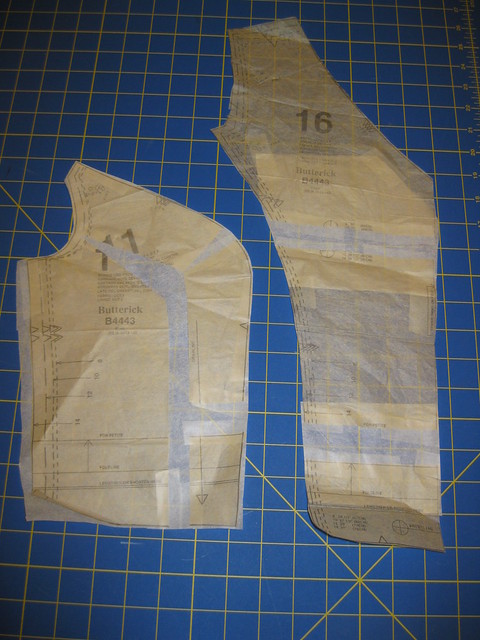
Now for the pattern. No gathering at the waist for me, probably some variation of a circle skirt. So I decided on Butterick 4443, which has a slightly flared skirt and a princess seam bodice. It's been in the collection for years and was an excellent choice for the dress.
Next, fitting the pattern. I made my usual adjustments:
- FBA - the princess seam bodice is the easiest to adjust. Special notes - First, I sew the center front seams with the 5/8 inch seam allowance from the armhole to the waist. Then to fit the bodice, I basted the back and shoulder seams together. Check to make sure it was leveled, seams are perpendicular to the floor. The center front was too big from under the bust to the waist. So I removed the center front stitches. Then cut away the excess along the center front seam, from under the bust to the waist. Then restitched the front and side front. Checked the fit. When it was perfect, I clipped along the curve where necessary.
- Sway back - small tuck across the lower back.
- Prominent Shoulder Blade - very small 1/4 inch.
- Added a few inches to the length of the skirt
Other changes:
- Cut twice the number of pieces for each section of the bodice.
- I underlined the bodice so that the crepe side of the charmeuse shows through the lace.
- Then used the remaining bodice charmeuse for the lining.
Last progress photo taken on April 12, 2012. More this week.
Happy Sewing!
C
Labels:
Butterick,
dress,
fashion show,
inspiration,
lace,
Sewing
Saturday, April 14, 2012
What Shape Are You In?
Question???
Do you follow the recommendations given on the back of the Vogue pattern? Many of the Vogue patterns include a figure flattery chart. This chart is designed to help you make the best choice in selecting a pattern.
On the website, Vogue includes some guidelines for using the chart. It made me chuckle because it claims to minimize your adjustments if you follow it. NOT. With any pattern choice, whether my shape is indicated or not, I have to make my standard fit adjustments. Following this chart certainly does not eliminate or minimize the fitting adjustments.
In the past, I followed this recommendation before buying a Vogue pattern. But, I've noticed that some bloggers do not, and have had excellent results. So I buy patterns based on what I like and whether or not I think it looks good on me.
The other thought that comes to my mind when making selection is what about the third dimension. If I turn side ways, will it still look good on me? I look at all sides, paying close attention to how the garment falls over my body. As I'm looking, I ask myself, is this a good look for me?
The figure flattering diagram is not enough. There needs to be a few more alternatives. For instance, I'm a upside down triangle through the upper waist (shorter than average turso, very long legs) with the shape of a vertical rectangle at the bottom.
How do you shape up? Do you follow the recommendation?
Happy Sewing!
C
Friday, April 13, 2012
What's Cookin'?
That's right...
What's cookin' is a lot of this and that. Every eye on the stove is covered. The oven is full. But soon, very soon many things will be done and ready to move to the table. When that happens, I will have plenty of room for other appetizing dishes.
What's ready or almost ready:
- Two more weeks of school. I decided not to take a summer course. I want my summer free to do whatever.
- The initial rating and evaluation of vendors is complete. We have a few weeks to chill before we start vendor presentations.
- Pastoral Anniversary week starts Tuesday and climaxing on Sunday. The media services group will work every night as always.
- Haute Couture Fashion Show is May 6th. I'm nearly finished with all my garments. Most reviewed here with the exception of the pieces I'm working on. Next year, I'm the Fashion Show Chair. This is a huge challenge for me. The new role will definitely change the way I spend my free time. I suspect there won't be as much sewing time. It will be interesting and fun though.
What's starting to simmer:
- Prom dresses. Two of them. One for my niece and the other my second cousin. Both ladies will look like princesses.
- Rethinking how I sew for other people. I'm leaning towards not. Because it's too stressful and not worth the time and effort. Personally, I like teaching sewing better. So I'm exploring that possibility.
On the Summer menu:
- Work, work, no school ..,
- Planning for next year's fashion show. The committee will meet sometime in June to start planning. I'm also looking for inspiration for my show garments.
- I will attend the Palmer/Pletsche workshop during the summer.
- Friday, I took a cursory look through Rhonda's posts for April/March and saw tutorials on interesting ways to create pleated and/or draped sleeves. I will at least try one of them.
- Get organized. I can't easily find things these days. Fabric everywhere, notions everywhere, projects unorganized. Everything must be put in it's proper place.
- House hunting. This is a biggie and will take some time to do. But I'm ready to get started.
Lately, I've been the poorest sewing blogger. I looked at my posting record for the first quarter; it's pitiful. And I think I'm averaging about two blog reads per day. And yes, I actually read them, not just looking at the great pictures.
Parting Shot:
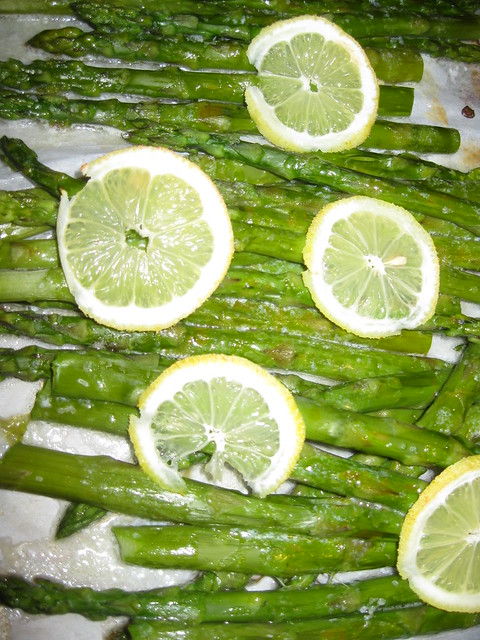
Easter has come and gone. We had a great Easter meal on Easter eve: lamb chops, cous cous with carrots and peas, yellow and green squash, and asparagus (Martha Stewart style). So my parting shots is the delicious asparagus we feasted on. It's quick and easy.
Per heat oven 350 degrees.
Cut off the bottoms of the asparagus and wash.
Par boil asparagus until bright green and tender; not mushy.
Line cookie sheet with parchment paper.
Assemble asparagus onto sheet.
Drizzle with melted butter and sprinkle with coarse salt.
Sneeze a bit of fresh lemon juice to taste.
Bake for a few minutes (10mins.)
garnish with lemon slices.
It's done.
Sunday, April 8, 2012
Black Jacquard Coat - M5766
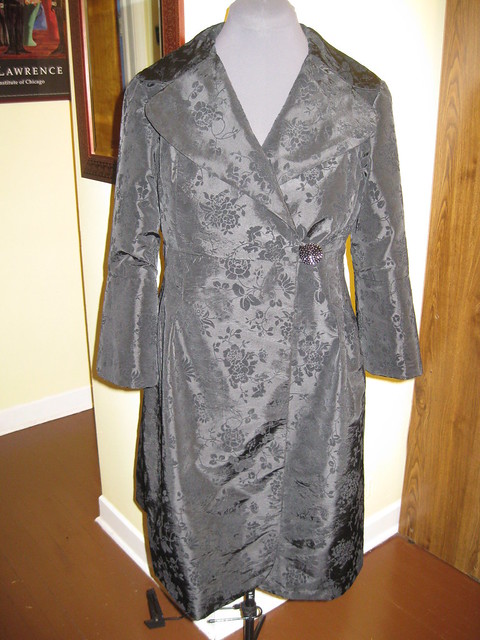
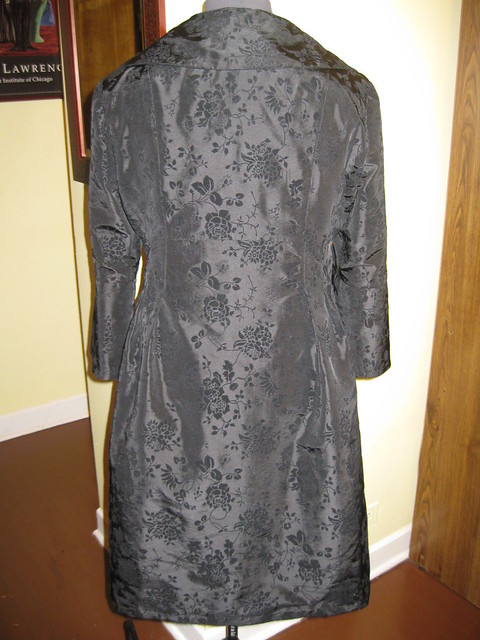
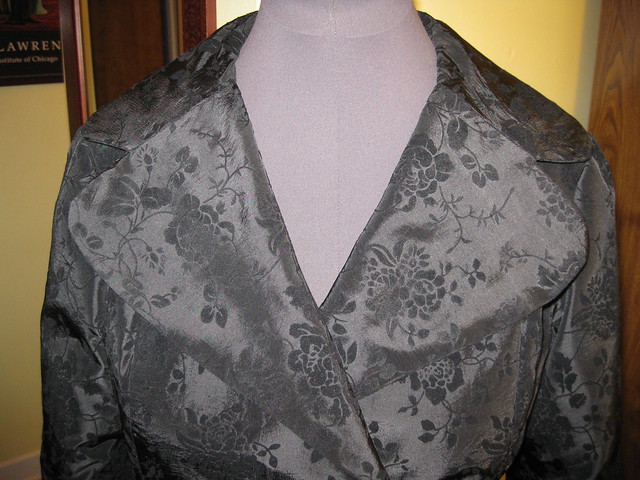
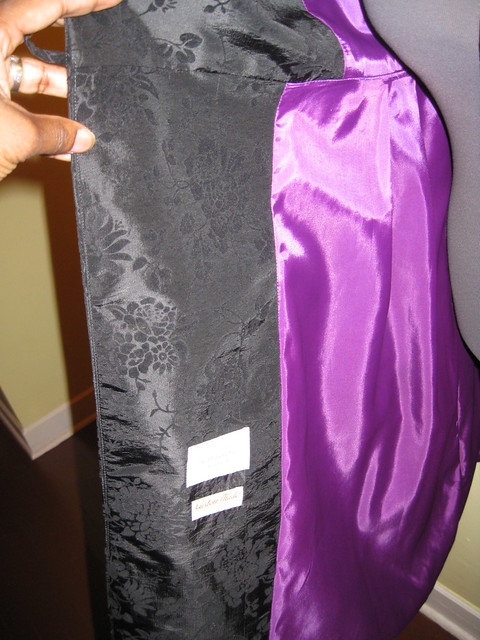
My evening coat was made using McCall's 5766. I was more pleased with how it turned out than the Vogue dress. This one has been in the stash for a couple years. And was the perfect complement to my dress.
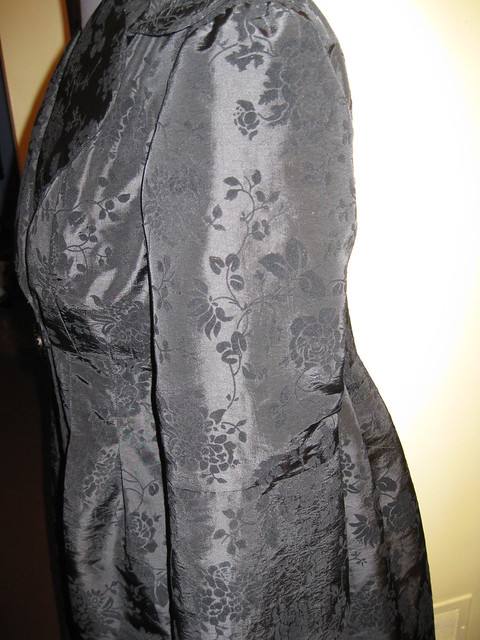
Pattern Description: Misses' lined coats: Fitted across bust coats have empire waist, princess seams with pleated lower section, side seam pockets and sleeve variations; coats are above mid-knee length.
Pattern Sizing: 4-18; I used size 14 with modifications. View A
Did it look like the photo/drawing on the pattern envelope once you were done sewing with it? Yes. Except I omitted the slits in the cuffs and made the pleats a little longer for more shaping.
Were the instructions easy to follow? Yes. No problems following them.
What did you particularly like or dislike about the pattern? Everything about the design of the coat.
- Wide Collar.
- Bell 3/4 sleeve.
- Empire waist.
- Princess seam - easy FBA.
- Pleats
- Big decorative button.
Dislikes - The pockets are about two inches too high.
Fabric Used: Black floral jacquard from JoAnn's.
Pattern alterations or any design changes you made: I simple FBA and I added a few inches to the length of the coat. Plus the two changes mentioned above.
Would you sew it again? Would you recommend it to others? Yes. I plan to make one for my DD. And yes, I do recommend it to others.
Conclusion: I really like this coat. The style and fabric are perfect for a special occasion coat. This pattern was not difficult to sew.
Vogue 1242 - My Anniversary Frock
Happy Easter!
Vogue 1242
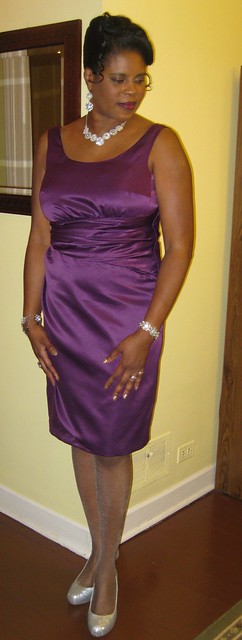
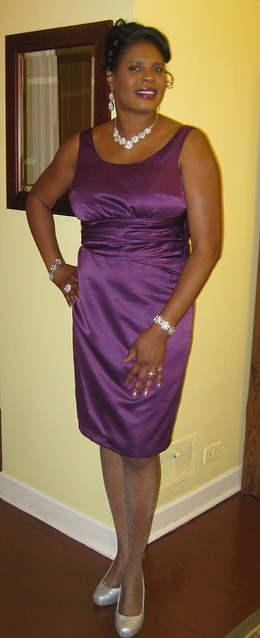
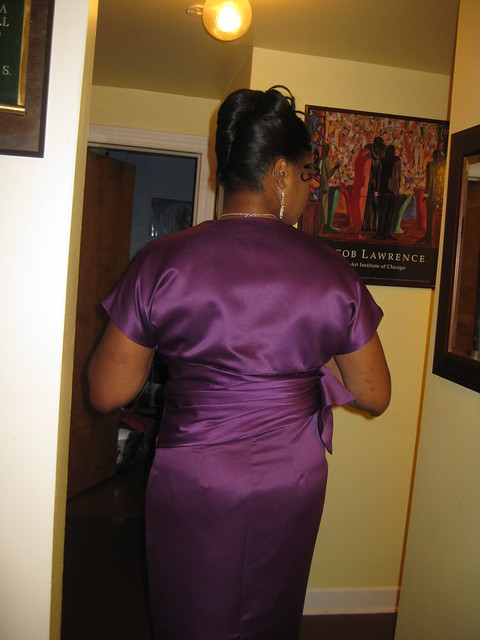
This Kay Unger dress has been on my list for a while. So this spring I decided to make it for the Pastoral Anniversary dinner.
Pattern Description:
MISSES' DRESS: Close-fitting, lined dress has left side seam invisible zipper and unlined over skirt.
Pattern Sizing: 6-18. I made size 14 with a lot of modifications to the bodice.
Did it look like the photo/drawing on the pattern envelope once you were done sewing with it? Yes, except for the small design change in the upper bodice.
Were the instructions easy to follow? Yes. Simple. Nothing gave me heartburn. You need to pay close attention to how to cut the pattern pieces. It matters and will impact the construction of the dress.
What did you particularly like or dislike about the pattern?
My likes -
- drape across the middle section.
- overlay of the skirt.
- applique and bow
My dislikes -
- The many pieces to form the midriff.
- My selection of fabric; I should have chosen a satin with a more body to it. The pleats may have formed better.
Applique and Bow -
Fabric Used: Medium weight satin from JoAnn's.
Pattern alterations or any design changes you made:
Oh my God! Where do I begin? They say, "A picture is worth a thousand words." So here is the picture of the FBA. There are six pieces for the bodice front. The upper pieces you can clearly see the FBA. But the lower pieces I didn't think I were need to alter until later. So I had to recut the middle section to correctly line up to the upper bodice vertical seaming. Needless to say, I didn't capture that change, but it was just a matter of making that section a little wider. Because of the FBA, I ended up gathering along the bottom edge of the upper bodice help match up with the seams of the lower bodice.
Sway back adjustment - standard and pretty easy to do.
Length the skirt about three inches.
Rise the underarm seam about 1/2 for better coverage.
I lined the over skirt. update
The rest of the fitting adjustments were made as I sew the dress together. And believe me, I must have tried it on about twenty times during the process of getting a decent fit in the bodice.
Would you sew it again? Would you recommend it to others? No. I only need/want one. But I do recommend it to others.
I made a little shrug to get me warm. This dress is cut low exposing chest, back and arms.
Conclusion: I like the style of this dress. It's hard difficult to sew, but can be a challenge to incorporate fitting adjustments and keeping the integrity of the seams.
Saturday, April 7, 2012
The Finish - Vogue 8615 - Ms. Bell
It seems like ages since I last posted. I've missed blogging and hope to start back as soon as things settle down a bit. Well, the Pastoral Anniversary (35) celebration was last Sunday. This is my review of Ms. P. Bell dress using Vogue 8615.
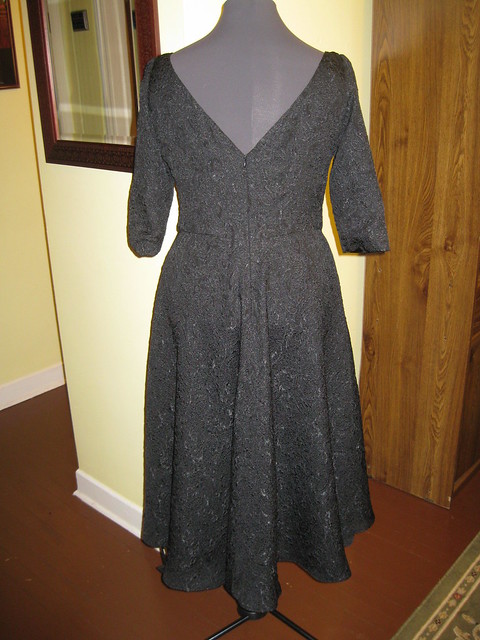
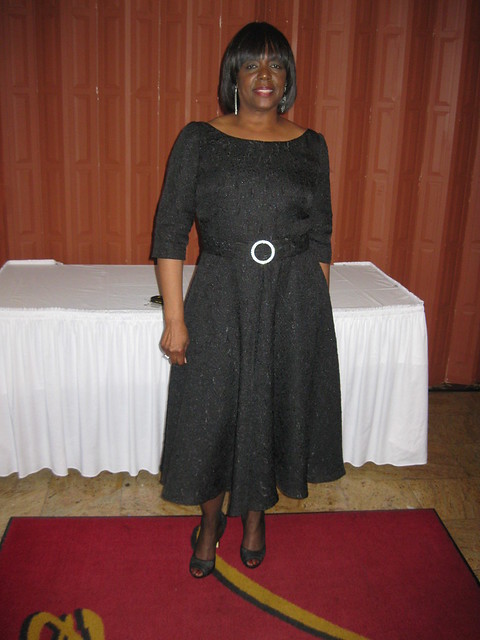
Pattern Description: MISSES' DRESS: Lined, below mid-knee or below mid-calf dresses A, B have fitted bodice, back neckline is lower than front and three-quarter or full length sleeves, flared skirt has side seam pockets and back zipper. Purchased petticoat and belt. Separate.
Pattern Sizing: 8 to 24.
Did it look like the photo/drawing on the pattern envelope once you were done sewing with it? Yes. Pretty much with the exception of a few design changes by Ms. Bell. I will talk them later in the review.
Were the instructions easy to follow? There were only six pattern pieces. Simple right? Right. The instructions were typical and easy to follow. I didn't like the finish of the armscye. So I turned in the seam allowance and hand stitched the lining to the armhole.
What did you particularly like or dislike about the pattern? This dress was for a client, but there were a few likes we both shared. and they are:
- simplicity of the design. Classic.
- the full skirt.
I also liked;
- the placement of the bodice darts and as well as the darts at the elbows.
- the most of the pieces went together well.
Dislikes -
- the amount of ease in the sleeve.
- the width of the sleeve cap. It wasn't smooth and formed a bubble around the upper part of the armscye.
- the shoulder seam is extremely narrow.
Fabric Used: A beautiful matalasse fabric from Fishman's.
Pattern alterations or any design changes you made: Most of the pattern alterations and design changes are here. But during the second fitting, Ms. P. Bell was not completely happy with the length of the sleeves and the formation of the sleeve cap. So, I shorten the sleeves two more inches and reset the sleeve to eliminate the bubble effect along the upper portion of the sleeve.
I added two inch black lace to the edge of the skirt lining, just to pretty it up a bit. (Carolyn taught me this.) I also added the bra strap holders to the shoulder seams to help keep the dress in place. Caution - If you're planning to make this dress, you may want to add a inch or two the the length of the shoulder seam.
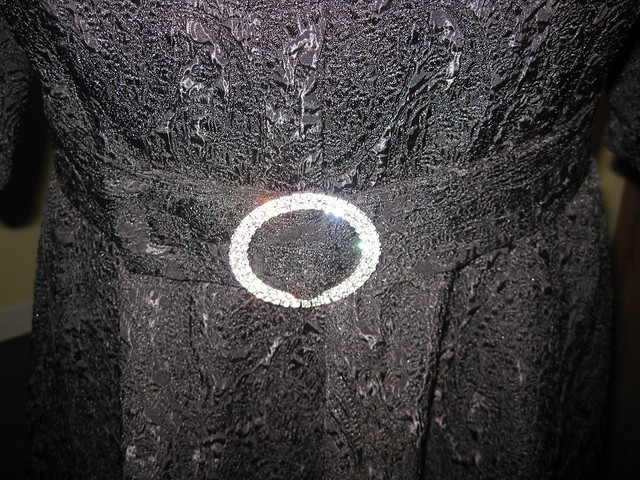
Ms. P. Bell wanted a matching belt. So I made one. Easy to do by cutting the belt the desired width and length plus seam allowance. Use canvas hair interfacing to add body. To finish the belt, a sparkling buckle. To keep the belt end from floppy over, I added a stripe of velcro. The stitching is buried in the fabric so you can't see it.
I also made a corsage that Ms. Bell can attach to the lapel or shoulder of her coat. You can use any flower pattern to make it. Finish the bottom of the flower and add a closer.
Would you sew it again? Would you recommend it to others? I thought about using this pattern for my Tracy Reese inspired dress, but I decided B4443 will work just fine. And yes, I do recommend it to others with modifications. It's classic. Just make a muslin for the bodice at least to get the fit down pat.
Conclusion:
This was good pattern choice for a classic design.
Pattern Sizing: 8 to 24.
Did it look like the photo/drawing on the pattern envelope once you were done sewing with it? Yes. Pretty much with the exception of a few design changes by Ms. Bell. I will talk them later in the review.
Were the instructions easy to follow? There were only six pattern pieces. Simple right? Right. The instructions were typical and easy to follow. I didn't like the finish of the armscye. So I turned in the seam allowance and hand stitched the lining to the armhole.
What did you particularly like or dislike about the pattern? This dress was for a client, but there were a few likes we both shared. and they are:
- simplicity of the design. Classic.
- the full skirt.
I also liked;
- the placement of the bodice darts and as well as the darts at the elbows.
- the most of the pieces went together well.
Dislikes -
- the amount of ease in the sleeve.
- the width of the sleeve cap. It wasn't smooth and formed a bubble around the upper part of the armscye.
- the shoulder seam is extremely narrow.
Fabric Used: A beautiful matalasse fabric from Fishman's.
Pattern alterations or any design changes you made: Most of the pattern alterations and design changes are here. But during the second fitting, Ms. P. Bell was not completely happy with the length of the sleeves and the formation of the sleeve cap. So, I shorten the sleeves two more inches and reset the sleeve to eliminate the bubble effect along the upper portion of the sleeve.
I added two inch black lace to the edge of the skirt lining, just to pretty it up a bit. (Carolyn taught me this.) I also added the bra strap holders to the shoulder seams to help keep the dress in place. Caution - If you're planning to make this dress, you may want to add a inch or two the the length of the shoulder seam.
Ms. P. Bell wanted a matching belt. So I made one. Easy to do by cutting the belt the desired width and length plus seam allowance. Use canvas hair interfacing to add body. To finish the belt, a sparkling buckle. To keep the belt end from floppy over, I added a stripe of velcro. The stitching is buried in the fabric so you can't see it.
I also made a corsage that Ms. Bell can attach to the lapel or shoulder of her coat. You can use any flower pattern to make it. Finish the bottom of the flower and add a closer.
Would you sew it again? Would you recommend it to others? I thought about using this pattern for my Tracy Reese inspired dress, but I decided B4443 will work just fine. And yes, I do recommend it to others with modifications. It's classic. Just make a muslin for the bodice at least to get the fit down pat.
Conclusion:
Subscribe to:
Comments (Atom)

