Saturday, March 19, 2016

Caped in Sweet Grape Faux Fur! Isn't It Spring?


Yikes!

It's almost Spring. So why did I decide to make this cape? Because this sweet grape acrylic faux fur (#306542) is beautiful.

Spring is not yet sprung in the mid-west. Days are sunny about 55 degrees, while night time temperatures drop to the mid or upper 40's. I'll get at least a few wears before warmer days truly come my way. Then when fall returns, I'm ready for it. ;-)


Just as the season is changing the availability of some heavier fabrics are no longer available at Mood's online store. Maybe this lovely textured textile will return for the fall season. I used Vogue 8212 to make my new cape. It's out of print, but I've seen many RTW capes in stores.


The pattern is described as Misses' wrap, cape, and shrug: A: gathered front wrap, self-lined, self loops and covered buttons, elastic at the upper and lower edges. B: front flounce and snap closing. C: flounce and contrast ties. D: side front wrap cape has flounce with double fold bias tape, self fabric leaves and flower. I made view B, size medium.

Although it was the basic over the head shape, there are some interesting design elements. The side looks like a sleeve and the diagonal seaming across the front with flounce is eye catching. It's calls for moderate stretch fabric. The faux fur has a knit backing, but hardly any stretch in it. No fuss, no muslin.


This was a quick and easy cape to sew. It's not as opaque as it appears when holding it to the light. For protection from the cold winds, I lined it. Adding a lining super simple to do. I cut the same pattern pieces except the flounce for the lining, sewing it together the same as the cape. Then attaching it to the cape using the bag method. I like this cape and the fabric too.

Now it's time to lighten up the wardrobe a bit. ;-)

Happy Sewing!
Cennetta

Friday, March 18, 2016

Tutorial: Hand Picked Zipper with Seed Beads

A few of my followers on periscope asked me to do a tutorial on hand-picked zipper.  This is a beautiful accent to add to a special dress or skirt.

A few years ago, Susan Khalje and Rhonda Buss did a workshop in Chicago where they shared some couture and some pattern drafting techniques.  It was a great workshop and I learn quite a few things.  Susan shared some tips on how to hand-pick a zipper.  I discovered that in some of my garments I didn't quite master the process for concealing the zipper teeth.  While lunching with Rhonda on  Thursday, I told her about my plan to post a tutorial.  She further explained that if the garment has a few inches on wearing ease, it's not necessary to create overlap between the two sides or create a rise at the center of the zipper.  And that butting the sides is fine.  But on the other hand if the garment fits very close to the body, the overlap is appropriate.  So when the garment fits around the body, there is room for the overlap to relax and spread a little without showing the zipper teeth.

Today, I will provide steps for hand-picking a zipper and adding seed beads along the stitching line.
The supplies needed are listed below:

Supplies-


  • fabric (garment)
  • thread
  • needles (I prefer the sharp thin ones)
  • bees wax
  • fusible interfacing or organza
  • zipper
  • pins
  • pencil
  • ruler
  • seed beads
  • scissors
Process-


  • Apply Interfacing to edge of opening where zipper will be sewn.
  • With right sides together, sew the garment up to the point where the zipper is to end.

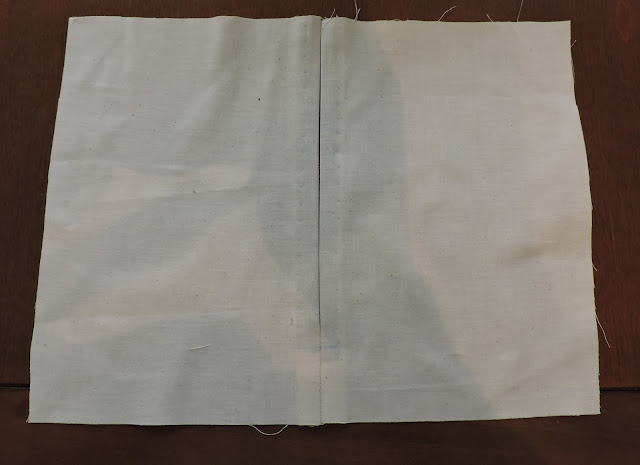
This next step is optional.  Explanation -Typically I do not mark where to stitch.  I do free hand stitching.  You may also use the ridge in the zipper tape as a guide for your stitching line. In the illustration, I marked the locations where the stitches should be made.  (Note: some chalks may not wash out.  So carefully consider how to mark and/or stitch. Tip from Rhonda)


  •  The stitches should be about 3/8" apart.  The markings are very light.


  • To overlap, bring the edge of the opening even with the zipper teeth as shown above.
  • Pin zipper in place.  Do this to both sides.
  • Before you begin to stitch, thread a few needles, run them through some bees wax, and press the thread.  This is done to help reduce tangling.
  • Stitch the zipper in place using a stab stitch.  I start at the top of the zipper.


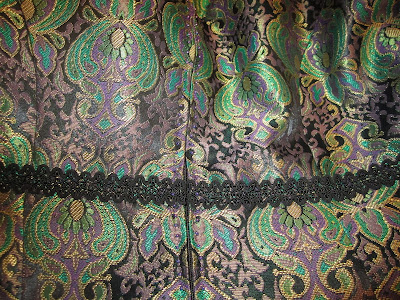
  • Now, add beads using the previous stitches as a placement guide.  Start adding the beads about 1" below the top of the garment.  You are literally stitching on top of the first stitches.  (I used to different types of beads for the illustrations.  You can use whatever you want.)


  •   Press after finishing the zipper.


Here are a few options for bead size and shape.  I hope this is clear and helpful.


Happy Sewing!
C


Monday, March 14, 2016

Notes on a Pattern - Butterick 5605 Ms. Paulette Bell's Dress


Good afternoon everyone,

It's been ages since I did a "Notes on a Pattern".  Today's post is on a vintage pattern that I'm using for Ms. Paulette Bell's annual dress.


The illustration clearly shows the princess seam bodice with cut on sleeves, which is different from most of the vintage pattern that I've seen with cut on sleeves.  This design element makes it easy to do a full bust adjustment.    Also, noted from the diagram is that the side front and side back are gores where the bodice is attached to the sleeve.   There may be a bit of a challenge to get all side bodices peaks the same.  Making a muslin is a great way to practice inserting the side front and back.


But with careful measuring, marking and sewing it can be achieved.   Other challenge may be the back opening.  It gapped mid-back on Ms. Paulette.  I would recommend that you make a muslin before attempting to make the dress out of your nice fashion fabric.

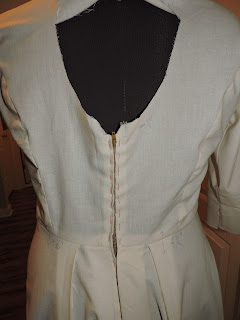
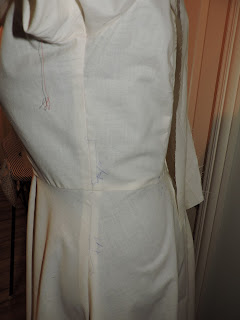
There was no way I would skip the muslin fitting.  Even though I've made a similar dress for her a few years ago without one.  On Saturday, Ms. Paulette came by for her muslin fitting.  There are several adjustments needed.

There are:
  • Lower the front neckline about 1/2".  This change is a matter of preference.

  • Right under arm, slight pull - may be resolved with adding  1/2" to the front underarm section.


  • Swayback adjustment 1/4" near side seam to 1/2" torwards middle of lower back.  (Note: incorrectly marked on muslin as adding 1".) 
  • Decrease back opening by 1"; gapping at top of zipper.

  • A little snug at outer shoulder and upper arm - add 1/8" to 1/2" along this area.


  • Add 1/2" back of skirt to compensate for the swayback tuck.
  • Side seam bodice, lower section add 1/8" to 1" at waist.

  • Side seam skirt, upper section add 1" to 1/8" along the side.
There was no problem with the construction process.  The markings were spot on.

Stay tuned.  More later on Ms. Pauletter's dress, but after the event.

Happy Sewing!
C


LinkWithin

Blog Widget by LinkWithin