Showing posts with label Crepe Knit. Show all posts

Wednesday, October 23, 2024

Black and White Color Blocked Easy Coordinates with Simplicity S9690


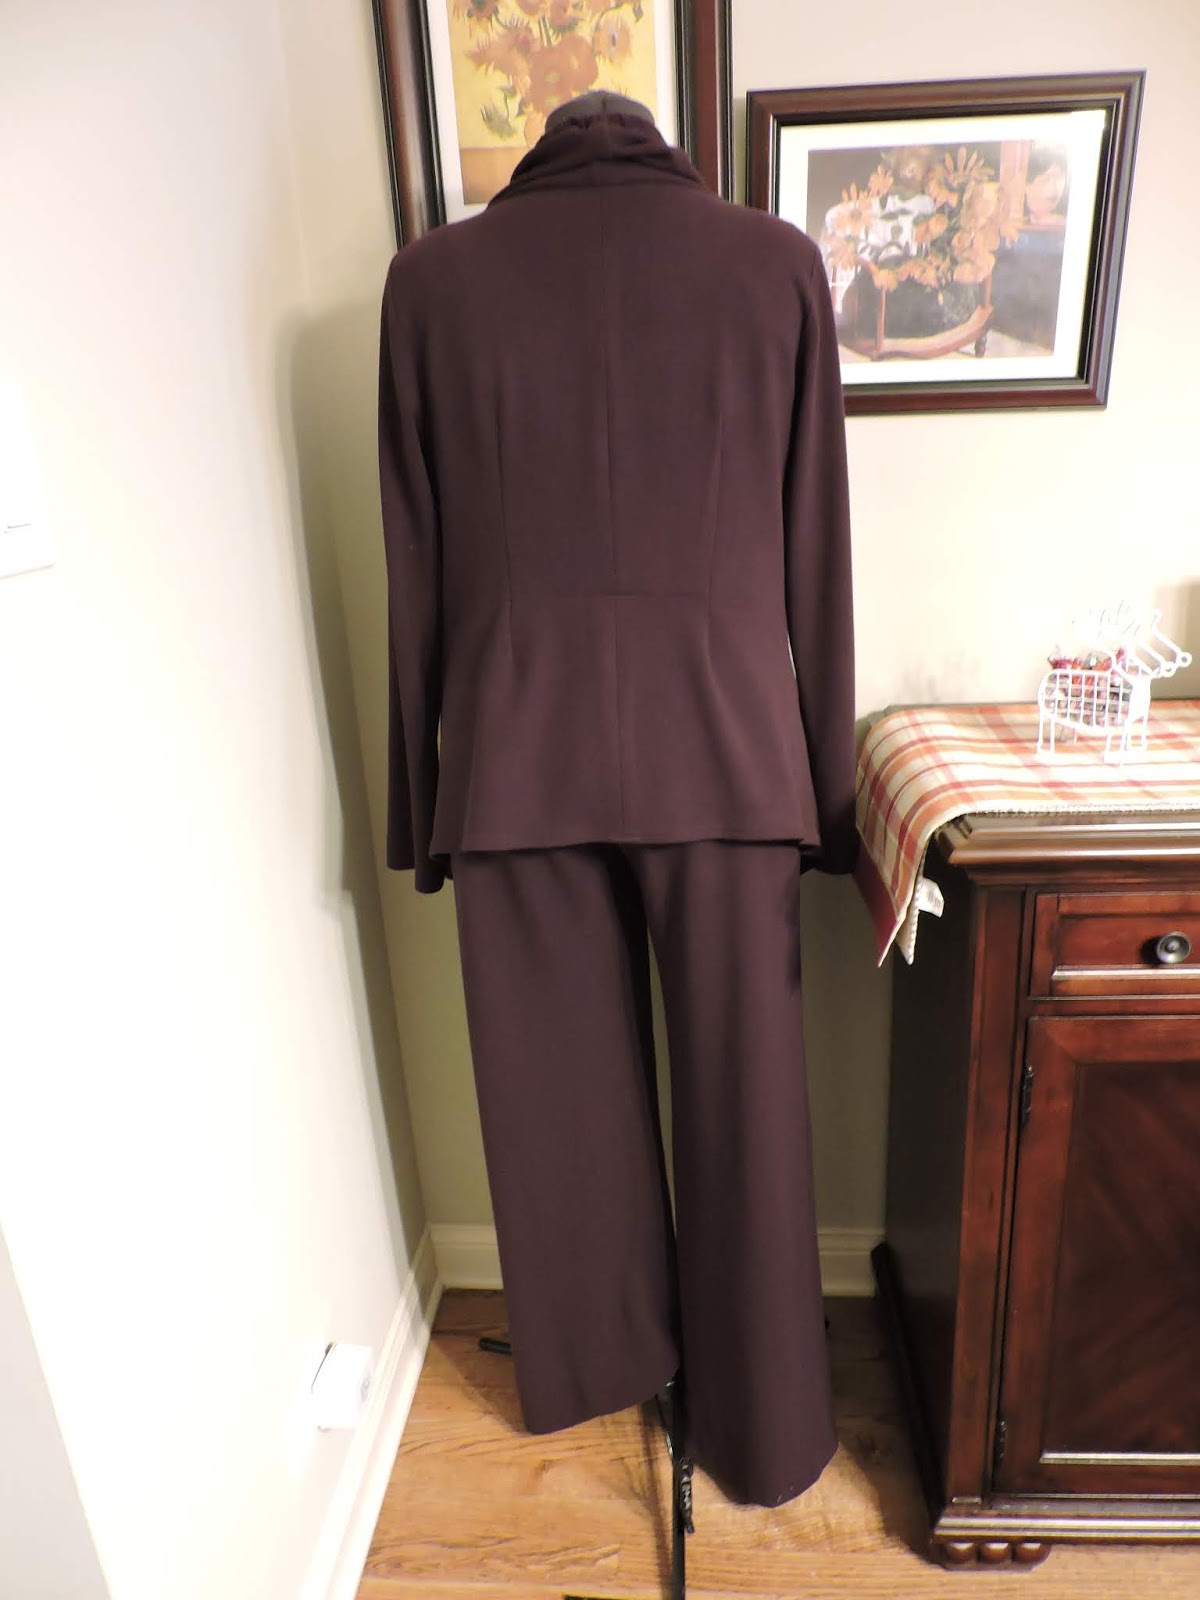
When you are short on fabric, try color blocking.  It is a great way to use fabric remnants.  I was able to make a coordinating top for two pair of pull-on pants that I made using Simplicity S9690.


Pattern Description:  Cold shoulder top A has scoop neckline with long sleeves.  Top B is short sleeved.  Both pants C and D have knit contrast on waistband.  Jogger pants D has ankle cuffs and pin tucks.  I made views top A and pants C with a few modifications.

Pattern Sizing:  size groups (8 - 16) (18-26).  I used size 16.


Did it look like the photo/drawing on the pattern envelope once you were done sewing with it?  Pretty much.  I did color block the top and I made little pleats in front of the pants.

Were the instructions easy to follow?  The instructions were super easy, and there was nothing in them that was confusing.

What did you particularly like or dislike about the pattern? I liked that the pattern was easy to sew.  In the early part of summer, I was sewing really basic patterns and garments trying to jump start my sewing mojo.

Fabric Used:  These are two more fabrics that I purchased at Hobby Lobby.  They really have some deals on basic fabrics.  Great place for beginners to shop.  The fabric is a knit crepe.  I pre-washed and dried it before starting my project.  It came from the dryer softer and bouncy.

Pattern alterations or any design changes you made: I made some changes.  Most of them were due to fabric shortage. Lol.


  • Top A - I decided to color block the top using the remnants from the two pairs of pants that I made.  
  • For the sleeves I added separate pieces to make the sleeves long enough.  I also added some topstitching to make the add on look intentional.  
  • Instead of using binding to finish the neckline, I used the fashion fabric to finish it.

Surprisingly, I didn't make my usual fit adjustments.  I thought the style ease in the top would be enough for the "fit adjustments" that I normally make.


  • Pants C - I added little pleats to the front of the pants.  I did not want all the gathers across the front caused by the elasticized waistband.  Also, I reduced the length of the waistband.
  • Lengthen the pants a few inches so that they would be long enough.


Would you sew it again? Would you recommend it to others?  Yes and yes.  This is an easy, quick pattern to sew.  Great for beginners.

Conclusion: Sometimes you need a few super easy projects to jump start your sewing mojo.  This one is great for that.  It is also a great beginner pattern that offers some creative designs.

Happy Sewing!

C


Monday, June 17, 2024

Soft Crepe Dress Simplicity S9820


Hello Sewing Friends,

I finally have something to share with pictures.  This Simplicity dress was made immediately after I finished my Chicago Frock tails dress.  In fact, I made it the morning before the Frock tails Saturday evening affair.  I really needed something to cleanse my palette.  Because I devoted many hours to making my Frock tails dress which in the end lack luster.  The truth is I made two dresses.  One trashed and the other a substitute for what I really wanted to wear.

Anyway, Simplicity S9820 helped me feel better about all the hours that I spent on the party dress.  To start, I had already made the pattern adjustments.  Anyone who has similar adjustments knows that this takes quite some time with every new pattern to use in a sewing project.  It was so satisfying to go right to the cutting table.  Sewing time was about 3.5 hours plus time to hand stitch the hem.


Pattern Description:  As usual, Simplicity gives the vaguest pattern descriptions.  My description:  Misses's knit dresses and shrug.  View A dress is an A-line mid-calf knit dress with shoulder and neckline drape details.  View B dress is a floor length A-line strapless dress with a front knotted long sleeve shrug.  Both dresses close with an invisible zipper at the back of the dress.


Pattern Sizing:  This pattern is available in  sizes 8 to 26, which is very nice.  I used size 16 with modifications.

Did it look like the photo/drawing on the pattern envelope once you were done sewing with it?  Yes, it did.

Were the instructions easy to follow?  The instructions were typical.  Nothing difficult or confusing in them.  

What did you particularly like or dislike about the pattern?  I love the shoulder and neckline drape.  The A-line silhouette was a plus too.  I was mostly interested in making view A.  But after I finished it, I considered making view B at a later date.


I don't have any real dislikes.

Fabric Used: My fabric is from New Rainbow Fabrics on Roosevelt Road in Chicago,  It is a blush, crepe knit with a soft hand.  The stretch of the fabric is more than 25%.  It has great recovery.  I think it is perfect for this dress.  New Rainbow has this crepe knit in a variety of colors at a very reasonable price of $7.00 per yard.

Pattern alterations or any design changes you made:  I have quite a few changes that I made.  I begin by examining the measurements on the pattern front for the finished dress.  The finished bust measurement is only 34 inches.  


  • FBA - Often, for my size it's around 39 inches.  So, I feel this pattern runs a little on the small size.  Because the front and back patterns are designed sleeveless, I had to think about how to make the FBA adjustment without distorting the shape of the dress.  Below is an illustration of the FBA.  I simply slashed through the neckline down to the bust area continuing the length of the pattern.  This had to be done twice because the front pattern piece was for the entire front body instead of half the width of the body.   This adjustment produce a dart.  I decided to angle the dart slightly.  I hate darts that are straight across from side to apex.


  • Added width to the two back pieces - When I make a FBA, the front is sometimes much wider than the back.  Particularly, below the bust. Often, I end up sewing larger side seams to slim down the rest of the dress.  This sometimes causes the back to be even smaller.  And the side seams are off center along the side.  So to balance things out a bit, I added some width across the back.  Note:  My usual prominent shoulder blade adjustment was not needed because the back of the dress falls well  below the shoulder blades.


  • Swayback - There are two back pattern pieces.  I suspect the reason is not to confuse the sewist with the markings for each shoulder and neckline attachments.  Tucks were made on both pieces.  Note:  the amount of the tuck has to be added back at the hem to balance out the hem.  


  • Marking the Lower dress pattern pieces - I decided to cut the pattern pieces at the hem for view A.  Each piece is label with the respective pattern number plus the letter "B".


  • Front and Back Facings -  I adjusted the width of both to match the adjustment that I made to the front and back.


  • Elastic Around the Top of the Dress -  To stabilize the neckline of the dress, elastic is added.  I measured the elastic by first stretching it to relief any added tension.  Then I measure it like I would to take an upper bust measurement.  This is how I determined the length of my elastic.  Next, I divided it into four sections.  Starting at the right back for section 1.  Sections 2 and 3 for the front.  Finally, section 4 for the left back.  I stretched the elastic to fit each section.  The elastic was attached after the facings were sewn on.
  • Shoulder and Neckline Drape - I added about an inch to each.  I didn't need it.  So, I had to remove the added length to those pieces.

These are my adjustments/changes.  I hope this is clear.


Would you sew it again? Would you recommend it to others?  I think I will make it again.  Probably for a holiday dress.  There is always a holiday party to go to.  And this dress is a quick make with great results.  And, yes I do recommend it to others.  

Conclusion: I am very pleased with how this dress turned out.  It was the perfect antidote for recovery from a "not so great" sewing experience.  Lol

Parting Photos:   Me wearing Simplicity Combo S8735 and S8637.  The pattern review is:   Easy, Breezy Summer Dress.  It is perfect for the 90 degree temps we are experiencing right now.


Thursday, May 2, 2024

Vogue Dress V1929 - I Made Two

This is almost an all photo post.  It's took my awhile to get pictures, even though I've worn both dresses.  More the ever, my focus is on the event or activity vs. taking pictures of my wearing a new make.  Within a week I made a second dress.  This version is exactly the same as the first.  So here goes pictures of my wearing Vogue V1929.


Wednesday, February 10, 2021

Presto Popover Top - Naughty Bobbin Pattern


This was my first time using Naughty Bobbin patterns.  And I decided to try the Presto Popover top.  

Pattern Description from the website: The Presto! Popover Top is designed specifically for knits for the wash and wearability your daily life needs.  Knits with 5% or more stretch, especially ITY knits and rayon/elastane come in all colors and patterns, so make more than one and get on with your life.  Good bye washday blues!  With it’s clever double-front V-neck collar construction and the always comfy 3/4 sleeve the Presto! sews up quickly on the serger, but can be made on a zig-zag machine, too.  Can be made in heavier knits for winter, lighter knits for summer. Excellent choice for sheerer knits.

For its ease, comfort and a fast sewing project, you’re gonna love the Presto!


Pattern Sizing: It comes in sizes small to 4 x-large.  I used large with a few tweaks.


This is the first version made.  I call this my wearable muslin.  For the other three tops, I added a few inches to the bottom.  I could use a little more move in the bust area.  So when I make it again, I do a little FBA (no dart) to have a better fit.


My tops look exactly like the drawing and the photos.  The instructions were very good and easy to follow. 


I really like the construction of the front of the top. The double layers of fabric and hide "body details" that aren't as flattering.  The seam down the center front also has a slimming affect.  Another detail that I like is the neckline.  You can choose to lower it and bring it up a bit.  Your choice.


All of the fabrics that I used were from FabricMart Fabrics.  The red and blue are a crepe knit that has a beautiful drape. The purple/pink print  and the black are jersey knits.  All fabrics have about the same amount of stretch.

My alterations were minor.  And like I said, I need a little more room in the bust area. When I make it again, I think I make it into a dress.  Rhonda gave me that idea when I saw her dress version on Instagram and on her blog.

This is a neat pattern that is flattering on most figures.  Try it. It easy and doesn't take a lot of time.

Happy Sewing!
C  


Thursday, January 23, 2020

Merlot Crepe Knit Coordinates - Sewing Workhop Pearl Cardigan and S9017 Pants


Today I'd like to share an outfit I made for my book club holiday party (2019).  I wanted to keep it simple. I paired the Mood's Merlot crepe knit with the Sewing Workshop Pearl cardigan and Simplicity S9017 pants.  This is a beefy fluid knit that is perfect for fall and winter apparel.   Before cutting into it, I tossed it into the washer. It came out of the dryer with the same touchable softness, unchanged color, and beautiful recovery.


Jewel tones are my favorite.  The rich hues of purple, red, and green are staple colors in my wardrobe. I'm always on the hunt for these vibrant beauties.  That's why I had to have it.  Too bad, it's no longer available, but there are several gorgeous purple textiles in Mood's warehouse just waiting for you.

The Pearl Cardigan is loose fitting with a front casing and drawstring to ruche, cascading side panels, back waist seam, long sleeves and narrow hems.  The wrong sides of the cardigan will show.  The cardigan can be made up in a variety of fabrics from ponte knit to linen and silk.  All sizes are available in the pattern XS to XXL.  I used a size large with a lot of modifications.

For the most part, it looks like the drawing on the envelope.  From the pattern drawing it is difficult to see the fullest of the collar.  There is quite a bit of fabric that bunches up around the neck. 


The instructions were super easy to follow. Nothing confusing about how to assemble the cardigan.  That was one of the things that I especially liked about it.  My challenges were more with the fit and choosing the appropriate size.


My other likes were the drawstring and the drape.  This was an interesting design element.  You could wear it loosely drawn or as I'm wearing it with lots of ruching.

My dislikes are the huge amount of fabric that bunches up around the back of my neck.  If I make it again, I will definitely reduce the width of that area.  Secondly, the length of the shoulder seams.  Extremely long.  The shoulder seam was about 1.75" too long for me. Thirdly, the size large was like an XXL on me.  This pattern runs BIG.  I had to take it in several inches all the way around.


 My other adjustments:

  • For starter no FBA needed.  Hooray!
  • Added center back seam and back darts.
  • Reduced length of shoulder seams by 1.75"
  • Reduced the side seams by 1.5"
  • Reduced width of the sleeve by 1.5"
All of these reductions gave my cardigan some shape, and now it looks like the picture on the envelope.  Happiness..,

With that being said, next;

The Pants Simplicity S9017

Easy, easy..,

Front, back, and waistband.  These pants sewed up like your typical pull-on pants.  No significant changes other than to lengthen the pants by several inches.  I don't particularly care for cropped pants.  From start to finish, it took me about 2.5 hours to make them, which was a great finish to an outfit that I'd spent more time than I thought I would.


In the end, I was able to wear my new holiday outfit with a smile.  So happy this one did not hit the can!

Happy Sewing!
C


Monday, January 6, 2020

Plaid Crepe Knit Top - McCall M6963


McCall M6963 was the next to last top that I made on New Year's Eve.  The goal that day was to make something quick and easy to end my year of sewing projects.  Last year was the year of knit tops.  I made over twenty.

Again, this pattern was already adjusted for fit.  It is also a Palmer/Pletsch pattern with fit instructions included.  The design is basically a t-shirt pattern with two variations of a cowl neck.  I used this to make another one of Rhonda's sleeve designs.  It's still available on the McCall Patterns website.  There are two size groupings:  8 to 16 and 16 to 24.  I used size 14 with modifications.

The fabric that I used is a beefy crepe knit from the New Rainbow Fabrics on Roosevelt Road. At first glance, I had to have it.  One of the things that I discovered while cutting out the top is that the plaid is not printed straight on the fabric.   From one end to the other, crosswise, the print is slightly off.  So it was difficult getting the plaid to line up throughout the top.  But I think I did okay.  Not perfect though.

My top does look like the photo on the pattern envelope with the exception of the drape of the cowl.  Mine has a little more body than the fabric used for the pictured top.  My fit adjustments produced a few more seams.  But other than that, it looked the same.

The instructions were typical and nothing confusing about them.  The bonus is that the pattern has fit instructions and some additional sewing tips.

I liked the cowl drape neckline variations.  As far as the rest of the pattern, it's a typical t-shirt pattern.  No dislikes.


My alterations:
  • FBA
  • Swayback and center back seam
  • Changed the sleeve length 
  • Prominent Shoulder Blade adjustment
I will use it again for sure.  It's a easy wardrobe builder.  It looks great underneath jackets and cardigans as well as by itself with pants or a skirt.  All level sewists can enjoy making it and wearing it.

Worn with Christine Jonson Travel Trio Pants

Both M6964 and M6963 t-shirt knit tops were a great way to close out my sewing projects for 2019.  They were easy and quick.  To start the new year I have two great looking tops to coordinate with other separates in my wardrobe.


Happy Sewing!
C


LinkWithin

Blog Widget by LinkWithin