Thursday, December 27, 2007
Inspiration Coat and McCall's 5247 - Final Chapter
I finished DD's coat on December 23rd, but didn't get a chance to post my final review of the process until now.
Making this coat has certainly been an adventure. Last Summer, DD and I spotted this coat at the Nordstrom online store. Immediately she requested that I make it for her. I agreed, but needed to find a pattern to follow. Then to add to the challenge, I decided that I wanted to "think like a designer" and create a fall collection for myself and DD. Well, I been successful with creating DD's collection, with only two pieces to go. But as for me, The challenge was too great. I only came up with three dresses so far. Back to the coat...,
I really wanted to have the coat made by Christmas; and it was, December 23rd. My version is slightly longer than the inspiration coat. It green (loden) instead of black. DD was very happy with the results.
Over the past few weeks, I have documented my process on creating this coat on my blog. I will refer to those posts throughout this review as not to rewrite the process. There goes.
Pattern Description: McCall's 5247
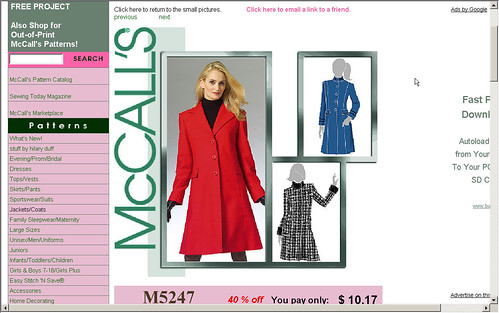
MISSES’/MISS PETITE LINED COATS: Fitted coat, mid-knee length has princess seams with topstitching trim, side seam pockets, mock flaps, back button-on band and vent; coats A and B have stand-up collar; coat A has purchased trim; coat B has contrast collar and cuffs; coat C has notched collar.
Pattern Sizing:
6-22. I used a size 8.
Did it look like the photo/drawing on the pattern envelope once you were done sewing with it? The top portion of the coat is similar to the original coat; the bottom is totally different. More on that below.
The instructions were pretty clear, but I ended up developing my own method of putting the coat together. I spent some time studying the pictures inspiration coat and the pattern pieces. I also studied the construction of some of my ready to wear coats to get an idea of how to attach the lining at the bottom of the coat.
Starting the Process
Fabric Used: I purchased the coating from Ann's Gorgeous Fabrics
Polyester Satin Lining in winter green from JoAnn's Fabrics.
I found the buttons at Vogue Fabrics. In the notions sections Vogue has sale items placed on the counter near the register. One of the on going sales items is a box of buttons. So the customer can fill a cup with buttons, which is provided by Vogue. Each cup sells for $2.00. Well I stood there and selected each button to go into my cup making sure I had enough for the coat.
Buckle was hard to find. So I went to the thrift store to see what I could find there. Found the buckle for $1.60 attached to a belt.
Pattern Alterations or any design changes you made: I started the process of redrafting the pattern the Tuesday before Christmas.
Redrafting, Fitting and Muslin
Second Fitting
Making more adjustments
Would you sew it again? I probably will not sew this particular version of the coat again. But I will certainly challenge myself with more interesting projects in the years to come. It was a great experience.
Conclusion It was a challenging experience with good results. I made my DD happy.
Urban College Girl - Last Knit Top M4303
I made view C previously with modifications to the sleeve. This is the fifth and final knit top for DD's UCG collection. I've completed most of it with only a vest and pair of slacks to go. This review is of view A.
Pattern Description:
Misses/Miss Petite Tops for stretch knits only. Tops have neckline variations, back zipper closure, topstitching and sleeve variations. Top A and B have sleeves with slanted hems. Top B has lace edging. Top C and D have two piece sleeves and purchased trim. Top C has contrast lower sleeves.
Pattern Sizing:
X-Small to X-Large. I made a small.
Did it look like the photo/drawing on the pattern envelope once you were done sewing with it? Pretty much. I omitted the zipper and front and back neck facings. Instead I used the binding method described in Kwik Sew's Beautiful Lingerie, pages 26 and 27.
Were the instructions easy to follow? Yes. They were easy to follow.
What did you particularly like or dislike about the pattern? My DD likes tops with bell sleeves. No dislikes.
Fabric Used: Knit fabric from Vogue Fabrics
Would you sew it again? Would you recommend it to others?
Only if DD wants another top out of this pattern.
Conclusion Easy top to make.
Urban College Girl - Second Skirt S4961
I made this up after completing the coat.
Pattern Description: Misses' Pleated Skirts in Three Lengths. View D with modifications.
Pattern Sizing: 6 - 20. I sewed size 8.
Did it look like the photo/drawing on the pattern envelope once you were done sewing with it? The front of the skirt did. I changed the back and added two inches to the length of the skirt.
Were the instructions easy to follow? Yes. They were straight forward.
What did you particularly like or dislike about the pattern? Like pleated skirt. Great match for the plaid fabric that I had in my stash. Nothing to dislike.
Fabric Used: Red/Blue plaid from Vogue. Purchased about three years ago.
Pattern Alterations or any design changes you made: I dont' know what I was thinking when I purchased this fabric; I only brought 1 1/2 yards. I didn't have enough fabric to properly line up the plaid pattern on the skirt pieces. So I eliminated the two side back panels. I used the center back piece to cover the entire back of the skirt and added darts to fit the waist.
Would you sew it again? Would you recommend it to others?
I have many more skirt patterns to try.
ConclusionThis is a great wardrobe builder.
Hoodies - M4675
I've made view C of McCall's 4675 twice before for my DMF. He really likes them. So he asked me to make a few more. Sorry this photo isn't good. No pictures of him wearing it. Maybe he'll let me take one later; but I doubt it. :-)
Pattern Description:
MISSES’, MEN’S AND TEEN BOYS’ TOPS, PANTS, SOCKS AND BLANKET: Tops A, B have V-neck, shaped hemline and contrast binding; top C has side slits and hood with drawstring; pants have casing with drawstring; socks have non-skid bottom; instructions given for blanket with contrast binding.
Pattern Sizing:
X-Small to X-Large. I made an X-Large.
Did it look like the photo/drawing on the pattern envelope once you were done sewing with it?
Yes and No. I added a front pocket using the pocket pattern of Simplicity 5362
Were the instructions easy to follow?
Yes. They were pretty straight forward. Nothing confusing or complicated.
What did you particularly like or dislike about the pattern?
Fabric Used: Anit-Pill Fleece from JoAnn's Fabric
Pattern Alterations or any design changes you made:
I made minor design change by adding the pocket. I made three of them: grey, blue, and black. The grey and black have the front pocket with no side opening at the hem. The blue hoodie has the openings, no pocket. I overlocked all of the edges. So I didn't tuck in the raw edges as suggested by the instructions.
Would you sew it again? Would you recommend it to others?
Yes. My cousin wants this same hoodie in a plum colored fleece.
ConclusionThis was a easy hoodie to make. I would recommend it to others
Monday, December 24, 2007
Saturday, December 22, 2007
Inspiration Coat and McCall's 5247 - Part IV
Yesterday I spent the majority of my sewing time redoing things that didn't look good:
1. All of the tabs were ripped out and replaced with tabs that were a combination of the lining and fashion fabric.
2. Ripped out the sleeves and removed the excess in the arm hole area.
3. Replaced the 1/2 inch shoulder pads with 1/4 inch pads.
4. Remade the belt; it was too short by a few inches.
5. Removed the pockets and resewed the side seams.
6. Removed excess from hemline of the lining.
Additional work done:
1. Attached lining to sleeves.
2. Applied interfacing to the hemline of the coat.
3. Top stitched the front and collar.
4. Made button holes.
Today:
1. Go to thrift store to look for a buckle. I have searched the internet and stores. Can't find one that I like for this coat.
2. Hem the lining and coat.
3. Sew on buttons.
4. Tack lining to the shoulder and underarm seam allowance.
5. Attach buckle if I find one.
6. Press and I'm done.
Friday, December 21, 2007
McCall's 4175 - Second Jacket
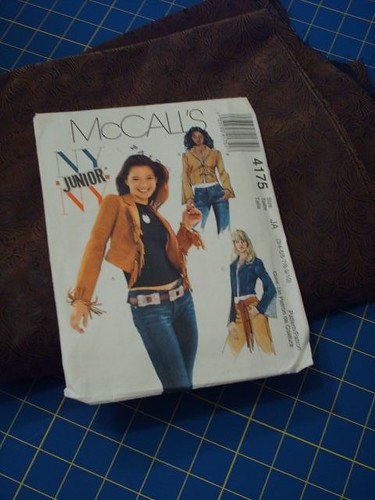
While I was waiting for DD to come home from work, I sewed another jacket from McCall's 4175. This time view C. I made a few changes.
At the front, I added button loops and a tab/placket (I am not sure what it's called-couldn't find it in any of my reference materials). I have seen this style on RTW garments. (Didn't do the final press yet.)
On the sleeves, I added rhinestones. These I purchased from Hancock's several months ago. The original plan was to add them to a pair of jeans but was concern about the application and the prongs...,
The rhinestone were only applied to the sleeve; not the seam allowance. I used the seam allowance to cover the pronged area to protect the skin and other clothing worn underneath the jacket.
Inspiration Coat and McCall's 5247 - Second Fitting
For the past three days I have been working on the collection coat for my DD. Sixteen hours sent so far. I have completed at 2/3 of the sewing. Let me tell you there have been some challenges:
- Thickness of fabric. There are some areas that have up to eight or ten layers of fabric to sew, which is hard to manage. There is some top stitching needed at the mid-section where the bodice and the skirt are joined. I thought about graded the seam allowance to make it easier. I'm a little concern about burning out the motor on my sew machine. I do have a stand by machine, but my Singer Quantaum DSX is my favorite. As soon as I'm done with completing the last pieces of the fall wardrobe for DD, I have it serviced. I need a industrial sewing machine.
- Alignment of pleats and seams. I think the thickness of the fabric adds to this.
- Matching the lining piece to the altered shell. After making the redraft of the pattern I had to make sure the major divisions of the coat properly met on the inside of the coat. I did not change the drafted lining pattern pieces other than incluing a broad shoulder alteration. I didn't want to add any unnecessary complications. In many ready to wear garments that have mulitple pieces, the lining is simplified. So I followed that same practice.
- Pressing. It's a BEAR! It's so hard to get the tabs and the middle section seams to lie flat, especially in the shoulder area. It makes the seam appear to be uneven. I thought about putting something heavy on it to help the flatten process.
Here's a peek at the progress. Note: There is still some major, major pressing needed. I had DD try it on to see if the fit was okay and to say if everything balanced out. On the left front shoulder and upper arm hole, I need to take out 2/16 inch. It's still too broad. At first try, I thought I cut off the access evenly. Also, I put the pockets in as the direction instructed. They add too much bulk. I'll remove them as well. A pocketless coat. ..,um. The lining will be adjusted; it was cut 2 1/2 inches too long.
My DD, My Little Poet
Yesterday morning we received six copies of "Forever Spoken". My DD submitted an entry to a poetry writing contest earlier this year and was selected as a finalist. Needless to say, I am one proud mama. DD has been writing and is published in a few journals and periodicals, none of which paid anything. Tee Hee. This particular contest could yield a cash prize of $10,000. LAWD Have Mercy! Please let her win! We need some tuition money. We have at least three and half years to complete the bachelor and master's degree.
Here is her entry.
Distance
It hasn't really been long ...
But life makes it fell like forever.
Your voice telling me what you don't want to hear
Forces me to clutch at that which was never.
Lilting chords of what used to be,
But what never could exist tinkle in the back of my head,
And listening to that unending song,
The ebb and flow of together ...
I feel that long distance coming to an end.
I struggle and fight, cry and scream.
No amount of wanting or longing could ever fix this thing.
It's broken beyond repair. It never should have been.
I let that part of myself wither and die.
Shut you out to stop the pain
And float along in the wind ...
Lost myself to that long distance again.
I know it's only a feeble lie, an excuse to keep trying,
But if it never was ... then neither was I.
Wednesday, December 19, 2007
Vintage Pattern Give-Away - Final Set
I am Legend - Big Willie Style
Movie pick this weekend: I am Legend. This was a different type of movie for Will. He's a scientific and the only person left in New York City. He is immuned to a deadly mutating virus. I won't tell the story, but I liked it. It's a cross between "Cast Away" and "Outbreak" with a Stephen King twist, a little scary. It was exciting and thought provoking. A blockbuster this weekend.
I'm a huge Will Smith fan, since his days on the "Fresh Prince of Bel Air" show. So I'm a little bias.
Other movies seem:
Hitman - Didn't like
American Gangster - Like
This Christmas - Like
This is only my opinion of these movies.
To See:
Beowulf
The Mist
Things We Lost in the Fire
Perfect Holiday
Golden Compass
Debator??? New Denzel Washington movie out Christmas day
Aliens vs. Pedator out Christmas day
Tuesday, December 18, 2007
Mc Call's M5247 and Inspiration Coat
An important meeting was scheduled for Monday, first day of my vacation. So I decided to take Friday off and come into the office for the meeting. The rest of this week is reserved for me and whatever I choose to do. Mostly sewing to complete DD's collection coat.
Friday I was able to redraft the pattern and sew the muslin. The process was very time comsuming but well worth it. I was careful in my redrafting of the pattern measuring and calculating every change needed to make the pattern work for the inspiration coat, but I still have to make several more changes based on the muslin fittings one and two.
The first draft of the front and back pattern pieces were too long so I shorten them by 2 1/2 inches. The bodice pattern pieces are cut off 4 1/2 inches below the waist line.
I divided the side front and side back pattern pieces into two sections to follow the style of the inspiration coat. Seam allowances were added to the redraft of these pieces. This was also done to align seams with pleats of the bottom half of the coat.
The collar of the inspiration coat is taller and does not overlap. My first draft of the collar only included more height. DD will decide on the overlap. It gets very cold in Chicago.
The front skirt pattern of the coat is the wideth of the finished front and side front sections plus eight inches for the two pleats. I did the same for the back skirt pattern. Each piece is 16 inches long
Additional pattern pieces needed: Collar tab 7 1/2" long 2 1/2" wide; Belt 20" long, 3: wide (place this piece on fold--will adjust as needed for circumference of hip area--didn't make a muslin yet.); and 4 tabs 6 1/2" long 3" wide; 4 tabs 5 1/2" long 3" wide.
Muslin: I need to decrease the length of the shoulder seam. I included a broad shoulder alteration with the redraft of the pattern. The front and side front joining seam is slightly off. In the bust area, I will decrease the joining seam of the front by 3/4" and increase the joining seam of the side fron by the same amount. The lower part of the bodice needs to be taken in a little, but I won't reduce the side seams until I put the shell of the coat together. I want to make sure DD has enough move to add a sweater or jacket.
The back also requires some adjustment at the seams where the back and side back pieces are joined. At the base of the neck, I will take in the center back seam by 1" at center back. The collar is a waddler. Again, I'll test this as I go on the actually coat to allow for move to layer underneath the coat.
I cut the pattern at size 8; could have cut size 6.
Tuesday Morning
Ring, ring.
Me: Good morning Sweetie. How are you?
DMF: Good.., Good. How about you?
Me: Very well, thank you..., I wanted to remind you that I'm not working this week.
DMF: I forgot...,
Me: I know.
DMF: What are you doing today? Sewing or cooking? chuckle, chuckle...,
Me: Sign. Too funny..., That's not ALL I do.
Tuesday, December 11, 2007
More Dresses For Me - M5269 and M4930
Three weeks ago I laid and cut two dresses 5269 and 4930 for me. I picked up M5530 at Joann's on Sunday. I'll probably pair view C with M4930. Last year I purchased some faux fur similar to the pattern drawing that would fit the bill. We'll see how much of the sewing I get done before Christmas. Happy Sewing!
The Urban College Girl Collection - Coat M5247
Sunday I went to Joann's in hopes of getting the lining, buttons, and the buckle for DD's coat. They didn't have the color that I wanted. So I started searching for the buttons and the buckle. No luck with those either as I need fourteen buttons and a buckle of a similar design. This week I'll probably end up going to Vogue Fabrics to find what I need to complete the coat. So I bought three patterns (M5530, M5538, and M5198) and some thread. Later that night I read the pattern instructions and analyzed the photos of the inspiration coat. On Friday (vacation day), I'll re-draft the pattern pieces accordingly, then cut and sew the muslin.
Still not done:
- 1 knit top (half done)
- 1 vest
- 1 pant
- 1 pleated skirt(cut)
- 1 jean jacket (cut)
This will complete the collection.
Still not done:
- 1 knit top (half done)
- 1 vest
- 1 pant
- 1 pleated skirt(cut)
- 1 jean jacket (cut)
This will complete the collection.
Sunday, December 9, 2007
Butterick 4849
Finally finished Butterick 4849. This is one of many UFO's that I started last winter.
Pattern Description:
MISSES’ DRESS: Below mid-knee or mid-calf, A-line dress has bands, back zipper and sleeve variations. A: three-quarter length sleeves and contrast bands. B: long sleeves, contrast bands and purchased trim. C: long sleeves and purchased trim or ribbon. I made view A
Pattern Sizing:
6-20. I made a 14 with alterations. I added 3/8 inch to the side seams making them 1 inch to allow ample room for circumference fitting adjustments and fabric variations. This is a tip from Threads magazine, January 2006, number 122.
My dress did look like to drawing on the envelope, slightly longer. For the most part the instructions were easy to follow. I used a few of my own preferred methods.
-For the front band, the pattern suggests slipstitching the pressed edge of the facing over seam. I carefully machine stitched it instead. I did the same for the sleeve band.
-I've never like the method for finishing the neck facing where the zipper and facing meet. I used the machine stitched method described in a featured tutorial on Pattern Review and in "Singer 101 Sewing Secrets", pages 70 and 71.
The trendy look of this dress really appealed to me. I liked the high waist and the contrasting front and sleeve bands.
Fabric Used: Some type of polyester animal (black/white) print w/a crepe feel/texture to it. It's kinda puts me in the mind of a double georgette, but heavier. I got it on sale at Hancock last winter at Christmas time. The contrasting fabric is polyester taffeta type from Vogue Fabrics.
Reference materials Used:
Threads magazine, January 2006, Number 122
Singer 101 Sewing Secrets
Pattern Alterations and design changes:
I had to make the bodice of the dress three times before getting it right. There is no excuse for the first make of the bodice. I cut the top thinking I had it all figured out based on other bodice alteration of the same type. Wrong. The front gaped open just above the bust area, the armholes and back were too tight. So I looked at Ann's and Sharon's pattern alterations for FBA again. I graded the bodice up to a size 14. Second try, I made a muslin to test the changes. Still there was a gape in the front. So I pinched out the excess; then transferred the change to the pattern pieces. The sleeves were still a little too snug. So I lower the opening about 1/2 inch.
Altered pattern pieces.
Lucky I had about a yard of fabric left. So I cut the bodice pieces based on the alterations of the muslin.
I made a broad back alteration and added three inches to the skirt of the dress.
Instead of inserting a standard zipper, I inserted an invisble one.
I don't think I'll sew it again for myself. It is a unique style of dress. But I would recommend it to others with alterations.
I like the look of this dress; it's trendy and stylish.
Saturday, December 8, 2007
Vintage Pattern Give-Away Part II
Here is the second set of give-away patterns. There are still plenty from the first. Please ask for as many as you like. Same deal as before. Claim it in the comments; then send me an e-mail with a forwarding address. Thanks!
B2457, Size 14, uncut
V5972, Waist 28, Hip 38, partially cut
B2591, Size 16, uncut
V7940, Size 16, cut
V7900, Size 14, cut
V5156, Size 12, cut
V9792, Size 12, cut
V5624, size 12, partially cut
A7716, Size 20, uncut
V7331, Size 16, cut
M6490, Sizes 20 1/2 - 24 1/2, uncut
M5729, Large, uncut
M5609, Size 16, uncut
M5704, Sizes 22 - 24, uncut
M5708, Size 22-24, uncut
S6917, Sizes 16-20, uncut
S9029, L and XL, uncut
Subscribe to:
Posts (Atom)