Monday, February 23, 2009
Snake, Raddle, and Roll - Trend #4
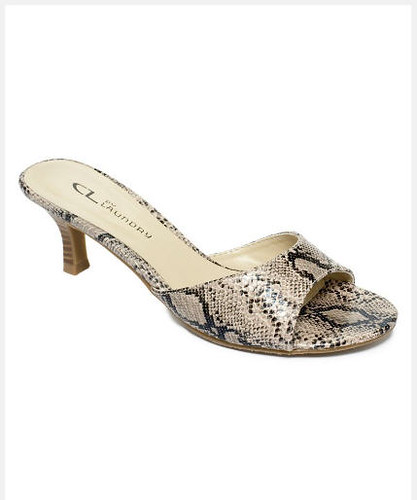
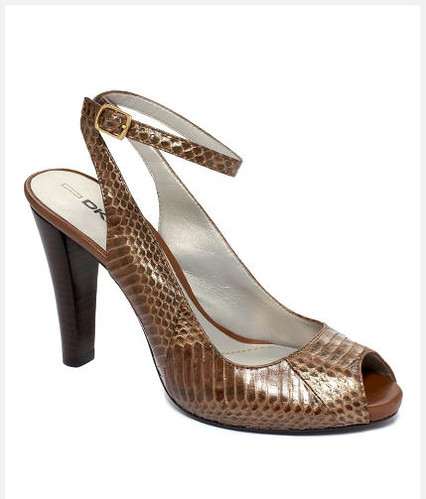
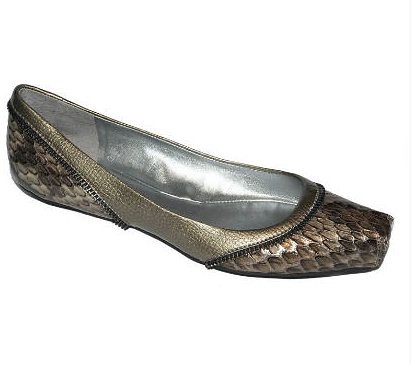
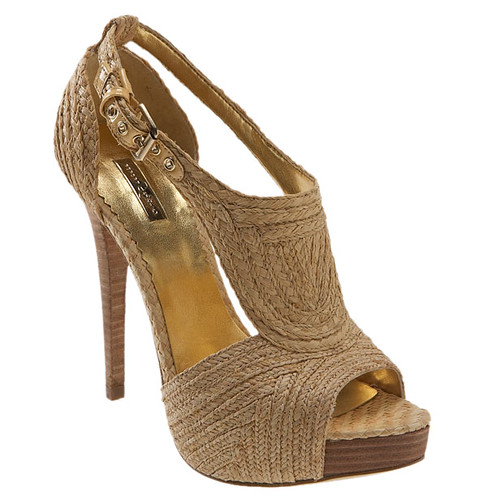
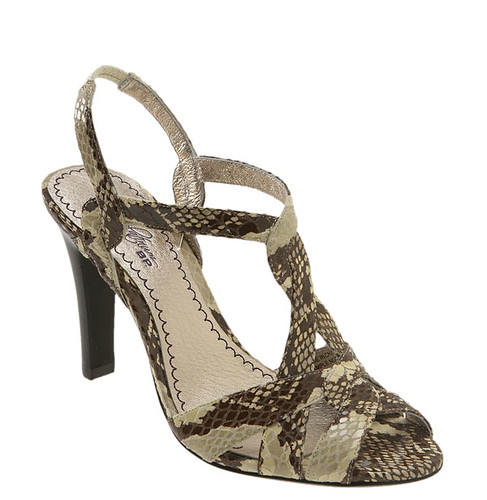
Trend #4 - Snakeskin shoes.
Best For: Women who want to make a statement without going overboard.
How to Wear Then: Real Simple magazine says: "As a sharp counter point to basics and monochromatic outfits."
- Nuetral-colored snakeskin pumps adds sophistication to a suit
- Strappy heels with a dress or a skirt, refined but sexy evening look
- Flats or sandals in pink, yellow, blue, or a metallic to dress up weekend clothes.
Worth the Investment? No doubt. This trend is a main stay. Faux snakeskin looks just as good is the real pathon.
Where to get them:
Macy's of course - Check it out!
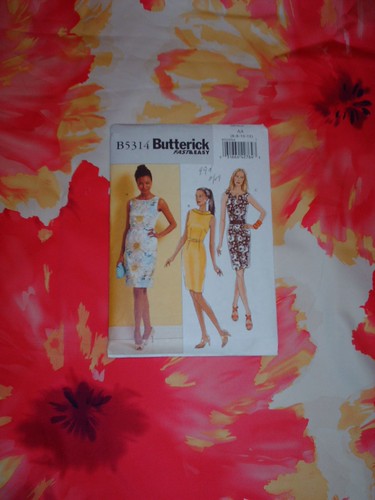
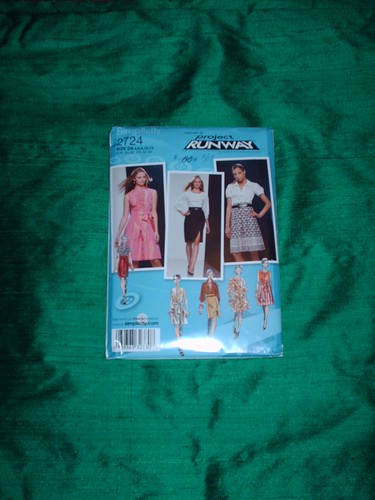
Two More Projects for Spring - B5314 & S2724
Two More Projects are making their way to the cutting table. One for me and the other my DD.
For me: B5314, View A The fabric was purchased at Hancock's; it's a stretch woven that is bright and very colorful. ..., hmmm..., So Spring like.
and..,
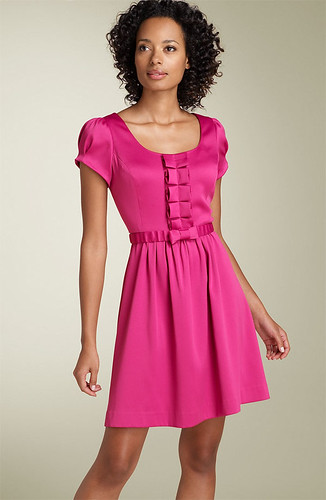
For DD S2724, a version of the pink dress, but with 3/4 length sleeves DD fabric is a emerald silk dupioni from Hancock's.
For me: B5314, View A The fabric was purchased at Hancock's; it's a stretch woven that is bright and very colorful. ..., hmmm..., So Spring like.
and..,
For DD S2724, a version of the pink dress, but with 3/4 length sleeves DD fabric is a emerald silk dupioni from Hancock's.
Sunday, February 22, 2009
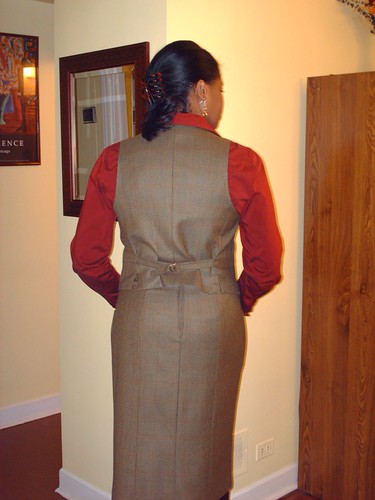
Pencil Me In - B5249 & S2862
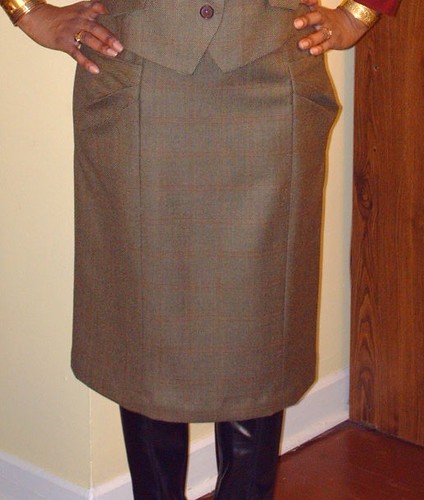
Pattern Description: Misses' Skirt and Belt: Skirts A, B, C, D have princess seams, back zipper, and high waist. A, C: carriers and self-belt with purchased buckle. B, D: side front pleats and pockets. C, D: self-ruffle, A, B, C, D: mid knee length.
Pattern Sizing: 6-20; I made size 14, view B.
Did it look like the photo/drawing on the pattern envelope once you were done sewing with it? Yes it does.
Were the instructions easy to follow? The instructions were very easy to follow.
What did you particularly like or dislike about the pattern? What drew me to this pattern was the interesting pockets of view B and D. One of my occasional clients asked me to make a few pencil skirts for her. This pattern was the suggested pattern. I really liked it so I decided to make view B for myself.
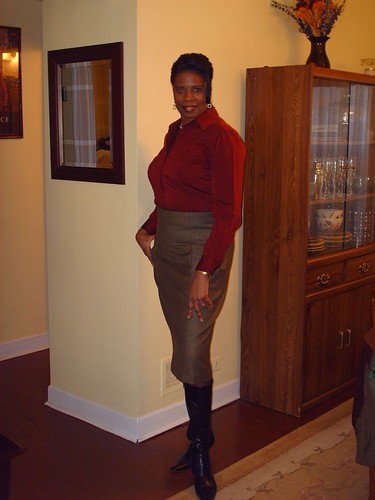
Fabric Used: Wool from Fishman's Fabrics on Roosevelt and Deplaines. I purchased this fabric last year at this time. It's a very nice wool that I got for half price (2 yards remnant for $22.00). I was able to squezze a vest (S2862) out of it.
Pattern Alterations or any design changes you made: I added a few inches to the bottom. Also fully lined it.
Would you sew it again? Would you recommend it to others? Yes and yes. This is a great skirt pattern.
Back
Conclusion: This is a nice skirt pattern that is easy to sew.
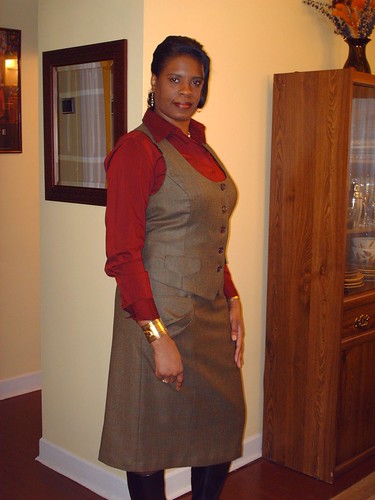
Pattern Description: Misses' lined vest, hat, wristlet, purse, and tote. Hat in three sizes SML.
Pattern Sizing: 6 - 20; I made size 14, view A with several alterations/changes.
Did it look like the photo/drawing on the pattern envelope once you were done sewing with it? Yes.
Were the instructions easy to follow? Yes. Nothing that's really confusing.
What did you particularly like or dislike about the pattern? I like that style of the vest. Also a plus: the pattern contains several nice accessories that I may one day try. So far nothing to dislike.
Fabric Used:Wool remnant purchased at Fishman's last year. This vest was made from the leftover scraps of B5249.
Pattern Alterations or any design changes you made: I made several alterations and changes.
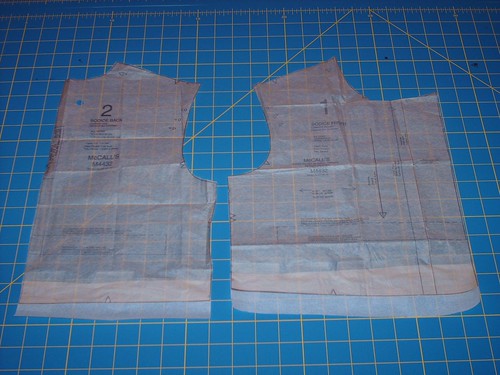
- FBA alterations following methods in Fits for Real People. First I changed the Stitching line for the side front. Then I slashed between the notches to add the needed room. Next I altered the front.
- Used two D rings instead of a buckle.
- Didn't use lining for the back -- use fashion fabric for the tabs as well.
- Increased the width of the tab by 1/4 inch.
- Increased the sea allowance at the upper side back to eliminate gap.
- I didn't have enough fabric for the front facing -- so I fused 2 layers of interfacing to the front. This work very well.
- I understitched the edge of the vest before joining the lining side seams.
- I used five buttons instead of four.
Would you sew it again? Would you recommend it to others? Yes and yes. with alterations where necessary.
Conclusion: I like this pattern. My vest turned out well on the first try. No muslin, just follow my normal alterations. Give it a try.
See more pictures on Flickr.
Tuesday, February 17, 2009
In the Nude - Spring Trend #3 2009
Everyone can Spring into the nudes this Spring. There is a shade to complement every complexion. But is best for olive skin tones.
Here's how you can work it in the nude!
The Key: achieve a soft flattering look go deeper or lighter than your complexion, so there's contrast.
Beigey or Peachy nudes work with olive skin
Blush and rose tinted nudes marry with fair and light skin tones
Carmael or chocolate shades complement dark skin
Shoes - are virtually foolproof: Neutral stilettos is perfect for every outfit
Worth the Investment: Of course. They appear every year.
Monday, February 16, 2009
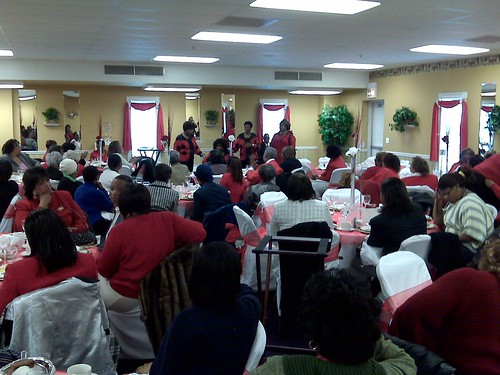
Delta Sigma Theta - February Gospel Brunch
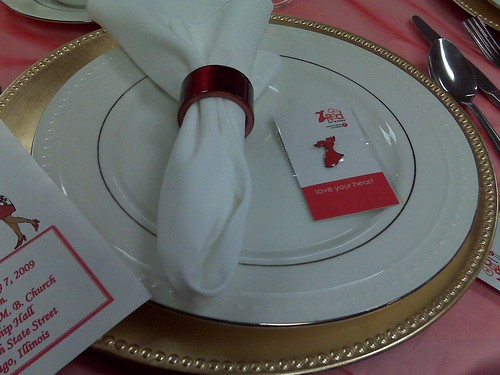
Delta Sigma Theta Sorority, Inc. Brunch Program. The chapter also gave everyone a floating red dress from the AHA, a red Bible (New Testament), and a brochure about wellness.
One of my mentees invited me to the Delta Brunch, held on February 7, 2009. Songs of Praise and words of inspiration and encouragement filled the day. What a joyous occasion.
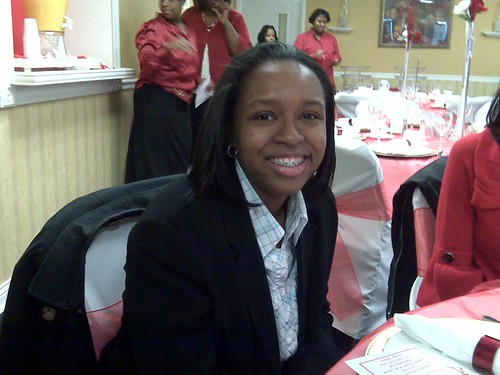
Miss. Dominique - Graduate of the University of Pennsylvania and an active member of Delta Sigma Theta Sorority, Inc. Dominique and I get along famously. We talk a lot and share life experiences. You would think, as her mentor, that I would be the primary teacher, but often, she teaches me. She is a cornucopia of knowledge and information. She is well travelled, well educated, and has a zest for life. Her energy is contagious.
My DD means the world to me and I'm so glad that we get along. She appreciate my friends and never feels uncomfortable around them. That's makes me very happy. The icing on the cake is that other young people also enjoy and appreciate my company. I really love being around young people. One of the most gratifying things about my relationships is that I have earned their trust, respect, and affection. They are the future, and I try empower them with my knowledge and experience to help them work through situations so that they can make the best choices and live the best lives. As God says: we are stewards over them and must assume the position.
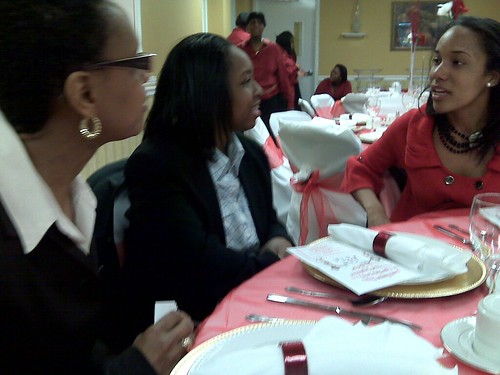
Here is my girlfriend, Janice (Dominique's mom), Dominique, and GalPal Ashley. A little story on Miss. Ashley. She is a native of Philly, but now resides in Chicago. Last year Ashley suffered an aneurysm. She is well and vibrant, working in Chicago.
We know and believe that God is a healer and that all illness is not unto death. We thank God that Ashley is here with us, celebrating life.
The Barrett Sisters of Chicago have been singing for over thirty years, now in their eighties and last seventies, still singing. The lead singer's daughter, Dr. Sue, was the MC for this occasion. It was wonderful and exciting. So many beautiful, successful, and talented women on the program and in the audience.
A former member of my church (Tina Brown-Bryant) accompanying the Barrett Sisters, as one of them had lost her voice. Tina was also one of the guest soloists and sang a few songs. These women can sing; always a treat.
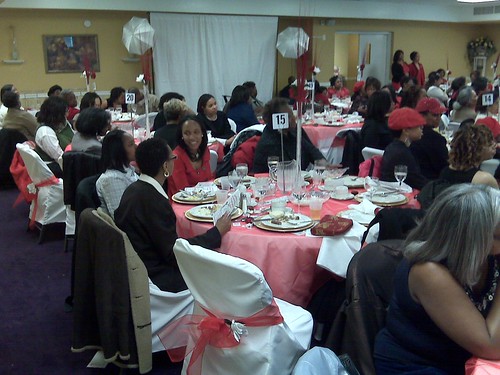
This is our table. The empty chair is wear I was sitting. Funny thing... I never think about having someone take my picture. Ugh...
No pictures of me, but I had a wonderful time and left the event feeling encouraged to do better and be better for whatever comes.
Peace!
C
What's New?
I hope everyone enjoyed their Valentine's Weekend. I did: shopping, dinner out, and good company. Sweet..., I like to "Valentine Day" all year long. It's alway great to have time off from work to enjoy the fruit of your labor. Especially these days.
Thanks for commenting of the recent fashion trends. I really enjoyed hearing what others think about the Spring trends. This week I will post a few more. I won't "answer" the "call" of every fashion trend, but I like to sharing fashion ideas from magazines, shows, and online. It seems as if the trends are all over the place, in style, color, texture, and silhouttes.
Sewing News: I spent more time organizing projects for clients, DD, and myself. The clients just keep coming. Three new ones over the weekend (referrals) for alterations. For my good, one decided to go elsewhere. The remaining two are simiple. hemming of a dress and hemming a pair of pants.
I'm almost done with two projects cut for myself. (vest-S2862 and skirt-B-5249). I'm so pleased with the fitting results of the vest. My Palmer/Pletsch: "Fit for Real People" is a must have for any sewing library. Still sewing the winter wardrobe. Peter Sow dress has been cut, The popular, galaxy dress has been cut, pants and skirt for DD have been cut. So alot of projects started for me and DD, but nothing finished yet.
The same is true for graduation and prom clients. One niece is coming tonight with fabric and pattern. My other niece will come for her muslin fitting this weekend.
Thinking about dresses for me and DD: Easter, Pastor's Anniversary party, and a ball (church friend -company party-pending). As always, I have a lot on my plate. So I need to ramp it up a bit. I will probably take a sewing vacation in March/April to help move things along.
Working very hard testing, webinars, and functional support. The budget for our project has been approved. So I get to keep this job a little longer. Thank God. So I think we're on for a trip to Louisiana late Spring to attend the annual convention hosted by our product vendor. All is well and very busy.
Happy Sewing!
C.
Friday, February 13, 2009
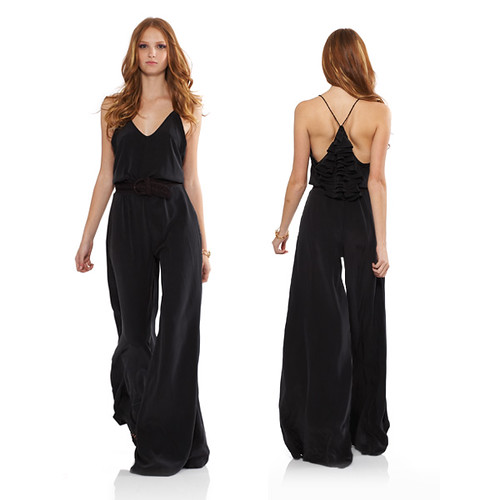
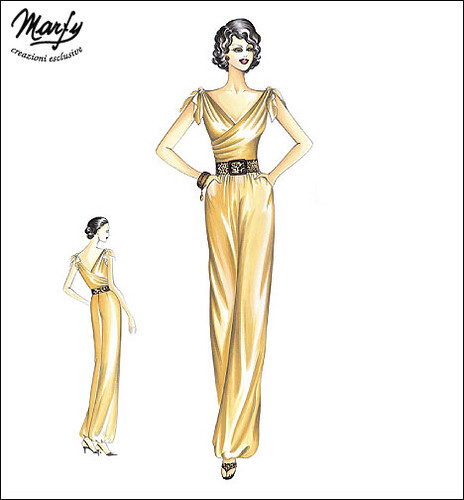
Jumpsuit - Fashion Trend 2009
Thursday, February 12, 2009
Spring! We're Anxiously Waiting
Over the weekend the midwest started to experience a warming trend. By Tuesday it was 61 degrees in the afternoon, and when leaving the office (5:30pm) I noticed a gleamer of sunlight. Spring is on it's way and I'm so, so happy with the anticipation of sweet smelling of flowers and green grass.
On the sewing table are several garments cut from heavy fabric: a skirt, vest, jacket. While Spring is definitely on my mind, winter will stick around Chicago for at least another six to eight weeks with a occassional day of warm weather. We have had snow storms as late as April. As we experience intermittent days of Spring, my thoughts are on what I want to wear this Spring.
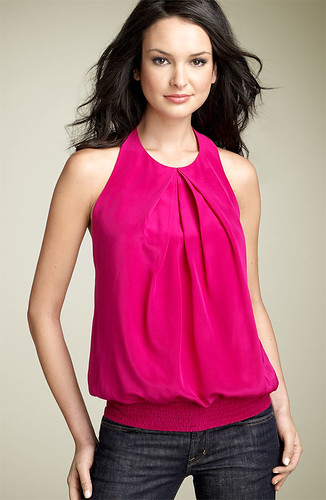
Starting with color; fuchsia is a favorite becoming a focus point in my wardrobe about every eight years or so. This Spring it's named as a trend color by "Real Simple" magazine.
Best For:
Women who aren't afraid of a second look
How To Wear It:
Bold dress, break it up with a belt or jacket
If you are busty or have full hips, avoid it in those areas.
Blonds in hot pink is a no, no.
Worth the Investment:
YES! Buy one great piece; not to be worn every day, but a beautiful compliment to your wardrobe.
All items posted can be purchased at Nordstrom.com.
Sunday, February 8, 2009
Celebrating African-American History Month -NL6147
This is a review of the second outfit made for a friend.
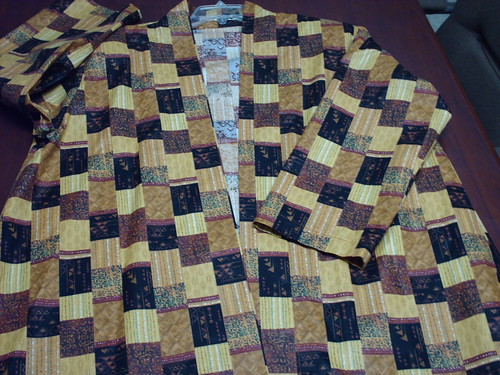
Pattern Description: Misses' Coordinates: unlined jacket, pull over top, elastic waist pants and skirt.
Pattern Sizing: 10 - 22. I used size 20. Views E and C
Did it look like the photo/drawing on the pattern envelope once you were done sewing with it? Pretty much. I made a slight change to the back of the skirt (making a vent instead of a slit). Finished vent.
Were the instructions easy to follow? Yes. Nothing confusing.
What did you particularly like or dislike about the pattern? Ms. Bonnie requested some simple skirts that could be easily put together. This pattern fits the bill.
Fabric Used: Cotton from WalMart
Pattern Alterations or any design changes you made: The only change was making the vent in the back of the skirt.
Would you sew it again? Would you recommend it to others? Yes. I originally bought this pattern for the top. So I will try it for myself.
Jacket on Table
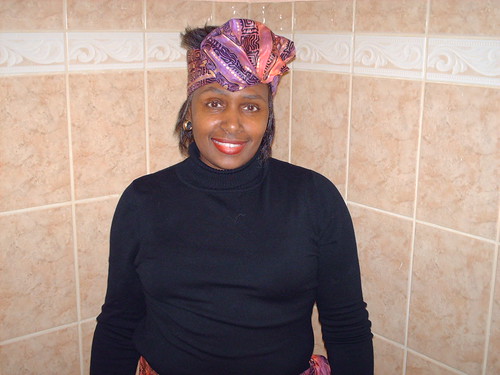
Headwrap made from leftover fabric, cut 8"X50"
Conclusion: This is an easy pattern that I would recommend to beginners. You can sew up some easy coordinates in no time at all.
Celebrating African-American History Month -McCalls 3145
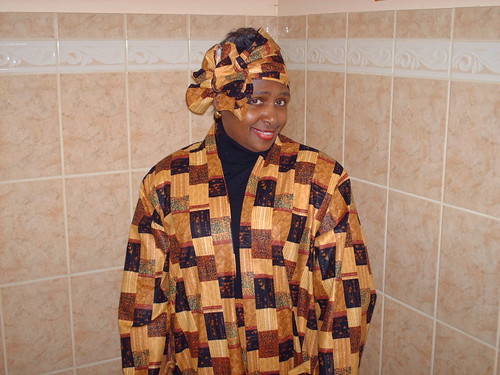
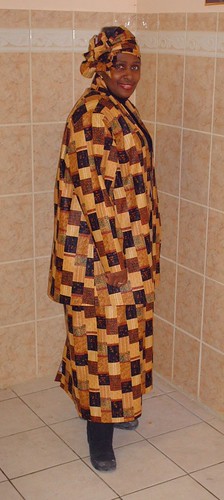
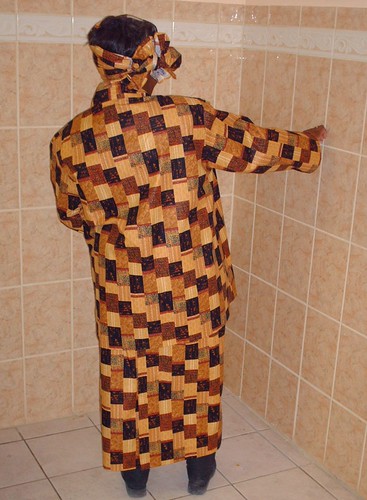
In celebration of African-American History Month, one of my church friends wanted two Afro-Centric outfits made. So she asked if I would do the honor. She basically wanted skirts and head wraps. This is the first of the two projects that I made for her in January.
This skirt is easy, easy. I've made it for myself, clients, and one of my sisters countless times. It sews up really fast and can double as a cover up over a swim suit.
Pattern Description: MISSES' WRAP SKIRT IN THREE LENGTHS: Wrap skirt has back darts and opening in right side seam for tie to pass through; all edges of skirt are narrow hemmed
Pattern Sizing:4 - 22 (x-small to X-large. I made Large. View B
Did it look like the photo/drawing on the pattern envelope once you were done sewing with it? Yes it did.
Were the instructions easy to follow? Yes. This is a make in 1 hour wrap skirt.
What did you particularly like or dislike about the pattern? Everything to like; no dislikes. It's quick and easy and a classic style. Plus Ms. Bonnie like it as well.
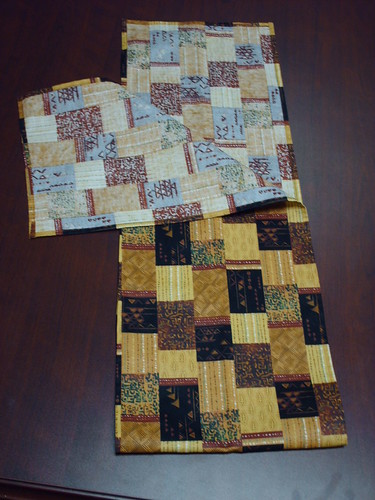
Finished Skirt on the Table
Fabric Used: Cotton print from Wal Mart
Pattern Alterations or any design changes you made: None.
Ms. Bonnie requested a head wrap to wear with this skirt, which I made from the scraps. The head wrap is about 12" X 36". Ms. Bonnie is quite the creative one. She gave me a mini head wrap tying lesson when I delivered the two outfits to her on Tuesday. Here are a few photos of the various styles.
Would you sew it again? Would you recommend it to others?
This pattern is out of print. But if you have it in your collection, do try it.
Link to all photos.
Conclusion: It's a great quick project. Good for beginners.
PS - Forgive the boots. It's cold, wet, and messy in Chi-town.
Happy Sewing!
C
Saturday, February 7, 2009
The First Aider's Dress Using McCall 4432
One of my church friends asked me to make the one and only junior first aider's a uniform. She told me what she had in mind, so I looked through my pattern collection to see if I already had something that I could use to make the uniform. No luck. So I searched the pattern books at Hancock's and found McCalls 4432, which worked perfect for this project.
The order was for a white jumper style dress that could be worn over a blouse. Fabric: something easy to care for, wash and wear. The little lady is about 10 years old and fits a size 10 child's pattern. Once I finished the seams on the serger, it took no time at all to finish the dress (uniform).
Pattern Description:
CHILDREN'S AND GIRLS' DRESSES AND HAT: Loose fitting, above ankle dress has raised waist, dirndl skirt and front button closure; A, B, C, D are sleeveless; E, F have short sleeves; C has contrast collar; D, F have a collar; A, B, C, E have pockets; B has contrast lower band; hat has crown, band, contrast brim and elastic back.
Pattern Sizing:
Children 3-6 and Girls 7-14 I made view B; size 10.
Did it look like the photo/drawing on the pattern envelope once you were done sewing with it? The basic form was the same, but I changed my version a little by adding 1 1/2 inches to the bodice and shorten the skirt by 4".
Were the instructions easy to follow? Yes. There was nothing confusing about them.
What did you particularly like or dislike about the pattern? This is an easy dress pattern that you could easily create a variety of dresses for little girls. No dislikes.
Fabric Used: Linen blend for Hancock's
Pattern Alterations or any design changes you made: As mentioned above I made two changes: I added 1 1/2" to the bodice and shorten the skirt by 4".
Would you sew it again? Would you recommend it to others? Probably not. But who knows.
Conclusion: This is a easy pattern to sew that only takes a few hours to make. Great pattern for beginners.
A Peak Inside the Gentleman's Over Coat
A few weeks ago, I was asked to altered a man's over coat (London Fog). The gentleman had lost weight and wanted the back and sides taken in a bit. Well in order to do that I had to take the lining a part to get to the inside of the coat to make the changes.
For the most part the manufacturer used the bag method of attaching the lining. The final seam of the lining was in one of the sleeves where they stitched it together after the coat was turned to the right side. After I opened the seam and turned the coat inside out, I was able to see the inner workings of the coat. This is all very interesting to me as I want to make more coats and make them better or as good as RTW.
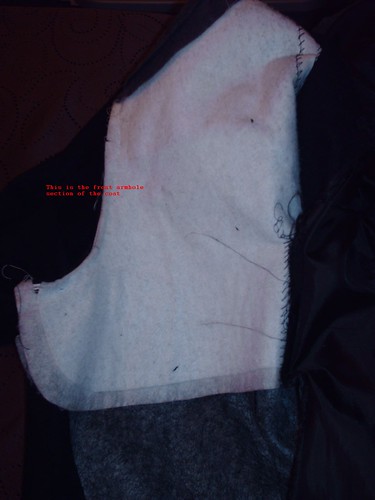
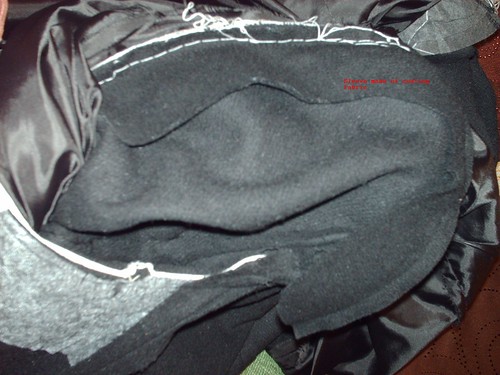
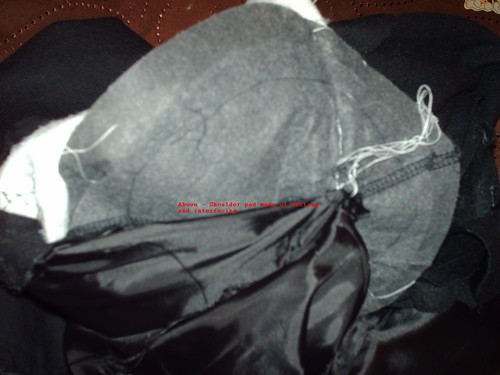
Here are a few shots of what I found on the inside:
At the shoulder, armhole and center front padding is attached to help smoothing and shaping of the chest area.
The sleeve head is made of the coating fabric instead of interfacing or batting.
The shoulder pads weren't anything special. For the most part they were made of interfacing.
Each of the armholes has two rows of stitching: one to secure the sleeve to the armhole and the other to attach seam binding to the armhole.
Every stress point (pockets, around the armholes, along the center front, collar and chest area, along the hems and back vent) was interfaced for added durability. Finally, the lining was attached at various points of the coat: at mid sleeve, underarm, shoulder, and along the back side seams.
At first I was not that thrilled to do this job, but after I started taking the lining apart I recognized the value of doing this alterations. I hope this information is helpful to someone who is interested in making coats.
Happy Sewing!
C
Monday, February 2, 2009
And The Stitching Goes On
This weekend I got a lot of sewing done. None of it was for me, but it felt great to finish three projects. All of them for clients.
The first was a dress for a ten year ago first aider (church). One of my friends asked if I would make the dress for their young member. I agreed to do it at no cost except for the material and notions. I actually finished this dress the last Sunday of January. But took a look at the measured length of the skirt and noticed that it was too long. So I shorten it by four inches and re hemmed the dress. This was a easy, easy project. After the seams were finished, it only took a few hours to make. It's nothing fancy. White linen blend from Hancock's, four buttons, all work done on the machine except for the hem. Full review and pictures later this week.
Second project was two Afro-centric outfits for another friend who fellowships at my place of worship. The original order was two head wraps and two skirts. As we talked about what kind of skirt and how long, she decided to add a jacket to one of the orders. All of the seams were finished the week before. So Friday and Saturday I put the outfits together. All sewing done by machine. More easy projects. Full review and pictures later.
A forth project is altering to a London Fog coat for a gentleman. This is an interesting project. The coat is a little too big in the back and sleeves. So I started the process by opening the lining in one of the sleeves to get to the interior of the coat. The adjusts were temporarily stitched. I wanted the client to try the coat on first to make sure the adjustments were correct. Believe it or not, I was excited about this particular alteration. The inside gave me a bird's eye view of the construction of a man's overcoat. There is a lot of padding and even seam binding at the armholes. This is a neat little learning experience for me. I am for the most part, a visual learner. This helps me with future coat construction techniques. I'll show a picture or two of the inside.
Subscribe to:
Posts (Atom)