
Sometime in January, I decided to do another "Shirt Making Project". To start, I cut out three shirt using Simplicity S1166. These shirts were in a bag in the UFO bin that I had almost forgotten about. This week I decided it was about time I made them. This is a pattern that I used before. The initial review and project here.
I like the shape of the collar and design of the sleeves. These details make it a little better than your average button down shirt (to me). They can also make or break the project as they are focal points of the garment. Making this batch of shirts was an opportunity to do a lot of top-stitching and paying attention to the simple details and construction processes.
Tip 1: Construction of the Collar
The collar is large and curvy ending in the typical point on each end. There are a few approaches to making the point just right. I posted Sandra Betzina's method of redrafting the collar pattern. The details: Part I and Part II.

For these shirts I used another method. Sorry I don't know what it is called. But, instead of sewing the seam and pivoting at the corner. I made it "squared" at the corner then I pivoted to continue. This is done in addition to "not" interfacing the corners of the collar.

The next few steps are critical: Use a pointer/creaser to help turn the collar inside out using the point to push the tip of the collar out.
Next, this is key: Pressing. I made sure I gave that collar a great press.

My last step is the top-stitching. I use thread at each point to help guide the collar under the needle. Often, at the corners of a garment it is difficult to get the end to move through the stitching area.

This method is also good for the cuffs.


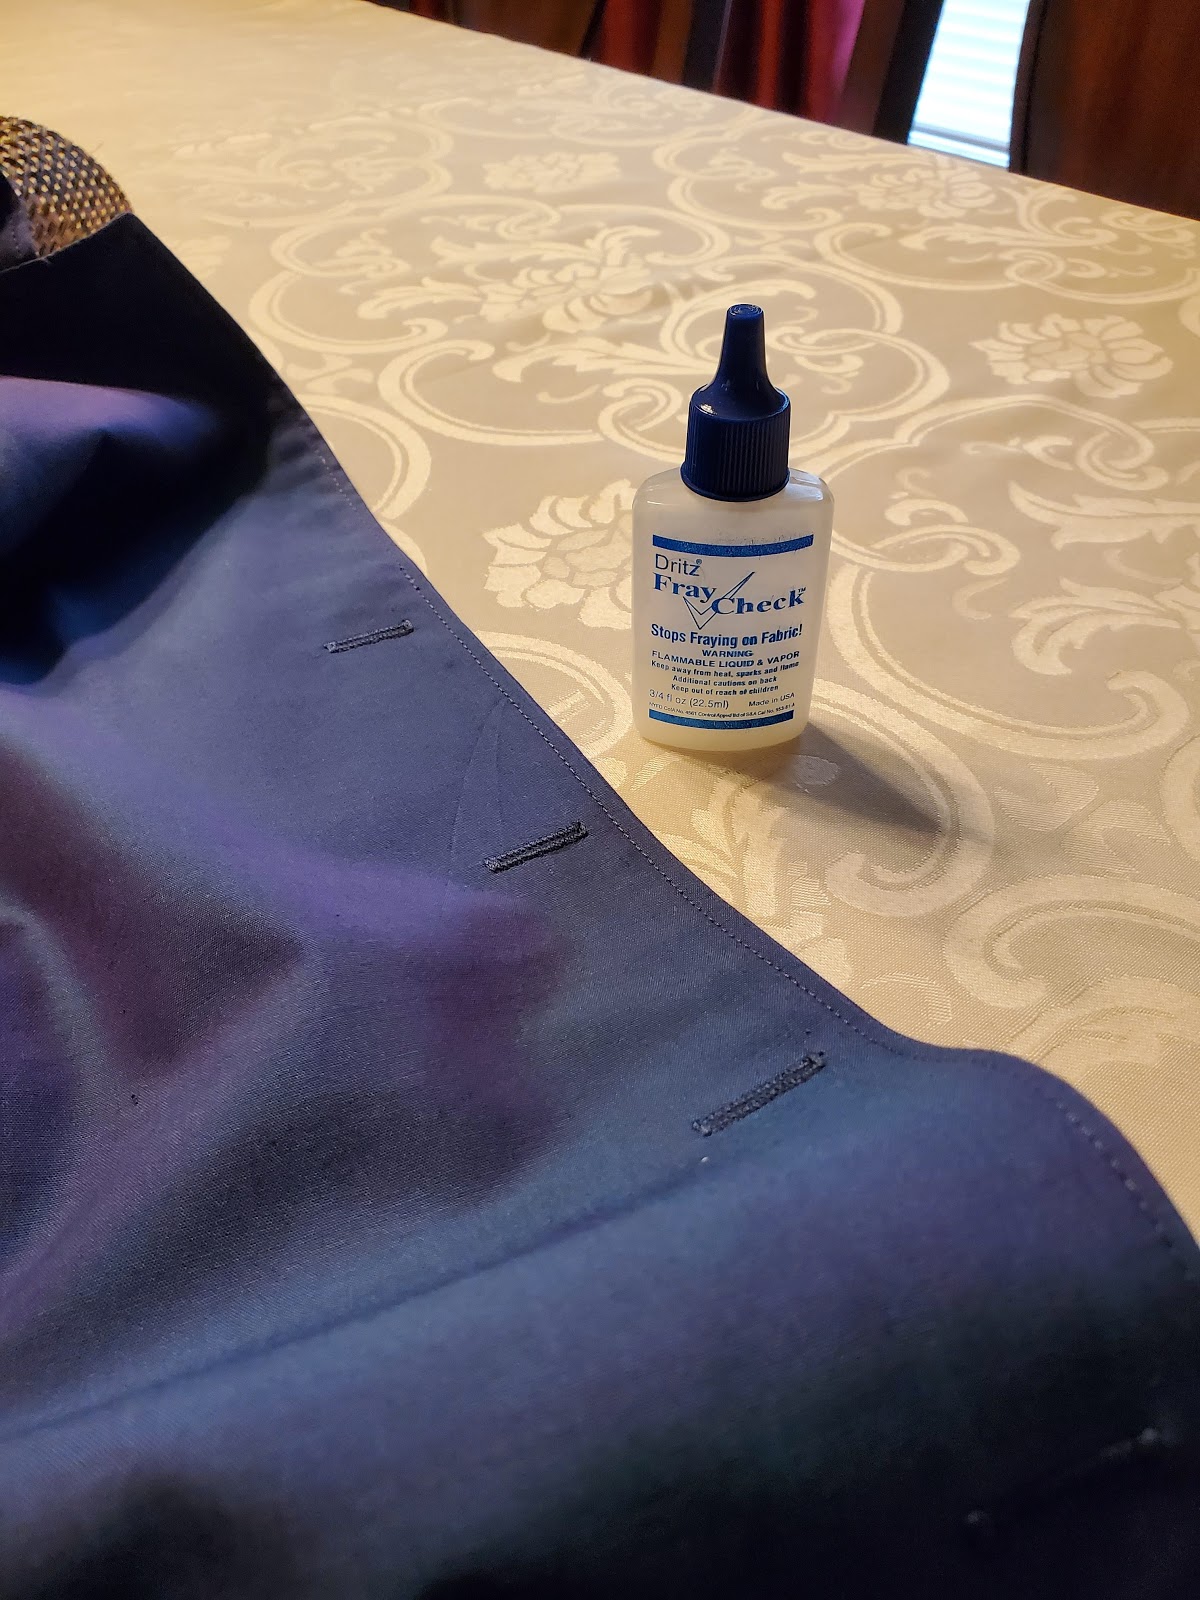
Tip 2: Construction of the Buttonholes
These days I'm making a lot of garments that button down the front. This is another focal point and I want it to look as good as possible. I've said this many times before. I test before I do it on my actual project. And for each shirt, each type of fabric I tested making the buttonholes.
After successful testing, I sew the buttonholes on my garment. They are not complete without some Dritz Fray Check. After the buttonholes are constructed, I apply fray check and allow it to completely dry before opening the buttonholes.
So that's it for my tips. I hope this information is helpful.
Happy Sewing!
C
Oooohhh good tips! You know how much I love sewing shirts so was very interested to see if your process was different from. Basically we're doing the same things so thanks for confirming that!
ReplyDeletethank you and yes I do. You've been going strong for awhile making some gorgeous shirts. So you've encouraged me to do another shirt project. Kudos my friend.
DeleteThank you for this tip. I was using fray check wrongly, i.e. on the cut threads. Do you apply fray check to both sides of the buttonhole, before cutting, or just the "front" side.
ReplyDeleteHi Chris, I apply it to the right side of the garment. The liquid penatrates through the wrong side. But it is not overly saturated. I hope that makes sense.
DeleteYes, it does make sense, thank you.
Deletethose are amazingly sharp corners, fantastic.
ReplyDeleteThank you, Beth.
DeleteThanks for the info on your tailoring techniques. I've never made a button up shirt, too scared of those exacting details.
ReplyDeleteYou're welcome. Connie. You should try it. Practice on some scrap fabric to try it and to help build your confidence. You can do it!!
DeleteIf I ever tried using the fray check I did it after cutting the buttonhole open - I'll have to try your method.
ReplyDelete