Showing posts with label button down shirt. Show all posts

Saturday, July 10, 2021

Vogue V1786 -Minerva Navy and Black Jacquard Shirt


I'm happy to share photos of my latest make: Vogue V1786,  a new pattern from the spring 2021 collection. Loved how it turned out. 


Here is a link to my Minerva profile that contains the rest of my review. The previous post included the details on the pattern adjustments. 


Happy Sewing!

C

Thursday, July 8, 2021

Notes On A Pattern - Vogue V1786

I haven't done a Notes on a Pattern in awhile.  I thought it would be good to share my struggle with this project.  Simply because this is a new pattern and I got carried away when I saw 46 inches as the finished width in the bust area for size medium.  I shouldn't have paid it any attention.  It is deceiving.


If you measure the circumference of the pattern pieces at the bust area, yes it is 46 inches.  But you need to look a little closer.  Once you form the buttonhole placket all of those "extra" inches disappear.  So the actual finished circumference at the full bust is far from 46 inches.  

This is what you actually have to work with minus side seam allowances

And this is where my troubles begin. Word to the wise.  Never go on automatic pilot.

I tried on my first version of the shirt: front, back, and yoke with finished button holes and all.  Guess what?  It did not fit. Ugh..,

Luckily, I had about a yard or so of the fabric left.  So I recut the front (dartless FBA) and the back yoke with a few more little tweaks.  Sewed it together again.  It was a good fit. Next, I checked the collar and collar stand.  They also needed to be recut (size large). After finishing the collar, I needed to tackle the upper sleeve because of the adjustments made to the front and tweaks to the back yoke.  My suspicions were right.  I needed the upper sleeve to be a little larger.  Not so much in the cap but the lower armsyce.  No more fabric.  So I made a little insert (2") cut on the bias.  It worked.  Finally, for the lower sleeve and cuff, no change.  I just eased the excess in.

All of this extra tweaking and fitting because of one little finished measurement.  My bad for not analyzing the design of the pattern a little further.  So, lesson learned again. Lol. This one I should have made a muslin.  Oops I did. Lol

I'm so glad I had extra fabric and I was able to work out the fit issues without trashing the entire project.  

So that's my Notes on a Pattern.  The rest of the review is coming soon.


Happy Sewing!

C


Wednesday, July 7, 2021

Catching Up

 Good evening everyone,

This is the first time I've attempted to write a blog post since my accident with the hedge clippers.  I'll skip the details.  The good thing is I'm all right.  Anyway, I had a few potential blog posts that got derailed the day of my incident.  It does take forever to type out a post on my computer.  So for a while my posts will be abbreviated. 

I just made another blog anniversary. Fourteen years of blogging on July 4, 2021. It doesn't feel like fourteen years have past. 


Today I'm posting a photo from my first pattern review. I made the faux leather outfit with fabric purchased from Walmart. The second half of the picture is my most recent outfit made with fabric from Minerva Fabrics of the UK.. 

It has been a wonderful journey. I am so happy I chose to start blogging.  It has so many benefits. I seen growth in my ability;  an opportunity to share with others who love what I do; I've gained a host of new friends; I've had opportunities to share my knowledge with others as well as an opportunity to learn from some great sewists. These are just a few benefits.

In the coming days I'm hoping to publish a few short posts on some projects that were near completion or in the works. 

I found a Threads Magazine Youtube video titled, "Pattern Adjustment for a Full Bust Without a Dart."  Excellent tutorial and I used it for two projects that I will post soon.  


Initially, I was going to do my own tutorial based on my own measurements and projects.  But I decided not to "reinvent the wheel".   Posting Threads video is easier.  My reason for wanting a dartless FBA  is to maintain the original pattern design as much as possible and/or to use striped fabrics without disrupting the flow of the stripes with a dart.  I hope that makes sense.

My first project is Simplicity S9222.  I'm still working on this one.  The dartless FBA does not interfere with the drape of the top of the dress.  This is one I decided to make after seeing Carol Crocker-Ware's dress that she posted on Patternreview.  My dress is coming soon.  


The second project I used the dartless FBA on is Vogue V1786.  I love this shirt and think it is great in a striped fabric.  My July Minerva project is using this pattern and a navy/black jacquard.  The jacquard is double layered where the navy stripes appear.  On the reverse side of the navy, it is black, and the reverse side of the black is navy.  So you can use either side of the fabric. Early June, I made a medium blue pair of slacks to wear with this shirt using Simplicity S9147 again. 


This project is actually finished, but I want pictures of me wearing the outfit before I post my final review. ;-)

That's all for today.  Happy Sewing!

C


Monday, May 18, 2020

The Shirt Project 2020 - Simplicity S1166 In Review


The making of these three shirts is the beginning of my second Shirt Project.  About two weeks ago, I found the shirts in a bag while inventorying my UFO bin.  Everything was already cut and marked.  All I needed to do was sew them.  This was the perfect project to finish while I wait for my button order to arrive.

I made this shirt once before, but I didn't do a full pattern review.  So today I'd like to share my thoughts on this pattern. 

Simplicity almost never gives a good description of the pattern views. For this one they just said, "Misses' blouse, skirt, and bra top.  How vague is that?


My description for view B - Misses' blouse with dolman like 3/4 length cuffed sleeves with wide collar and curved hem.


The pattern comes in sizes 6 to 24. The sizes are grouped: 6-14  and 16-24.  I used size 14 with modifications.

This drawing and the envelope photo do not match.  The drawing is the same silhouette as my blouse, but the blouse on the model is different.  Either the blouse she is wearing  is three sizes too big or the pattern design is for an all together different pattern than what is provided in the envelope.


The instructions were easy, and I didn't see anything confusing in them.  I did make some fit adjustments and minor changes for my versions.

My likes:
  • Sleeve design
  • Wide collar
  • Cuffs
No real dislikes other than the misinterpretation of the design modelled on the envelope.


I used three different fabrics from three different sources:
The pattern alterations are some of my usual adjustments:  FBA plus I lowered the bust dart; and I lengthen the blouse about a few inches.

Design/Construction changes:  I did something a little different for each blouse
  • White - No top-stitching except for the cuffs.  I didn't do a rolled hem.  I serged, turned and sewed the hem.  Added darts to the back.  Stitched in the ditch of the shoulder seams instead of tacking the facing to it.
  • Stripe - Followed the instructions except for the hem and tacking the facing to the shoulder seams.  The collar design change for this one was due to limited amount of striped fabric.  I didn't have enough for both upper and lower collars.  So I used some of the white pima for the under collar.
  • Blue - Same as the stripe blouse. No design change.

So far I've made a total of four blouses using this pattern.  Why stop now?  I can see myself using it again.  And I do recommend it to others.  It's an easy sew.  All level sewists can enjoy making this blouse.

I noticed a few areas where I could tweak the fit a little more.  But overall I'm pretty pleased with how these turned out. They are good wardrobe staples and will be in high rotation.  Perfect pairing with jeans and pull-on pants.  


My tips:

Buttonholes
Collar

My first blouse made 2016.


Side Note:  Whenever I make shirts, I include at least one white one.  You can never have too many. ;-)


Happy Sewing!
C


Friday, May 15, 2020

Shirt Making Project Spring/Summer 2020 - Simplicity S1166


Sometime in January, I decided to do another "Shirt Making Project".  To start, I cut out three shirt using Simplicity S1166.  These shirts were in a bag in the UFO bin that I had almost forgotten about.  This week I decided it was about time I made them.  This is a pattern that I used before.  The initial review and project here.

I like the shape of the collar and design of the sleeves.  These details make it a little better than your average button down shirt (to me).  They can  also make or break the project as they are focal points of the garment. Making this batch of shirts was an opportunity to do a lot of top-stitching and paying attention to the simple details and construction processes.

Tip 1:  Construction of the Collar

The collar is large and curvy ending in the typical point on each end.  There are a few approaches to making the point just right.  I posted Sandra Betzina's method of redrafting the collar pattern.  The details:  Part I and Part II


For these shirts I used another method.  Sorry I don't know what it is called.  But, instead of sewing the seam and pivoting at the corner.  I made it "squared" at the corner then I pivoted to continue.  This is done in addition to "not" interfacing the corners of the collar.


The next few steps are critical:  Use a pointer/creaser to help turn the collar inside out using the point to push the tip of the collar out.

Next, this is key:  Pressing.  I made sure I gave that collar a great press.


My last step is the top-stitching.  I use thread at each point to help guide the collar under the needle.  Often, at the corners of a garment it is difficult to get the end to move through the stitching area.


This method is also good for the cuffs.


Tip 2:  Construction of the Buttonholes

These days I'm making a lot of garments that button down the front.  This is another focal point and I want it to look as good as possible.  I've said this many times before.  I test before I do it on my actual project.  And for each shirt, each type of fabric I tested making the buttonholes.

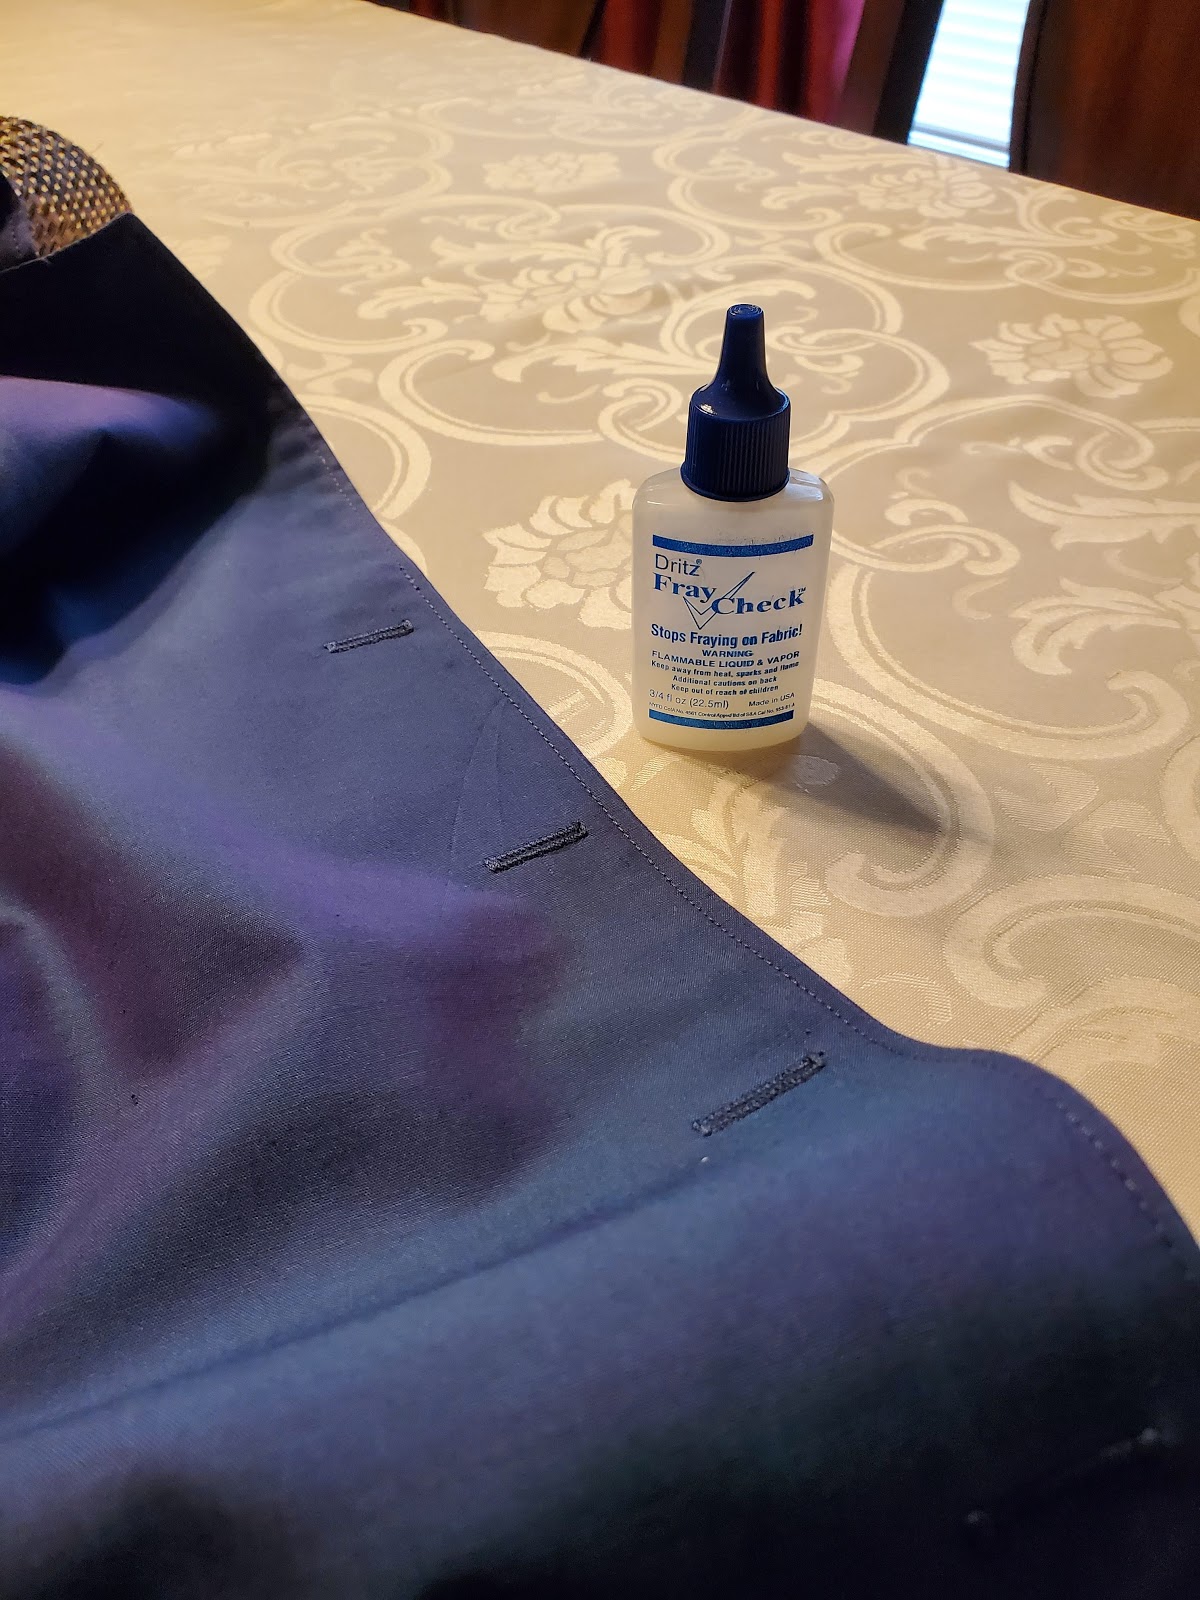
After successful testing, I sew the buttonholes on my garment.  They are not complete without some Dritz Fray Check.  After the buttonholes are constructed, I apply fray check and allow it to completely dry before opening the buttonholes.

So that's it for my tips.  I hope this information is helpful.

Happy Sewing!

C

Wednesday, September 19, 2018

It's Not Too Late - August, 2018 Sewing Projects


It's incredible, I wrote this blog on August 28, 2018; but didn't publish it.  Why?  I think because I became disappointed with the last project to finish in August.

I was almost finished with the dress when I tried it on again and decide it's just not for me.  It's, it's.., something..,  What I couldn't exactly pin point.

Anyway, after two weeks, I decided to try it on again.  This time, I saw renewed hope of finishing the dress. With a few more adjustments, it's wearable. 

Now, what's left to do is:
  - take it in where needed
  - finish attaching the facing to the dress
  - Make buttonholes and sew in buttons
  - Hem dress
and finally,
  - Decide on a different color belt.  I think that will improve the look.

This will be the last of five projects started in August.  To recap my sewing projects for August, 2018.  Blue is the common color theme for August; I really didn't notice before.


Vogue Top 1247 - I haven't worn this top yet.  I want to pair it with a red or white denim skirt for vacation.


Simplicity 8014 Gingham Dress - Love the 1" inch gingham squares. Perfect for this style shirt dress.


Simplicity 8014 Crane Shirt for DD - She really appreciated this little summer top and will get a lot of wear out of it.


Vogue 9260 Hacked Dress -  This floaty challis dress is my least favorite of my August makes.  But it won't be hidden in the back of the closet.  I've worn it and will wear it some more.


Stay tuned for notes and reviews.  I should finish the dress this week.   BTW - I still have a few projects from earlier this year to review.  They will be added to the September and October reviews.

Thanks you for following me and special thanks to those who continue to post comments.  They are much appreciated.

Happy Sewing!
Cennetta

Tuesday, August 21, 2018

Another Flock of Cranes - Simplicity 8014 - Hacked Little Summer Shirt


The flocking cranes continue.  I purchased enough of the crane cotton voile to make my darling daughter a shirt too.

I'm making her a dress, using Simplicity 8014.  So I decided to use the same pattern for a shirt.  This was a super easy pattern hack.  I simply cut the dress pattern the desired length for a button down shirt.  Simple.


My previous review of the dress really says it all as fair as the sewing process is concerned.  My only other changes for her shirt were a small FBA and I did French seams for the sleeve and side seams.  I used the short sleeve instead of the long one.

I came close to matching the cranes on the pocket to the ones on the shirt

So this shirt was easier to make than the dress, which had a lot of steps to finish the sleeve and cuff.


That's it.  Thanks for always stopping by!

Happy Sewing!
C

Saturday, September 30, 2017

White After Labor Day


When I was growing up, wearing white after Labor day was one of the biggest fashion faux pas.  These days people are wearing whatever anytime of year.    Fashion is anything at anytime of year!  Believe it or not, I'm still a little jaded when it comes to certain fashion faux pas.


Today's post is about two white fabrics that I purchased this summer from Mood Fabrics:  Helmut Lang Optic White Tissue Weight Cotton Poplin  and Soft White Stretch Blended Cotton Jacquard.  Both textile were great to work with.  There is something special about working with natural fibers.  Cottons are easy to sew, press and super comfortable to wear.


My shirt is part of a "Shirt Project" that I completed this summer for a Haute Couture Club presentation. I used Simplicity 8416 to make, and the contrasting fabric was gifted to me by one of our generous club members, Andrea Birken.   I made no fit adjustments for this shirt.  But I wanted to add a little color to it.  Threads magazine, published an article on customizing your shirt.  This is where I got the idea to add the contracting fabric details.   Check out the details.


The pants are Burda 6879.  This is my third pair of pants made with it.  My reviews are here.  All of them have been made with Mood Fabrics.   For this pair, I made the pants wider for a more relaxed fit.  


So what are your feeling about wearing white?  

Happy Sewing!
C

LinkWithin

Blog Widget by LinkWithin