Thursday, June 11, 2009

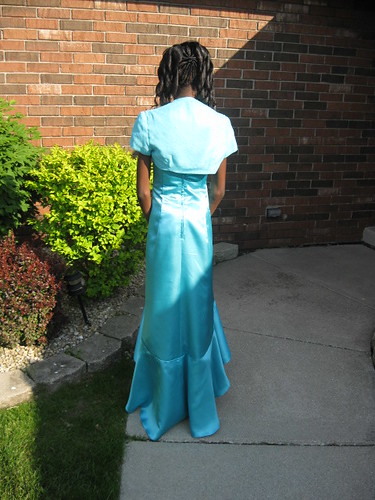
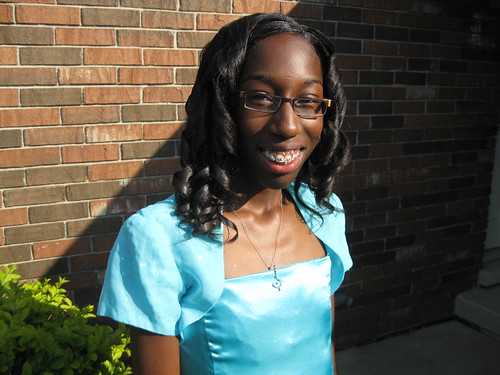
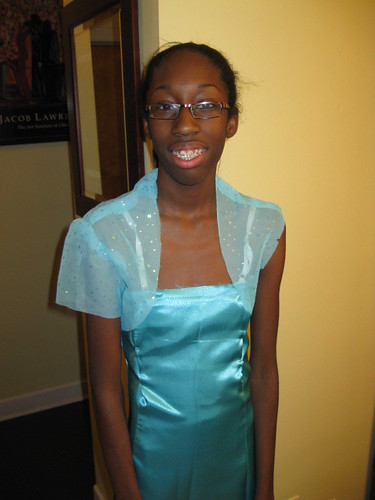
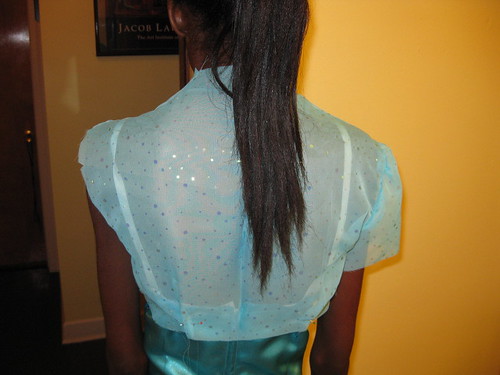
Prom 2009 - The Princess Ball Final Chapter B5182

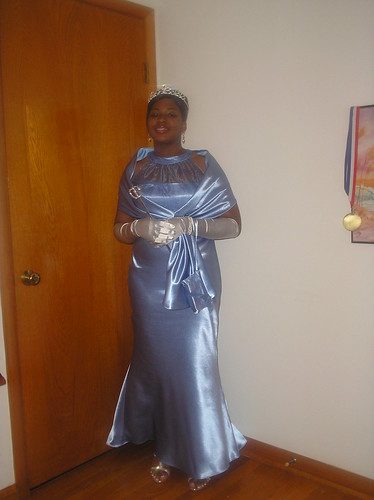
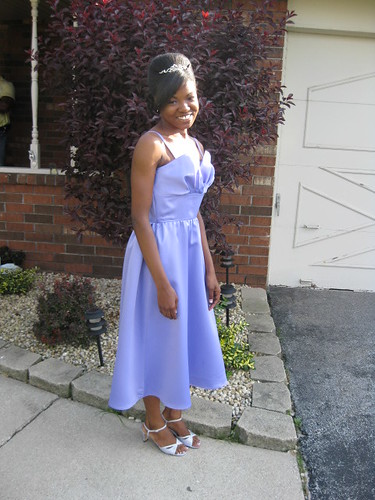
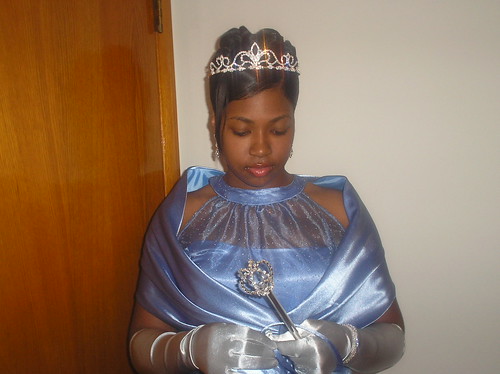
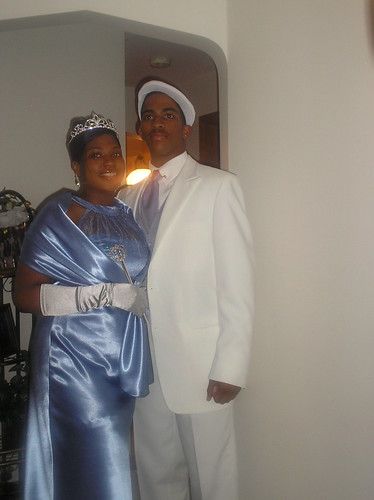
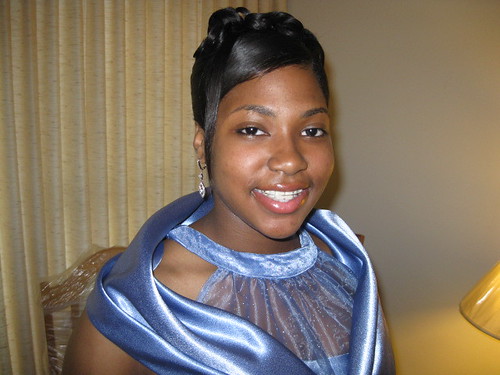
Miss. Archanette, Prom May 15, 2009

Happy lady

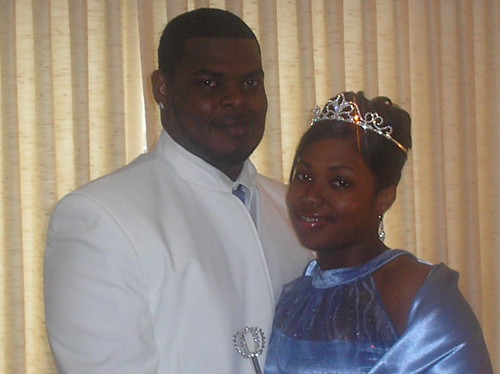
Joseph and Archanette

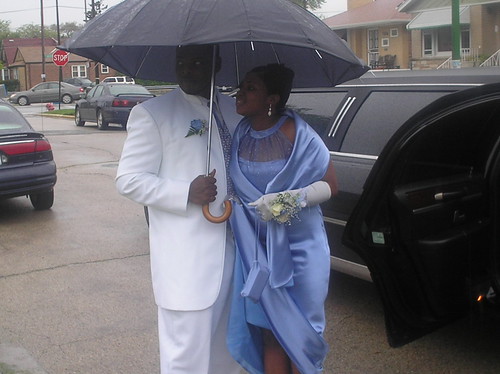
At the Car

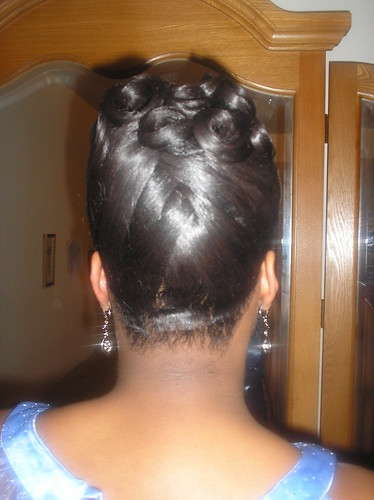
Pretty Hair

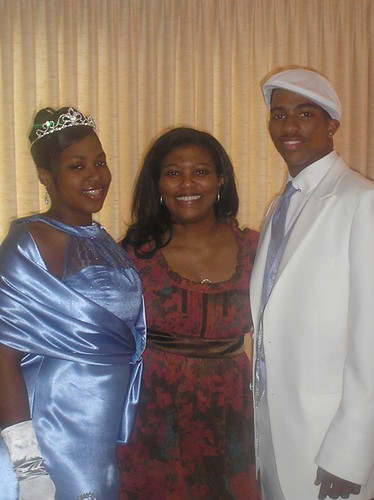
Daughter, Mother, and Son


B5182
Finally, I am able to post the final review on the making of my niece's prom dress. It's been a journey, but a pleasant one. There is a lot to cover in this review and my sister in law provided lots of photos.

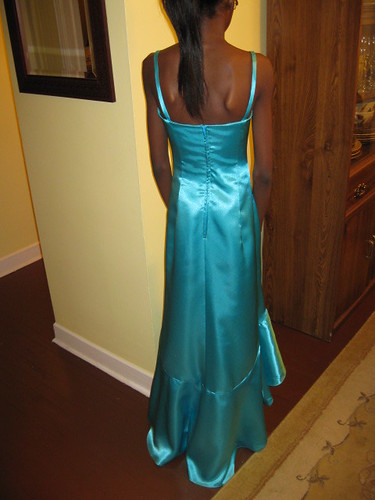
This was the second choice. The first was V2891, which turned out to be a little too much exposure. This pattern was the perfect selection for her frame, her style, and the occasion. I must admit, when I arrived at her home I was delighted to see a young lady who looked like she was going to a "princess ball".

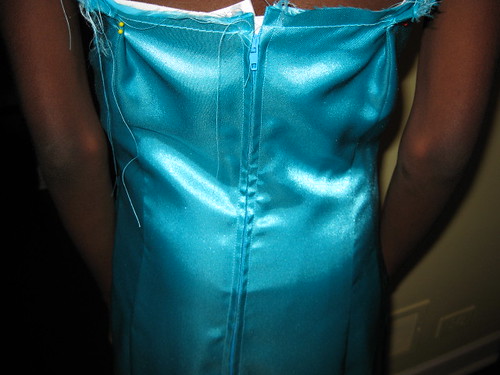
Pattern Description: MISSES' DRESS: Lined dresses A, B, C have close-fitting bodice, semi-fitted bias skirt, train and back zipper. A: contrast drape and trim. C: bow. I made view A.

Pattern Sizing: 6 - 20. I started with between size 16 to 18. Then reduced the bodice between 14 and 16.

Did it look like the photo/drawing on the pattern envelope once you were done sewing with it? Yes, I made a few changes. But for the most part my version of view A looked like the dress on the envelope.

Were the instructions easy to follow? Yes, the parts of it that I followed. There were a few that I opt to use a different method.

Step 9 - I made french seam to join the front and back of the drape instead of double-stitching the seam. The french seam look much better than the double stitching. Pattern companies tend to suggest this method over the french seam method for handling sheet fabric.


Before Step 18 - I used the organza as an overlay on the collar instead of adding trim (Step 88).


Step 89 - I made loops for the button on the collar instead of sewing thread eyes.
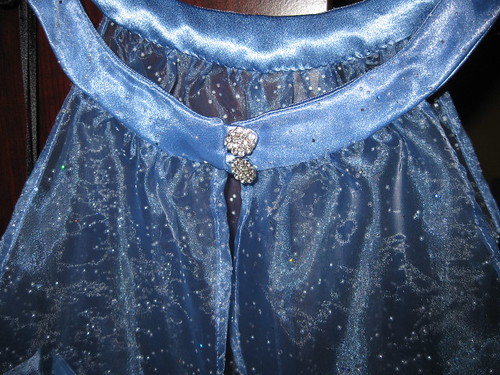


Step 85 & 86 - For the lining and the skirt hems I did a rolled hem instead of following the instructions given.

What did you particularly like or dislike about the pattern? My sister in law picked this as the second choice; my niece agreed. I thought it was a much better choice than the V2891. I was happy to make it for her.

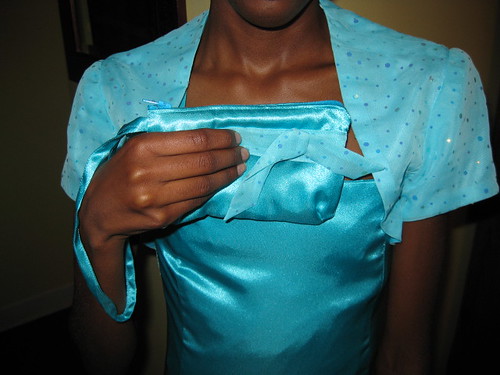
Fabric Used: Crepe Satin - Back from JoAnn Fabrics and a organza with peppered with glitter. Ambiance lining.

Pattern Alterations or any design changes you made: There were quite a few.

Notions: My sister in law couldn't find a good thread match for the fabric. So she bought Sulky embroidery thread. I tried it; it sewed beautifully.

Alterations are recorded here.

Design and Construction Changes: See notes above in the instructions section.

I also made a stole, garter (a Chicago thing), and purse for the occasion.

My nephew (Archanette's brother) also went to a prom.


Would you sew it again? Would you recommend it to others? Probably not. But I think its a great choice for a special occasion.

Conclusion: This was a great choice for my niece's prom dress. She looked absolutely beautiful and enjoyed her special day. I would recommend this dress to others.

Here is my flickr set which documents the project and the event.

Tuesday, June 9, 2009

Peter Sow Dress - Part IV


In this review I will include information on two dresses that were "partially" made from S2926. For the first dress, I made alterations to copy an inspiration dress. And the second one, I used the bodice to save what would have been a disaster.

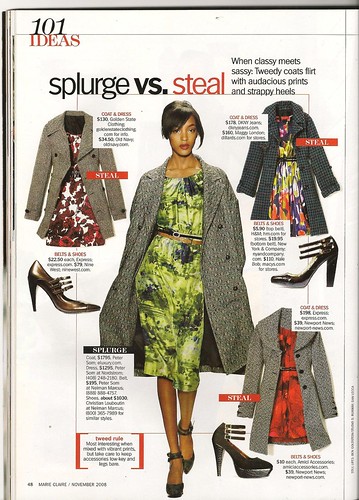
In January 2009, I started a series of projects called "Copy That". I am constantly on the hunt for fashion that appeals to my taste and life style. I found the inspiration dress in Marie Claire magazine, which features a tweed coat a top of an audacious print dress, "Classy meets Sassy".


I like both pieces. And plan to make a similar coat with a basketweave boucle purchased from Gorgeous Fabrics.

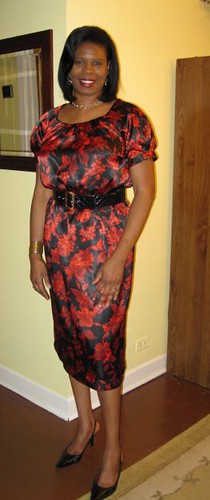
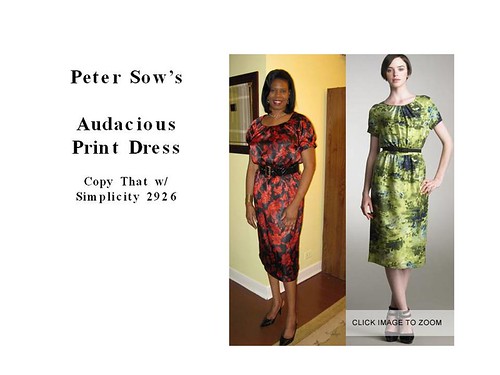
I used this simplicity pattern to copy the style of the Peter Sow dress.

Pattern Description: Short waist dress, midriff with skirt variations.

Pattern Sizing: 8 - 24, I used 14 a neckline, 16 through the shoulder and upper body to capture the fullness of the inspiration dress. For the skirt I used to straight pattern size 14.

Did it look like the photo/drawing on the pattern envelope once you were done sewing with it? No. I changed it to match the inspiration dress. But based on the paper pattern I think it would look very much like the photo on the pattern.

Were the instructions easy to follow? Yes the parts of it that I followed.

What did you particularly like or dislike about the pattern? I selected this pattern because it was the perfect solution for creating the Peter Sow dress. It had a similar neckline and bodice. Making the adjusts in the bodice and the elasticized waist was easy. I didn't dislike anything about it as I had a special goal in mind when I selected it.

Fabric Used: silky polyester floral print that I purchased at JoAnn's a few years ago. I didn't know what I would make out of it when I purchased it, but it was perfect for the Sow dress.

Pattern Alterations or any design changes you made:There were several including my usual FBA. I added bust darts, extended the bodice, eliminated the midriff, made the sleeve band half the width, and added elastic to the waist.

Initial Alterations and Inspiration Information

After I attached the bodice to the skirt and tried the dress on, I noticed the bodice was too long. I decreased the bodice length by 1 1/2 inch then reattached it. Perfect.

The sleeve band was wider than I wanted for this dress. So I cut two bands instead of four. Then I folded them in half, stitched the short seam of each, then sewed one end of the length to the sleeve. To finish it, I slip stitched it closed.

Elastic waist - I sewed a 7/8 seam allowance. Turn it down toward the skirt and stitch to make the elastic casing. Then threaded 3/8 inch elastic measured for by waist. At the back opening I stitched closed the ends of the casting with the elastic slightly passed the end. Then I inserted the zipper.


Now for the second dress. This was truly a "save the dress anyway you can". I blogged about five must haves last fall and the structured dress was included in the five. Well, Vogue has the perfect structured dress. V8280, which has been reviewed here several times.

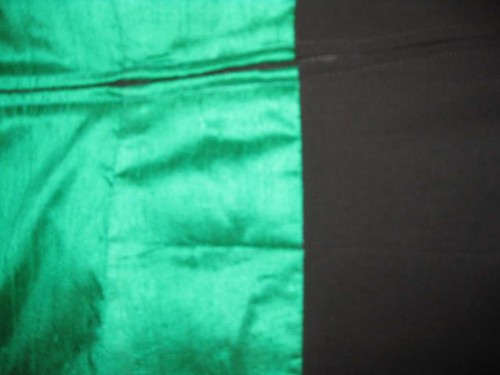
Well, my first mistake was not making a muslin. The back was too tight and the flange didn't lay flat and had some excess fabric at the side seam. You can imagine I was disappointed when I couldn't come up with a quick fit. The fabric that I used was leftover from a dress that I made many, many years. There was only about a yard to make the bodice.


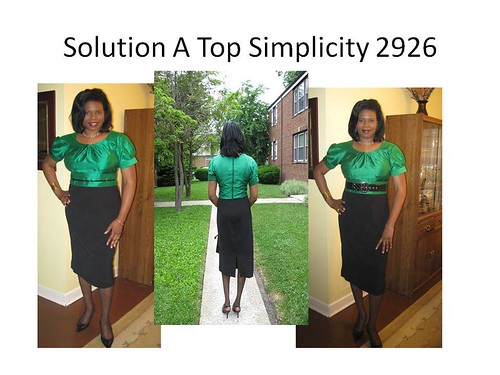
I wanted/needed a quick fit. So I took the top of the S2926 and combined it with the bottom of V8280 to come up with a wearable dress.

Fabric: Very nice polyester for the skirt and leftover dupioni silk from DD Easter dress.

Changes:
Continued the back darts through the midriff to address my sway back.


Followed the same sleeve band application as the inspiration dress, adding a inch more to the width.


Would you sew it again? Would you recommend it to others? I probably will not make this one again. I think I've worked "it" enough. But do try it if it suits your taste. It's not a difficult pattern to sew, and I didn't notice any fuzzy instructions on how to make it.


Conclusion: This pattern was the perfect solution to copy my inspiration dress. And the plus is: it saved the bottom of my V8280 dress (will try again in the fall).

Friday, June 5, 2009

Nickie's Dinner Dance Dress (M5382 & 5669) - Final Chapter

At last, I'm finally able to post the Dinner Dance Dresses that I made for my niece and her friend Rihanna. They looked very beautiful today. Caution: The post is image heavy. The reviews of my sewing experience follow.


My niece, Dominique, in M5382


Rihanna, Dominique friend in B4731.


Pretty Feet and shoes.

Dominique's Jacket is made from M5669.


Everyone is happy! Me and the ladies.


Review of Dominique's outfit:


Pattern Description: MISSES'S DRESS AND SASH: Close-fitted, fully lined dress with princess seam on bodice, gathered at waistline and front pleated over bodice, back zipper closing; dresses A, C have shoulder straps; dress B has waist and lower edge with lace trim; dress C has skirt with drape detail and sash; dresses A, B, C are below mid-knee lengths.

Pattern Sizing: size 4 to 18; I made view A with Sash size 8.

Did it look like the photo/drawing on the pattern envelope once you were done sewing with it? Pretty much.

Were the instructions easy to follow? No problems, easy.

What did you particularly like or dislike about the pattern? We liked everything about the design. The pattern was not difficult to sew and the alterations: minor. It's wonderful sewing for the young and kinda flat. ;-) I have no dislike. But a few observations:

The pleated front bodice may require some interfacing for crispness. My version is made of dutchess satin. I didn't add interfacing, but tacked the pleated front bodice to the inside bodice to keep it in place. Second, the front skirt has fewer gathers than the back. On the envelope photo, the gathers appear to be evenly formed through the front and back.

Fabric Used:; dutchess satin and nice polyester lining.

Pattern Alterations or any design changes you made: I should have cut it at size 8 to begin with. So altering the muslin, I decided to cut it a size 8, which gave her the needed ease through the bodice and I added about an inch to the top of the inner bodice. We were a little short on length of fabric; so the sash is about 5 inches shorter than the drafted pattern.

More detailed on alterations and changes here

Would you sew it again? Would you recommend it to others? Probably not. I made this dress from niece and don't plan to make it for myself or DD.

Conclusion: I recommend this pattern to others. It's perfect for a prom dress. It's not difficult to sew and yields very nice results.

My Flickr Set on the making of the outfit

Jacket Review:

I made this jacket (view-C without the ribbon closure) for my niece. It compliments the dress made from M5382-A. I will review it later. This outfit was finished a little over a month ago. My niece will wear it to her 8th grade dinner dance on June 5th. I'll post the event photo later; today I wanted to post some reviews as I have many. I started with making a muslin several months ago. Then in March I made the actual outfit out of the fashion fabric. My review is below.

Pattern Description: MISSES’ JACKETS: Loose fitting, unlined jacket ends at waist and has neck ruffles, snap closure at neck and sleeve variations; jackets B, C have ribbon bow; jacket C has ribbon binding.

Pattern Sizing: 4 to 18, I cut between a 6 and 8.

Did it look like the photo/drawing on the pattern envelope once you were done sewing with it? Yes, for the most part.

Were the instructions easy to follow? Yes, they were.

What did you particularly like or dislike about the pattern? I picked this jacket to complete the outfit, and my sister approved it. What we liked about the design was the ruffled neckline. Pretty and appropriate for the occasion. My niece liked it too, which was a plus. Young ladies can be hard to please. :-) My dislike from a seamstress point of view was the application of the ruffle. I didn't like the finished inside of the neckline. I couldn't sew perfect seams. So the stitching lines were not perfectly uniform. To help make myself feel better I added bias tape to the inside of the neckline

Fabric Used:Pattern Alterations or any design changes you made: There were only a few alteration and design changes.
- Added bias tape to inside neckline
- Omitted the ribbon and snap closures at the neckline
- Added 1/4" to the length of the shoulder seam.

Would you sew it again? Would you recommend it to others?Conclusion: Nice little jacket that produce satisfactory results. It even pleased a 13 year old. I think a beginner could make this jacket.

B4731 - Rhianna's Dinner Dance Outfit


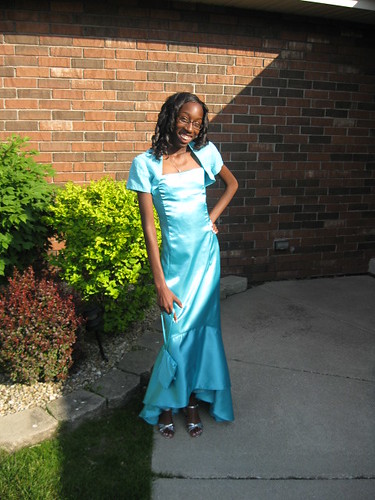
I finished this dress about a month and half ago for my niece's GalPal, who is attending the same graduation Dinner Dance as my niece. This pattern has been in my collection for about a year. I purchased my copy because I thought it would be a good basic form fitted dress pattern to have. It can serve as a foundation for many design options for a formal gown or a casual dress that you can add straps to. That all being said, here is my review of the dress for Rhianna's version.

Pattern Description: MISSES’/MISSES’ PETITE SHRUG AND DRESS: Lined shrug has short or long sleeves. Shrug A: front button and loop closure. Fitted, lined, slightly flared dress, evening or floor-length has boned foundation and back zipper closure. Dress D: flounce and shaped hem (lower calf length at front and floor length at back).

Pattern Sizing:6 to 20. I made what would be a size 1 1/2". The little lady is tiny. Sizing it down was a bit of a challenge because of the amount of the decrease required to fit her. I use the multiple sizing in reverse to scale down the pattern. That is, I used the distance between the sizes to scale down to what could be considered the desired size. My first attempt was about a size 4. But after the first fitting I had to reduce the width of the dress and shrug. More details below.

Did it look like the photo/drawing on the pattern envelope once you were done sewing with it? For the most part. I added straps.

Were the instructions easy to follow? Nothing confusing about the instructions. Pretty standard for this type of design.

What did you particularly like or dislike about the pattern? I like the pattern because it had classic lines and offer a variety of styling options. Nothing to dislike.

Fabric Used: A polyester satin with glitter on top for the dress. A polyester chiffon for the shrug. Also finished with a glitter like substance. Pressing it was a challenge. I had to double my pressing cloth to keep from removing the finish (glitter). Both fabrics were purchased at Hancock.

Pattern Alterations or any design changes you made: There were quite a few alterations and one design change. I didn't make a muslin. So most of the alterations were made as I sewed the dress.

I cut the pattern at what I considered a size 4. I shorten the skirt and the bodice by 1 1/2".

I put together the dress for the first fitting. There were several changes needed:

-The shoulder seam were too long. I trimmed 1/2" from the seam. The results of the shoulder adjustment.
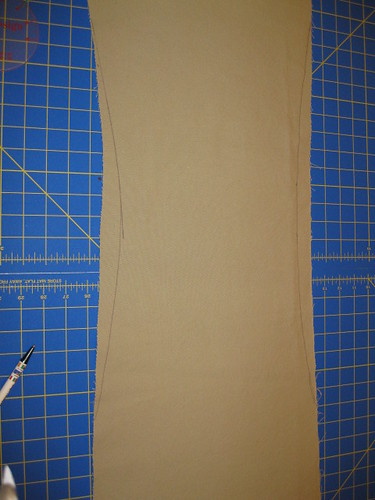


-The back of the jacket stood away from her body. I added two tucks to bring it closer to the body.

-The dress was still too large. I took it in about 3" more through the bodice area. Adjustment needed at the back.


Final finish of the dress adjustment.
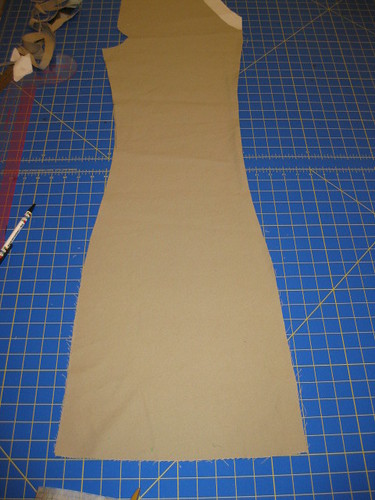


- Straps were added to it for added comfort.

- I made a purse to go with the outfit.


Would you sew it again? Would you recommend it to others? May be if another special occasion comes up. Yes, I would recommend it to others. It's a decent pattern to use for a classic form dress.

Conclusion: This dress was easy to make. My challenge was achieving a good fit for a tiny lady.

Thursday, June 4, 2009

Jean Pool - What's the Right Fit - Part I


Lately, there has been a sewing frenzy of the ever so proper jean. The blogging designers/sewists have been doing an amazing job with providing tutorials and information on their sewing experiences.

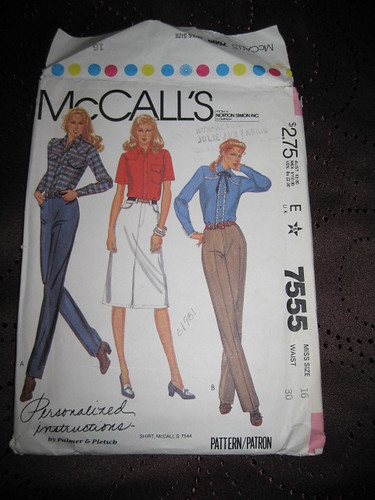
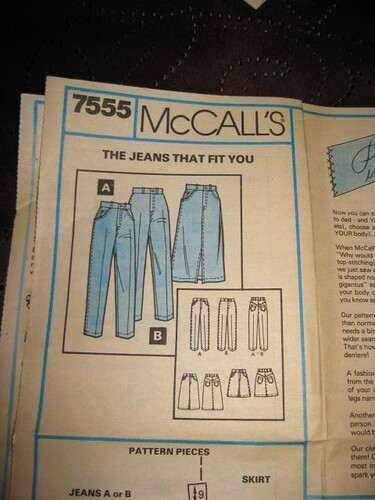
All of this activity prompted me to sew up my own version of a stylish, great fitting pair of jeans. First, I searched through the many, many patterns that I own trying to find something interesting to sew for myself and DD. I came across a couple patterns to make. One special pattern to digest is a oldie, McCalls , Palmer/Pletsch. This pattern is loaded with ideas and tips for a stylish, great fitting pair of jeans.

Some of the tips and techniques are familiar to me and may be familiar to you as well. I thought I would catelogue the information here so that other sewists can take advantage of the tips and techniques.

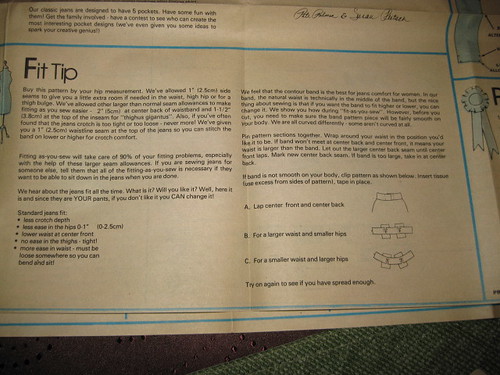
The first page of the instruction guide is divided into three basic sections: fit, quick and pro tips. Each clearly discussing approaches to make the perfect pair of jeans. So for this first post, I'm documenting general information on fit. This is an area that is a hot topic for most sewists/designers. Everyone wants to achieve the "perfect" fit while customizing their clothes to their personal taste in fabric and embellishments.


Palmer/Pletsch discribes the design of the pattern to allow the sewist to fit as you sew. Most of the seam allowances are 1" or more. Ninety percent of the fitting can be achieved as you sew. Some standards for jean fit are given. They are:

- less crotch depth
- less ease in the hips 0-1"
- lower waist at center front
- no ease in the thighs - tight
- more ease in waist - loose somewhere so you can bend and sit.

None are engraved in stone, but a standard to start with. The comfort is as customized as the selection of fabric used and whether or not you should topstitch.

One paper patter fit is suggested for the waistband. Try it on your body to make sure it fits and is smooth on your body. If it isn't adjust by adding, clipping, and/or taping where necessary.

Special feature is the contour band, which is best for jeans comfort for women. The natural waist is in the middle of the band. Keep that in mind when you tissue fit the waistband.

Please NOTE: It's my goal to make a couple pair of jeans this summer, but I will work them in as I sew other garments. So I will report/post as I proceed with making my own version of jeans.

Closing with a Pro Tip:

Plan your sewing project in blocks. Four blocks are recommended.

1 Prepare patter and fabric, and assemble all goodies
2 Cut; sew front pockets and zipper
3 Sew back and back pockets; assemble body
4 Fit and finish

Happy Sewing!
C

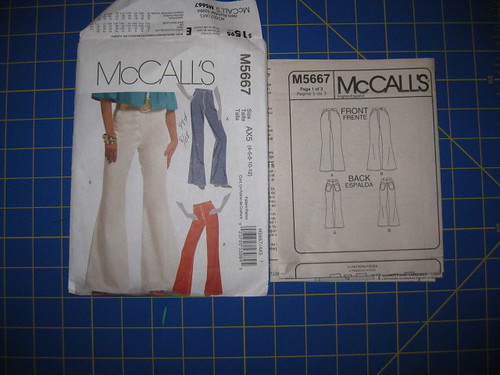
Finding the Curve - M5667


M5667

Tuesday before last, I decided to work on some UFO's for DD. She purchased her own fabric for these and several other pants. I cut them out and finished the seams about three months ago. So I was able to finish one of two pair from the pattern and another pair from S3690

Here's my review:

Pattern Description: MISSES’ PANTS: Slightly flared or flared pants (semi-fitted through the hip) have side front pockets, fly closure, waistband with buttonhole and button closure, carriers, yoke back, back patch pockets and stitched hems.

Pattern Sizing: 4 to 20; I made size 10, which turned out to be a little big in the waist. Next pair I'll make the adjustment when I put them together.


Did it look like the photo/drawing on the pattern envelope once you were done sewing with it? Close, but not exactly. The waist sits high on these pants. On photographed model you can't really see it, but on the drawing it looks a little higher the average. The curve of the leg isn't as pronounced as the photo or the instruction page diagram. That look is what drew us to this pattern.


When I cut them out, I two pair at the same time. The first pair navy and the second a tan color that I modified to look more like the photograph on the envelope. More on that later.

Were the instructions easy to follow? Yes, easy enough for a beginner to follow. I didn't notice anything difficult about them.

What did you particularly like or dislike about the pattern? We liked the design of the pant leg. Thought it was a good change for jeans/pant style to make up. I disliked the fact that the paper pattern didn't hold true to the design photo and diagram.

Fabric Used: DD purchased the cotton blend with some stretch from Vogue Fabrics last winter.

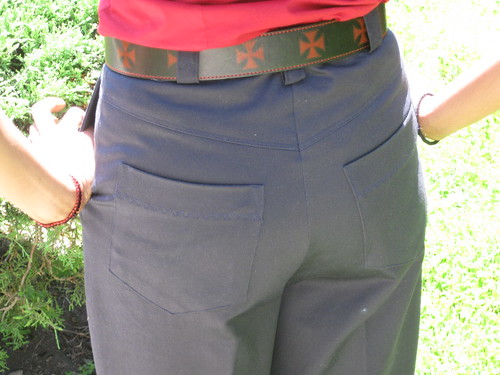
Pattern Alterations or any design changes you made: This first pair I only added some decorative stitching on the back pockets. DD missed a belt loop and may be they need a small sway back adjustment.


Here are the alterations for the next pair: Note - changes made of the actual pants instead of pattern.

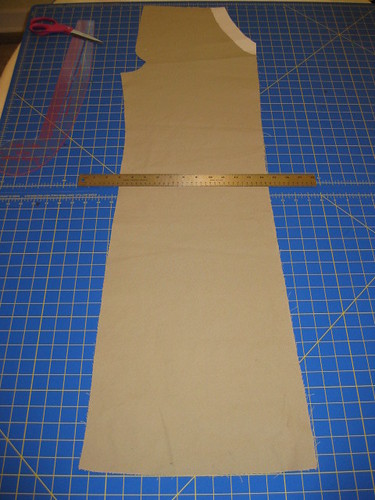
Finding the most pronounced curve point of the pant leg. To do so, find the mid knee section in the front pant. Measure the length from the waist to the mid knee on DD. Transferred the measurement to the pant.


Use the rule to mark the desired curve of the pant leg.


Make the same changes to the back pant using the front pant as a guide.


Front pant after removing the unwanted sides. Do the same for the back pant leg.


Now all is left is the sewing of this second pair. May be this weekend. ;-)

Would you sew it again? Would you recommend it to others? Sewing them again: already in the works. Yes, with the understanding that the pant leg is not the same as the diagram or the photograph.

Conclusion: DD likes the first pair. And is looking forward to me finishing the second pair with the flare pant leg. These pants are easy to sew. And the pattern could be used to create two looks with minor adjustments.

Wednesday, June 3, 2009

Blogger Buddy Award

The fabulous Mz. Choize of Style That Flows nominated me for the Blogger Buddy Award. Thanks lady! Much appreciated.


I've been blogger for nearly two years and am still having fun. The sharing of information has been amazingly rewarding. I've learned so much from my "blogger buddies". It's like being in/at a perpetual classroom, fashion show. In the spirit of sharing the nomination, I would like to nominate a few talented fashionistas.

Amanda
Trena
Kim
Carolyn
Karen
Krystal
Peacock Chic
Ann

Parting Shot: My niece, Archanette, Prom Day (May 15th). I'm still waiting for the "professional" photos before posting my final review.


Happy Blogging Fashionistas!

LinkWithin

Blog Widget by LinkWithin