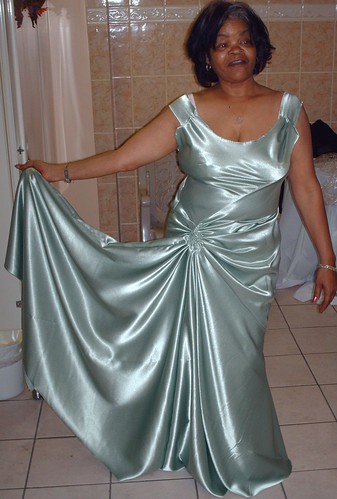
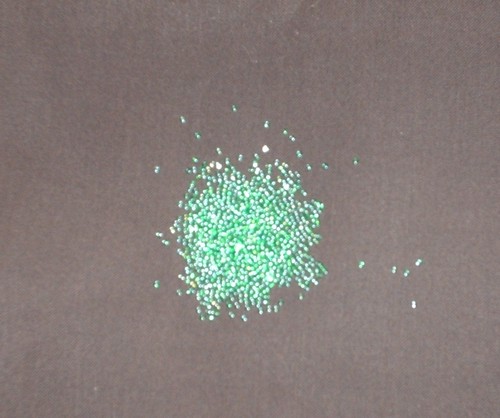
Fabric and Notions: crepe back satin, ambiance lining, 18" zipper, emerald seed beads, fusible interfacing.
Friday night I spent about 45 minutes making the pattern adjustment.
On Saturday, the majority of the day was spent working on the dress.
From 12-3p I cut the dress out of the fashion fabric. All adjustments were included except shortening the length of the dress.
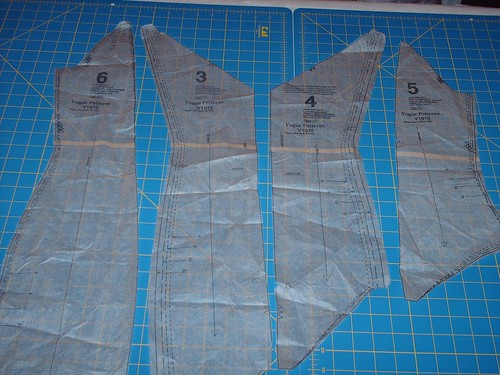
Note: If you plan to make this dress, patience is needed with the layout and cutting. There are a lot of pieces to this dress. Many require only one of the fabric and/or lining. Several pieces are very large and require the joining of two pattern pieces to make one piece to sew. Be sure not to allow the fabric to hang over the edge of the cutting table. It pulls the fabric that is on the table and distorts the width and length.
Skirt #8 is used to cut the lining and outer fabric. Each has to be cut separately. Be careful, the grain lines are different and some of the cutting lines are different.
From 3 to 10p I worked on putting the dress together. The front bodice pieces and the side/front skirt are to be cut on varying degrees of bias. On a piece of scrap, I tested sewing with a sharp 11 and universal 11 needles. Neither produced good stitches on the crepe back satin. So I tried a Singer ball point 11. It worked just fine.
The pattern called for an invisible zipper. I didn't have one on hand and wanted to complete as much work as possible. So I hand-picked a regular zipper. I decided to wait for Ms. CB's approval before adding the beads. She liked the idea.


My Struggle: Pattern #8 is joined at the center back then it comes together at the front where all the pleats and gathers meet. I read the instructions, looked at the illustrations, and made several attempts at joining the pieces. At each failed attempt the skirt, pleats, and gathers looked wonky. This pattern/dress had truly worked my nerves. So I decided to go back to the original pattern. There it was as clear as day. I forgot to mark the square where the skirt attaches to the side bodice. It all made sense now. I marked the square and everything went together.
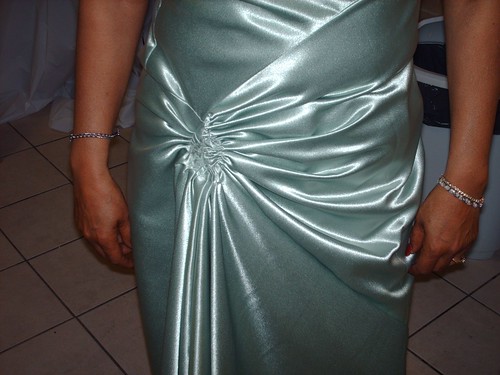
Dislike: The instructions only shows how the godet and the front skirt come together on the wrong side. The only right side view is when the "cover up" rectangle is applied to the area.
I'm Almost There: All of the adjustments were incorporated into the pattern pieces before cutting.
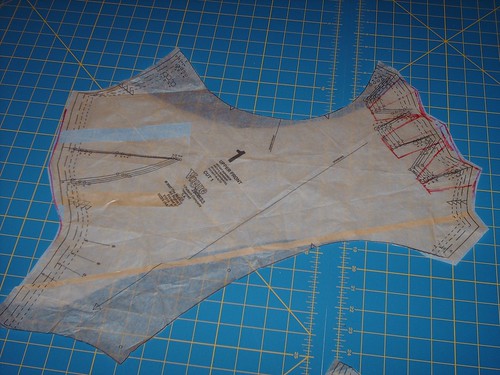
The back view: More was needed across the back. I increased the back by 1 1/2 inches dividing the increase evenly among the four pieces.
From the second fitting - At the lower shoulder I needed to reduce by 1/4" on each side. Through the first 4 inches of the zipper (at side back seam) I need to let out by 1/4" and the release of the pins at the shoulders will take the stress off the zipper. Slight pulling in the upper part of the zipper.
The Straps need to be shorten by 3/4".
The front view: The bust darts were lowered, both pattern pieces. And 3/8" added to each side. The pleats were lowered as well. But I notices that the last one needs to be rotated a bit and moved up.
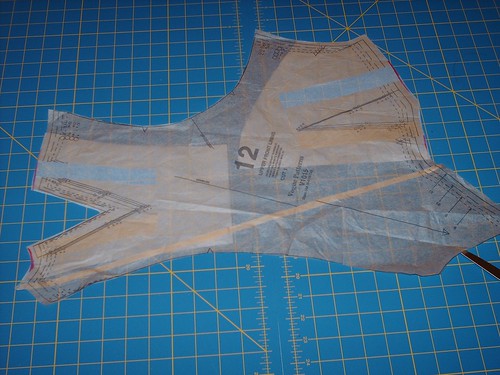
The Skirt - I added 1/4" to the seam allowances were multiple size adjustments are indicated. The skirt needs to be shorten by 2". This will be done at the very end because I want to make sure the strap adjustments are correct before cutting.
After these adjustments are made, I'll sew on the beads, add lining, and sew together the foundation. The flowers, leaves, and steams have not been cut yet. I'm saving that for last. When I arranged for the second fitting, I forgot to ask Ms. CB to bring foundation to be worn underneath. It will definitely impact the way the dress wears on the body and it will show any additional adjustments. I think we are good on the adjustments though, but I want to see the look of the dress with both foundations.
Next fitting -- After June 12th.
Stay Tuned...,
I hope you love what you do, cause I get all tense just reading about all the work you're putting into that dress! It's really looking beautiful.
ReplyDeleteThat dress is really beautiful!
ReplyDeleteCennetta,
ReplyDeleteThe dress is simply beautiful! This is such a beautiful style for Ms. CB. She's not tiny, not large, and this style is really flattering on her.
Prom dresses are an issue I will face in a couple of years. DD#1 will buy RTW, of course, and has the model figure with perfect curves. DD#2 is short-waisted and has less curves like me (a very athletic figure too) and has expressed an interest in me making her prom dress. I think this style of dress would look absolutely perfect on her. It's so classy and elegant. I think Princess Diana when I see it. Ms. CB just needs a tiara now :) !
And BTW, where did you learn your alterations skills? They are SO impressive!!!
Cennetta .- Mrs looks divine ...... uhmmm. I am sure that will be admired by their clothing. thanks for showing rectification of the pattern. QUESTION: a pattern seems complicated but I think it has no problems. so Cennetta?.
ReplyDeleteCennetta .- Mrs looks divine ...... uhmmm. I am sure that will be admired by their clothing. thanks for showing rectification of the pattern. QUESTION: a pattern seems complicated but I think it has no problems. so Cennetta?.
ReplyDeleteDana- It's fun most of the time. My only trouble so far was joining the bodice, skirt, and pleats details. Thanks for "walking" with me through the process.
ReplyDeleteErica- I'm taking a short break from the dress because of business travel. I wish I could take it with me. lol I'm anxious to get finished.
Faye- Big Thanks!
Kat- I really enjoy sewing for my DD; sometimes it's challenging though. On prom - With each prom dress I learn something, which is great. Already, I have one commission for a prom dress 2009. I only take a few each year. Is this something in your future? On alterations - my sewing bible (Vogue Sewing) is the best next to actually fitting the pattern/garment on the body. I also use the Palmer/Pletsch books. And, of course, all of my internet sewing buddies provide helpful information on alterations. ;-)
Nicely done - it does take a lot of work, but the results are worth it! I do hope we can see the finished product.
ReplyDeleteCenetta, thr gown is beautiful. The color is precious. Mrs CB is going to looked fabulous
ReplyDeleteThanks for stopping by my blog and leaving a great comment.
ReplyDeleteI totally love your blog. WOW that dress is omg so amazing. I haven't got that far with my sewing. But, you have done great work there.:) I will totally have to add you to my favorite. Take care. Keep on sewing.
This dress looks fabulous!
ReplyDeleteWoW!!! absolutely beautiful.
ReplyDeleteWow, what a project. Thanks for your kind comment on my blog, but your sewing skills are so far ahead of mine! This dress is looking fabulous.
ReplyDeleteWow that was a lot of work,but it came out beautiful!I know she loves her dress.
ReplyDeleteAll I can say is WOW!
ReplyDeleteYou're doing a fabulous job!
ReplyDeletethis dress is gorgeous! I am from chicago and I graduated from Northwestern!
ReplyDeleteStunning. You are so lucky; I love that color but on me it looks like bread mold!
ReplyDeleteThanks so much for the work you did on documenting this - I will likely be making this as my wedding dress, so I appreciate knowing what I'm getting into!
ReplyDelete