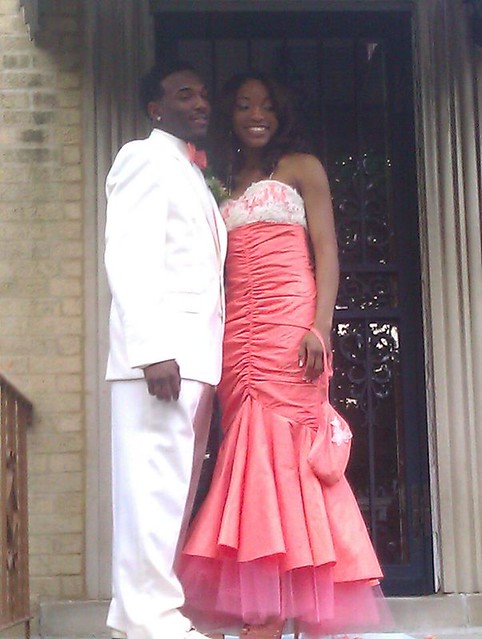
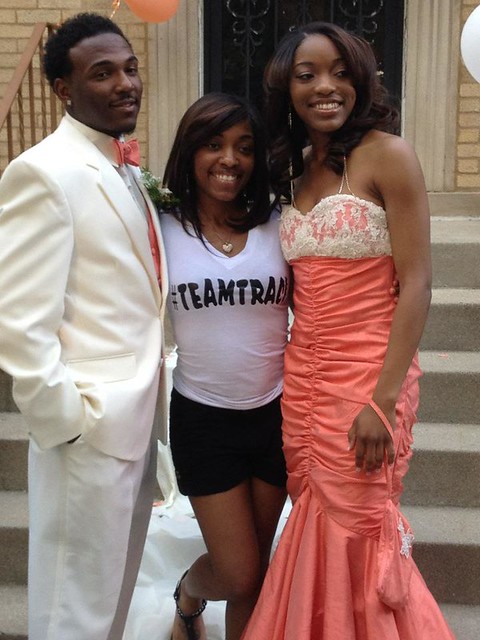
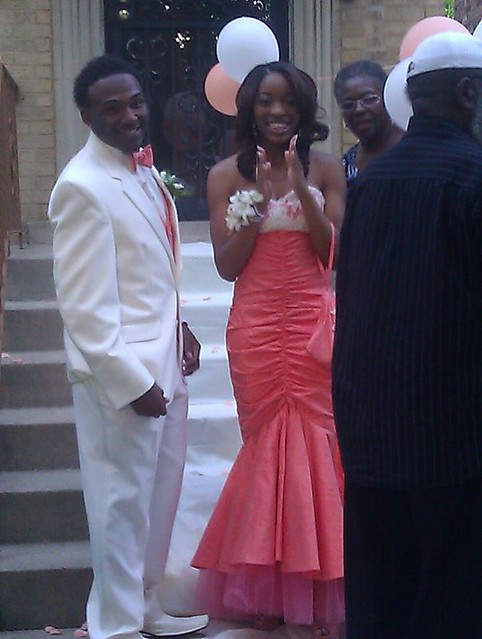
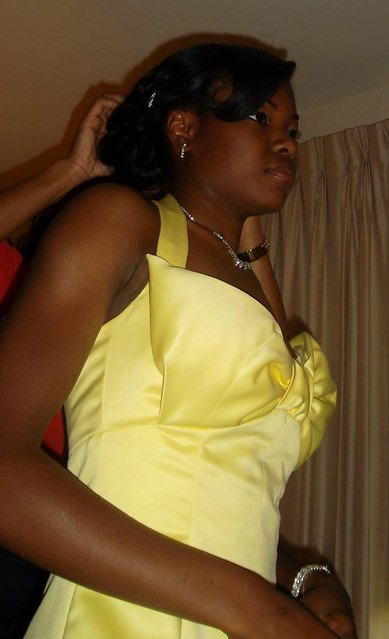
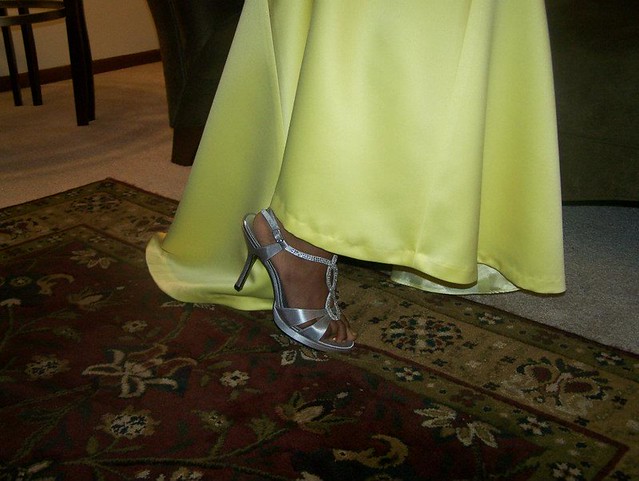
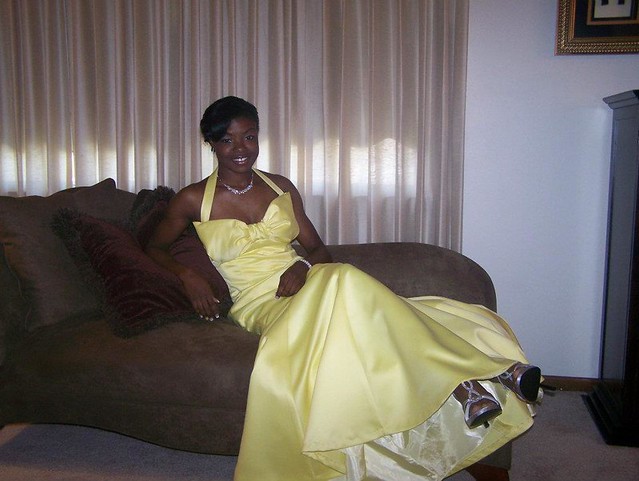
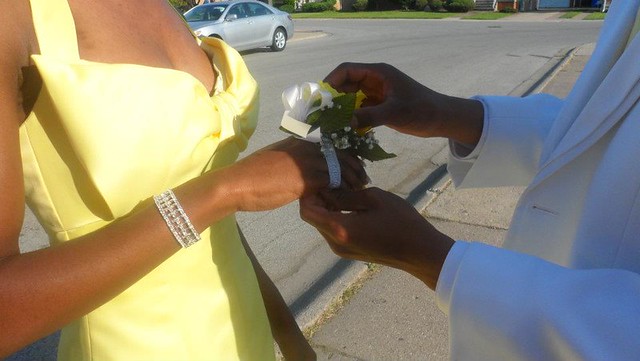
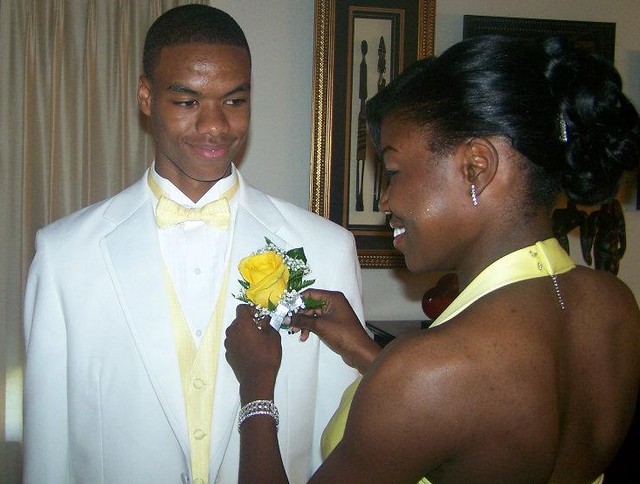
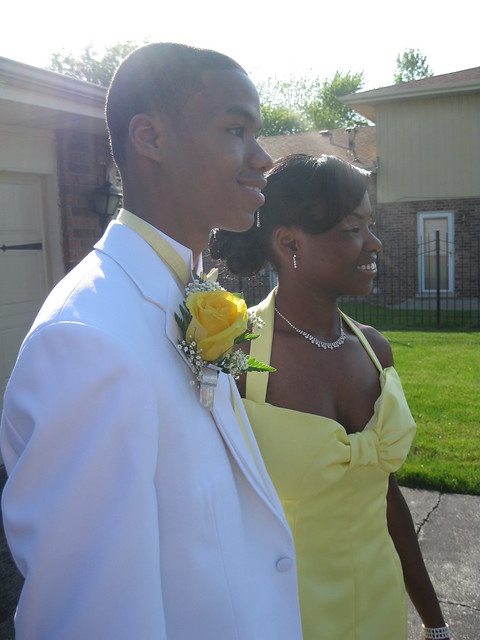
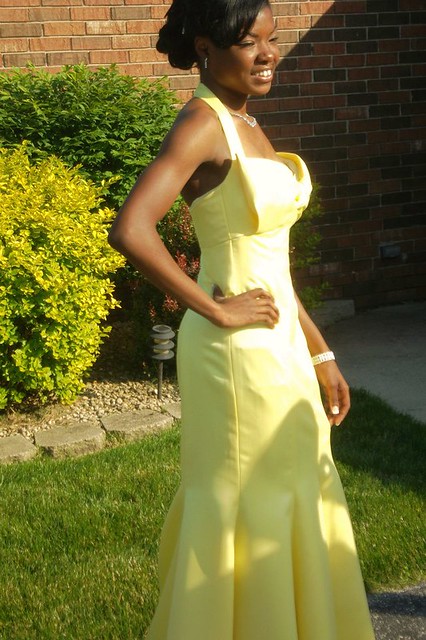
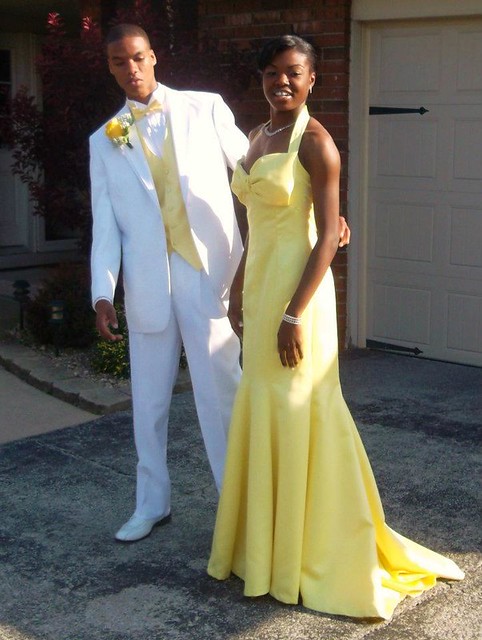
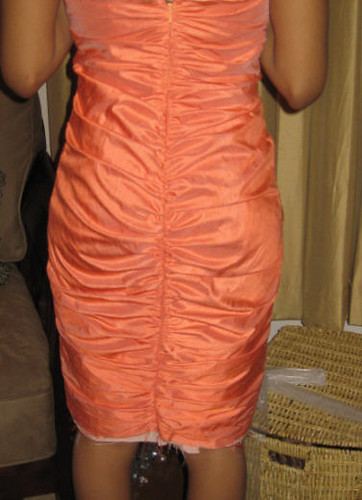
Now it's time for the finale on Vogue 8190. The prom was last Friday; but before writing the review, I needed a breather from all the activities surrounding the event. This year I had to finish two prom dresses within a four week period because of competing activities. Just a little bit of stress. The good thing, I'm pleased with the outcome of both gowns and relieved that it's all over.
My services including making six pieces for Traci's (2nd cousin) big day. So this review will encompass some mini reviews (linked) on the accessories that I made for this prom event. Yes, this review is long, but I think the details are important to cover. Let's start with the dress. I posted a few blog entries so I would not forget the alterations and design changes. So instead of repeating all of that I will refer to those posts at the appropriate time.
Here goes..,
We actually started discussing this gown early March. My first shop day was March 24th, with many to following (mostly for notions). I logged 32 hours on this project. That includes: shopping, cutting, sewing (muslins and garments), cutting mistakes, sewing mistakes and adjustments, and ripping out mistakes and adjustments. A lot of hours. Compared to Vogue 2931 this dress was a bigger challenge. Vogue rating this one (8190) average and Vogue 2931 as advanced. I think they are both advanced.
Pattern Description:
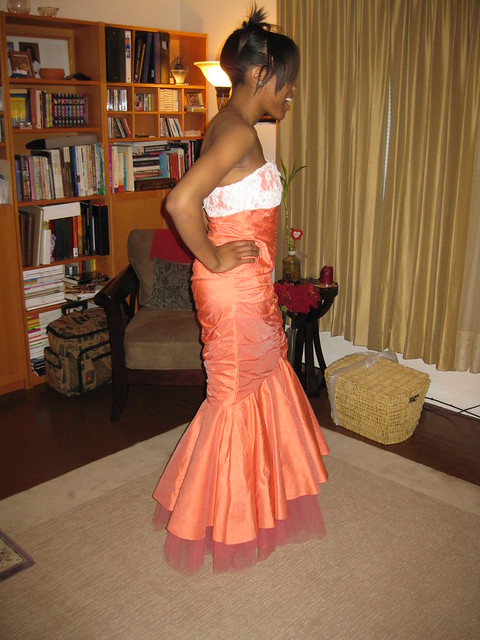
MISSES’/MISSES’ PETITE DRESS: Strapless, lined, fitted, mid-calf or floor length flared dress has front and back gathers, built-in foundation with boning, flounce variation and back zipper. A: shaped flounce (wrong side of fabric will show). B: dress and flounce contrasting overlay. C: purchased trim.
Pattern Sizing:
8 to 18. I started with size 12, but ending with a combination of sizes 8, and 10, and 12, depending on the area of the body.
Did it look like the photo/drawing on the pattern envelope once you were done sewing with it?
For the most part. There were a few design changes that made the finished dress slightly different.
Were the instructions easy to follow?
Yes. I had no problems following any of them. Standard, but very time consuming.
What did you particularly like or dislike about the pattern?
Traci gave me a sketch of how she wanted her dress to look, I picked this pattern because it closely resembled want she had envisioned.
My likes: ruching and the flounce. It's very attractive and figure flattering. Traci, as is Dominique, is lend and shapely. Almost zero fat.
I really don't have any dislikes about this dress. Because the time consuming elements are well worth it. The outcome is splendid. The pattern design and layout are excellent.
Fabric Used:
Silk Dupioni, bemberg lining, and bridal lace from Fishman's Fabrics in Chicago.
Pattern alterations or any design changes you made:
Some of the alterations and design changes can be found here and here.
The rest are;
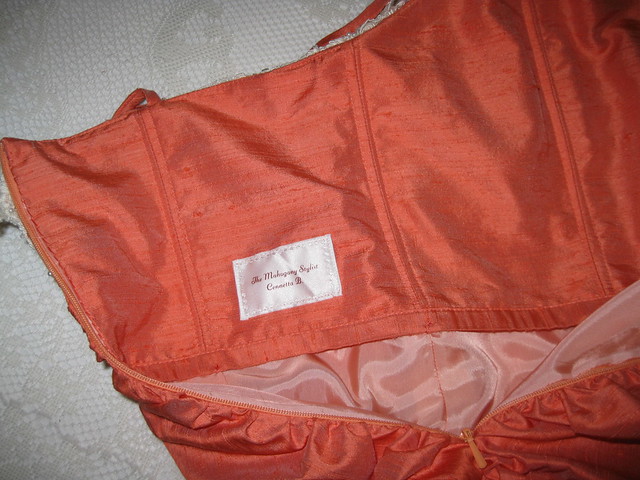
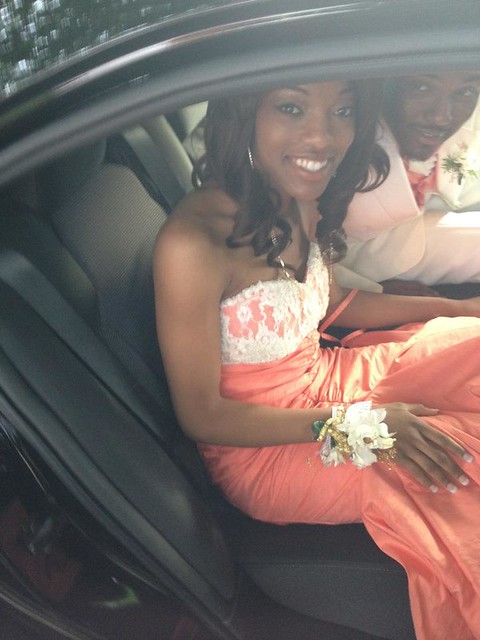
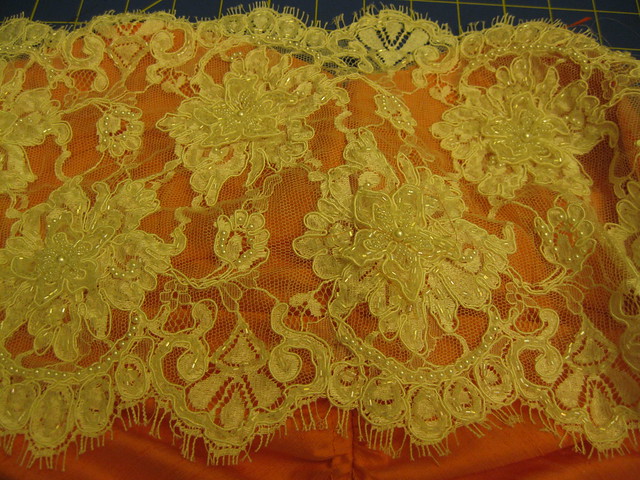
Lace adorned bodice - The lace was sewn together and attached to the dress bodice by hand. I used the bodice lining pattern and drafted a bodice back to create the lace overlay. The beautiful embroidered, beaded lace had small floral appliques sewn to it. I carefully removed them when they fell on the seam allowance. After the overlay was sewn together, I reattached the appliques where appropriate.
Straps - I added straps for comfort. Traci probably didn't use them. But I added them just in case. A lady has to have options. ;-)
Foundation bias tape - I made my own using the silk dupioni. I thought it would look better. And it did.
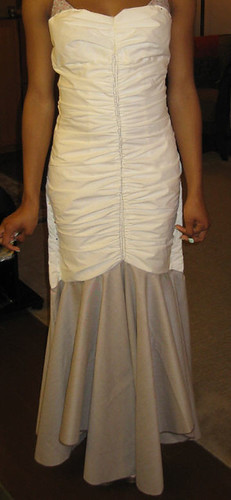
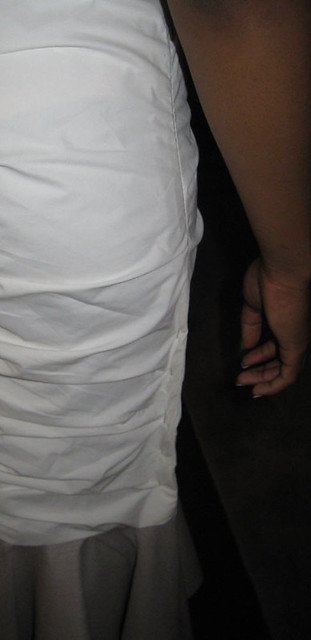
Graduated Flounce - You should make sure your fabric is wide enough to make the fabric flounce. Because the fabric was only 45" wide, I had to make the flounce (View C) shorter than the design. In this photo, you can see the front flounce is higher than the back. At the final fitting, I cut the tulle a little shorter in the front to match the curve of the fabric flounce. This was done after this photo.
Omitted the lace trim at the upper edge of the dress.
Accessories
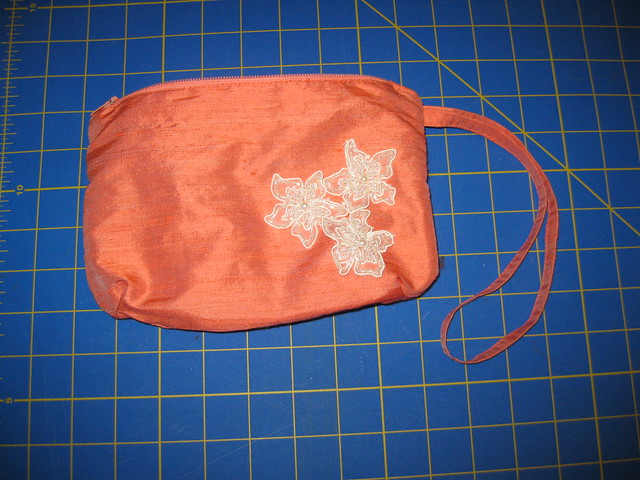
Purse - I used the same purse pattern as before (many times). It's reviewed here. Details on how to enlarge on Flickr.
Garter - I've designed many. Here is a link to my tutorial on Flickr. There are tons of ideas for prom garters here.
Stole - (sorry no pictures) But it looks like this one.
Would you sew it again? Would you recommend it to others?
Only if I make it for someone else. I don't think I'll need a dress like this. Then maybe I will. :-). I highly recommend it to others. If you have the body for it, this is a gorgeous dress to show it off in. Beware it's labor intensive.
All pictures are on Flickr.
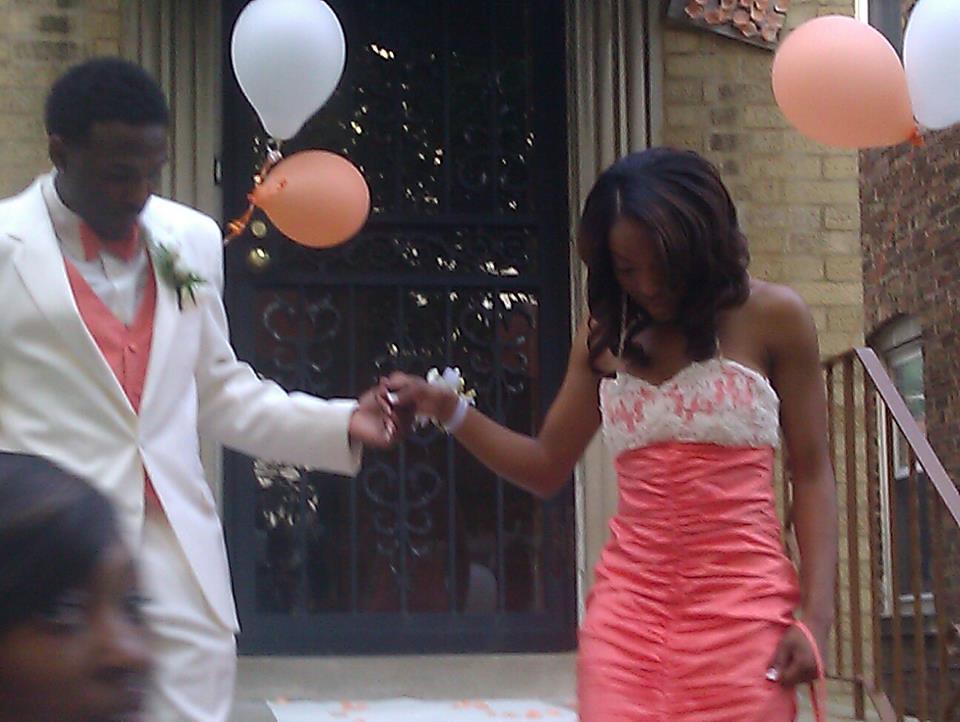
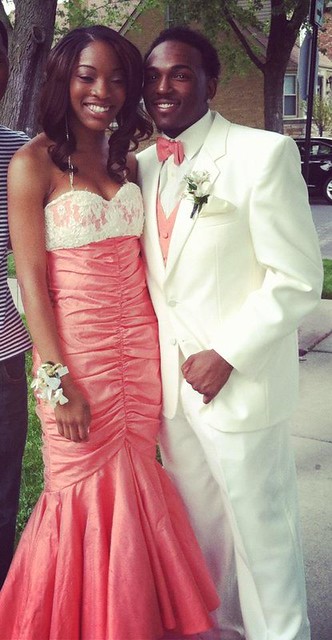
Conclusion: This was a great dress to sew with excellent results. I love how it turned out. And more importantly, Traci and her mom were very pleased with it.
Showing posts with label prom. Show all posts
Showing posts with label prom. Show all posts
Wednesday, May 30, 2012
Vogue 8190 - The Finale Prom 2012
Labels:
bow tie,
client,
garter,
gown,
mc call 4321,
prom,
purse,
stole,
trend color,
vest,
Vogue 8190
Prom 2012 - Do Gentlemen Wear Coral?.., M4321
This is one of the best photos available to me.
I selected McCall's 4321. The vest has a clean sophisticated look. It's a great complement to most tuxedo jacket. The bow tie looked simple and easy to make. Perfect for completing the gentleman's evening attire.
In review:
Pattern Description:
Men's Lined Vests, Bow Tie and Cummerbund: Vest A and B have collar and back belt; vest B has contrast collar; vest C and D have welts, shawl collar, front button closure, adjustable back neck button closure and back elastic with clip; bow tie E has two sections and back clasp; cummerbund F has pleated front, back lining and back elastic with clasp.
Pattern Sizing:
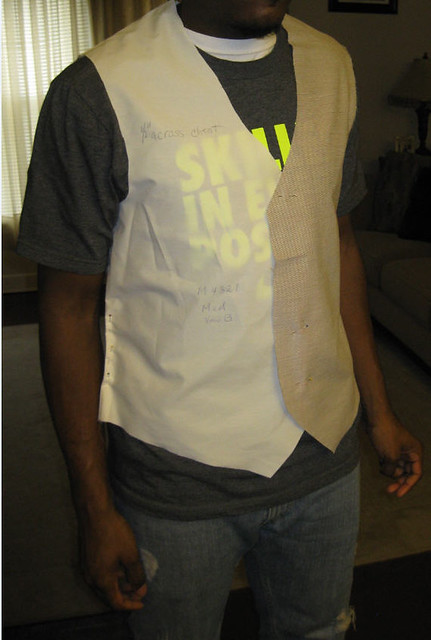
Small - XX-Large; I used size medium with modifications. Views A and E
Did it look like the photo/drawing on the pattern envelope once you were done sewing with it?
Yes. Except for the omission of the collar on the vest.
Were the instructions easy to follow?
A piece of cake with the exception of stitching the back (3) and stopping at the circle. The circle was about two inches from the edge. I didn't get that. So I stop about 5/8" from the bottom of the edge of the center back seam.
What did you particularly like or dislike about the pattern?
I like the fact that the design was clean and would not take away from the style or design of the jacket. I didn't know what style of tux the young man would wear. So this pattern was simple enough to complement most styles. And it sewed up quickly. This is the first time I've sewn a bow tie. No pain there either.
Fabric Used:
silk dupioni and bemberg lining.
Pattern alterations or any design changes you made:
View A - Vest. At first I thought I needed to do a prominent shoulder blade (PSB) adjustment. But the gaping at the armholes didn't quite match with the PSB adjustment. So I looked through my Palmer/Pletsch fit book for the correct solution. And ended up doing a round back adjustment. Additionally, I needed to trim about a 1/4 inch from the side seams, and I omitted the collar. View E - Bow Tie. I searched at a few stores trying to find the hook, eye and slide for it. Finally, I went to Vogue (Roosevelt Rd). They only had 1/4", 1/2" and 3/4". The tie was about 1" wide. So I had to trim it to make it fit through the closures.
Would you sew it again? Would you recommend it to others?
I will sew both again. And yes I do recommend this pattern to others.
All photos on the vest and bow tie are here.
Conclusion: This was an easy pattern to sew. The pieces went together with no problem. The clean look of the vest is a great complement to evening attire. The bow tie literally took less than an hour to sew.
Monday, May 21, 2012
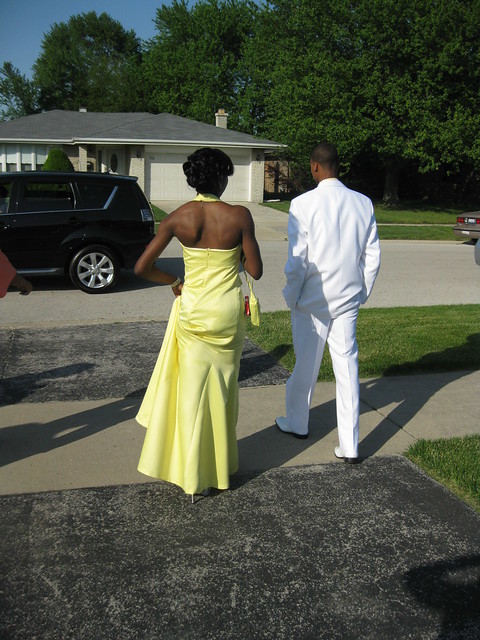
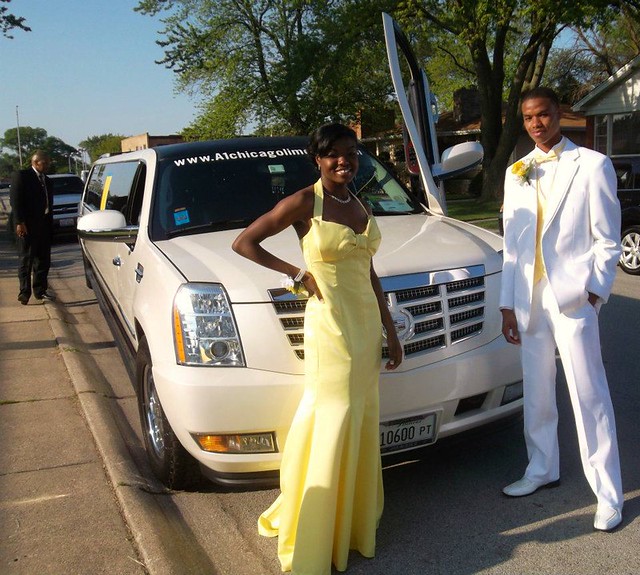
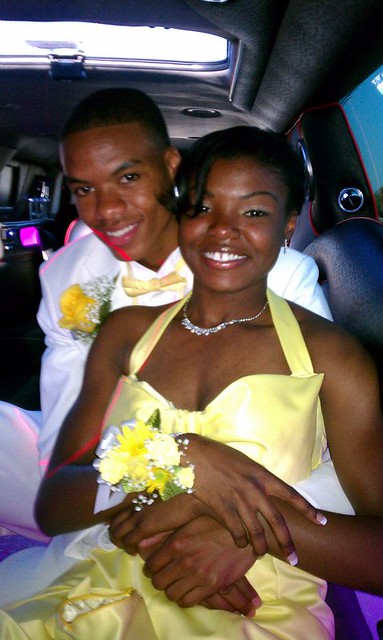
Brandon and Dominique Go To The Prom 2012 - Vogue 2931 & McCall 3033
Friday was the big day for my niece, Dominique and Brandon. I arrived at my sisters minutes before the couple left for the prom. There was lots of excitement at the house. We were all gathered to see the lovely couple off to the prom.
First a few a lot of pictures, then the reviews:
Vogue 2931 Pattern Description:
MISSES’ DRESS: Fitted, lined dress has princess seams with bow and front bra, back invisible zipper closing and neck straps. Built-in foundation with boning, hook and eye tape closing. Floor length.
Pattern Sizing:
6 to 22; I started with a size 10; but ended up using size 6 for the top and 8 from the hips down.
Did it look like the photo/drawing on the pattern envelope once you were done sewing with it?
Yes it did. This pattern makes a lovely prom dress.
Were the instructions easy to follow?
Simple. At first I thought the bow was going to give me a "slight headache", but no. The construction of it was no problem at all. The key is to follow every step. The rest of the instructions were pretty standard.
What did you particularly like or dislike about the pattern?
My niece picked a great pattern for starters. The over-sized bow and fish tail are the speakers. And boy do say speak elegance. You don't have to add rhinestones or crystals to come up with a beautiful dress. I enjoyed making it. There are a few dislikes, and they are related to some of the construction and my own personal taste (After thoughts are making the dress.) Step 27 instruction you to sew in bra cups. I think she could have done without them. The shaping around the bust area was a little bulky. No one else noticed I noticed in the fitting, but decided not to remove them. I didn't like that the founding was all lining fabric. In hind sight, it would have been better if the outer portion had been the dutchess satin. It seemed to round up over the top of the dress. And it was snug around her upper body. And finally, for years I have hated the method used by pattern companies for creating the French tack. This time I came up with a new way to get it done quickly. I used DMS floss and a tiny crochet needle to make the tacks. At the ends I left a three tail. So that I could easily thread a needle to attached the tacks between the lining and the dress.
Fabric Used:
Dutchess satin and poly lining from Fishman's Fabric in Chicago.
Pattern alterations or any design changes you made:
Dominique was easy to fit. No serious alterations. I made the halter straps shorter and shorten the dress by an inch or so. The other fitting adjustments were made as I sewed. The princess seams made that easy. No design changes.
Would you sew it again? Would you recommend it to others?
I probably won't sew this again. But do recommend it to others.
Conclusion: The is a great prom dress pattern that doesn't require a lot of fussy trims, rhinestones and crystals. It's speaks elegance all by itself. The indicated sewing level is advanced, but I think with careful sewing intermediate sewers could also make this dress. As part of the prom dress assemble, I made a shrug/jacket, garter, and purse for my niece. All made from the same fabric as the dress.
McCalls 3033 Pattern Description:
MISSES’ EVENING COVER-UPS: Capelet A and B are unlined with optional trim detail; shrug C is self lined has ruffle detail; shrug D is unlined has set-in sleeves; capelet E and F are lined; capelet E has trim detail.
Pattern Sizing:
X-Small to Large. I made a Small
Did it look like the photo/drawing on the pattern envelope once you were done sewing with it?
The silhouette was the same. I used the pattern for View D to make a lined jacket. So my rendition of the shrug/jacket is different.
Were the instructions easy to follow?
I really didn't look at them until I started writing this review. At glance, they appear to be easy. My method is much like the instruction for views C and D.
What did you particularly like or dislike about the pattern?
I thought is was a perfect "chill chaser". We are have cool days in Chicago. So it's nice to have a jacket or capelet as part of the prom outfit. No dislike for this easy shrug.
Fabric Used:
Dutchess satin and poly lining from Fishman's Fabric in Chicago.
Pattern alterations or any design changes you made:
No alterations. The design changes are: - I cut lining as well as the fashion fabric for the three pattern pieces. Sew each together the combined them using a similar method as described for view C.
Would you sew it again? Would you recommend it to others?
Yes and yes. This is a great pattern to have in your collection. Especially, if you sew prom dresses. All of the views are appropriate for gowns and evening attire.
Conclusion: This is a easy pattern to sew and a great complement to evening wear. I highly recommend it.
All photos can be viewed on Flickr.
Friday, May 18, 2012
Vogue 8190, The Second Fitting - Part III
Yesterday was the second fitting of Traci's prom dress. Boy, I tell you the ruching takes about two hours to complete. And I've done it twice for this dress. The good thing about it is, the effort is well worth it. The dress is coming along nicely and I hope to have it finished by Monday. I hope.., Lol
This lace will go across the bodice of the dress. Sorry the photo is dark. This lace is gorgeous.
The purse and the garter are done. I used the McCall 4679-D (purse) again; just graded it up and added some embellishment. The garter, I designed. Pretty easy.
Stay Tuned; there is more to come.
C
Wednesday, May 16, 2012
Vogue 8190 Transferring Adjustments to the Pattern, Part II
This is the second installment of the Vogue 8190 prom dress for my cousin. The adjustments were pretty easy, and I was able to transfer them to the pattern pieces with no problems. Below are the steps taken to make cutting and sewing easy.
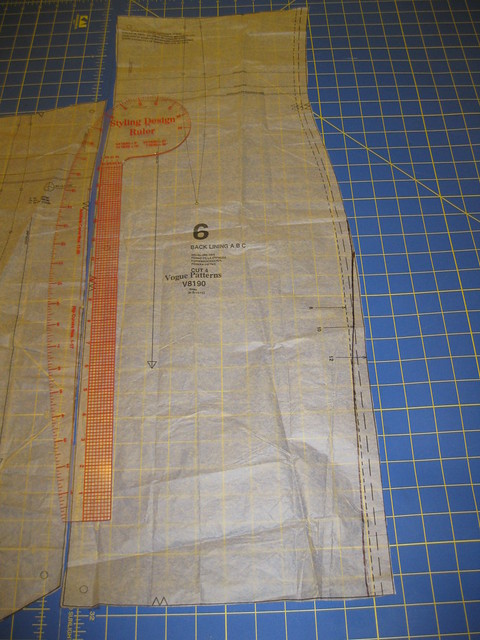
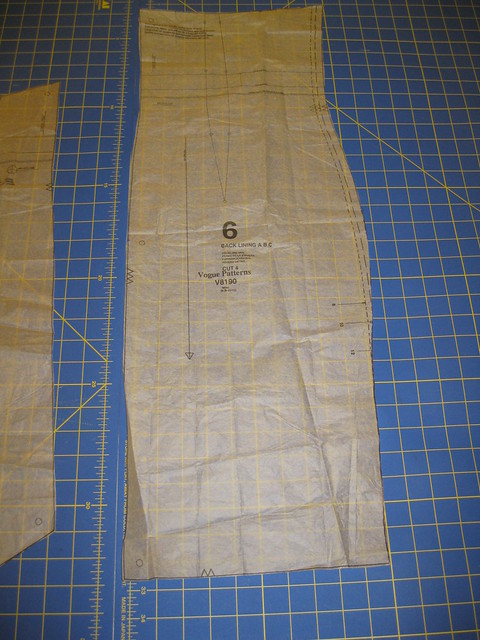
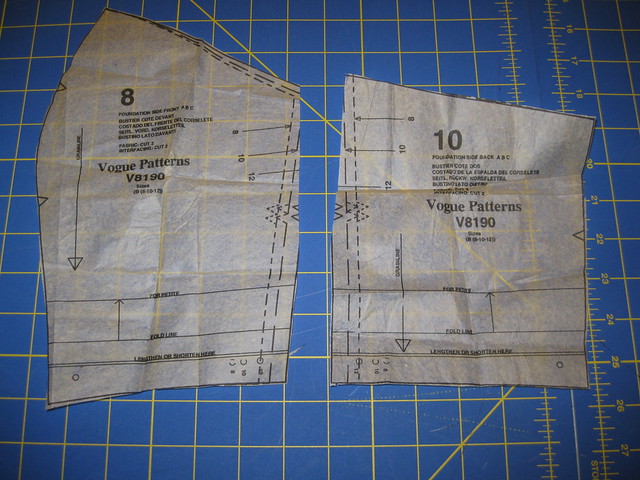
First, I drew the new line starting below the hip area to the bottom of the upper skirt. Here you see the full back lining.
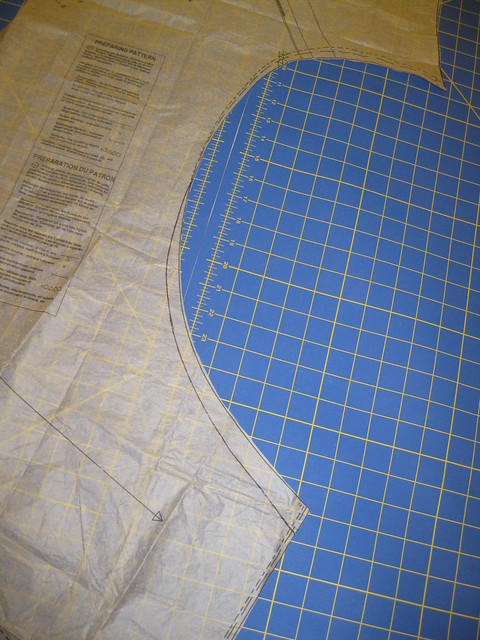
Next, I trimmed away the excess tissue. This process was done for the front as well.
The same adjustment is needed for the front and back of the dress. Both pieces have this flounce like shape. After it has been ruched, it will resemble a typical front and back close fitting dress.
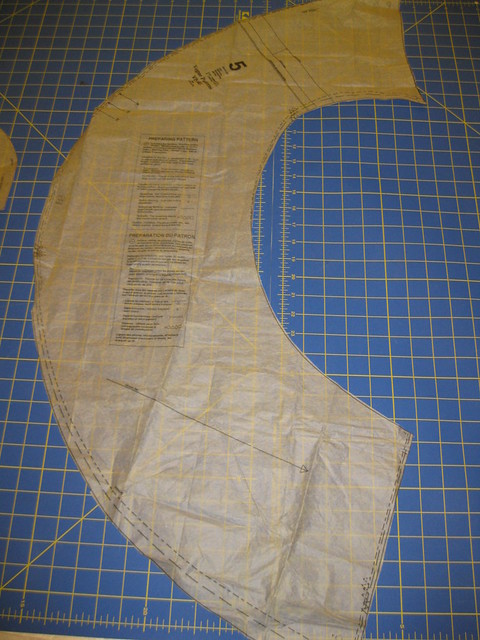
Here is the pattern with the excess trimmed away.
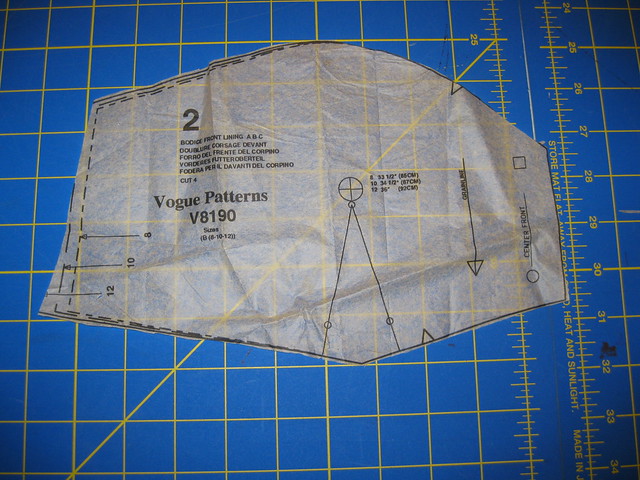
Instead of using the bodice front (center ruching) for C, I decided to use the bodice front lining for my version of View C. The top of the dress will have a lace overlay. I want it to be as smooth as possible. At the top of this piece I graded the pattern down to size 8 then gradually out to size 12. All other pieces where adjusted the same.
That's it for the pattern adjustments. Next, I'll sew the dress together.
Stay Tuned!
Cennetta
First, I drew the new line starting below the hip area to the bottom of the upper skirt. Here you see the full back lining.
Next, I trimmed away the excess tissue. This process was done for the front as well.
The same adjustment is needed for the front and back of the dress. Both pieces have this flounce like shape. After it has been ruched, it will resemble a typical front and back close fitting dress.
Here is the pattern with the excess trimmed away.
Instead of using the bodice front (center ruching) for C, I decided to use the bodice front lining for my version of View C. The top of the dress will have a lace overlay. I want it to be as smooth as possible. At the top of this piece I graded the pattern down to size 8 then gradually out to size 12. All other pieces where adjusted the same.
The adjustment was also made to the foundation front and back sides.
Stay Tuned!
Cennetta
Labels:
adjustments,
client,
gown,
prom,
Sewing,
Vogue 8190
Monday, May 14, 2012
Fitting Vogue 8190 and McCall 4321
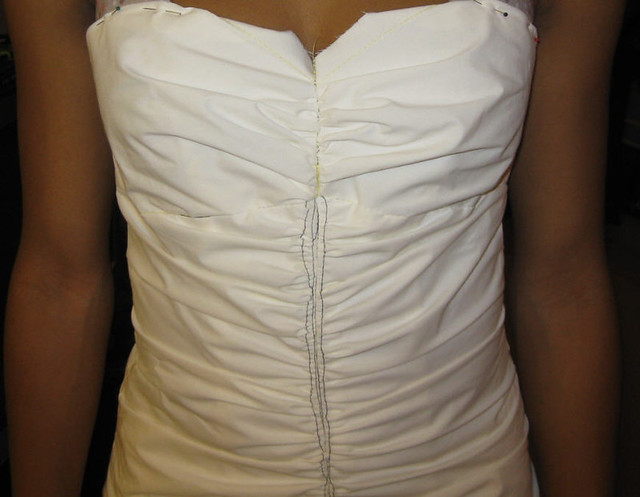
It's such a blessing to have clients with minor fitting issues. I'm in the process of making the second prom dress. This one is for my cousin (second) Traci. The only fit issues are: slightly too big in the bust area. All is needed is a reduction is the width of the bodice. And slightly to big below the hip area. Simple. (Yes the skirt is uneven due to lack of width of the muslin fabric.)
I'm using Vogue 8190, View C, for this dress. The design changes are minor too. Traci does not want the tulle exposed at the bottom so the overlay will be the same length. A beautiful embroidered, beaded lace will adorn the top of the dress. She wanted the bottom detachable; but I said nothing doing. That takes too much time.
Traci's date will wear a matching vest and bow tie. I'm using McCall's 4321. His muslin fitting was just as painless with adjustments along the upper back and the side seams. I'm thankful.
Next week, I will reveal the finished gown and vest. Meanwhile, the reveal of my niece's prom dress is scheduled for this Friday night.
Stay tuned and Happy Sewing!
Cennetta
Labels:
bow tie,
Clients,
gown,
Mccall 4321,
prom,
Sewing,
vest,
Vogue 8190
Tuesday, May 19, 2009
Prom - Accessories

For every prom dress that I make for someone I also make a garter, purse, and some type of coverup (stole, shawl, or jacket). Over the years I've purchased several accessory patterns that include complimentary views to special occasion wear. This year I kind of took the easy route, using the same purse pattern (M4679) for all three outfits made. The stole pattern(M3880)for my niece is now out of print, but I do recommend that you try it. There are a few views from this pattern that I will use again and again. This was the second time that I used the stole view.
A few weeks agoKat of Phat Chick Designs made a beautiful stole for her DD. It's similar to the McCall's pattern. The differences are the shape at one end of it and how the slit is made to join the two ends. I really like the bound buttonhole slit of Kat's version. I will use that technique for future versions of the stole. My sister has already requested a black one to add to her wardrobe.
The purse that I made for each lady was specially made to match the outfit as I used scraps from the dress.
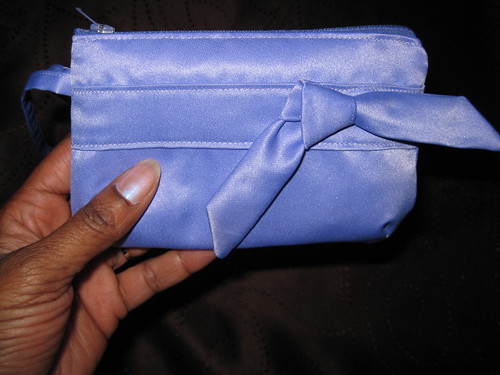
I started including garters and purses with the prom/graduation assembles about 15 years ago. Many of the clients complained that the garters in the stores were ugly or cheap looking. That prompted me to make some from the fashion fabric on the dress or grosgrain ribbon. Garters are simple to make taking about 45 minutes to complete. All you need is about a yard and half of ribbon/fashion, some elastic, thread, and some type of decorations.
My niece's garter

DD's garter

My reviews of the purses and stole are on Patternreview.
I would like to give a BIG thanks to Omega and Opal for nominating me for the Attitude of Gratitude Award.
Happy Sewing!
C
Thursday, May 7, 2009
Still Here!
I'm still here, but too busy at work and too tired in the evening to sew as much as I would like to. The second fitting of the prom dress was pretty good. My niece was all smiles, giggles, and jokes. I was glad to have a "happy" fitting. The purse and wrap are finished. But I'm having a hard time finding the right color ribbon for the garter belt. Today I'll stop by Vogue Fabrics; they are sure to have what I need. The plan is to have my nieces dress finished by Monday.
In the meantime, I've gotten a lot of commissions for sewing projects. I need to take a breather. Plus there are some things I want to make for DD and I. So no client sewing for the rest of May and all of June.
DD and friends are headed to the Anime Convention near O'Hare Airport. These brainy college coed's are crafty little ladies. They rented a table to sell their handmade jewelry and other crafts. DD encouraged me to sell some of my accessories as well. So she taking several of my crocheted caps and scarves. I also made a few crushed velvet and satin scarves with fringes or beads. The convention last through the weekend. Sunday night I'll find out how much they enjoyed the convention.
I'm a little behind with responding to e-mail and reading blogs. Hopefully I'll catch up soon.
That's all for now.
Happy Sewing!
C
Thursday, April 23, 2009
Muslin Fitting for B5182 - The Second Choice
Last weekend I was able to fit my niece's second choice prom dress. Sometimes I hate doing muslins, but they are so necessary when I'm sewing for others. Butterick 5182, view A is a go. There are several changes that need to be made. And most are in the bodice area.
I started with cutting the pattern based on her measurements. In these photos, every part of the bodice needs some type of adjustment. I probably could go down a size to eliminate some of the excess room at the neckline and at the side. There are several photos below to help me with transferring the changing to the paper pattern. And of course, I welcome any suggestions from you.
First photo: You can see, I have pinned out the gapping neckline and bust area. There is an under bodice (didn't want to share that photo, too revealing.) It's too long; that's a minor adjustment.
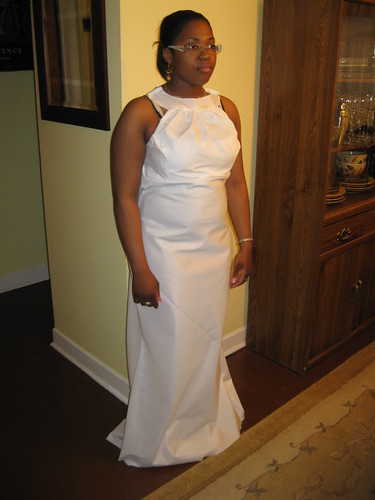
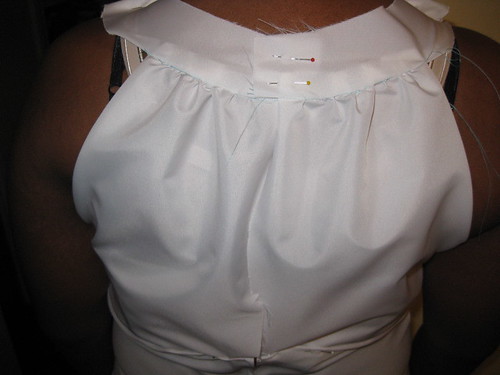
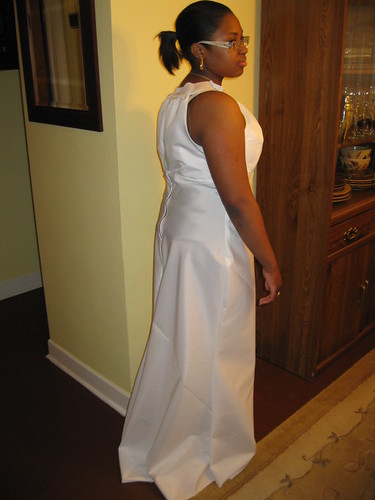 Full back photo: Where the bodice joins at the waist, there is some excess fabric that I sort of pinned out. She has a slight sway back.
 Here is a better photo of the back bodice. I think the side also come to close under the arm area.
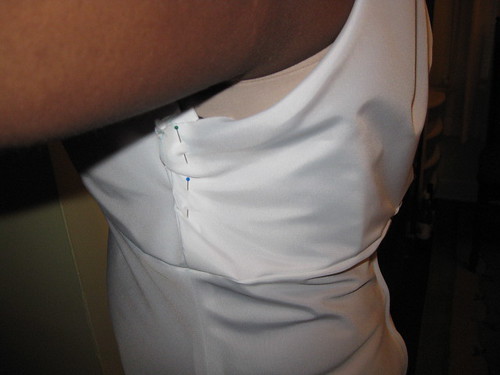
 Bodice side: I pinned out the excess at the sides.
 Front bodice: Here you can see the gapping area of the bust line. Also the bodice is a little to long for her torso.
 Neckline: The center back appears to stand away from her body.

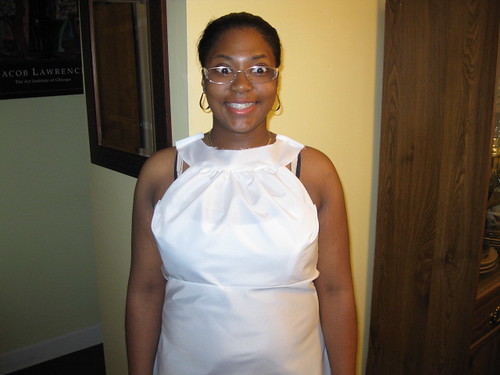
Parting Shot: This was actually the first picture taken. My niece was clowning around. I thought it would be a funny parting shot. Prom preparation can be tense. So we tried to have some silly moments throughout the process.
I started with cutting the pattern based on her measurements. In these photos, every part of the bodice needs some type of adjustment. I probably could go down a size to eliminate some of the excess room at the neckline and at the side. There are several photos below to help me with transferring the changing to the paper pattern. And of course, I welcome any suggestions from you.
First photo: You can see, I have pinned out the gapping neckline and bust area. There is an under bodice (didn't want to share that photo, too revealing.) It's too long; that's a minor adjustment.

 Full back photo: Where the bodice joins at the waist, there is some excess fabric that I sort of pinned out. She has a slight sway back.
 Here is a better photo of the back bodice. I think the side also come to close under the arm area.
 Bodice side: I pinned out the excess at the sides.
 Front bodice: Here you can see the gapping area of the bust line. Also the bodice is a little to long for her torso.
 Neckline: The center back appears to stand away from her body.
Parting Shot: This was actually the first picture taken. My niece was clowning around. I thought it would be a funny parting shot. Prom preparation can be tense. So we tried to have some silly moments throughout the process.

Subscribe to:
Posts (Atom)
