Thursday, February 17, 2022

Another Recipe: Vegetable (Chicken) Stir Fry


Yes, I have another  recipe. It's quick and the perfect meal for a day like today when I've been busy cleaning and doing laundry.

It's one of my one pot wonders or one skillet wonders. This is also good for cooking vegetables that you have small quantities of. 

Once you have sliced and diced the vegetables and cooked the rice (chicken (optional)), it takes less than 30 minutes to prepare.

2.5 cups rice cooked

1 carrot sliced

1 zucchini sliced

1 cup broccoli  cut into small florets 

1/3 cup onion chopped

1/3 cup green pepper chopped 

5 stalks asparagus chopped

4 tblsp soy sauce

3 tblsp olive oil

1 tsp garlic power (to your taste)

1/2 tsp black pepper ( to your taste)

1/2 tsp salt ( to your taste)

1 fully cooked chicken breast (optional-or you can add more if you like.)


Prepare rice and sit it aside.

Bake or broil chicken breat until tender. Be careful not to dry it out. You may also purchase cooked chicken from your local market.  Sit the chicken aside.

In a large skillet or sauce pan, heat olive oil on medium flame.  Add all vegetables sautéing until tender. About 5 minutes.

Add cooked rice, salt, pepper, garlic powder, soy sauce. Stir until well mixed being careful not to over stir. Lower flame.

Add chicken breast. I usually break it up into small pieces using my hands. Stir. Turn off flame and cover for a few minutes.

Ready to serve in less than 30 minutes. 


Sunday, February 13, 2022

Swedish Meatballs - Time for Comfort Food


It's time for a comfort food recipe.  

If you are like me, I love my wintertime comfort foods.  Today I'd like to share a Swedish Meatball dish that I love to eat with mashed potatoes and oven roasted lemon brussel sprouts.  I hope you'll try it.  It's delicious.

Meatball Ingredients -

  • 1 lb ground beef
  • 1 lb ground turkey
  • 1/4 cup flat leaf parsley minced
  • 1/2 tsp ground allspice
  • 1/2 tsp ground nutmeg
  • 1/2 cup yellow onion, grated (finely chopped)
  • 2 tsp salt
  • 1 tsp pepper
  • 3 cloves garlic minced
  • 3/4 cup herb breadcrumbs (I like Pepperidge Farm herb seasoned classic stuffing)
  • 2 eggs
  • 2 tbsp olive oil

Cream Gravy Ingredients -

  • 1/2 cup butter
  • 1/2 cup flour
  • 4 cups beef broth (can substitute chicken broth)
  • 1 tsp pepper
  • 1 tbsp lemon juice
  • 1/4 tsp ground allspice
  • 1/4 tsp ground nutmeg
  • 1 cup heavy cream


Mix meat, parsley, allspice, nutmeg, grated onion, salt, pepper, garlic, breadcrumbs, and eggs until combined.


Using a tablespoon measure out the meat mixture into roughly 35 meatballs.


In a large pan, heat 2 tbsp. of olive oil over medium heat.  Add meatballs and cook until browned.  Takes about 5 minutes.

Remove grease from pan -- Lower the heat to medium and add the butter to the pan.  When butter starts to bubble, sprinkle in the flour and cook for 1 minute.  Add the beef broth to the pan a little at a time.  Whisk.

Add salt, pepper, lemon juice, allspice, and nutmeg.  The slowly add cream.  Add meatballs.


Simmer until the gravy has thicken and the meatballs are cooked all the way through 8-10 minutes.

Serve with mashed potatoes or egg noodles, and vegetable of your choice.

That's it.  Enjoy!

Cennetta


Friday, February 4, 2022

January 2022 - End of the Month Sewing Review


I owe this new approach to reviewing my sewing activities to my friend, Carolyn, over at "Diary of a Sewing Fanatic."  Carolyn has been doing this for quite some time now.  I really like the idea of posting mini recaps of my sewing journey.   This may be better for me than waiting until the end of the year for a grand post about all my makes of the year.  Following this practice will give me 12 mini recaps that I can draw from at the end of the year.  Then hopefully, I will find it easier to post an end of the year review.

After the holidays, I'm happy to stay at home and sew.  I'm encouraged and excited at the close of the year to start making new goals, new plans for a rewarding year of accomplishments.  This attitude is no different for things I want to make.  Usually, I decide what I'd like to make in December for January.  By the first of the year, I cut out a few garments to start.  Something easy.  

This helps get the mojo going after all the holiday season cooking, cleaning, and decorating.  So, this year I started with three knit tops.  I cut them all out on the same day.  I made the black velvet top first, as I thought it would be the prettiest of the three.  Then, I moved on to sew up the second and third tops.


Black Velvet Top - M7836 - View C 

This is actually my favorite, and it is a good compliment to the black leggings that I made last year.  So, I was off to a great start with a pretty top and something new to wear with the black leggings.  My fabric came from JoAnn's.


Ribbed Knit BS6990 - View D and M8238 - View B

The next two tops, I've made a few times before.  Especially, the Burda Style turtleneck BS6990.  It is a TNT.  This is the fourth time I've made it.  And McCall's M8238 - View B.  I just had to try it again.  From bodice to pullover knit top.  Both are great staples, and I will get a lot of wear out of them.  Fabric from FabricMart Fabrics.


Beige Polyester Suiting - V1294 - View B

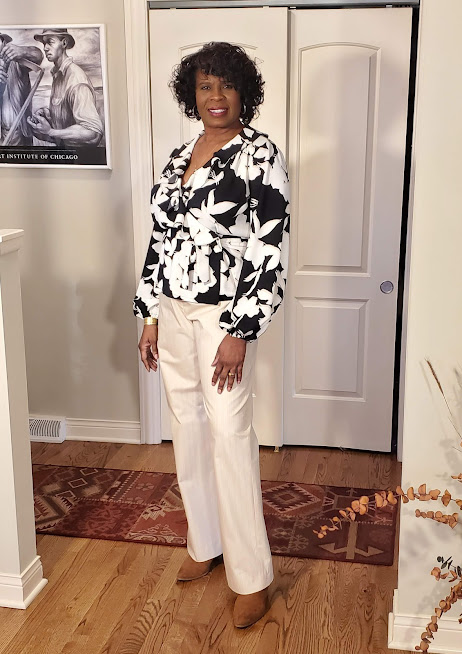
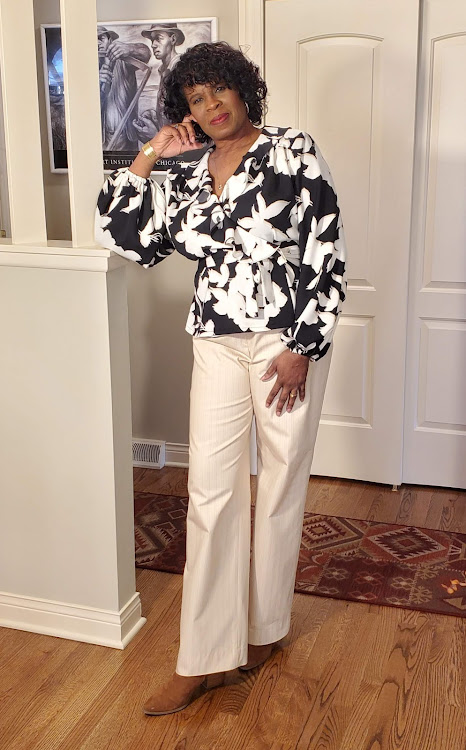
Black and Ivory Floral Blouse - NL6560 - View D

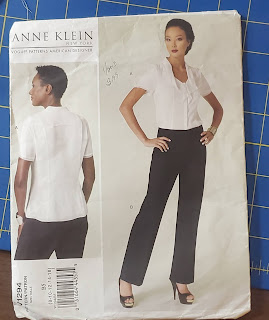
My next two projects were not the quick and easy two-hour projects.  I wanted to add some details to a plain pair of pants.  I selected V1294.  These pants are well drafted and good for a sloper/TNT pant.  Welt pockets are still a challenge for me.  I don't know why as I've made them several times.  For these pants, I added them to the back.  They turned out perfect.  Happiness.  So, this was my challenge project for the month.  It was also a Minerva Fabric sponsored project.


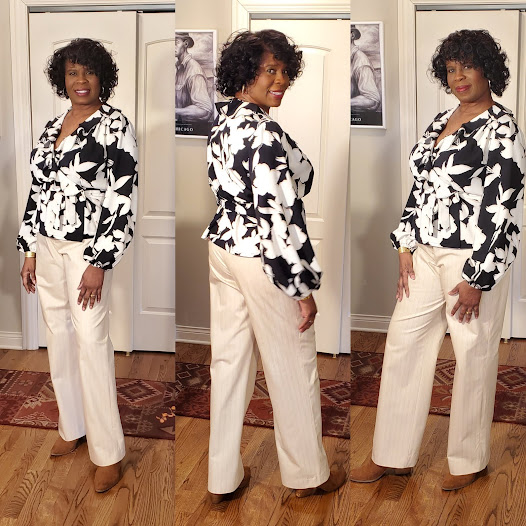
My Coordinate of choice is also a Minerva sponsored project.  I've wanted to make this blouse for a while.  I like it paired with the subtle pinstriped beige pants.  Both the bold and the subtle show up in this outfit.  My new blouse is floating and feminine; it can be worn with a few other garments in my wardrobe.  That's another sub-goal of mine.  Is to create more mixing and matching instances in my wardrobe.


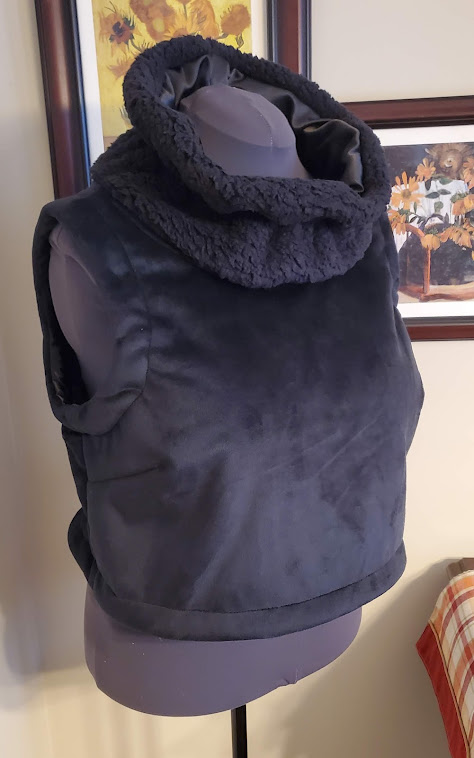
Black Faux Suede with Fleece Backing V1515 - View A

My final garment made for the month of January is a pullover vest made of faux suede from JoAnn's.  Unfortunately, this is my least favorite make of the month.  Nothing to do with the construction, but the style on me is not that great.  So, this one I will gift to someone.  

This sums up my sewing projects for the month of January 2022.  In total I completed six garments.  The majority are knit tops: fancy and staples.  Love my new neutral feminine blouse and pants.  There is only one not in love with project.  Pretty good for the first month of the year.

Til next time!  Enjoy!

Cennetta


Thursday, February 3, 2022

Vogue V1515 Pullover Vest and Skirt


I hesitated awhile before finally deciding to go ahead with posting my pattern review of Sandra Betzina's Vogue V1515 (OOP).  The hesitation is due to my "not being so happy" with how the top/vest looks on me.  I really was hoping that it would be a good look for me.


This is the last garment that I made in January 2022.  I decided I would do end of the month reviews.  And before doing that, I wanted to post this last garment made.  To be clear, the vest is the last garment for January, and the skirt is the last garment for December 2021.

Anyway, as far as the making of it, the construction was fine. There are somethings I could try if I decide to make it again, which I'll mention later in the review.  So, let me get to the specific details of the review.


Pattern Description:  Misses' top and skirts:  Loose fitting, pullover top has elasticized collar, forming ruffle, contrast facings at armhole and lower edges, and topstitching.  Below waist skirts have wide yoke piping cargo pocket, hidden pocket on front yoke facing and shaped hem.  C: Side zipper.


Pattern Sizing: Sandra Betzina uses a different sizing chart from other Vogue pattern designers.  I used size E with very little modifications. Views A and B

Did it look like the photo/drawing on the pattern envelope once you were done sewing with it? I think both garments looked like the photos and drawing for the most part. 


Were the instructions easy to follow? The instructions were pretty easy to follow.  I did have a little issue with the outside cargo pocket (skirt). I mistakenly place the ends too far apart.  So, there is a pull at the top of the pocket.  But other than that, no problems.

What did you particularly like or dislike about the pattern?  What drew me to this pattern was the pullover top.  (I'm calling my version a pullover vest because of the heaviness of the fabric.)  Unfortunately, I'm not that happy with how it looks on me.  


So here are my likes:

  • The design of both the top and the skirt.  I love the ruffled collar of the pullover as well as the shape of the uneven skirt hem with the cute cargo pocket.
  • Easy to sew project.
  • Yoked skirt.
  • The bust darts were spot on.  I didn't have to lower them.
My dislikes:
  • The length of the pullover.  I wasn't thinking when I cut it out.   I should have made it a few inches longer and tapered it a bit at the bottom so it wouldn't look so boxy on me.  So I added a piece of elastic to create some shape to the vest.  In turn, create some shape for me.
  • The length of the elastic to form the ruffle on the collar.  It's too long.  I would have like it closer to my neck.  

Fabric Used: 
  • Pullover Vest - I used a faux suede with fleece backing from JoAnn's.  I thought this was perfect for the vest.  Only problem, it's a little bulky for me.  Contrast facings - crepe back satin remnant from my fabric collection. 
  • Pullon Skirt - I thought this was a cute jersey knit.  For the life of me I can't remember where I purchased it. BTW- this is a UFO.  It was cut and ready to sew for about two years.  

Pattern alterations or any design changes you made:  I only wish I had made a few adjustments on the vest.  For the skirt, I added the elastic to the waist and omitted the piping.  I made a design change on the vest.  For the collar I used the satin for the inside of the collar.  I actually, divided it in half lengthwise adding an inch to the faux seude outside and subtracting an inch from the inside satin. The original design would call for an all-faux suede collar and that would be too hot in my opinion. No other changes.  

Would you sew it again? Would you recommend it to others? I really like the skirt.  I may make a woven version with the side zipper and adjustment to the width of the yoke to fit better.  The pullover vest, I probably won't try it again.  I think I'm going to gift this one to someone.  


Overall, I like this pattern especially the skirt.  I do recommend it to others.  The rating on the envelope is average.  I think most sewist could make this with no problems.  

PS - I did add the little inside pocket.  I forgot to take a picture of it.

Happy Sewing!
C


Thursday, January 27, 2022

New Look NL6560 and Vogue V1294 - New Outfit Done


I'm so pleased with how both of these pieces turned out. It was a lot of fun making them. There are so many things I like about it.


Blouse

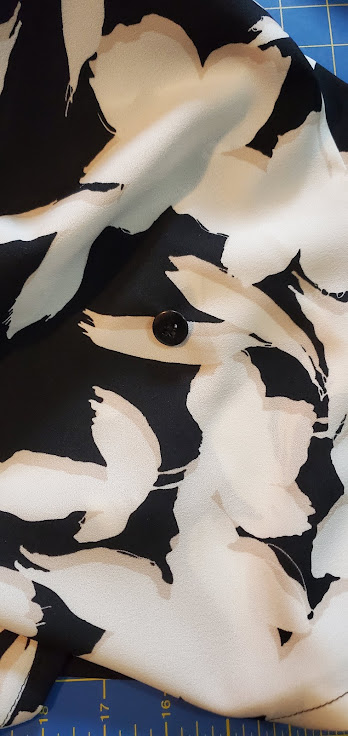
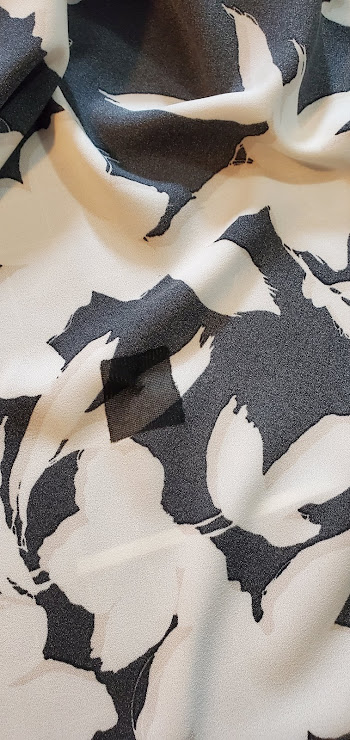
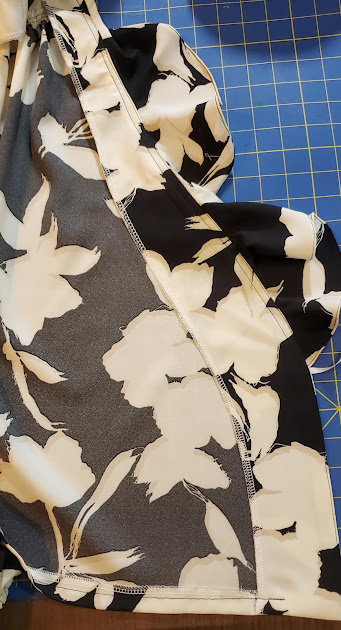
The fabric is lovely.  It is a polyester crepe from Minerva.   This soft, floaty fabric falls close to the body.  It sews and presses with no problems.  I love the bold, floral print.  There is an excellent balance between the ivory and black. 

The flounce is very feminine and pretty.  Most of the time, I shy away from neckline flounces, but this one doesn't add to my top heaviness.  

The sleeves are pretty and simple.  The bell falls perfectly above my hand held together by a piece of elastic.  Super simple to construct.  


I also like that the tie was separate from the top.  It closes with an inside twill tape tie and a buttonhole closure on the outside just above the waist.  I used a piece of interfacing to reinforce where I sewed on the button.


My adjustments to the front facing resulted in a wider lower facing.  I wish I had made the upper portion wider too, It kept flipping to the right side of the blouse.  So, after I under-stitched around the neckline, I stitched again to secure the facing to the blouse in hopes of reducing the flip over affect.

This was the second time I used this pattern.  Previously, I made view C and gifted that top to my sister.  So, I was already familiar with most of the construction steps.  In general, they are typical.  Nothing difficult or unique about them compared to other styles with similar instructions.


Pants

The pants are of a viscose suiting, also from Minerva Fabrics.  It has a crisp hand and a stiff drape.  Easy to sew and press.  I love a nice striped fabric.  The pinstripe is subtle, pairing the two fabrics there is no competition between the prints.  They complement each other.

I'll use this pattern again.  They are well drafted, and I love a curved waistband.  And I will definitely add welt pockets again.  They are a great detail.

My related posts are here: blouse and pants 

Happy Sewing!

C  


Tuesday, January 25, 2022

Notes On A Pattern - New Look NL6560

Today I wanted to share my pattern fit adjustments of a recent project for Minerva Fabrics.  I actually made these adjustments a few years ago and made a top using New Look 6560, view D.  That top was gifted to my sister, and I didn't think about blogging the details about the project.

This month Minerva is hosting a challenge using New Look patterns.  I decided to use this one because it was ready for use.   My goal is to share the pattern adjustments in case another sewist is planning to try the pattern that may need to make similar fit adjustments. 


FBA


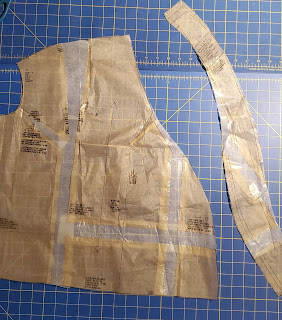
There is a lot going on with these two pattern pieces.  First, I made the FBA on the front rotating the side dart to the gathers above the bust.  Zoom in to see details.  Along the neckline about where the two front pieces intersect, I made a 1/2 inch tuck to reduce gapping at above the bust and in the neckline.  

For the front facing, I added length based on the FBA on the front blouse.  I also made the same tuck to make sure the pieces matched.  As you can see, the lower part of the facing is wider than the upper part.  That's ok.  But you can widen the rest of it as well making sure you do the same to the back facing.


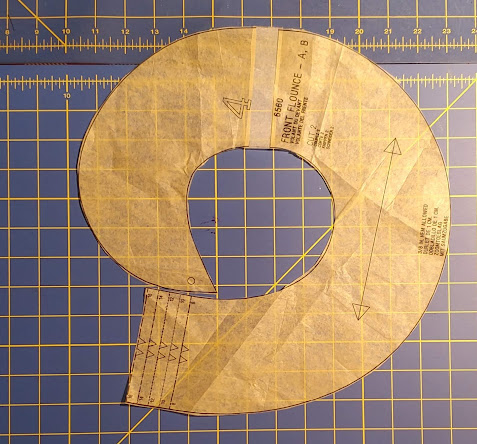
Next, I added the same amount of length to the flounce to make sure it matched up with the front and the facing.


Prominent Shoulder Blades


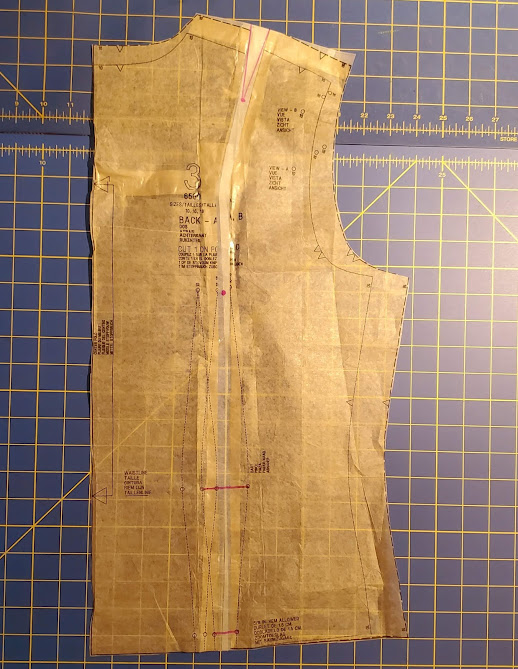
I simply sliced the pattern from the shoulder seam to the hem to add the desired width.  To true up the shoulder seam, I added a small dart.  The vertical back/waist darts is slightly wider too.  But these can be adjusted as needed.  

I didn't do my usual sway back adjustment because I will wear this top with a belt. 

Note:  This top is really short.  I added about two inches to the bottom of the front, back and front facing.  Check the length to make sure it long enough for you. 

So that's all for the adjustment on this pattern.

Stay tuned!

C


Monday, January 24, 2022

Notes On A Pattern - Adding Welt Patterns to Vogue V1294


Goodness, I haven't done a Notes on a Pattern in a while.  Being on Instagram more these days, make it so easy not to come to blogland to surf or post.  

So many of my recent posts have been made well after I've posted on Instagram or to other platforms.  I want to get back to reading blogs and posting on a more consisted basis.  Yeah, I know, I've said that before. 

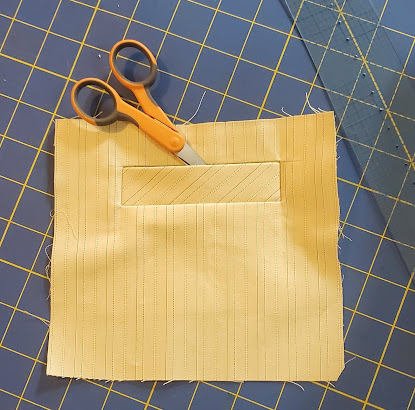
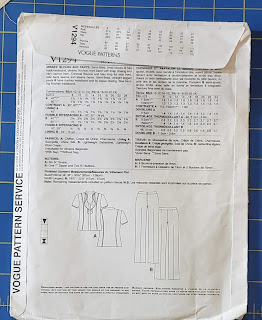
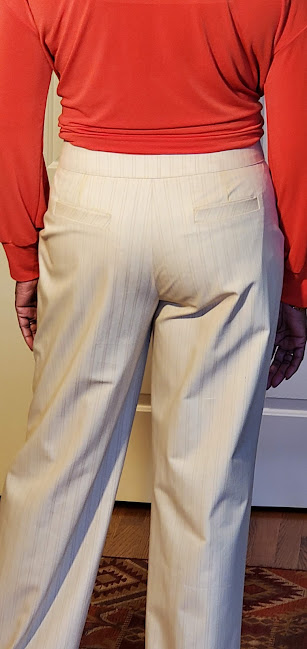
Anyway, this note is about adding welt pockets to a pair of pants.  One of my goals is to continue to add more welt pockets to my garments.  For these pants, I simply used a welt pocket pattern from another pattern.  Sorry, I can't remember which one.  I made another copy of the pieces and added them to the envelope of Vogue V1294.  I already know I will make these pants again.


I really like the draft of these pants.  There is a "real" fly, and the curved waistband is the best.  Also, the crotch isn't super long.  I didn't have to shorten it.  The width of the pant leg is great too.

Before I added the pockets to the pants, I did a test pocket just to make sure. ;-)  It turned out perfect.  Next, time to add the pockets to the back of my pants.  This was the next step in the construction after I made the darts.

Placement is really important.  From what I've read, the tip of the dart shouldn't extend pass the bottom of the welt. 

But I notice that my pockets are a little low on the back side.  So, next time, I think I'll add an inch to the top of the waist.  It won't be too much above the waistline as these sit kind of low to begin with.  And with that small change, I can raise the pocket an inch.

More later on the making of my pants.  Stay tuned.

Parting Shot:  View of my pockets with me wearing the pants.  I'll post a full photo after I post to Minerva's website as this is a Minerva sponsored project.


LinkWithin

Blog Widget by LinkWithin