Wednesday, September 28, 2011

John Koch - Creative Genius at Montrose Studio


Last week I had the distinct pleasure of participating in a two day workshop at the Montrose Studio. John Koch is the owner and propetier of this eclectic studio located on West Berwyn Street. The location is unassuming, but when you enter your eyes are on visual overload. John makes everything. Customes, stage props, purses, shoes, hats.  You name it. John makes it.


John made almost everything on this wall. The shop is filled with sculptures, pictures, hats, purses, beads and all the supplies and equipment needed to produce beautiful works of art.


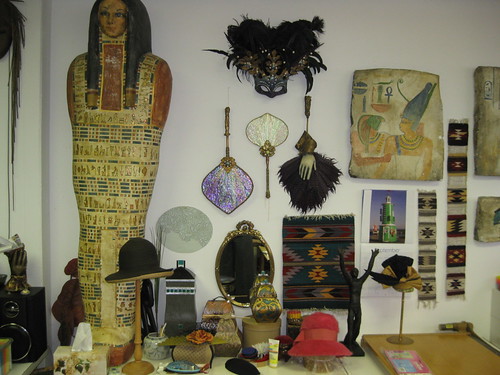
John has degrees in Art and Design and Art History. He has dressed windows for Carson Pirie Scott and actors of stage plays. His work has been featured in newspaper and magazine. Looking through his portfolio is a sweet treat that you should not pass up if you happen to stop by his shop. Seriously, I could just watch him work.

Below, Sandy Young working her purse. This lady is a pro at making purses. She gets orders for her custom made bags.


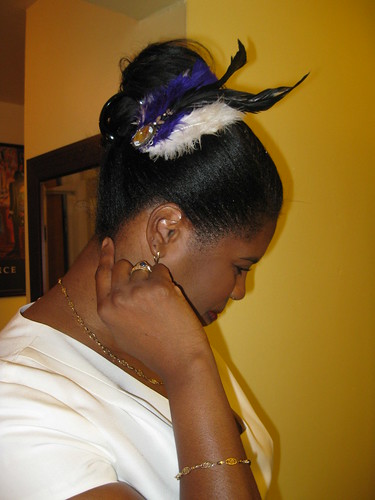
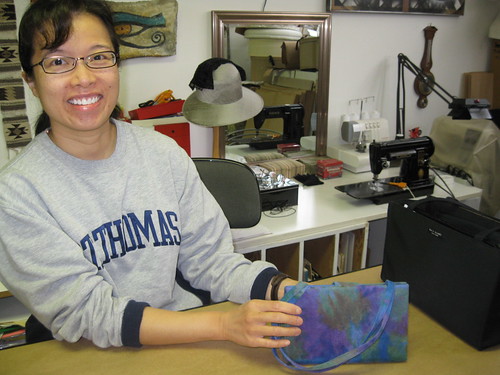
Janice pictured here with one of John's petite purses.


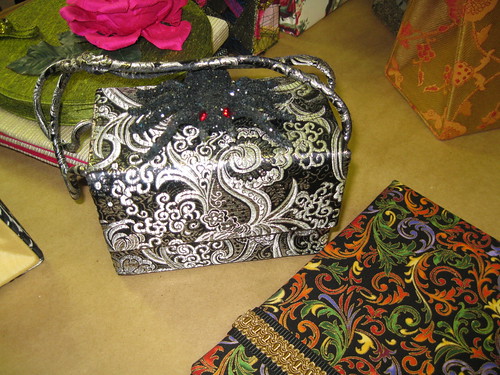
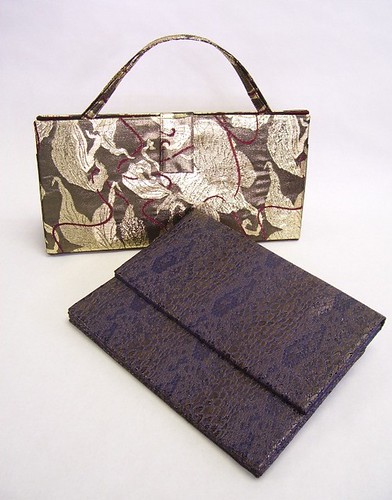
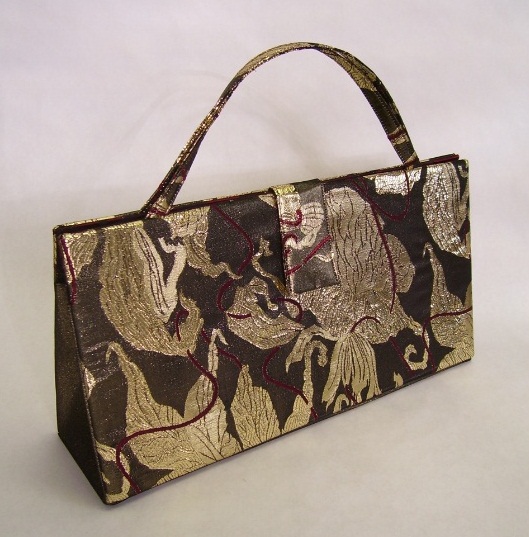
Below are several purses designed by John. Many shapes, sizes and types to fit the occasion.

The Haute Couture Club coordinates workshops and seminars with local and national artisans to help us hone our creative skills. John Koch regularly gives workshops on designing purses, hats, and gloves. This was my first time attending one of his workshops and it was worth every cent.

So if you have a group or club in the Chicago land area that wants to take classes at Montrose Studio, give John a call. He would be happy to share his talent with your group.

      Montrose Studio
      1070 West Berwyn Avenue
      Chicago, IL 
      773-275-4151


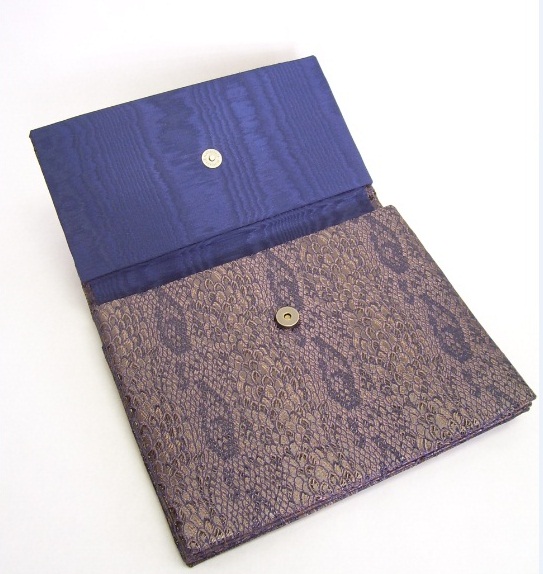
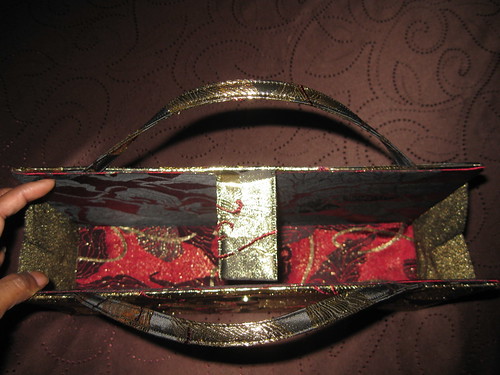
At the end of the workshop, I had made two purses: clutch and clarinet type bags. Both taking less than a yard of fabric, plus lining, and a few other notions. All in all, I enjoyed the experience and look forward to the next class.

I thought about doing a little tutorial on making the clutch bag, but I am not sure yet. Believe me, it's easy and you can modify the process to a very nice portoflio.

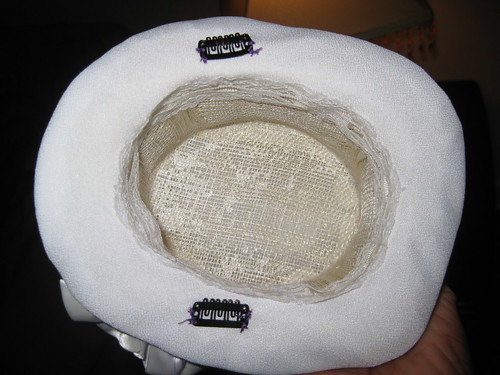
So here are pictures of my bags. The insides are just as beautiful as the outsides.


More pictures can be found here.

Happy Sewing!
C

Monday, September 19, 2011

Lady in White - Unity Conference 2001 - Burda 7576


I originally considered using Butterick 5263 to make DD's Unity Conference outfit. But there were too many changes needed to bring the pattern up-to-date. So I decided to go with Burda International 7576.

This review will be on all three coordinates available in this pattern. So this is a long review.


Pattern Description: Often Burda is vague about descriptions and instructions. Their description reads: Coordinates - A: fitted B: Close fitting and C: Semi-fitted. My description - Fitted lined jacket with notched collar, pocket flaps, and peplum. Lined pencil skirt with front slit. Top with gathered neckline and collar, back loop and button closure.

Pattern Rating and Other Information: This pattern is rated average which I think is pretty accurate. I wondered about the description of the jacket. It states fitted. But after sewing it I noticed that there is quite a bit of wearing ease across the chest area. I wondered if my pigeon chest adjustment was too much (usual) amount. But I looked at the model wearing the jacket again and noticed that she was holding the left lapel and that there was a little more room across the chest area in the jacket.

Pattern Sizing: 10 -20; I used size 10 with modifications

Did it look like the photo/drawing on the pattern envelope once you were done sewing with it? Yes it did. I added another button above the waist button.

Were the instructions easy to follow? Everyone knows how Burda does it. But enough to follow without getting confused. On page one - Interfacing. There is an illustration showing what needs to be interfaced. They forget to include information on interfacing the hem of the jacket. I did as I interfaced the noted pieces. It's not mentioned/shown until instruction 14. Step 38b - placement of the loops and basting. The illustration shows the loops too far apart. I've seem this illustration in other patterns as well. I like to put the ends closer together.

What did you particularly like or dislike about the pattern? I like the outfit. This was a pattern that I selected for myself. But this became plan B when plan A (Butterick 5263) fail through. Jacket - the sleeve detail, lapel, and peplum. Skirt - front slit, tapered hem. I love the draft of Burda pencil skirts. Great silhouette. Top - Gathered neckline and back closure.


Oops.., It look uneven; but it's not.  I just didn't properly lay it down.

Outside of wearing ease of the jacket, the pattern is pretty well drafted. All of the pieces went together with no problems. Attaching the lining to the skirt slit was a breeze.

Fabric Used: Polyester crepe and lining from Vogue's (white) and a purple/violet silky polyester (special occasion) from JoAnn's.

Pattern alterations or any design changes you made:

Jacket -
First, I wanted to get a visual on how the pieces would go together. Then I made a square shoulder and pigeon chest adjustments to the appropriate pattern pieces. See those changes here on Flickr.

I also added a button above the waist. It just looked better to me. I covered the buttons using the same fashion fabric as the suit.

Skirt -
After attaching and sewing the ends of the waistband, I hand stitched it to the inside of the skirt. My closures are a skirt hook and eye where the two ends meet at the zipper plus and button and buttonhole wear the waistband overlaps.

Top -
No adjustments for fitting. I moved the ends of the loops closer together for a nicer finish. And I didn't have three of the same button for the back closure. There were only two in the stash that were alike. I made a trip to Hancock's to buy more. And guess what.., they changed the materials used for that style. Didn't like them. So I just used what I had, having two button alike and one different.

Would you sew it again? Would you recommend it to others? Yes, I will sew it again for myself next time. And yes I do recommend it to others. It's a great outfit and the pattern goes together with no problems. Nice design lines and well drafted pattern. Make sure you work on fitting the front jacket to your comfort level.

Conclusion:
This is a great little suit pattern that can be sewn by someone with intermediate sewing skills. The look is clean and sophisticated.


Happy Sewing!
Cennetta

DIY Fascinators


For a while I've wanted to try my hand at making hats. Not the crocheted type but ones made of wool felt or straw adorned with all the accoutrements that make it special. Since reading about fascinator's in a current issue of Essence magazine, I decided to try making one.

I purchased a petite hat on eBay. I needed a white one, but they only had off-white.  So first, we tried to paint it pearl white. That didn't work. Then I decided to make a cover for it. Sorry I don't have any measurements and not many pictures.  But it's not hard to do.   Here's how.

- Place the hat top side down on the fabric; trace the outline. Cut the cloth, adding the desired seam allowance.

- Measure the circumference of the traced outline minus the seam allowance. This measurement (circumference) is the length of the fabric for the body of the hat.
- Next, measure the height of the body. Use these to measurements to cut the body of the hat. Add seam allowance.

- Double the fabric. Then place the hat top side down on the fabric; trace the outline of it. Then turn the hat right side up and trace the brim of it. Cut away the smaller oval. Next, cut away the fabric from the larger outline (brim) adding the seam allowance.

- Sewing; join the two short lengths of fabric for the body of the hat. Press. Make little slashes around the Oval (top of the hat). Then pin it to the body of the hat. Sew and press. Now turn it inside out and roll it down over the hat. For the brim - sew the outer edge of the brim together. Slip it over the top of the hat. Work the brim between the two layers.

- The hat band (ribbon) will cover the raw edges. Glue it in place.  For the inside, add ribbon or lace, whatever you like, to conceal the raw edges on the inside of the hat. Add little hair comb clips to hold the hat in place when worn.


- Finally add (glue) feathers, flowers (Mine are handmade leftovers from a previous project), or ribbon to decorate.


And you are done.

Parting Shot: DD made this fascinator for me. Worn Unity Conference 2011.

Wednesday, September 14, 2011

To Color Block or Not


It's no wonder color blocking is everywhere.  The fall color palette includes strong, bright reds, greens and blues.  I must admit this trend was a bit over the top for me.  My thinking, one strong color is enough. Brights from shoulder to toe maybe too much for me.   So for the sake of testing the trend, I looked in my already full closet to see if I could come with a color blocked outfit.  So I paired a McCalls blouse (made 2010)and a McCalls skirt (made 2009) then added some grey patent leather shoes to see if it was a passable trendy outfit.


Oprah magazine has a different take on color blocking for the fall season.  blocks of bold colors in one garment or accessory.  Here's how.


Some curvy ladies may think this trend is over the top; Essence magazine shared these opinions for embracing bold colors.


What are your thoughts on color blocking?

How T

Tuesday, September 13, 2011

Free Online Pattern Drafting Classes!!


Today I wanted to take the opportunity to let my readers know about a great learning site. On Rhonda Buss's blog you can find free pattern drafting lessons. Here are some examples of materials recently covered:
    One piece lotus skirt

    Waist cincher

    Eight Gore Skirt

    These are just a few lessons available on Rhonda's Creative Life blog.

    Happy Sewing with Inspiration!
    C

    Friday, September 9, 2011

    More Skirts - Quick Projects B3734 and B3858

    No doubt long skirts and long dresses have been in for a while. Marie Claire Real Style shows how you can get one maxi dress to create three different looks. Long gauze skirts are great for the summer and can be worn during the traditional fall days.


    I used B3734 (OOP) to make two skirts for my DD. These were cut last year and stored in the "UFO bin". I just couldn't let another year go way without sewing up these easy skirts.


    Pattern Description: Misses'/Misses/ Petite skirt - Skirt, above mid-knee, lower calf or above ankle, has elastic waist and tier variations. A, B, and E; purchased trim, C and D: optional crinkling. C, D, and E: narrow.

    Pattern Sizing: XS - XL. I used size small. View C and View B no trim.

    Did it look like the photo/drawing on the pattern envelope once you were done sewing with it? Pretty much. The length of the tiers and amount of gathering appeared to be like the pattern illustration.

    Were the instructions easy to follow? Sorry. I didn't really read them. This pattern consist of making an elastic casing, gathers, serging, and straight seams. Not difficult to make.


    What did you particularly like or dislike about the pattern? DD picked this for simple floaty, summer skirts. No dislikes.

    Fabric Used: Gauze from Vogue.

    Pattern alterations or any design changes you made: The only thing I changed was no trim on View B. Sorry, no pictures of this view. It's basically the same, minus the lower tier. So you get the picture.

    Would you sew it again? Would you recommend it to others? Maybe. I've seen a lot of this style skirt through the years. I think it's a classic silhouette that repeats season after season. So I do recommend it to others. All level sewists can easily make it.


    Conclusion:
    This is a classic skirt design that all level sewists can make with no problem.

    B3858 - Another OOP pattern, Also an easy skirt to make. This one is for me. And I am ashamed to say, it was stored in the "UFO bin" for over seven years. But the good thing is, I cut extra wide seam allowances. So fitting was no problem. This makes the second time I've sewn this pattern, made view B.


    Pattern Description: Misses' loose fitting or semi fitted skirt has contour waist, shaped hemline and side zipper. A, B: A-line, below mid-knee at center front. A, C: narrow hem C, D: below mid-knee at center. B, D: purchased trim.

    Pattern Sizing: 6 -22; I used size 12 cutting extra wide seam allowances.

    Did it look like the photo/drawing on the pattern envelope once you were done sewing with it? Yes it did. I made View C.

    Were the instructions easy to follow? Easy breezy.

    What did you particularly like or dislike about the pattern? I really like the shape of the hemline. No dislike.

    Fabric Used: Rayon from JoAnn's. This fabric is soft and floaty. And the print is perfect for tropical vacation wear.

    Pattern alterations or any design changes you made: I only added extra wide seam allowances and lengthen the skirt a few inches.

    Would you sew it again? Would you recommend it to others? I don't know. I have so many patterns to try. But I do recommend it if you have it in your collection.


    Conclusion: Cut little flouncy skirt that easy to make.


    Parting Shot: My sweet DD bought me a pair of KAI scissors. They are the best. Cutting with them feels like slicing through butter. Smooth and silky. She purchased these on eBay for about 15 bucks. Deal right. The green handled dressmaker's shears were a Japan exclusive (So they say).

    Tuesday, September 6, 2011

    Fall is Just Around the Corner

    First, thank you for your many, many visits to my blog. And those of you who have left a comment or sent me a personal e-mail, I'm especially grateful that you took the time to send me a message.

    I hope everyone's holiday weekend was as planned: sewing, partying, or just relaxing. I had a great weekend enjoying visits with friends and family and a little bit of this and that mixed in. On Friday, the weather was hot and sticky, but by Sunday the temps had cool down to the lower 70's. It's still cool today. The good thing is the sky is clear and the sun is shining. I love days like this, when the air is crisp. Good sleeping weather.

    Fall is just around the corner. Or should I say it's here..., I've given more thought to what I will make this fall, but feel like I can't get started until I finish up the few summer projects that are still in the works. On Saturday, I managed to finish up two skirts (will review next). I still have the unity conference outfits to make (white) and a few items for vacation. So the next two months my projects will be a mixture of summer and fall.

    There are so many things I want to put at the top of the list, but there isn't enough time or enough me to get it all done. So I'm struggling with what to make first. Anyway, I wanted to leave you with a few things that have provided some level of inspiration for the coming, here already, fall season.


    Something neutral or beige is on my list. I'm leaning forwards a beige coat. (Leftover from last year.)


    Something with dolman sleeves. I like this top and the trousers.


    Something red. I thought about color blocking red with something else. Red by itself is good.

    These are but a few inspirational ideas on my fall list. What's on your list?

    Happy Tuesday!
    C

    LinkWithin

    Blog Widget by LinkWithin