Thursday, December 29, 2011

Adding a Little Shine with Simplicity 2149


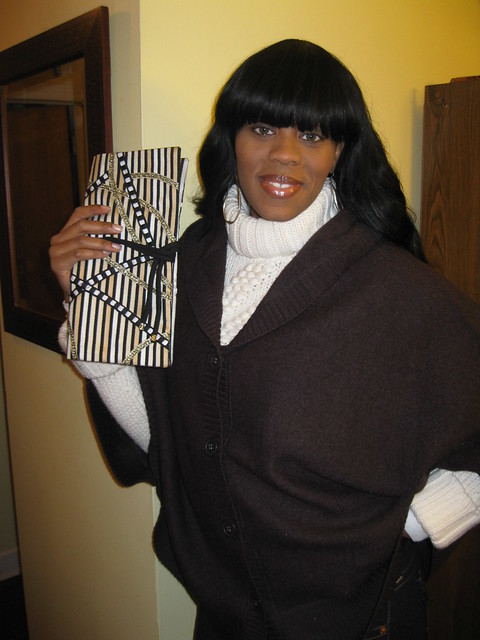
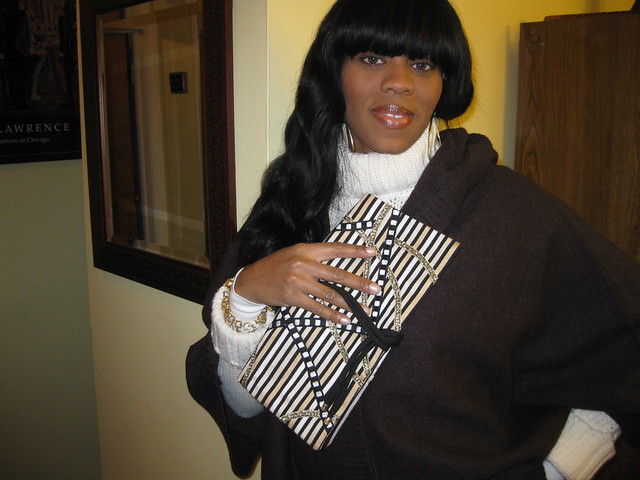
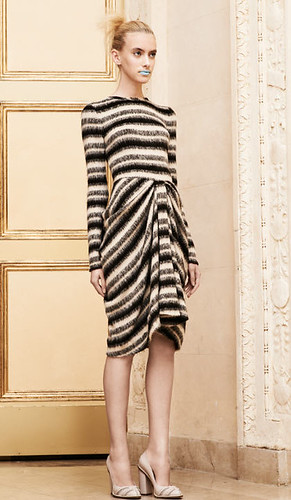
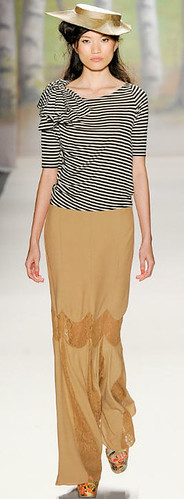
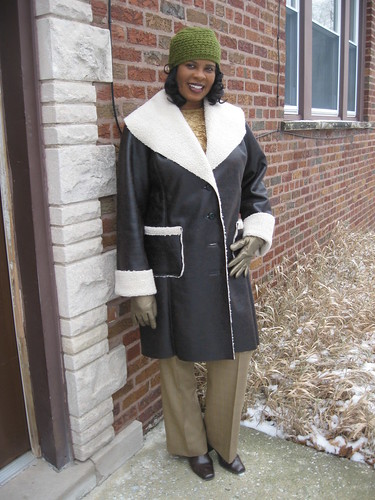
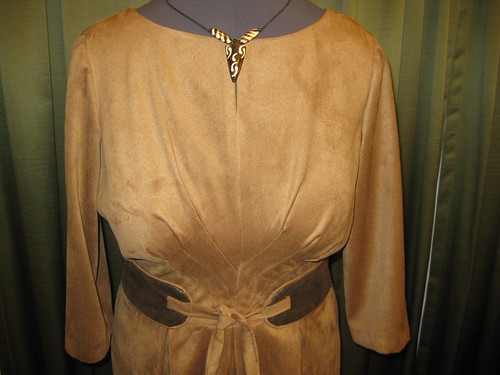
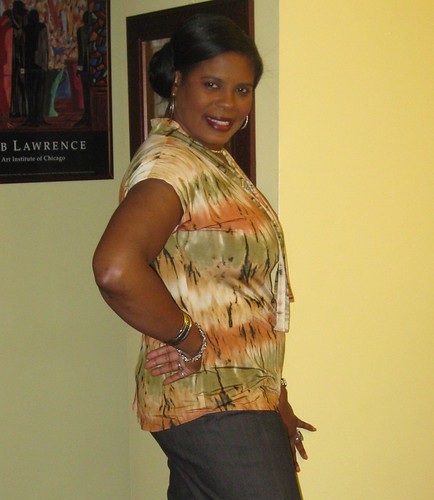
This is the season for adding a little sparkle and shine to your wardrobe. So I paired Simplicity 2149 with some semi-shiny, striped fabric to create a festive jacket for my daughter.


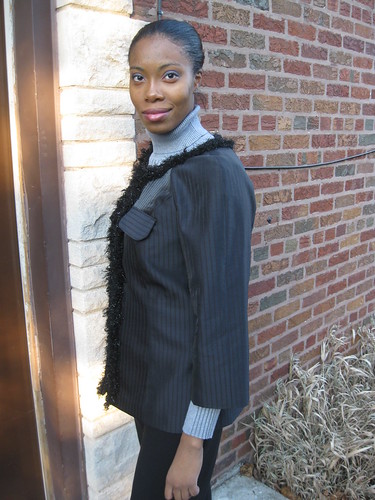
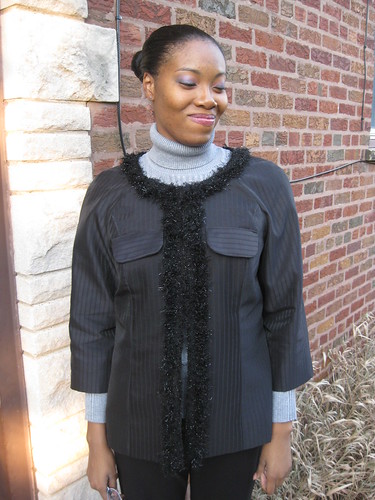
Her work uniform (Macy's) is black attire. She wanted something festive to wear on Christmas Eve, which is a big work day for her. This jacket was perfect. The sparkle in the trim and the shiny fabric add a bit of pizazz to a what could be considered a boring black work uniform.

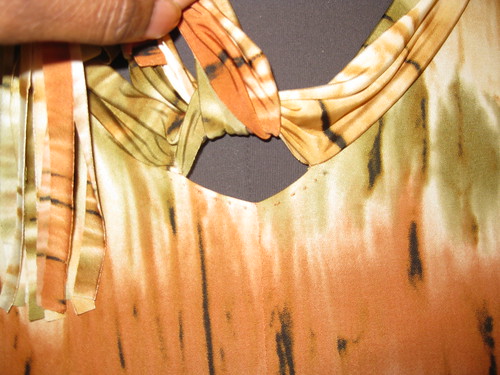
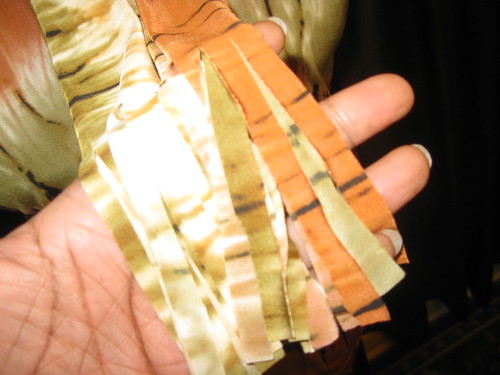
I made a combination of View D and E. A misses' jacket with 3/4 length sleeve Princess style front with pocket flaps and trim. My jacket pretty much follows the design line for view D with the trim of view E.

This pattern comes in sizes 6 to 22 and includes separate pattern pieces for A, B, C, and D cup sizes. I like this pattern because of the sleeve variation. And it can be used to make an overcoat (views A & B with collar). My daughter likes those views as well. My only dislike with the pattern is that the jacket/coats are unlined.

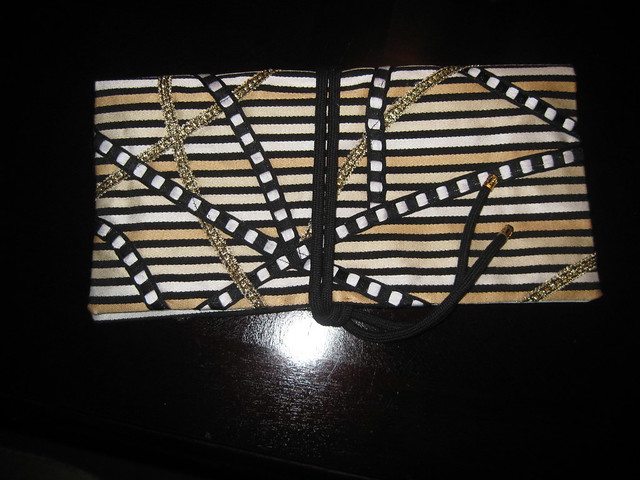
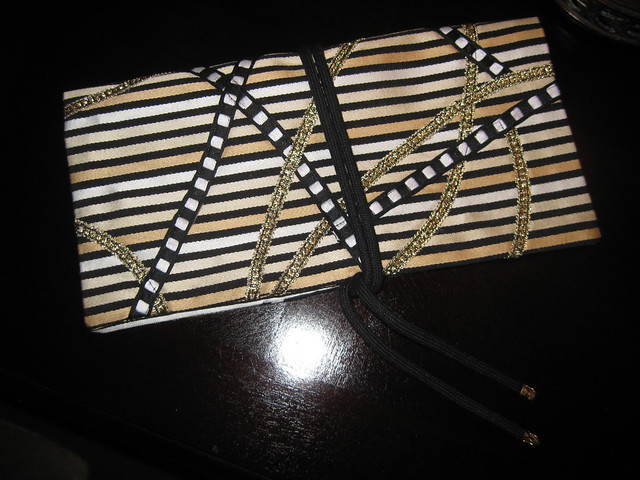
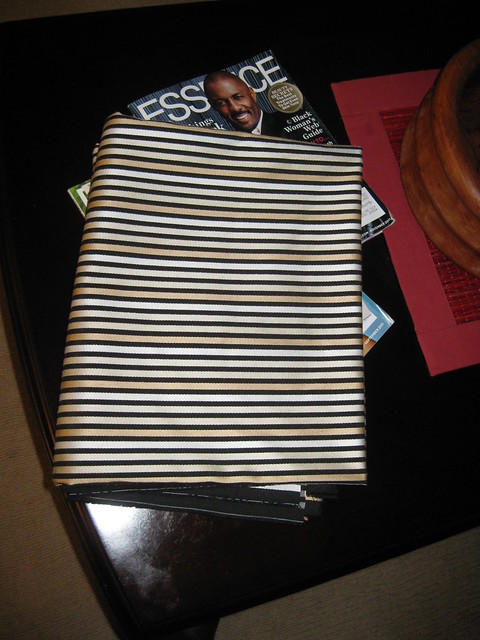
The fabric came from Vogue Fabrics. It's polyester. I struggled to get a deceit press on this jacket. A visit to the dry cleaners will remove the remaining stubborn wrinkles.

The instructions were typical for sewing this type of jacket. I didn't encounter any problems with them.

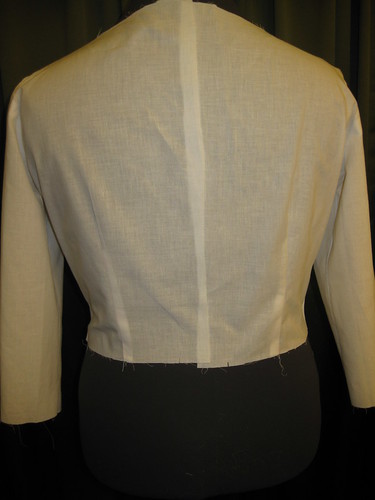
There are only a few alterations and design changes. Typically, I make a pigeon chest and sway back adjustments for my daughter. This time I skipped them. The front is cut size 12 and the back size 10 across the upper back. When joining the front and back pieces, I trued up the seams as needed. At the mid to lower back area I adjusted seam allowances where needed. Basically, I made the fitting adjustments as I sewed.


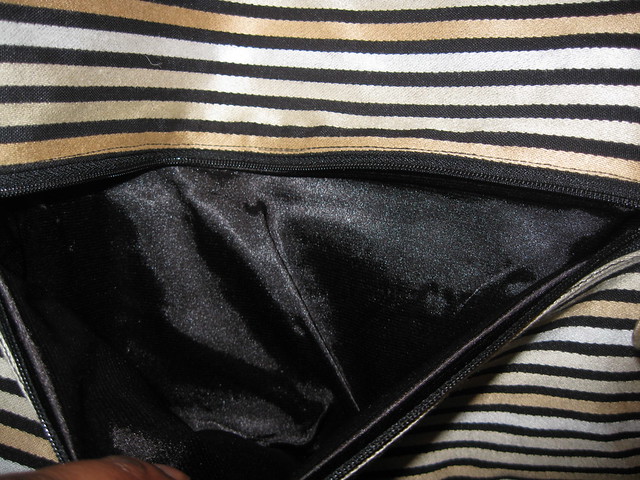
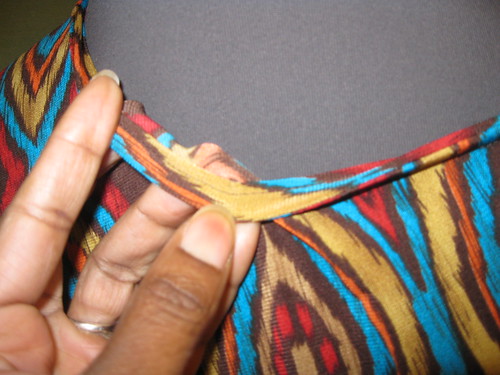
For the design changes: I omitted the buttons on the trim and the back tab. I also lined the jacket. To make the lining, I used pattern pieces for the shell omitting the front and back facings. I cut four of the front piece. Two for the jacket and two for the facing. Both facing pieces were interfaced. The lining was attached using the bag method. Interfacing the upper sleeve and back jacket would add stability to the entire neck area. I didn't think of that until I was finished with the jacket.

I will probably make this pattern one more time for my daughter. She wants view A. And I would recommend it to others sewists including beginners. If you are like me and prefer a lining that is easy to do. Just use the jacket pieces instead of the facings.

This is a fairly deceit pattern to sew. All levels should be able to make it with no problems. So, if this is your style, try it.

Tuesday, December 27, 2011

Haute Couture Club - Stripe Challenge It's In the Bag Part II


Happy Holidays!

Now that the hustle and bustle of the holiday is over, I have time to sew and blog. About fifteen minutes ago, I finished my matching clutch for the Haute Couture Club Stripe Challenge outfit.  (My baby sis was over when I made the purse so I asked her to model it for me.)

I used Cynthia Rowley's Simplicity 2350 pattern, view C.

Pattern Description: It includes patterns for three different bags: bucket, tote, and clutch. All have can be made with decorative trim, which you can purchase on the simplicity website.

Front of Bag

My finished clutch matches the design illustrated on the envelope. I applied the decorative trim slightly different, but the basic design is the same. The instructions were a piece of cake. Step 1 states to pin the novelty trims, I used stitch witchery to hold the trim in place. Once all trim was applied to the bag, I sewed each strip to the bag. I couldn't find the "right" cord ends. So I used two hair ornaments that I bought from a local beauty supply store. This bag is really easy. It took less than two hours to make.

Back of Bag


I like all three bags. Adding decorative trim makes it easy to make a one of a kind bag. And I recommend that you give them a try.

Of course, I used the stripe challenge fabric for this. It's a rayon, wool, poly blend. There is enough left to make an interesting outfit for the fashion show. More on that later.
Inside Bag

The quick and easy clutch is an attractive bag to add to your wardrobe. Try it.

Parting Shot:
My little black dress made the March issue of Threads magazine. What an honor.


Happy Sewing!
C

Tuesday, December 20, 2011

Creative Stripes - Haute Couture Challenge

One of the big trends of 2012 is stripes. Everything is striped: dresses, suits, tops, pants, handbags and shoes. Truth be told, every season stripes show up on the runway. But this season they are front and center in many of the designer collections.


No wonder the Haute Couture Club of Chicago included a Stripe Challenge for this 2012 Fashion show. This beautiful fabric was selected for the upcoming challenge. Each participating member purchased yardage to create a garment for the challenge. Now I am faced with the opportunity to create something beautiful to showcase in the fashion show.

Katherine Hepburn with Spencer Tracey


Of course, I turned to the fashion blogs and fashion sites to help stir up the creative juices. Then to top that off, Turner Classic Movies featured four films starring Katherine Hepburn and Cary Grant. Guess what? Ms. Hepburn sported several striped outfits. So I have several idea to help me come up with an eye-catching striped outfit.

Just in case, you want to follow along here are some inspirational garments made by some of my favorite designers.

10 Crosby Derek Lam


Thakoon


Tracy Reese


10 Crosby Derek Lam


10 Crosby Derek Lam


Tracy Reese


Michael Kors


10 Crosby Derek Lam


Tracy Reese

Happy Sewing!
C

Saturday, December 17, 2011

Faux leather/shearling and Simplicity 4356 - A Perfect Match


I've wanted a faux leather/shearling coat for over two years. I thought about making Vogue 1198, but that wasn't quite the look I was thinking when I first envisioned a faux leather/shearling as part of my winter arsenal. So I started researching online stores and found a few that I liked at Nordstorm. Once I found the inspiration coat, purchasing the fabric was easy. Vogue (Roosevelt Rd.) has a large section of faux suede and faux leather shearling many colors. I went with this rugged texture.


I didn't necessarily want to replicate the Nordstorm coat, but to find a silhouette that match the pattern I was thinking about using hoping the design would be a good match for the fabric.

This morning I woke up to snow which I could do without for another twelve months.  The blizzard of 2011 was enough to last me a lonnnngg time.


Simplicity 4356

There is not a lot of descriptive information on the pattern envelope.  But I described this view as a shawl collar princess seam coat with patch pocket and cuffs.  It comes in sizes 6 - 22. This pattern has been around for a while. I used it to make view C for my sister in 2006.


My coat has the basic silhouette of View A, but I made many changes to create the look I was going for. Most of the instruction were skipped because of way I wanted to use the fabric. But the basic construction method were the same as described in the sewing directions. This pattern is good basic shawl collar jacket/coat pattern. It's a keeper. I didn't have any dislike for it.


My changes were many -
  • I omitted the front facing and the use of the block for binding.
  • The pocket were finished by turning the shearling to the right side of it; then stitched.  Next, I attached the pocket to the coat with the raw edges exposed.
  • To finish the center back of the collar, I following the same instructions for the cuff on the sleeve (#11 and #12).
  • I made a FBA and prominent shoulder blade adjustment.  The fabric has almost zero give.  So I cut the coat one size bigger to make sure I had enough wearing ease.
  • I eliminated most of the ease of the sleeve cap because of the bulky,stiff fabric.
  • None of the raw edges were finished.  
  • Added about an inch to the center front; made buttonholes.
  • I lengthen the coat about two inches.
I can't say that I will or will not sew the coat again.  I do like the purse and may make it using the leftover fabric from this project.  This pattern is versatile and can be used as the basis for designing your own coat or jacket.  I recommend it to other sewists.  It not a difficult coat to sew.  And the instructions for adding the binding are not hard. 

More pictures can be found here on Flickr.
This is a fairly easy pattern to sew that will produce good result.  I love my new coat and I will get a lot of use out of it.   I'm wearing a Butterick top made years before I started blogging and Simplicity pants 2860 made October 2008


Friday, December 16, 2011

Another Burda 7576 Skirt for DD


The silhouette of this skirt is very flattering. It's long and slick; it tapers as it approaching the hemline. The attractive center front seam instantly takes 10 pounds off your figure.


No doubt flattering on any figure. The skirt definitely works for DD. Here she paired it with a fitted RTW jacket.


This is part of her work gear.

DD found the fabric at Vogue's. She has a great eye for nice fabric.


Happy Sewing!
C

Sunday, December 11, 2011

Faux Suede, Faux Leather - New Look 6067


Saturday evening I finished New Look 6067, View D with belt. I made a few trips to the store in search of a fabric to make this dress. But after not finding that "perfect fabric", I turned to my forever growing collection of fabric. I decided on a faux suede. It's been in the collection for several years and no better time like the present to reduce the stash. It's sort of a taupe, camel-ish in color. The faux leather is leftover from a previous project.


This dress is described as: Misses' pleated dress in two lengths with sleeve and belt variations.  It comes in sizes 6 to 16.


My dress looks much like the drawing on the envelope. My belt does not exactly meet in the front like the drawing, but the model's does either. If I make the belt again, I'll lengthen it so it does meet. View C appear to have a slim keyhole at the neckline. I wanted that same design element. So I modified my dress to include it. There were no instructions for that neckline variation. It's easy to do. Just sew from the top down about 1 1/2 inches stop, then start sewing again at the notch to the end of the CF. Finish the front facing the same way. After attaching the facing to the neck, sew the edges of the opening to the facing on either side make finish the keyhole.


The instructions were typical. Nothing difficult or confusing. However, I didn't like how the zipper is finished (#15). By the way, it calls for an invisible zipper, I used a standard one. I am so trying to reduce the collection, notion included. So I used what I had on hand.


The pleating on the bodice is what attracted me to this pattern. I made a few changes, some I've already mentioned. Others changes: lengthen skirt about three inches, omitted the lining, FBA, sway back, prominent shoulder blades.

The piping for the belt is made from the same fabric used for the dress. It's not difficult to make. It just takes a little time. I want to test using the Simplicity Bias and Piping machine, but I didn't have the fusible tape.  So I had to make it the traditional way.  Later expect a review on the machine.  It's sure to speed up the time it takes to make custom piping.


This is a nice dress to have in your wardrobe. It sews up quickly and has some nice design elements. I probably won't sew it again for myself. I have about 500 dress patterns to try. Seriously, 500. But if you like this style, I do recommend that you try it.

Happy Sewing!
C

Thursday, December 8, 2011

To Muslin or Not To Muslin - Fitting New Look 6067

To Muslin or Not to Muslin. That is the question...,

While working on a muslin fitting for a client who sewed, she said to me, "When I sewed for people I never made muslins. I just went by the measurements." My reply, "Oh no, I have to make a muslin to get the fitting right.  I'm afraid not to."


There are great benefits to making a muslin first especially when the garment is for someone other than yourself.  


better fitting of the garment
helps avoid re-dos of garment
Saves money and time on fitting mistakes made

Now as for myself and DD, I don't always make a muslin.   Our basic adjustments have been pretty much worked out using the big four patterns. I have a few patterns that I use as slopers that help make adjustment easier on new patterns.  As a safety precaution, I cut one inch  side seam allowances.  This adjustment gives me a little more room to make changes if needed.

My biggest challenge is fitting my torso due to my fuller bust and prominent should blades.  Both changes are made in the same reign of my upper body front and back respectively.  But when it comes to the upper chest, neck, length of shoulder (from neck to ball of my arm) and my waist, there are almost no change needed from the pattern size 14.

One of my current projects is New Look 6067. Cute dress with pleating at the center front just below the bust area.  This pattern has no bust or waist darts.  My initial reaction was cute but I'll take a pass.  My second thought, but I like it.  I'll give it a try anyway.

Challenge:  Full bust adjustment in the absence of a waist and bust dart (woven fabric).


So this project required me to make a muslin to test my solution for a FBA adjustment. 

First the pattern:  I slashed the pattern in the center of each pleat pivoting a few inches away from the armhole.  Each slashed is spread increasing with width of the pleats and the bust area.  Total amount of spread in the bust area is about 1 1/4 inch.


My typical prominent shoulder blade and swayback adjustments are shown below.


Second the muslin:  Sorry it's on Rochelle and not me.  But you'll get the idea of how it will fit.  It looks like there is too much fabric around the armhole and side area.  It's just that way on Rochelle.  It fits better on me.  When I tried on the muslin, I noticed the waist was a little high.  I will add about an inch to the length of the bodice to correct that.


I hope this information is helpful.  Now my question to you:  Do you make a muslin?  If not, what's your process for getting the right fit?

Happy Sewing!


Tuesday, December 6, 2011

McCall 6400 - Two More Tops; It's a Winner

Yes, McCall 6400 is a Winner! I made two more of these quick and easy tops. Both made in less than two hours.


Fabric purchased at JoAnn's Thanksgiving sale. Each piece cost about $7.50. Great deal on pretty knit fabric.


I finished the neckline the same as the first, which was reviewed here..


Need I say more. This is a great little trendy top that sews up quickly with the least amount of effort.

Happy Sewing!
Cennetta

Monday, December 5, 2011

Hot Patterns Fringe Scarf-T - Another Easy Knit Top

Hot Patterns Fringe Scarf-T

It's when awhile since my last post. I've had very little time to blog. So I chose to read a few blogs instead of writing a few posts of my own. I hope everyone is enjoying the holiday season. For over a week I have been suffering with whatever virus that's going around. I couldn't sew even though I wanted to. For two days all I could do was drink plenty of liquids and lie in bed.


Anyway, I have several knit tops to show and review. The first set was made with a free pattern from Hot Patterns, the Fringe Festival Scarf-T. If you remember during the summer, this was a free pattern available on the Fabric.com website.


This top goes together with no problem. Very simple and easy to sew. There are a few things I did differently. Here is the review:

This top is a pull-over, cap sleeved T-shirt that has center front & back seams, a curved hemline and a self fabric scarf tie at the V neckline. Fringe the ends of the scarf for a funky look, and add decorative stitches to the center front & back seams.

The sizes range from 6 to 26. This top can be worn be women of all shapes and sizes given a few adjustments. My tops did look like the drawing on page one of the pattern. It is a slightly longer than I expected it to be.


The instructions were okay. How to finish the section were the scarf meets in the center front were a little unclear. I decided to change the finishing of the neckline. The instructions tell you to press the seam allowance forwards the body of the top. Then stitch it in place. I didn't want stitching to show around the neckline. So I only turned down and stitched the center front. And at the center back, I folded the scarf inside as if I were going to attach the raw edge to the inside of the neckline only stitching about a 1/2 inch on either side of the center back seam to keep the scarf from bunching up around the neck.


After reviewing and cutting the pattern, I changed my mind about making the fringe for fear of making a mess trying to transfer the markings onto the fabric. But I quickly changed my mind again to give it a try. With the end of the scarf placed on the cutting mat, I used a rotary cutter to cut 4 inch fringes on each end of the scarf. This was achieved by slowly cutting them with no marking.


I omitted the decorative stitching at the center front and back. The print of the first top was speaking loud enough. And the second one looks good without it. I also made my usually sway back and prominent shoulder blade adjustments. No FBA. I just cut a size 16 through the bust area. The rest was cut at size 14.

What I like about this pattern was the fringe scarf. And I thought it would work well under a blazer. Plus you have the option of adding sleeves to it for a winter ready version. You can easily extend the cap sleeves or you can use the sleeve of M6241. My next version will have long sleeves.

The multi-color fabric (Vogue) is the leftover from a failed knit dress project from two years ago. And the gray knit (Hancock) is leftover from a drape neck cardigan made earlier this year.


In conclusion, this is a nice, easy top to make that is a great wardrobe builder. If you downloaded this pattern, give it a try.

LinkWithin

Blog Widget by LinkWithin