Showing posts with label lace. Show all posts

Tuesday, September 22, 2026

September - My Favorite Month of the Year

2008

2024


Hello everyone, 

It's my favorite month of the year!  It's also my birthday month. I'm feeling blessed to still be here. All praises to God!

Many of you, who have followed me on social media platforms, know that I celebrate my birthday by making myself a special dress to wear either to Women's Conference or to include with my travel wardrobe to some lovely destination.  I love making a special dress to celebrate my birth and to express my gratitude to God for my wonderful gift of creativity.

2021

2023

2022

2022

This year I didn't make a special dress.  Because there were just too many other commitments.  But, I plan to make something extraordinary next year to make up for the past two years of not making anything special for my birthday.  

So, today I want to share some of my favorite birthday dresses.  I hope you feel inspired to make something special for yourself.  

So, here are some of my all-time favorite handmade dresses.

2016

2018

2018

2019

2014


Thursday, March 17, 2022

Anthropologie So Inspired: It's Spring and Summer Dresses

Dresses, dresses, and more dresses!

It's time for a little dress inspiration.  Spring is already here, and summer is around the corner.  I'm itching to make a pretty dress.  Before I start planning what fabric, style, and color I wanted to see what RTW styles are on the horizon.  Anthropologie has a great selection of the season's best spring and summer looks.  From their posted inventory, I see an entire caribbean vacation wardrobe.  They have beautiful florals, abstract prints and solids of every style and for every shape.  Below are some of the dresses I'd like to have.  But you can take a look at the entire collection that is posted online here.    


Happy Sewing!

C

Thursday, September 7, 2017

Simplicity 8416 In Review - The Shirt Project


I hope everyone had a great holiday weekend.  Happily I spent sometime in my sewing room where I made two shirts, Simplicity 8416 views B and D.


 I can't believe it!  Fall is almost here!

A twist on a classic shirt design.  The shirt design is loose fitting like a camp shirt, but it has long sleeves, cuffs, and a collar band.   There is no center front band. Back options include vent with ties or lace, pleated back with or without tab. It can be worn like a camp shirt with jeans unbuttoned with a tank top or T-shirt underneath.  Of course, you can button it, tuck or tie the shirt tails.


These two shirts wrap up my shirt making project for the summer.  Initially, I planned to only make a few during the summer; then later make more.  But when Sue and Rhonda asked me to do a presentation, I needed a few more shirts to show and talk about.  My goal was to practice and learn, hone  my skills.  I chose this pattern to test sizing, fit, and drape trying to determine if it was loose enough to eliminate my normal fit adjustments.  At first sight, I was interested in trying some of the back variations.  So this one quickly fell into my shopping basket with several other Simplicity patterns during a JoAnn's pattern sale.

I made my usual size and determined that a slight FBA is still needed.  The sides seams are not perfectly perpendicular to the floor.

I also noticed that the cuff is longer and the spacing of the button is wider, beige shirt on the pattern envelope. The armhole seam starts below the ball of the shoulder. These observations are not a big deal, just things I noticed.

Of course I changed a few things.
  • I squared the collar band at the end
  • Plaid - I turned the edge to the right side of the center back hem then pressed.  Next the lace was stitched along the folded edge, then I sewed another row just before the scalloped edge of the lace to secure it.  This created a clean finish.
  • Plaid - I added 1" to the length of the shirt.

  • Plaid - I made the loops for the back closure instead of using elastic.  I simply cut a bias strip, sewed, turned, cut desired length, and apply to edge of instructed.  To make the loops narrower, I sewed a few stitching to hold the ends together.
Adding a little something, something -


  • White - I copied the contracting design element from a article in "Threads" magazine.  The contracting fabric adds some color to what would be a plain white over sized shirt.
I literally made almost no fit adjustments.  The neck is a little too big for me (hardly noticeable).  When I tried the shirt on, I noticed the shoulder seam was not completely vertical from neck to shoulder.  At the ball of my arm, it is off centered.  So for the plaid version, I added 3/4" to the height at the end of the yoke and the subtracted that same amount from the front.  That resolved the issue.  You may not need the same adjustment.  Check it before you cut into your fashion fabric.

Fabric -

White - I used a tissue weight cotton from Mood Fabrics and a cotton blend print gifted to me by Andrea Birkan (Haute Couture Club member).

Plaid - A lightweight silk that I was gifted over 25 years ago.  The lace came from JoAnn's.
My dislikes -


  • The construction process for creating the finished opening above the cuff.
  • The lack of a front band. It's a little more work but worth it. 
 Finally, a few tips for making your own shirts.

  • Press, press, and press throughout the construction process.  It makes the sewing easier.
  • Trim (3/8") seam allowances of the collar and collar band.  It eliminates bulk, making the top stitching easier.
  • Basing - I prefer basing over pinning before top stitching and finishing bands and cuffs.  Another option is to use glue sticks.
  • One collar piece.  I like Sandra Betzina one piece collar method.  It can be found in her "Tool Kit" book.  My tutorial is here.
  • Don't be afraid to change it up a bit.  Surf the internet and magazine for ideas.
Note: I'm no expert.  This is only my explanation on how I made Simplicity 8416.  Sorry no pictures yet. later..,


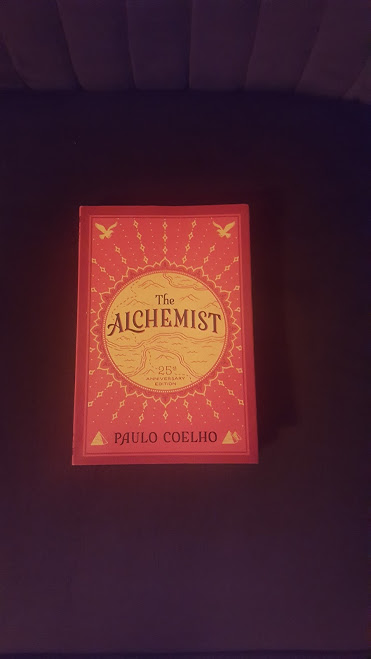
Parting Shot:  Last book read:  "The Alchemist" by Paulo Coelho .  This is a powerful little book.  Check it out.


Happy Sewing!

C


Tuesday, April 12, 2016

Maroon Double Cloth Lace - Simplicity 1314


My eyes light up with joy when I see something beautiful.  And that was exactly what happened when I saw this Maroon Double Cloth with Lace from Mood.  At first, I imagined a high-waist pencil skirt.  But when the pretty cloth arrived to my surprise the yardage was more than I requested.  It must have been the last on the roll, because it included this tag.  No matter the circumstance, I was too happy to get a little more and couldn't let it go to waste.  So I decided to make Simplicity 1314 again.


There is nothing wrong with getting a little extra mileage out of your pattern.  Especially if you've spent time making fit adjustments.  My first look made from it was "Cookie Lyons" inspired, from the hit show, "Empire".  This time I wanted a more sophisticated look.  So I paired my maroon lacy double cloth with black neoprene from a local fabric store in Chicago.


All of the descriptive information is the same as before.  I made view B. For the most part the pattern was ready to use without more adjustments.  But I did want to bring the neckline closer to base of my neck.  With most patterns I find that the necklines are very wide.  This makes it difficult to keep the garment on the hanger.  Also, I had to take it in along the sides about three more inches.

My likes for this dress are, of course, the fabric.  And all the things I mentioned in the first review.  It was even easier to sew this time.  I consider this a sloper, a basic princess seam dress that is very easy to sew.  I definitely recommend it to others and will probably sew it again for myself.


That's all for now.

Happy Sewing!
Cennetta

Monday, September 22, 2014

Meshed in Anna Sui Lace - Teach Me Fashion Two Tone Singlet


At first sight, I ordered Anna Sui's Black Multicolored Stripe Lace. The lace has texture and has a soft embroidered feel to it and the mesh is smooth and silky. I love working with it.  The lace and mesh were combined to reduce transparency (first version for DD) and the ponte knit was used for the lower portion and the neck and armhole bands.


A few months ago Harrison from Teach Me Fashion asked me to test their Two Tone Singlet.  Last week I was able to finally complete a top that was post worthy.  The top pictured here is my third attempt.  I made it for myself, making a few adjustments.  But I couldn't address my requirements for a FBA without altering the block design.  Plus it wasn't flattering on me.  So I worked towards making the top for my daughter. 


The sizing is a little different from the big four patterns.   I would say it runs small.   I usually make her a size small.  In this pattern it was too tight across the bust.  The second top is a size medium.  That was perfect for her.


The top does look like the photo.  But the version on the model appears to be a larger size than she normally wears.  She appears to be about the same size as my daughter.  The top looks like a large or x-large.

The instructions were great.  They are included with the pattern download.  Additionally,  Teach Me Fashion includes a video on how to make it on their site.  I didn't have any problems following the instruction of the top.


This is a cute trendy top that can be made in a variety of fabrics.  I liked that it sew up very quickly and you have the option to color block it. 


Instead of making neck and armhole facings, I made bands using a black ponte knit.  My DD was very pleased with the results and wouldn't mind a second top. The Anna Sui lace is a great fabric to play up the color blocking aspect of this little trendy top.

Happy Sewing!

Cennetta

LinkWithin

Blog Widget by LinkWithin